
Loading ...
Loading ...
Loading ...
10 ENGLISH
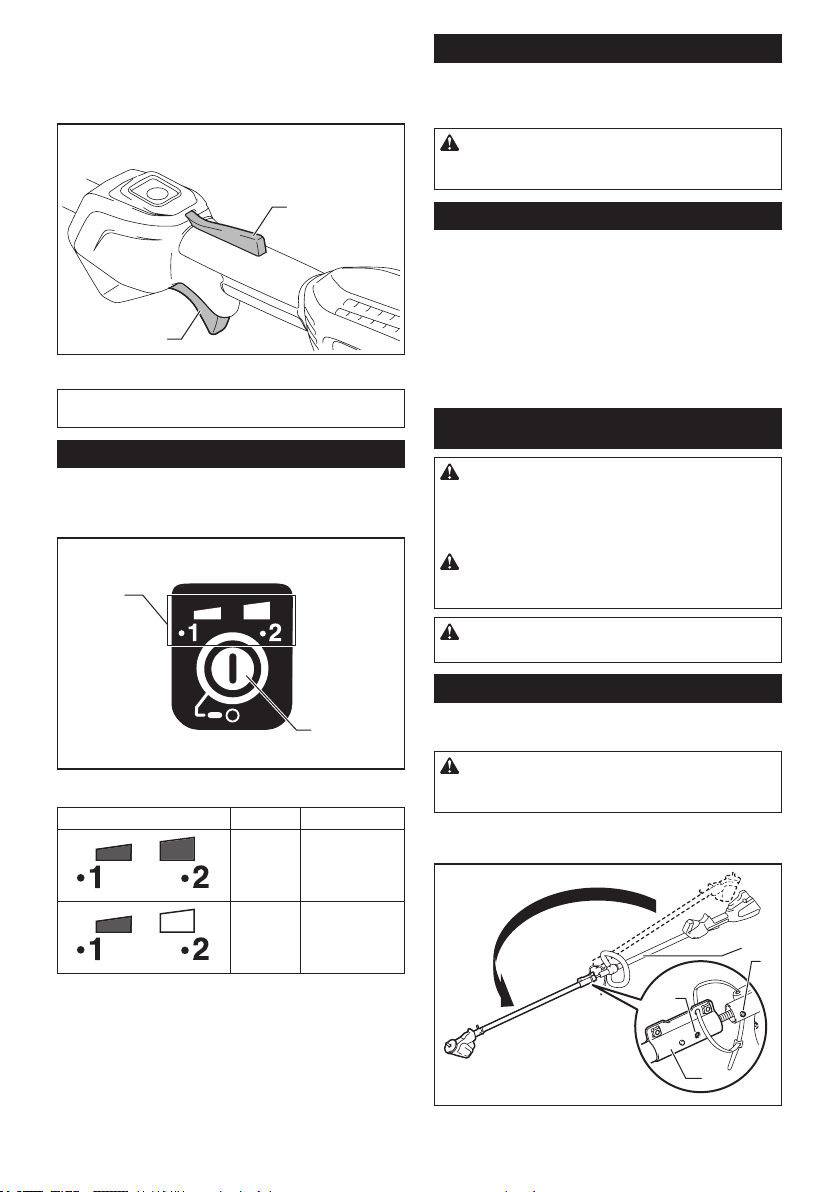
To prevent the switch trigger from being accidentally
pulled, a lock-o lever is provided. To start the tool,
depress the lock-o lever and pull the switch trigger.
The tool speed increases by increasing pressure on the
switch trigger. Release the switch trigger to stop.
1
2
► 1. Lock-o lever 2. Switch trigger
NOTE: The tool is automatically turned o after the
tool is left for a certain period without any operations.
Speed adjusting
You can select the tool speed by tapping the main
power button. Each time you tap the main power button,
the level of speed will change.
1
2
► 1. Indicator lamps 2. Main power button
Indicator lamps Mode Rotation speed
High 0 - 6,000/min
Low 0 - 4,500/min
Electric brake
This tool is equipped with an electric brake. If the tool
consistently fails to quickly stop after the switch trigger
is released, have the tool serviced at our service center.
CAUTION:
This brake system is not a substitute for
the protector. Never use the tool without the protector. An
unguarded cutting tool may result in serious personal injury.
Electronic function
Constant speed control
The speed control function provides the constant rota-
tion speed regardless of load conditions.
Soft start feature
Soft start because of suppressed starting shock.
ASSEMBLY
WARNING: Always be sure that the tool is
switched o and battery cartridge is removed
before carrying out any work on the tool. Failure to
switch o and remove the battery cartridge may result
in serious personal injury from accidental start-up.
WARNING:
Never start the tool unless it is completely
assembled. Operation of the tool in a partially assembled state
may result in serious personal injury from accidental start-up.
CAUTION: Do not disassemble the tool once
you have installed all the main components.
Installing main components
Pipe assembly
CAUTION: Avoid cutting the cable tie (nylon fas-
tener) away until the folded pipes have been securely
assembled.
1.
Straighten the two-folded pipes, and then align the
stopper pin on the upper pipe with the stopper hole in the joint.
3
1
2
4
► 1. Upper pipe 2. Stopper hole 3. Stopper pin 4. Joint
Loading ...
Loading ...
Loading ...