
3
88757 88758 88759 88760 88761 88762 88763 88764 88804 88805 88807 88808 88809
88810 88811 88813 88817 88818 88819 88820 88821 88822 88823 88824 88834 88835
88836 88837 88838 88839 88840 88841 88850 88851 88852 88853 88854 88855 88856
88857 88842 88843 88844 88845 88846 88847 88848 88849 88924 88925 88926 88927
88928 88929 88930 88931
Abrasive Systems Division
3M Center
St. Paul, MN 55144-1000 U.S.A.
www.3M.com/abrasives
© 3M 2022.
34-8727-4332-2, 03/2022
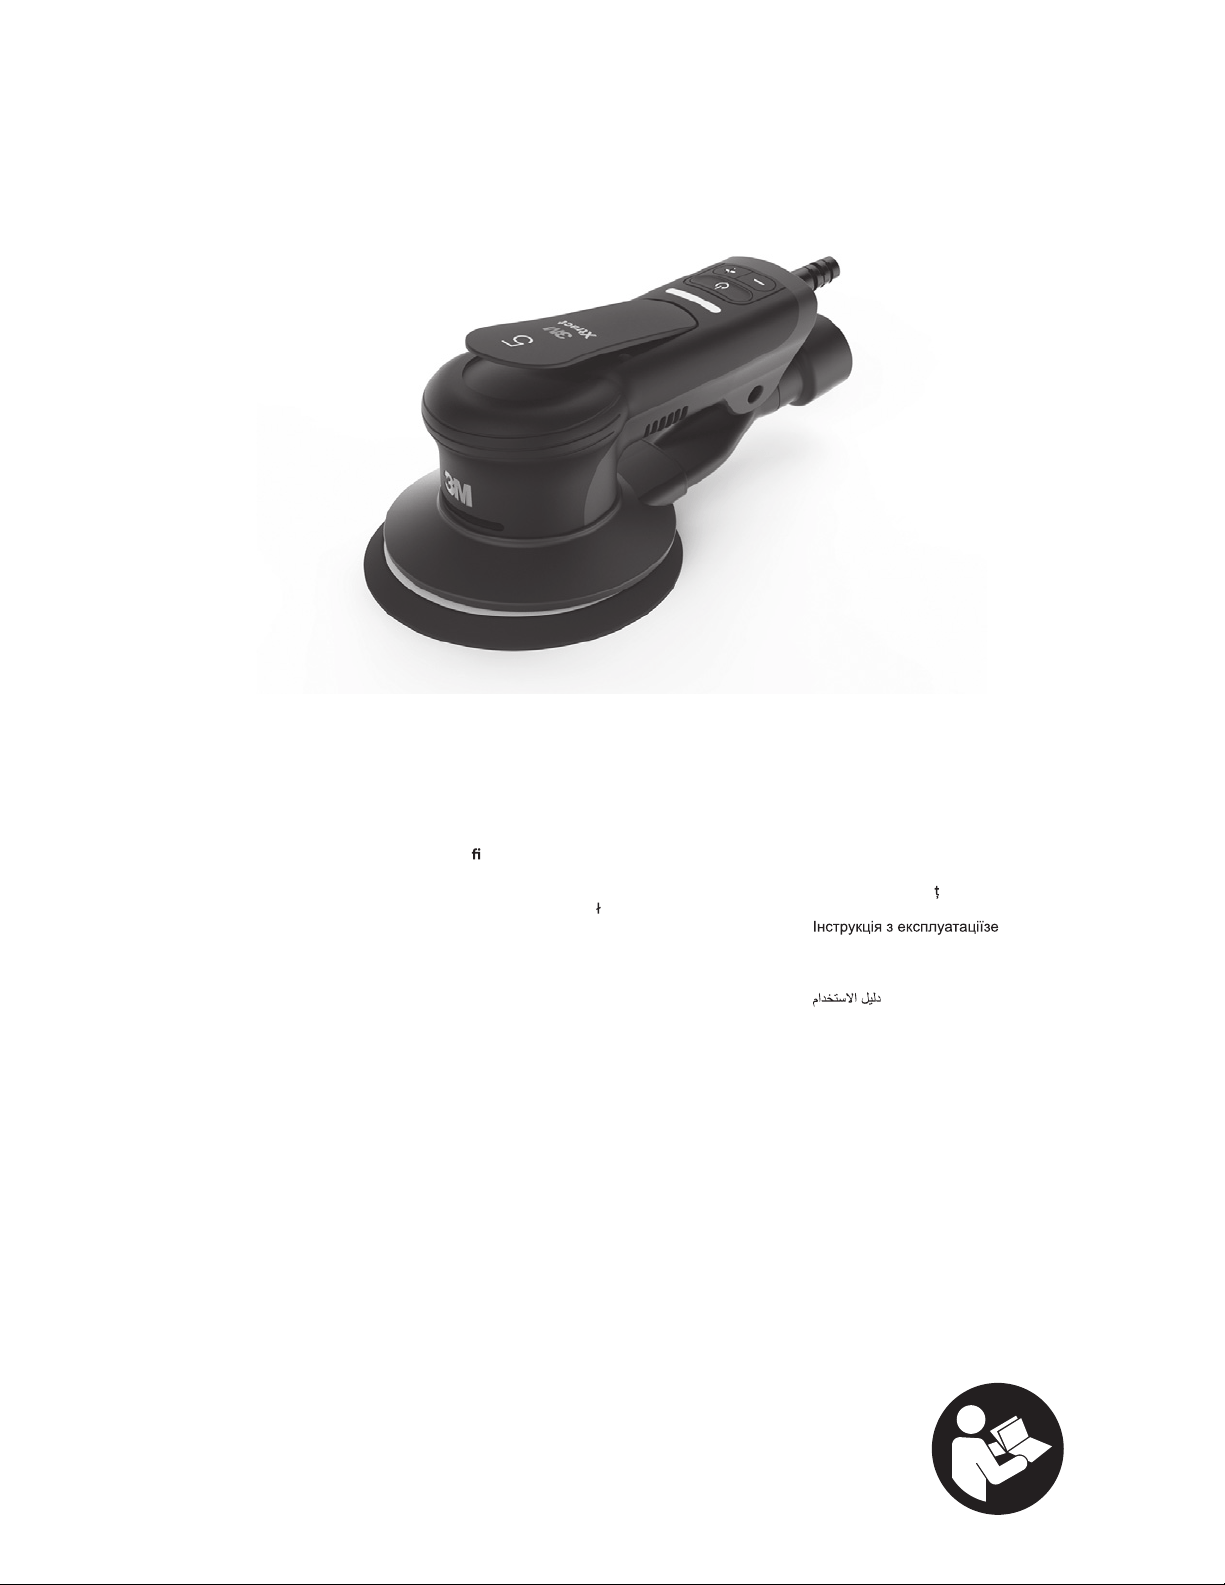
en User Manual
fr Manuel d’instructions
de Bedienungsanleitung
it Manuale di istruzioni
es Manual de instrucciones
nl Gebruiksaanwijzing
sv Bruksanvisning
da Brugsvejledning
no Bruksanvisning
Käyttöopas
pt Manual de instruções
el Εγχειρίδιο χρήστη
pl Instrukcja obs
ugi
hu Használati útmutató
cs Návod k použití
sk Návod na použitie
sl Navodila za uporabo
et Kasutusjuhend
lv Lietošanas instrukcija
lt Instrukcijos vadovas
ro Manual de instruc
iuni
ru Инструкция по эксплуатации
uk
hr Upute za uporabu
bg Ръководство за употреба
tr Kullanim kilavuzu
ar
2
#
2
8
19
22
24
25
29
30
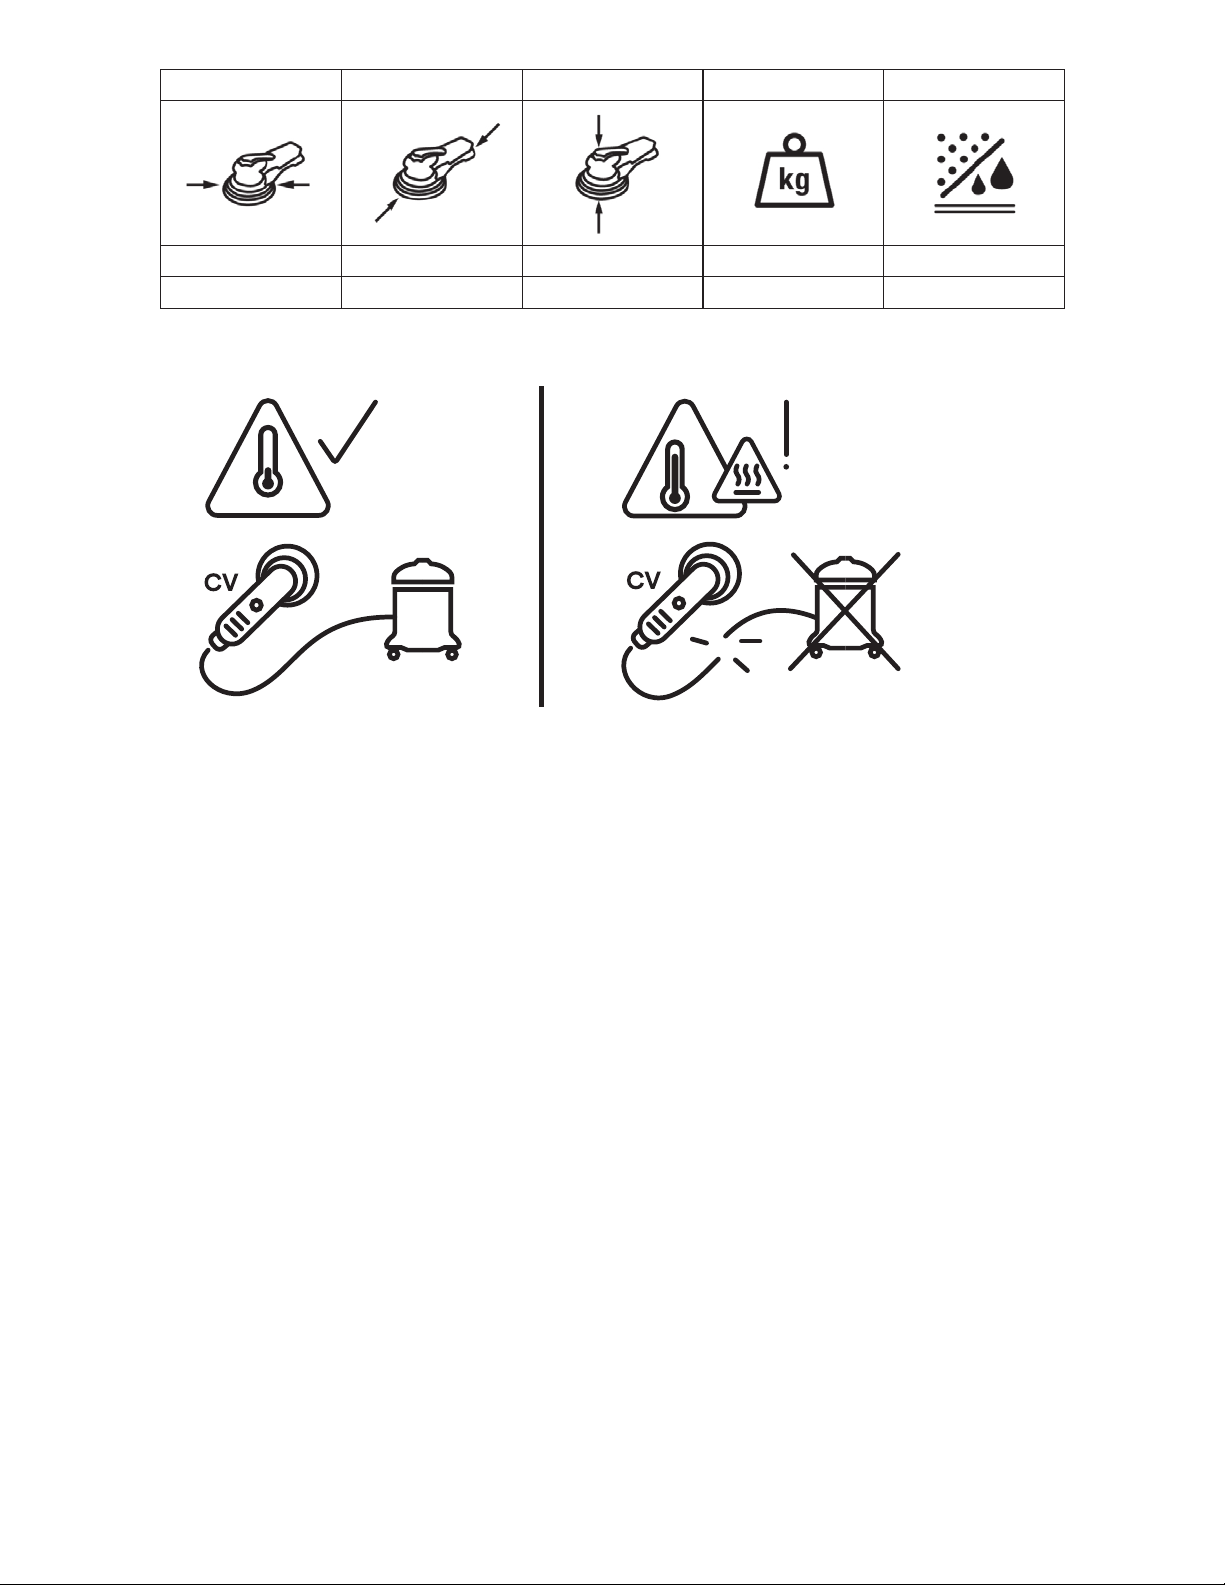
N.m / in.-Ibs
6.2-7.3 / 55-65
0.78 / 6.94
0.34 / 3.03
0.34 / 3.03
0.34 / 3.03
0.34 / 3.03
0.44 / 3.91
0.88 / 7.81
3
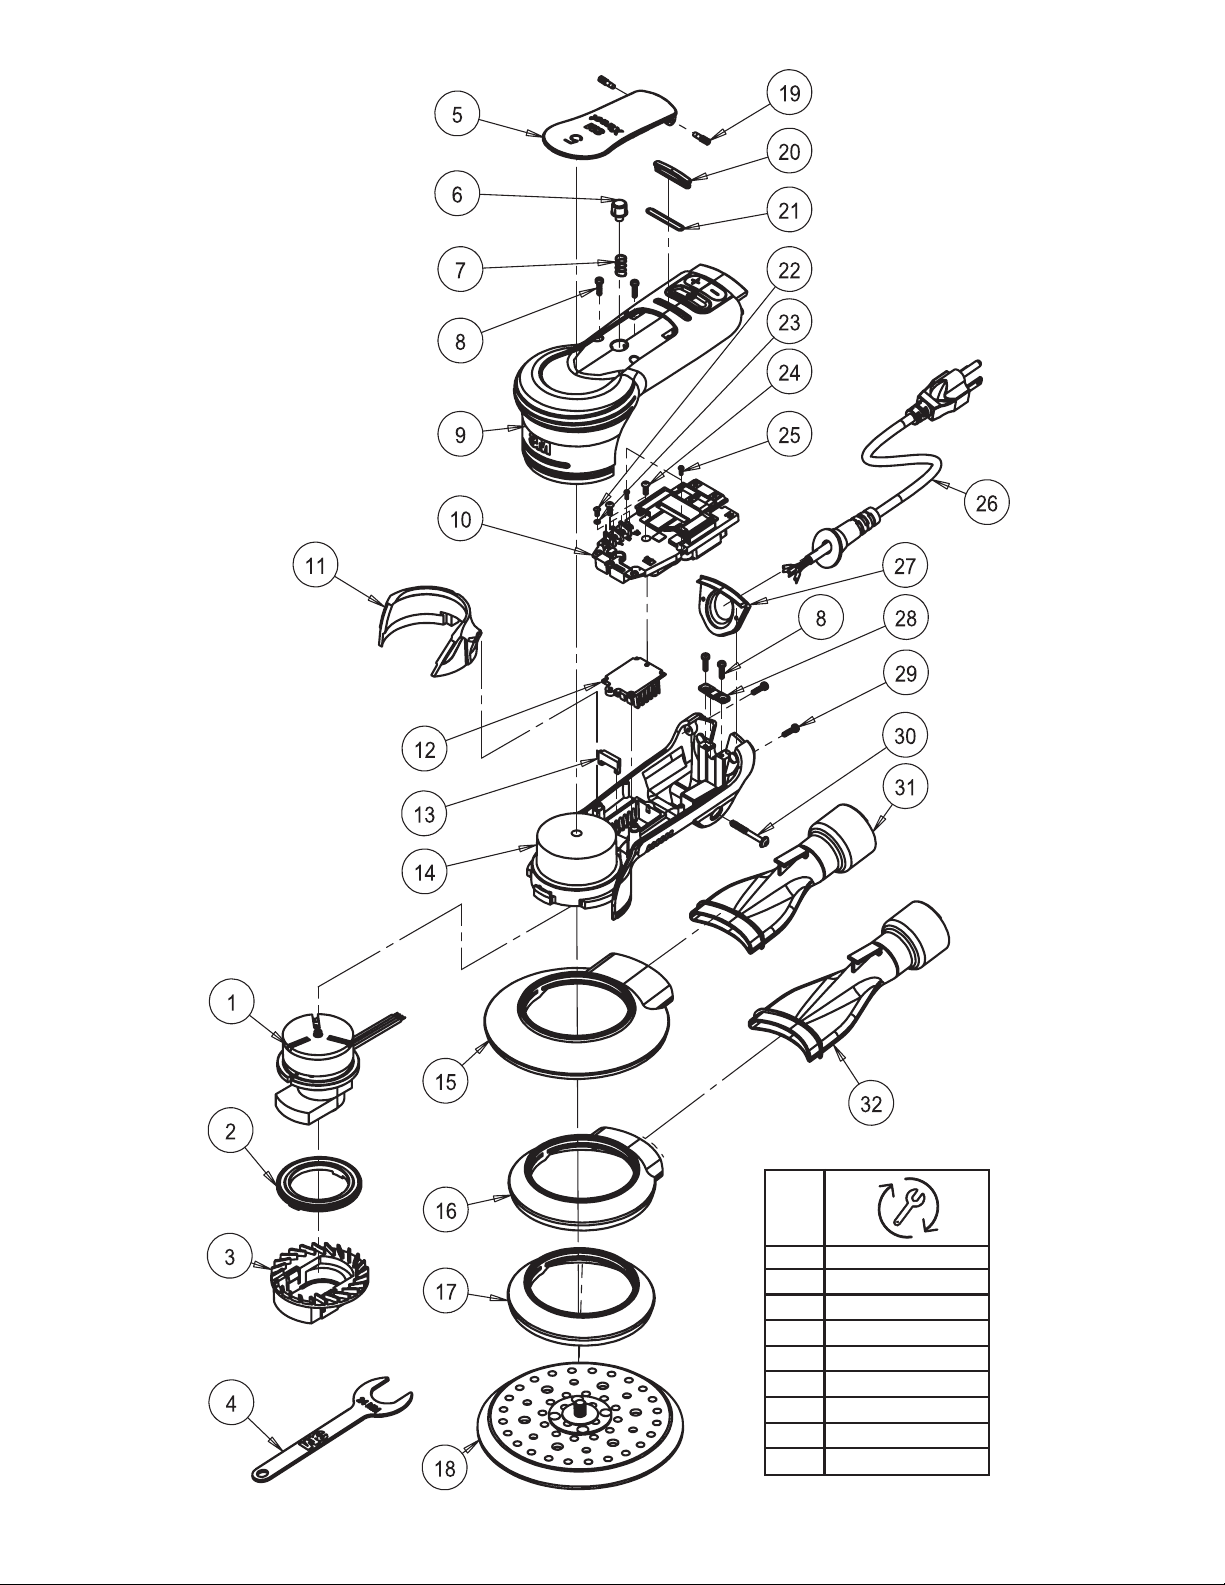
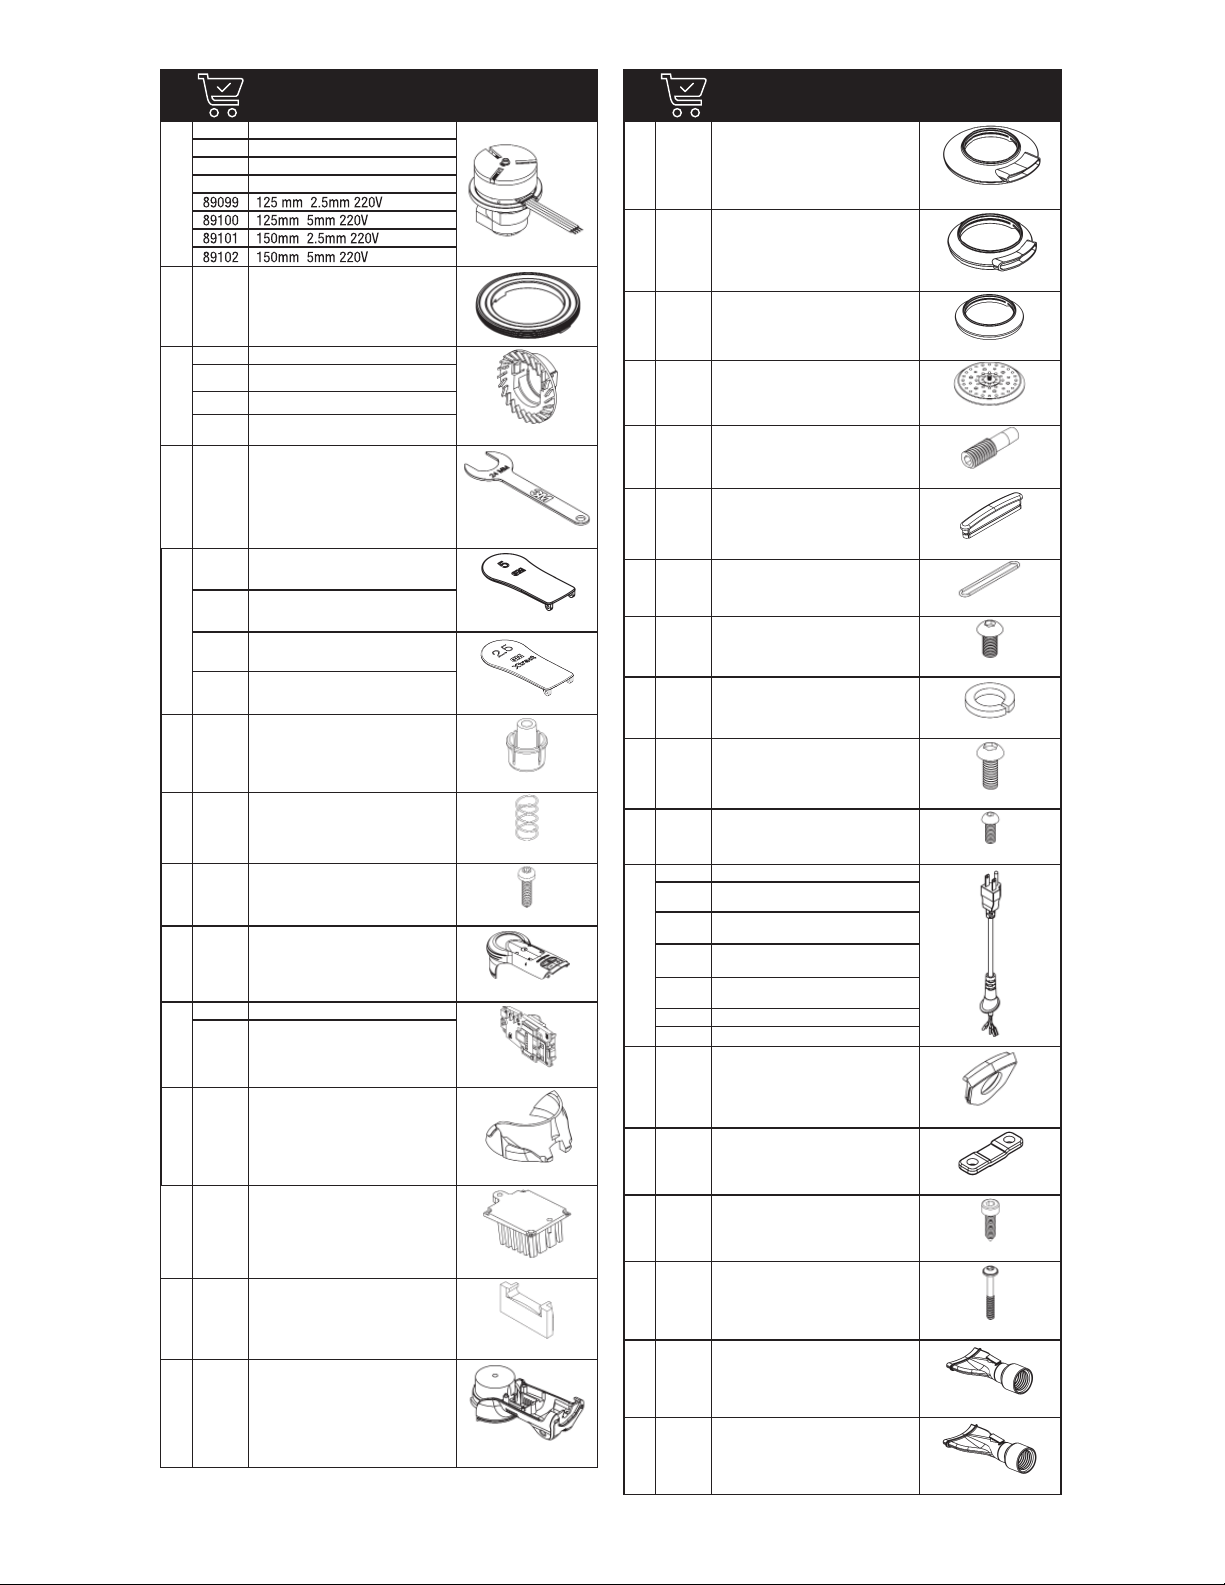
1
89056 5 in. 3/32 in. 110V
89057 5 in. 3/16 in. 110V
89058 6 in. 3/32 in. 110V
89059 6 in. 3/16 in. 110V
2 89060
3
89061 5 in. x 3/32 in. (125mm X 2.5mm)
1x
89062 6 in. x 3/32 in. (150mm X 2.5mm)
89063 5 in. x 3/16 in. (125mm X 5mm)
89064 6 in. x 3/16 in. (150mm X 5mm)
4 28108 24 mm
1x
5
89065 10,000 RPM, 2.5mm
1x
89066 10,000 RPM, 5mm
90080 10,000 RPM, 2.5 mm, Xtract
1x
90081 10,000 RPM, 5 mm, Xtract
6 89067
1x
7 89068
1x
8 89069 M3.0 x 12 mm
4x
9 89070
1x
10
89071 110-120V
1x
89105 220-240V
11 89072
1x
12 89073
1x
13 89074
1x
14 89075
1x
15 89076 6 in. CV
1x
16 89077 5 in. CV
1x
17 89078 5 in./ 6 in. NV
1x
18 N/A
1x
19 89079
2x
20 89080
1x
21 89081
1x
22 89082 M2.5 x 5 mm
4x
23 89083
4x
24 89084 M3.0 x 8 mm
2x
25 89085 M2.0 x 6 mm
2x
26
89086 US, CA, MX, JP, GT, CR, TW (B)
89095 AU, NZ (I)
89098 CN, AR (I)
89106 EU, RU,TR, NO, TH, VI (E)
89109 KO (E)
89114 UK 110 V (EN60309)
89115 UK, IR, MY, SG, GULF (G)
27 89087
1x
28 89088
1x
29 89089 M2.6 x 10 mm
2x
30 89090 M4.0 x 30 mm
1x
31 89091 1 in./ 6 in. CV
1x
32 89092 1 in. / 5 in. CV
1x

4
NV
K
CV
s/m**ABd*CAV).ni( mm).ni( mm
2
(ft./s
2
) ** m/s
2
88817 125 (5) NV 5 (3/16) 240 64.9 / 75.9 1.96 3, 1.5
88818 125 (5) CV 5 (3/16) 240 64.9 / 75.9 1.96 3, 1.5
88819 150 (6) NV 5 (3/16) 240 75.3 / 86.3 2.48 3, 1.5
88820 150 (6) CV 5 (3/16) 240 75.3 / 86.3 2.48 3, 1.5
88821 125 (5) NV 2.5 (3/32) 240 65.8 / 76.8 1.5 3, 1.5
88822 125 (5) CV 2.5 (3/32) 240 65.8 / 76.8 1.5 3, 1.5
88823 150 (6) NV 2.5 (3/32) 240 65.5 / 76.5 2.08 3, 1.5
88824 150 (6) CV 2.5 (3/32) 240 65.5 / 76.5 2.08 3, 1.5
88804 125 (5) NV 5 (3/16) 240 64.9 / 75.9 1.96 3, 1.5
88805 125 (5) CV 5 (3/16) 240 64.9 / 75.9 1.96 3, 1.5
88807 150 (6) NV 5 (3/16) 240 75.3 / 86.3 2.48 3, 1.5
88808 150 (6) CV 5 (3/16) 240 75.3 / 86.3 2.48 3, 1.5
88809 125 (5) NV 2.5 (3/32) 240 65.8 / 76.8 1.5 3, 1.5
88810 125 (5) CV 2.5 (3/32) 240 65.8 / 76.8 1.5 3, 1.5
88811 150 (6) NV 2.5 (3/32) 240 65.5 / 76.5 2.08 3, 1.5
88813 150 (6) CV 2.5 (3/32) 240 65.5 / 76.5 2.08 3, 1.5
88757 125 (5) NV 5 (3/16) 110 64.9 / 75.9 1.96 3, 1.5
88758 125 (5) CV 5 (3/16) 110 64.9 / 75.9 1.96 3, 1.5
88759 150 (6) NV 5 (3/16) 110 75.3 / 86.3 2.48 3, 1.5
88760 150 (6) CV 5 (3/16) 110 75.3 / 86.3 2.48 3, 1.5
88761 125 (5) NV 2.5 (3/32) 110 65.8 / 76.8 1.5 3, 1.5
88762 125 (5) CV
2.5 (3/32) 110 65.8 / 76.8 1.5 3, 1.5
88763 150 (6) NV 2.5 (3/32) 110 65.5 / 76.5 2.08 3, 1.5
88764 150 (6) CV 2.5 (3/32) 110 65.5 / 76.5 2.08 3, 1.5
88834 125 (5) NV 5 (3/16) 240 64.9 / 75.9 1.96 3, 1.5
88835 125 (5) CV 5 (3/16) 240 64.9 / 75.9 1.96 3, 1.5
88836 150 (6) NV 5 (3/16) 240 75.3 / 86.3 2.48 3, 1.5
88837 150 (6) CV 5 (3/16) 240 75.3 / 86.3 2.48 3, 1.5
88838 125 (5) NV 2.5 (3/32) 240 65.8 / 76.8 1.5 3, 1.5
88839 125 (5) CV 2.5 (3/32) 240 65.8 / 76.8 1.5 3, 1.5
88840 150 (6) NV 2.5 (3/32) 240 65.5 / 76.5 2.08 3, 1.5
88841 150 (6) CV 2.5 (3/32) 240 65.5 / 76.5 2.08 3, 1.5
88850 125 (5) NV 5 (3/16) 110 64.9 / 75.9 1.96 3, 1.5
88851 125 (5) CV 5 (3/16) 110 64.9 / 75.9 1.96 3, 1.5
88852 150 (6) NV 5 (3/16) 110 75.3 / 86.3 2.48 3, 1.5
88853 150 (6) CV 5 (3/16) 110 75.3 / 86.3 2.48 3, 1.5
88854 125 (5) NV 2.5 (3/32) 110 65.8 / 76.8 1.5 3, 1.5
88855 125 (5) CV 2.5 (3/32) 110 65.8 / 76.8 1.5 3, 1.5
88856 150 (6) NV 2.5 (3/32) 110 65.5 / 76.5 2.08 3, 1.5
88857 150 (6) CV 2.5 (3/32) 110 65.5 / 76.5 2.08 3, 1.5
88842 125 (5) NV 5 (3/16) 240 64.9 / 75.9 1.96 3, 1.5
88843 125 (5) CV 5 (3/16) 240 64.9 / 75.9 1.96 3, 1.5
88844 150 (6) NV 5 (3/16) 240 75.3 / 86.3 2.48 3, 1.5
88845 150 (6) CV 5 (3/16) 240 75.3 / 86.3 2.48 3, 1.5
88846 125 (5) NV 2.5 (3/32) 240 65.8 / 76.8 1.5 3
, 1.5
88847 125 (5) CV 2.5 (3/32) 240 65.8 / 76.8 1.5 3, 1.5
88848 150 (6) NV 2.5 (3/32) 240 65.5 / 76.5 2.08 3, 1.5
88849 150 (6) CV 2.5 (3/32) 240 65.5 / 76.5 2.08 3, 1.5
88924 125 (5) NV 5 (3/16) 240 64.9 / 75.9 1.96 3, 1.5
88925 125 (5) CV 5 (3/16) 240 64.9 / 75.9 1.96 3, 1.5
88926 150 (6) NV 5 (3/16) 240 75.3 / 86.3 2.48 3, 1.5
88927 150 (6) CV 5 (3/16) 240 75.3 / 86.3 2.48 3, 1.5
88928 125 (5) NV 2.5 (3/32) 240 65.8 / 76.8 1.5 3, 1.5
88929 125 (5) CV 2.5 (3/32) 240 65.8 / 76.8 1.5 3, 1.5
88930 150 (6) NV 2.5 (3/32) 240 65.5 / 76.5 2.08 3, 1.5
88931 150 (6) CV 2.5 (3/32) 240 65.5 / 76.5 2.08 3, 1.5
5
PI).bl( .gk).ni( mm).ni( mm).ni( mm
125 (5) 249.5 (9.82) 105 (4.13) 1.39 (3.06) IPXO
150 (6) 262 (10.3) 105 (4.13) 1.43 (3.15) IPXO
* EN 62841-1/AC:2015, EN 62841-2-4/AC:2015
** EN 12096:1997; EN 62841-1/AC:2015, EN 62841-2-4/AC:2015
6
English
Original Instructions
ELECTRIC RANDOM ORBITAL SANDER INSTRUCTION MANUAL
125 mm (5 in), 150 mm (6 in)
4,000/min – 10,000/min (RPM)
100-130 VAC 60 Hz., 220-240 VAC 50-60 Hz.
Important Safety Information
Please read, understand and follow all safety information contained in these instructions prior to the use of this tool. Retain these instructions for future reference.
Intended Use
This power tool is intended for use in workplaces, and only by skilled, trained professionals in accordance with the instructions in this manual. This electric tool
is designed to be used with a disc pad and appropriate abrasive for sanding metals, wood, stone, plastics and other materials. It should only be used for such
h this tool. Use in any other
manner or with other accessories could lead to unsafe operating conditions.
Do not operate tool in water or in an excessively wet application.
Do not use disc pads that have a Max RPM or Max OPM less than the tool Max RPM or Max OPM rating. Never use disc pads that have a weight and/or size
Explanation of Signal Word Consequences
WARNING: Indicates a potentially hazardous situation which, if not avoided, may result in death or serious injury and/or property damage.
CAUTION: Indicates a potentially hazardous situation which, if not avoided, may result in minor or moderate injury and/or property damage.
NOTICE: Indicates a situation which, if not avoided, could result in property damage.
cation Marks
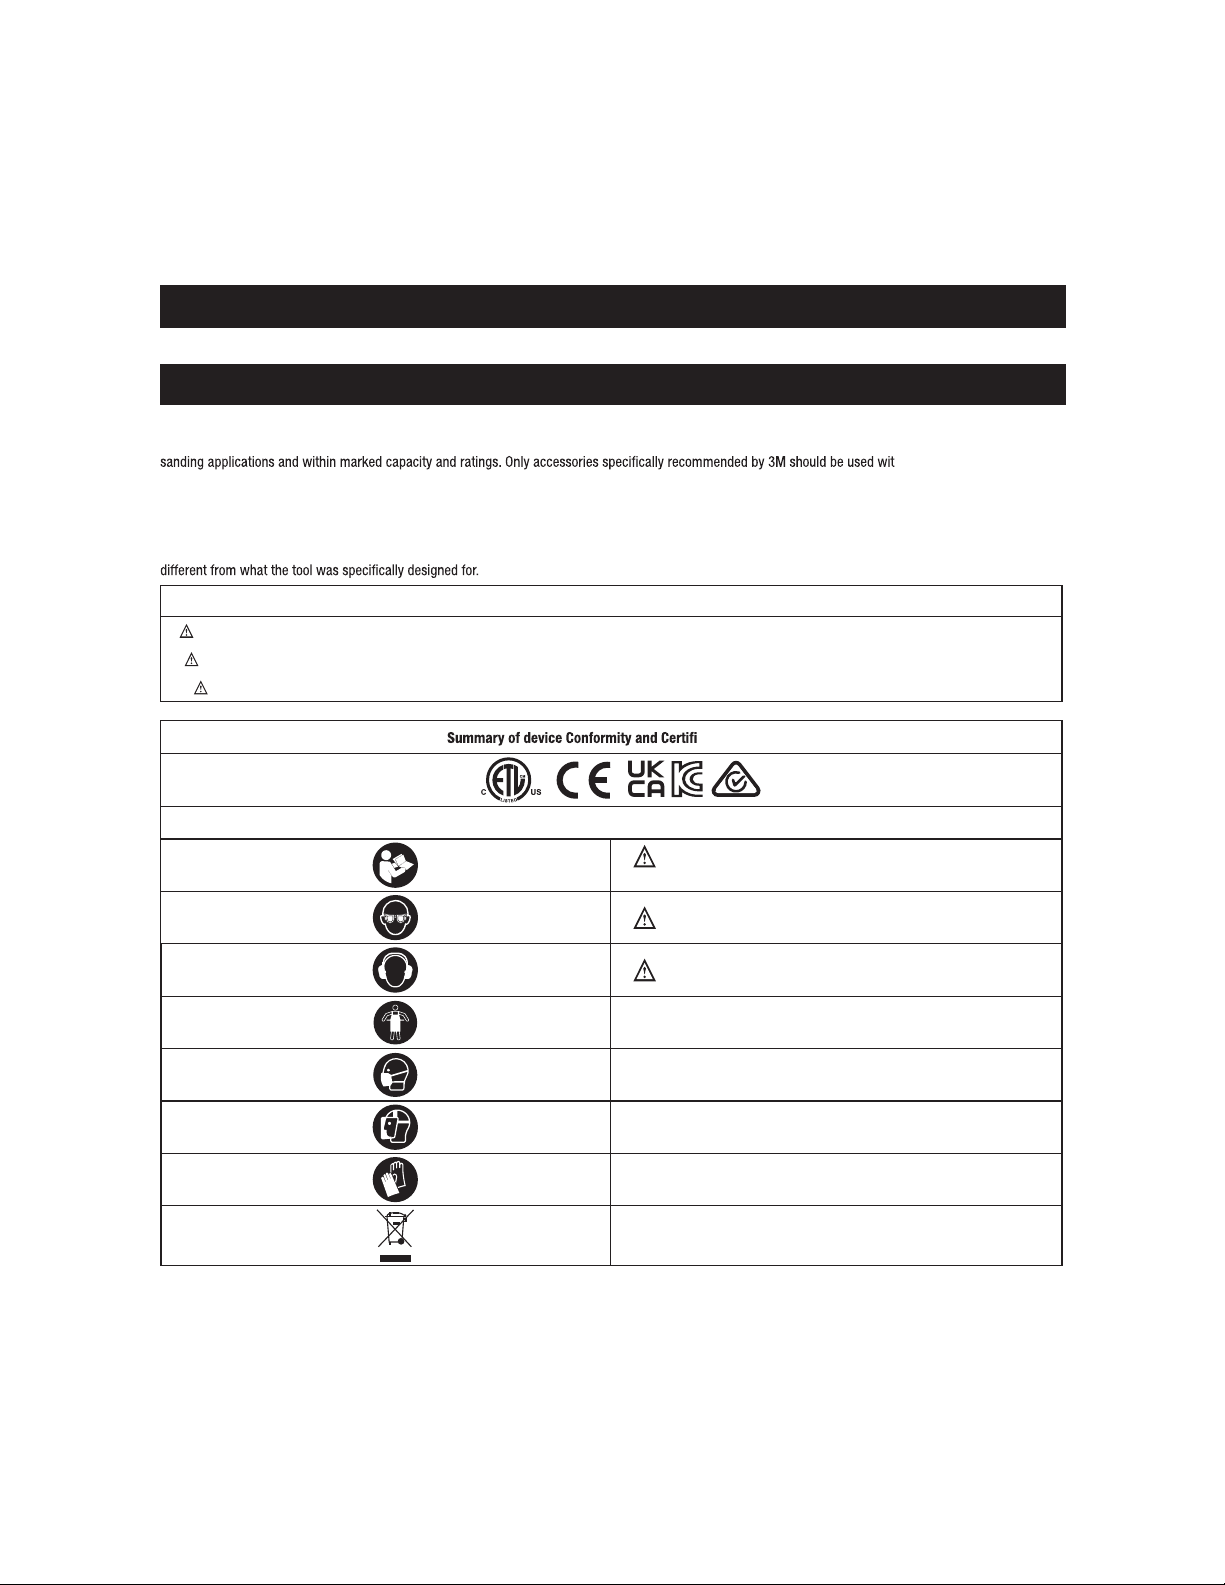
Summary of device labels containing Safety information
WARNING: READ AND UNDERSTAND INSTRUCTION MANUAL BEFORE
OPERATING TOOL.
WARNING: ALWAYS WEAR APPROVED EYE PROTECTION
WARNING: ALWAYS WEAR APPROVED HEARING PROTECTION
APRON PROTECTION
DUST MASK PROTECTION
FACE SHIELD PROTECTION
GLOVE PROTECTION
WEEE Disposal Mark
7
Read the Safety Data Sheets (SDS)
before using any materials.
WARNING!
Exposure to DUST generated from workpiece
and/or abrasive materials can result in lung
damage and/or other physical injury.
Use dust capture or local exhaust as stated in
the SDS. Wear government-approved respiratory
protection and eye and skin protection.
Failure to follow this warning can result in
serious lung damage and/or physical injury.
Contact the suppliers of the workpiece materials
and abrasive materials for copies of the SDS
if one is not readily available.
GENERAL POWER TOOL SAFETY WARNINGS
WARNING: Read all safety warnings and all instructions. Failure to follow the warnings and instructions may result in electric shock, serious injury.
Save all warnings and instructions for future reference. The term “power tool” in the warnings refers to your mains-operated (corded) power tool or battery-
operated (cordless) power tool.
1) Work Area Safety
a) Keep work area clean and well lit. Cluttered or dark areas invite accidents.
b)
ammable liquids, gases or dust. Power tools create sparks
which may ignite the dust or fumes.
c) Keep children and bystanders away while operating a power tool. Distractions can cause you to lose control.
2) Electrical Safety
a) Power tool plugs must match the outlet. Never modify the plug in any way. Do not use any adapter plugs with earthed (grounded) power tools.
b) Avoid body contact with earthed or grounded surfaces, such as pipes, radiators, ranges and refrigerators. There is an increased risk of electric
shock if your body is earthed or grounded.
c) Do not expose power tools to rain or wet conditions. Water entering a power tool will increase the risk of electric shock.
d) Do not abuse the cord. Never use the cord for carrying, pulling or unplugging the power tool. Keep cord away from heat, oil, sharp edges or
moving parts. Damaged or entangled cords increase the risk of electric shock.
e) When operating a power tool outdoors, use an extension cord suitable for outdoor use. Use of a cord suitable for outdoor use reduces the risk of
electric shock.
f) If operating a power tool in a damp location is unavoidable, use a residual current device (RCD), ground fault circuit interrupter (GFCI) or earth
leakage circuit breaker (ELCB) protected supply. Use of an RCD, GFCI or ELCB reduces the risk of electric shock.
3) Personal Safety,
a) Stay alert, watch what you are doing and use common sense when operating a power tool. Do not use a power tool while you are tired or under
uence of drugs, alcohol or medication. A moment of inattention while operating power tools may result in serious personal injury.
b) Use personal protective equipment. Always wear eye protection. Protective equipment such as dust mask, non-skid safety shoes, hard hat, or
hearing protection used for appropriate conditions will reduce personal injuries.
c) Prevent unintentional starting. Ensure the switch is in the off-position before connecting to power source and/or battery pack, picking up or
carrying the tool.
d) Remove any adjusting key or wrench before turning the power tool on. A wrench or a key left attached to a rotating part of the power tool may result
in personal injury.
e) Do not overreach. Keep proper footing and balance at all times. This enables better control of the power tool in unexpected situations.
f) Dress properly. Do not wear loose clothing or jewelry. Keep your hair and clothing away from moving parts. Loose clothes, jewelry or long hair can
be caught in moving parts.
g) If devices are provided for the connection of dust extraction and collection facilities, ensure these are connected and properly used. Use of dust
collection can reduce dust-related hazards.
h) Do not let familiarity gained from frequent use of tools allow you to become complacent and ignore tool safety principles. A careless action can
cause severe injury within a fraction of a second.
4) Power Tool Use and Care
a) Do not force the power tool. Use the correct power tool for your application. The correct power tool will do the job better and safer at the rate for
which it was designed.
b) Do not use the power tool if the switch does not turn it on and off. Any power tool that cannot be controlled with the switch is dangerous and must
be repaired.
c) Disconnect the plug from the power source and/or remove the battery pack, if detachable, from the power tool before making any adjustments,
changing accessories, or storing power tools. Such preventive safety measures reduce the risk of starting the power tool accidentally.
d) Store idle power tools out of the reach of children and do not allow persons unfamiliar with the power tool or these instructions to operate the
power tool. Power tools are dangerous in the hands of untrained users.
e) Maintain power tools and accessories. Check for misalignment or binding of moving parts, breakage of parts and any other condit
ion that may
affect the power tool’s operation. If damaged, have the power tool repaired before use. Many accidents are caused by poorly maintained power
tools.
f) Keep cutting tools sharp and clean. Properly maintained cutting tools with sharp cutting edges are less likely to bind and are easier to control.
g) Use the power tool, accessories and tool bits etc. in accordance with these instructions, taking into account the working conditions and the
work to be performed. Use of the power tool for operations different from those intended could result in a hazardous situation.
h) Keep handles and grasping surfaces dry, clean and free from oil and grease. Slippery handles and grasping surfaces do not allow for safe handling
and control of the tool in unexpected situations.
5) Service
a)
ed repair person using only identical replacement parts. This will ensure that the safety of the power
tool is maintained.
WARNING
To reduce the risks associated with impact from abrasive product, disc pad, work piece or tool breakup, sharp edges, hazardous vibration and
hazardous noise:
• Read, understand and follow the safety information contained in these instructions prior to the use of this tool. Retain these instructions for future reference.
• Only personnel who are properly trained should be allowed to service this tool.
8
• If you notice any abnormal noise or vibration when operating the tool, immediately discontinue its use and inspect for worn or damaged components. Correct
or replace the suspect component. If abnormal noise or vibration still exists, contact 3M. Refer to warranty instructions.
• Prior to use, inspect abrasive product and accessories for possible damage. If damaged, replace with new abrasive product and accessories available from 3M.
• Only use abrasive product, mounting hardware, safety features and accessories supplied or recommended by 3M.
• Never operate this tool without all safety features in place and in proper working order.
• Never over-ride or disable the safety features of the start-stop control such that it is in the on position.
• Never allow this tool to be used by untrained people.
• Tool is not to be operated in the presence of bystanders.
• Operators and other personnel must always wear protection for eyes, ears, and respiratory protection when in the work area or while operating this product.
Follow your employer’s safety policy for PPEs or local/national standards for eyewear and other personal protective equipment requirements.
• Wear protective apparel, taking into consideration the type of work being done.
• Proper eye protection must be worn at all times.
ase the risks to the operator.
re and/or explosion:
are able to create sparks when
• Make sure tool is in proper working order.
d.
y off of abrasive product or parts:
• Inadequately tightened abrasive product, mounting hardware, safety features or accessories could cause damage to the tool, product and/or work piece and
possible injury to the operator or bystanders.
• Check that the maximum operating speed of the related abrasive and/or accessories is equal to or higher than the rated speed of the power tool.
To reduce the risks associated with hazardous dust ingestion or eye/skin exposure:
• Dusts and fumes generated when using power tools can cause ill health (for example: cancer, birth defects, asthma and/or dermatitis); risk assessment of
these hazards and implementation of appropriate controls is essential.
• Risk assessment should include dust created by the use of the tool and the potential for disturbing existing dust.
• Operate and maintain the power tool as recommended in these instructions, to minimize dust or fume emissions.
• Where dusts or fumes are created, the priority shall be to control them at the point of emission.
• All integral features or accessories for the collection, extraction or suppression of airborne dust or fumes should be correctly used and maintained in
accordance with the manufacturer’s instructions.
• Select, maintain and replace the consumable as recommended in these instructions, to prevent an unnecessary increase in dust or fumes.
• Use respiratory protection as instructed by your employer and as required by occupational health and safety regulations.
• Use dust capture or local exhaust as stated in the SDS of the material being worked on. Wear government approved respirator protection and eye and skin
protection.
• Periodically blow out all air passages and area above disk pad and under shroud with dry compressed air. All plastic parts should be cleaned with a soft damp
cloth. Never use solvents to clean plastic parts.
• Wear safety glasses while using compressed air.
• Failure to follow these warnings can result in serious lung damage and/or physical injury.
To reduce the risks associated with hazardous vibration:
f your body.
• If you experience numbness, tingling, pain, whitening of the skin or any additional hand/wrist discomfort, work should be stopped promptly to seek medical
attention. Overexposure to vibration from repetitive work/motion can cause disabling damage to the nerves and blood supply of the hands and arms.
• Hold the tool with a light but safe grip taking account of the required hand reaction forces, because the risk from vibration is generally greater when the grip
force is higher.
To reduce the risks associated with hazardous noise:
• Unprotected exposure to high noise levels can cause permanent, disabling, hearing loss and other problems such as tinnitus (ringing, buzzing, whistling or
humming in the ears).
• Always wear hearing protection while operating this tool. Follow your employer’s safety policy or local/national standards for personal protective equipment
requirements.
• Use appropriate controls to reduce the work piece vibration. Including but not limited to, damping materials being worked on.
To reduce the risks associated with overhead work:
• On overhead work, wear a safety helmet and protect from falling debris.
• Be aware of environment and bystanders below grinding application if working on a platform.
WARNING
To reduce the risks associated with skin abrasion, burns, cutting and severing, entrapment or entanglement:
• Keep hands, hair, jewelry, neckwear and clothing away from the rotating part of the tool.
• Wear suitable protective gloves while operating tool.
• Do not touch the rotating parts during operation for any reason.
• Hold the tool correctly. Be ready to counteract normal or sudden movements - have both hands available.
• Use only lubricants recommended by the manufacturer or as designated by the facility.
CAUTION
y off of abrasive product or parts:
• Use care in attaching abrasive product, mounting hardware, safety features and accessories, following the instructions to ensure that they are securely
attached, aligned, and in good working order before use.
• Never over-tighten the abrasive product, mounting hardware, safety features or accessories.
• Never free spin the tool without inspecting tool, abrasive product, mounting hardware, safety features and accessories.
• Do not allow the tool to be started unintentionally.
• Never point this product in the direction of yourself or another person.
To reduce the risks associated with environmental contamination:
• Dispose of all process dust and affected abrasive in accordance with all applicable regulations and/or material SDS.
• Do not throw electric power tools into the household waste! In accordance with the European Directive 2002/96/CE on Waste Electrical and Electronic
Equipment and transposition into national law, used electric power tools must be collected separately and recycled in an environmentally friendly manner.
• Separate collection of used products and packaging allows materials to be recycled. Use of recycle materials helps prevent environmental pollution and
reduces the demand for raw materials.
9
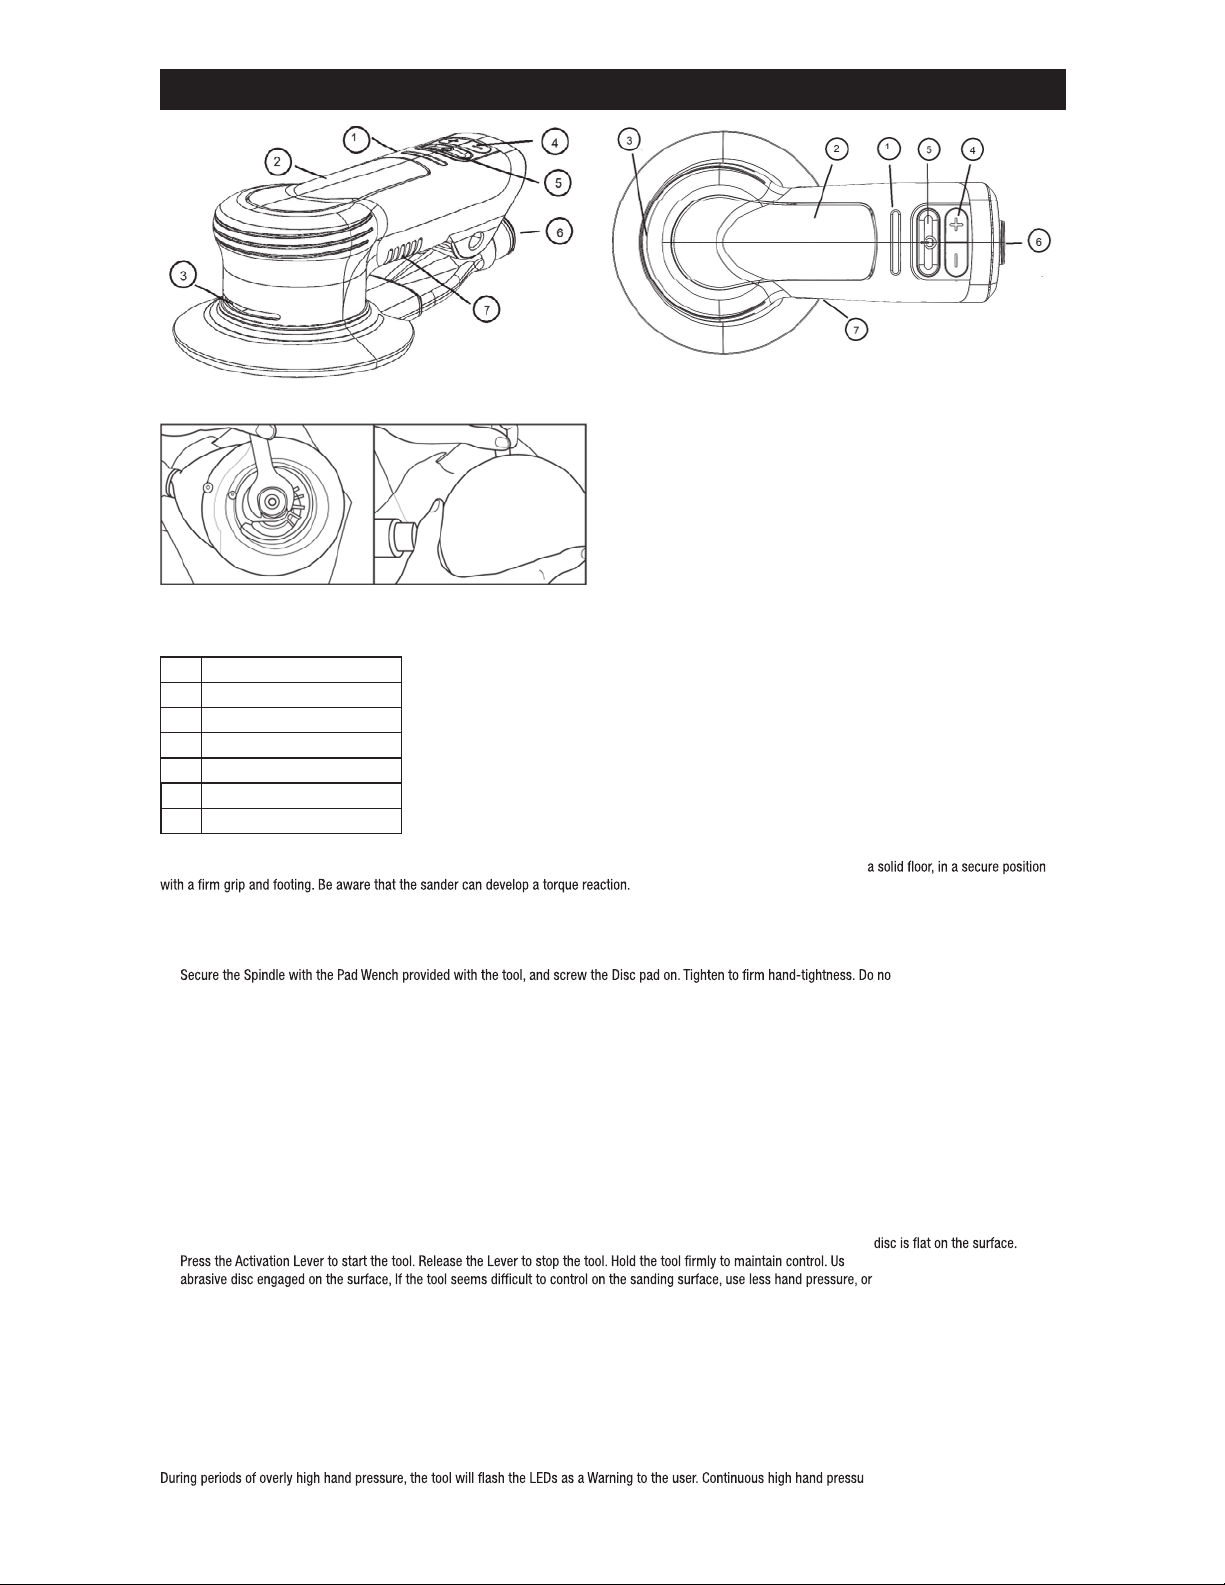
Operating Instructions
Fig. 1
Fig. 2
Fig. 3
1 LED Display
2 Activation Lever
3 Cooling Vent Outlet
4 Speed Control
5 Power On/Off
6 Dust Hose Connection
7 Cooling Vent Inlet
PRIOR TO THE OPERATION
The tool is intended to be operated as a hand held tool. It is always recommended that while using the tool, operators stand on
ATTACHING DISC PADS (See Figure 4.)
3M™ Disc Pads are specially designed to mate to the 3M™ Electric Random Orbital Sander. Improper Disc Pads could cause damage to the tool and workpiece.
1. Turn to tool to “OFF”, or disconnected from the 100-130 VAC or 220-240 VAC socket.
2.
t over tighten.
3. To remove the Disc Pad, insert the Pad Wrench between the Disc Pad and shroud. Secure the Spindle with the Pad Wrench and unscrew the Disc Pad.
“RUN” MODE (See Figures 1 and 3)
Connect the tool to the 100-130 VAC or 220-240 VAC. At this time it is in “Stand-By” Mode. This mode prevents tool from running if the lever is pushed
accidentally.
1. Press the Power ON/OFF switch to turn the tool “ON”. The LED display will indicate that the tool is in Run Mode and will respond to pressing the Activation
Lever or the Speed control “+/-” buttons. The speed setting of the tool will be either 10,000 RPM or the most recent speed selected during the previous use if
it has not been disconnected from AC power.
2. Press either the “+” or “-” button once to change the speed in 1000 RPM increments. The LED display will show increasing and decreasing speed settings by
the number of LED segments illuminated.
3. The tool can now be used normally. While in “Run” Mode”, the “+” and “-” buttons can be used to raise and lower the speed of the tool at any time.
STARTING AND STOPPING SANDER (Make certain the Disc Pad is secured onto the tool and that it is the proper sized and type.)
1. Ensure the proper abrasive disc is attached to the disc pad.
2. Press either the “+” or “-” button to set the desired speed. Place the tool onto the surface to be sanded. Ensure the abrasive
3. e moderate hand pressure to keep the
raise the speed setting.
MAXIMUM SPEED FUNCTION
The 3M™ Electric Random Orbital Sander has preset Maximum Speeds (4,000 – 10000 RPM).
When the tool is turned “ON”, any speed setting will be stored until Power is turned “OFF”. When the Power is turned “OFF”, the setting will return to 10,000 RPM
when the Power “ON” again.
OVERLOAD PROTECTION SYSTEMS
The 3M Electric Random Orbital Sander has two systems to protect it from overloading and overheating.
Downforce Overload System
The Sander has the ability to monitor and maintain the preset Maximum Speed as user hand pressure increases or decreases during use.
re should be no greater than
approximately 7 lbs (30 N).


