Loading ...
Loading ...
Loading ...

5
ENGLISH
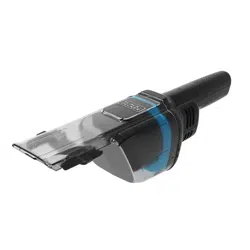
Cleaning the Filters (Fig. G)
1. Place the dust bowl over a trash bin and remove the dust
bowl
3
from the main housing
11
by twisting the dust
bowl counterclockwise and pulling the dust bowl away
from the mainhousing.
2. Remove the filter assembly by pulling it out of the
dustbowl.
3. Empty any dust from the dust bowl into a trashbin and
wash ifnecessary. Ensure the dust bowl is completely dry
beforeusing.
4. Twist the pre‑filter
14
counterclockwise and pull the
pre‑filter off of thefilter
15
. Shake or lightly brush any
dust from thefilter and pre‑filter.
5. Wash the pre‑filter and filter regularly using warm, soapy
water. The cleaner the filter is, the better the product will
perform.
6. Ensure both filters are completely dry for 12 hours
beforerefitting. It is very important that the filters are
completely dry and correctly in position beforeuse.
7. Install the pre‑filter onto the filter, ensuring the filter
slots
16
align with the pre‑filter tabs
17
and rotate the
pre‑filter clockwise to lock it firmly intoposition.
8. Install the filter assembly into the dust bowl.
9. Install the dust bowl onto the main housing, ensuring
the dust bowl slots
12
aligns with the main housing
tabs
13
as shown in Fig.G and rotate the dust bowl
clockwise to lock it firmly intoposition.
Dust Bowl (Fig. F)
WARNING: Never use this cordless hand
vacuum without itsfilters.
IMPORTANT: Maximum dust collection will only be
obtained with clean filters and an empty dust bowl. If dust
begins to fall back out of the product after it is switched off,
this indicates that the dust bowl is full and requires emptying
To Empty the Dust Bowl (Fig.F)
1. Place the dust bowl over a trash bin and remove the dust
bowl
3
from the main housing
11
by twisting the dust
bowl counterclockwise and pulling the dust bowl away
from the mainhousing.
2. Remove the filter
4
assembly by pulling it out of the
dustbowl.
3. Shake or lightly brush any dust from thefilter assembly.
4. Empty the dust from the dust bowl into a trashbin
and wash ifnecessary. Ensure that the dust bowl is
completely dry beforeusing.
5. Place filter assembly into position in the dust bowl.
6. Install the dust bowl onto the main housing, ensuring the
dust bowl slots
12
align with the main housing tabs
13
as shown in Fig.F and rotate the dust bowl clockwise to
lock it firmly intoposition.
centers or other qualified service organizations, always using
identical replacement parts.
Optimizing the Suction Force
In order to keep the suction force optimized, the filters must
be cleared regularly during use.
Dry Pick Up
For everyday spills of dry material.
• Do not fill the dust bowl
3
beyond the end of the
intakechute.
Switching On (Fig. E)
1. To switch the appliance ON, press and hold the On/Off
trigger
1
on the underside of the handle
2
.
2. To turn the appliance OFF, release the trigger.
OPERATION
WARNING: To reduce the risk of
serious personal injury, turn unit off and keep
hands away from the switch before making any
adjustments or removing/installing attachments
or accessories. An accidental can causeinjury.
Flip-Up Brush (Fig.D)
• A flip‑up brush accessory
9
is built into the nozzle and
can be flipped upwards for use as shown in Figure D.
Accessory Tools (Fig.C)
Your hand vac may be supplied with the following accessories:
‑ Flip‑up brush
9
‑ Crevice tool
10
• The crevice tool can be fitted directly to the nozzle
4
as
shown in Fig. C.
ASSEMBLY AND ADJUSTMENTS
WARNING: To reduce the risk of serious
personal injury, turn unit off and keep hands away
from the switch before making any adjustments or
removing/installing attachments or accessories. An
accidental can causeinjury.
Charging Indicator LED
1. While charging, the blue LED on the charger
6
will illuminate.
2. When charging is completed, the blue LED will turn off.
MAINTENANCE
Use only mild soap and damp cloth to clean the vac. Never
let any liquid get inside the vac; never immerse any part of
the vac into a liquid.
WARNING: Make sure the vacuum is
completely dry before using it.
IMPORTANT: To assure product SAFETY and RELIABILITY,
repairs, maintenance and adjustment (other than those listed
in this manual) should be performed by authorized service
Loading ...
Loading ...
Loading ...
