Loading ...
Loading ...
2
3
ENGLISH
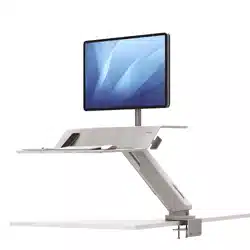
Lotus™ RT Sit-Stand Workstation
CONTENTS CONTINUED
SAFETY INSTRUCTIONS/WARNING
CONTENTS
≤ 30 lbs
≤ 13.61 kg
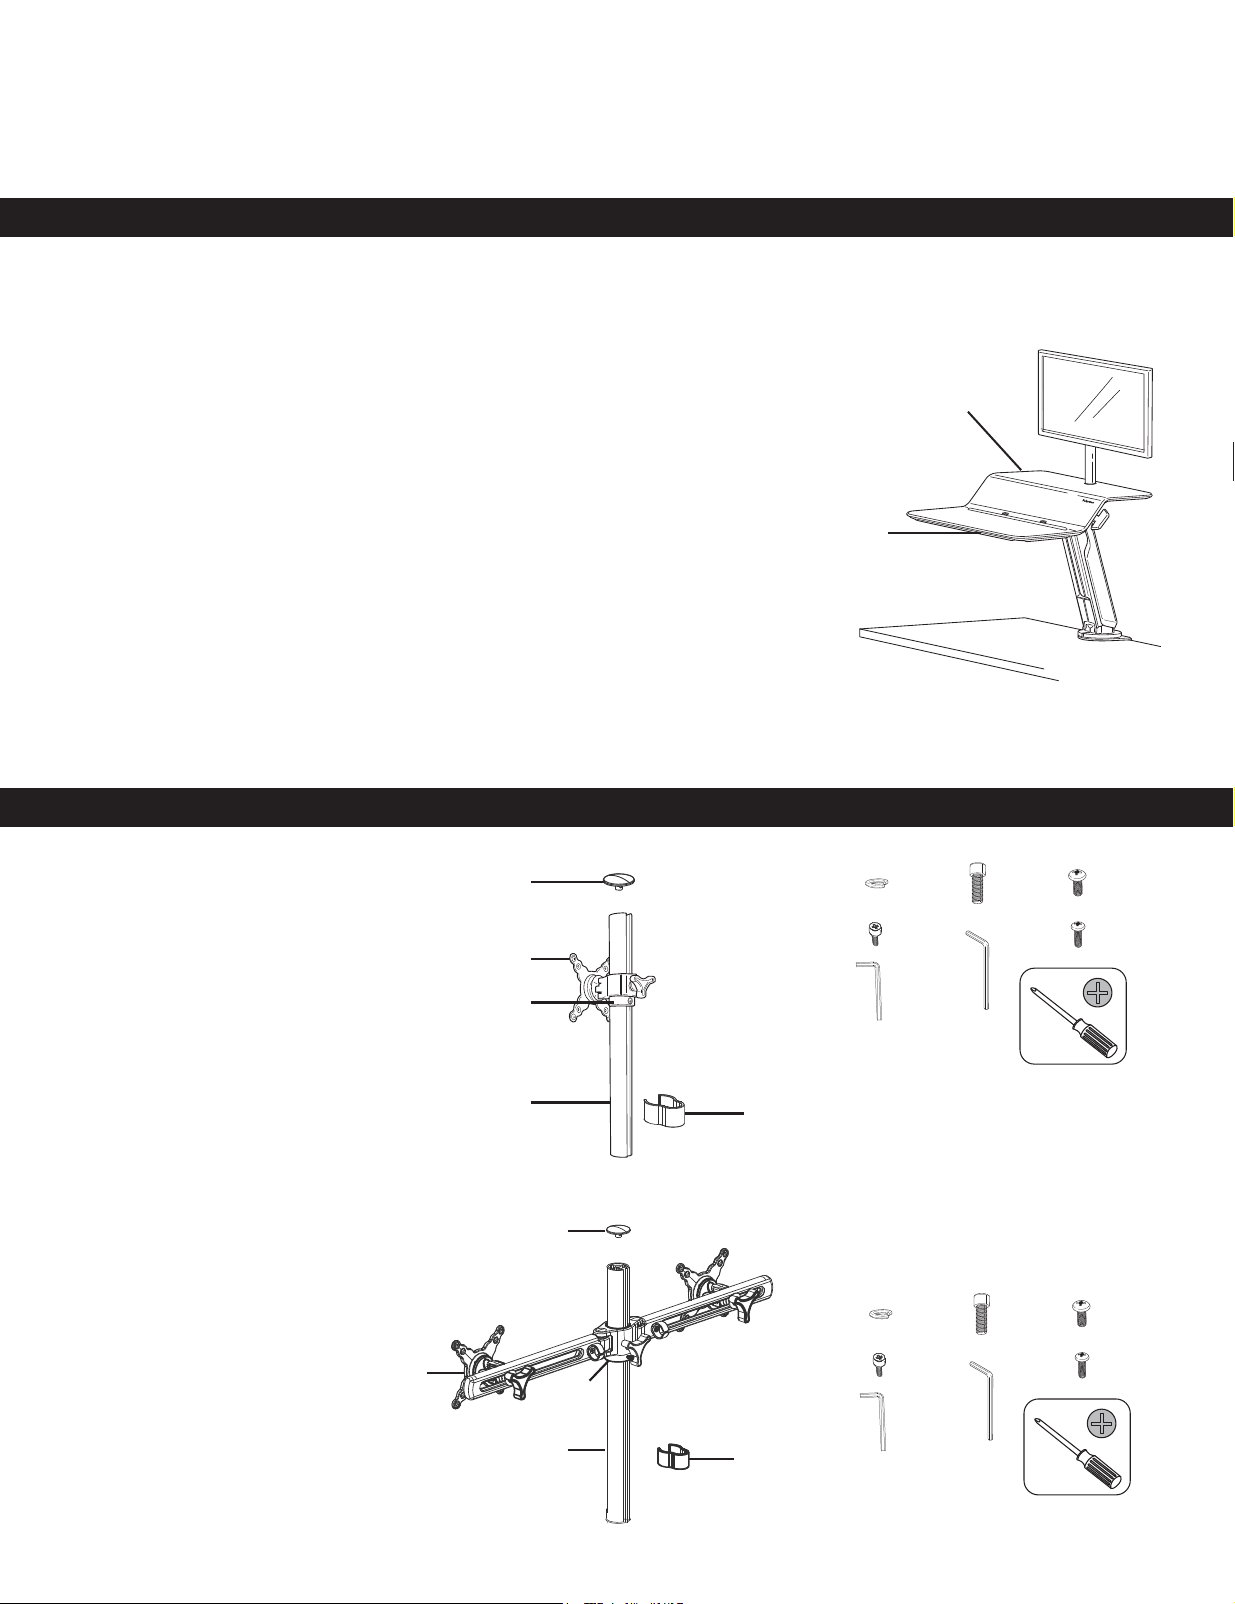
Monitor Arm Parts
1 Cap x1
2 Pole x1
3 VESA assembly x1
4 Fitting x1
5 Cord Clip x1
Hardware
A 10.5 x 2.5mm, 16mm OD Lock Washer x1
B M4 x 10mm Socket Head Cap Screw x1
C 4mm Allen Key x1
D M10 x 2.5 Socket Head Cap Screw x1
E 8mm Hex L-Key x1
F Phillips Pan Head Screw M5x12mm
x4(Single), 8(Dual)
G Phillips Pan Head Screw M4x12mm
x4(Single), 8(Dual)
Sit-Stand Parts
6 Base + Worksurface x1
Hardware
H Clamp Support Plate x1
I 10mm wrench x1
J 6mm Allen Key x1
K 4mm Allen Key x1
L M8 x 1.25mm Thread,
65mm Long Socket
Head Screw x2
Other Tools Required
Phillips Screwdriver
• WARNING: PINCH POINT! DO NOT PUT HANDS OR OTHER OBJECTS UNDER THE PLATFORM OR ARM DURING
OPERATION. SERIOUS INJURY MAY OCCUR.
• WARNING: DO NOT EXCEED MAXIMUM STATED WEIGHT CAPACITY. SERIOUS INJURY OR PROPERTY DAMAGE
MAY OCCUR.
• CAUTION: LIFT HAZARD! TWO PEOPLE ARE REQUIRED TO MOVE THE WORKSTATION. SERIOUS INJURY OR
PROPERTY DAMAGE MAY OCCUR.
• Ensure cable lengths are long enough and follow the cable routing instruction in this manual. Failure to follow
these instructions may result in equipment damage or personal injury.
• DO NOT adjust tension setting until all equipment and accessories have been placed on the workstation.
• DO NOT lean on the keyboard platform.
• Only compatible with Fellowes Monitor Arm Kit for Lotus.
• Make sure the desk or mounting surface is level and can support the combined weight of the workstation and
accessories.
• Remove all equipment and accessories from the workstation before moving.
• Not for use with glass surfaces. Maximum desk thickness: 3” (76mm) / Minimum desk thickness ¾” (19mm)
Ensure that the sit stand is anchored tightly to the desk/table before using it to prevent injury or damage to the product.
A
A
DFx8
x4
x8
x4
F
D
EG
G
E
IKLx2J
B
B
C
C
1
6
H
1
3
4
2
5
3
2
5
4
ASSEMBLY
STEP 1B
Clamp Install with Limited Space
• Use 2 people to lift the Base and Worksurface (6) out of the box
• Remove the clamp using the 4mm Allen Key (K)
• Place on the rear of the desk and re-install the clamp underneath the desk. Move to Step 1C
STEP 1A
Clamp Install for Thicker Tables
• The clamp comes assembled to accommodate tables 1 5/8” (41.27mm) thick and requires 3 13/16”(96.52mm) of clearance behind the desk. If
your table is thicker, continue with Step 1A. If your desk is close to a wall and has limited space, 1/4” to 3 13/16” (6.35mm to 96.4mm), move
to step 1B. If neither apply, move to step 1C.
• Use 2 people to lift the Base and Worksurface (6) out of the box
• On the clamp, loosen one screw and remove the other using the 4mm Allen Key (K)
• Slide the clamp off to change the orientation. Slide back on as shown in image C
• Re-install screw and tighten the other. Ensure both are securely fastened. Move to Step 1C
A
AB C
BC D
KK
K
K
K
≤ 5 lbs
≤ 2.27 kg
Lotus_RT_Manual_872443_RevB_10L_052918.indd 2-3 5/29/18 1:10 PM
Loading ...
Loading ...
Loading ...