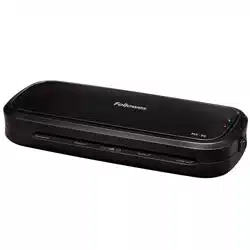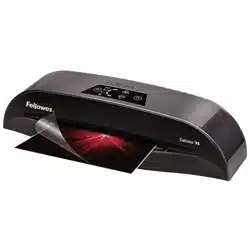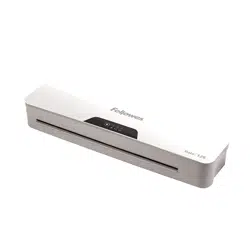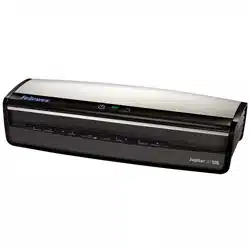
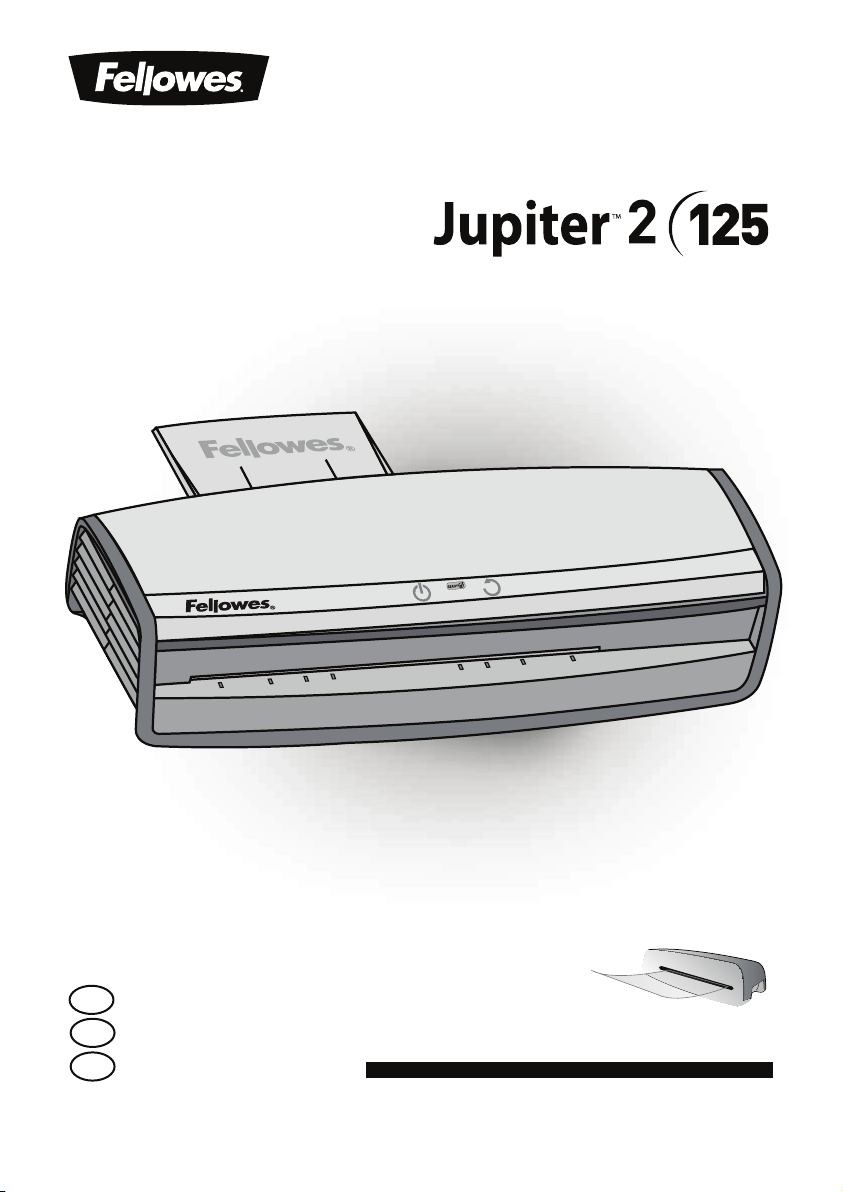
Office Laminator
Please read these instructions before use.
Lire ces instructions avant utilisation.
Lea estas instrucciones antes del usarlo.
E
F
S
For best quality use Fellowes ImageLast pouches
Pour une meilleure qualité, utilisez les pochettes ImageLast Fellowes
Para obtener la mejor calidad, utilice bolsas Fellowes ImageLast

CONTENTS
-".*/"503$0/530-426*$,45"35(6*%&
&/(-*4)
FRANÇAIS 7-9
ESPAÑOL 10-12
PRODUCT REGISTRATION / WORLDWIDE WARRANTY
Thank you for purchasing a Fellowes product. Please visit XXXGFMMPXFTDPNSFHJTUFS to register your
product and benefit from product news, feedback and offers. Product details can be found listed on
the rating plate positioned on the rear side or underside of the machine.
Fellowes warrants all parts of the laminator to be free of defects in material and workmanship for 2
years from the date of purchase by the original consumer. If any part is found to be defective during
XBSSBOUZQFSJPEZPVSTPMFBOEFYDMVTJWFSFNFEZXJMMCFSFQBJSPSSFQMBDFNFOUBU'FMMPXFTPQUJPO
BOEFYQFOTFPGUIFEFGFDUJWFQBSU5IJTXBSSBOUZEPFTOPUBQQMZJODBTFTPGBCVTFNJTIBOEMJOHPS
unauthorized repair. Any implied warranty, including that of merchantability or fitness for particular
purpose, is hereby limited in duration to the appropriate warranty period set forth above. In no
event shall Fellowes be liable for any consequential damages attributable to this product. This
warranty gives you specific legal rights. You may have other legal rights that vary from this warranty.
5IFEVSBUJPOUFSNTBOEDPOEJUJPOTPGUIJTXBSSBOUZBSFWBMJEXPSMEXJEFFYDFQUXIFSFEJGGFSFOU
limitations, restrictions or conditions may be required by local law. For more details or to obtain
services under this warranty, please contact Fellowes or your dealer.
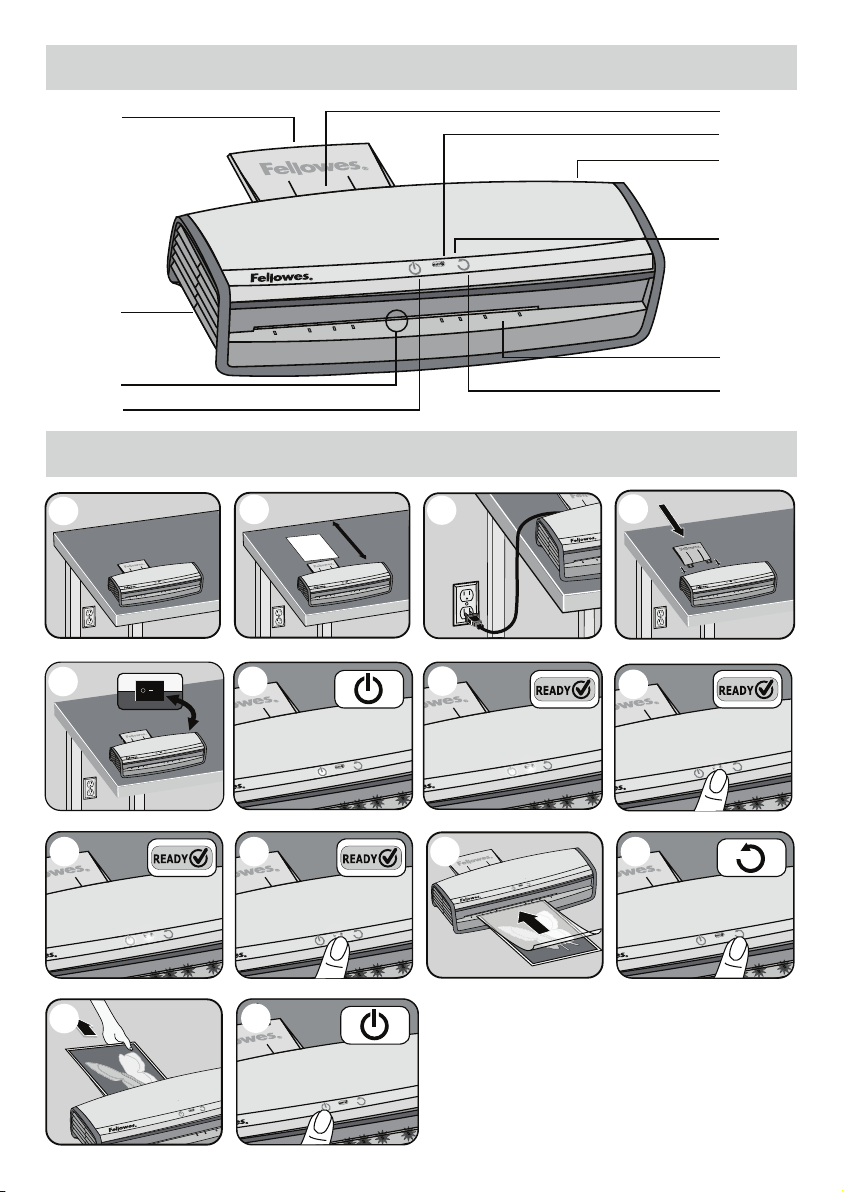
LAMINATOR CONTROLS
QUICK START GUIDE
3
F
A
J
B
1
20”
2
3
4
5
7
14
C
D
E
G
H
I
13
6
8
10 11 129

LAMINATOR CONTROLS
IMPORTANT SAFETY INSTRUCTIONS - KEEP FOR FUTURE USE
4
ENGLISH
E
A 0OPGGTXJUDI
B 4UBOECZ1PXFSPOCVUUPO
C 3FBEZ)PU$PMECVUUPO
D Reverse button
E Carry handles
F 1PVDIEPDVNFOUFOUSZTMPU
G Entry shelf (illuminated)
H 1PVDIEPDVNFOUFYJU
I Illuminated user interface
J &YJUUSBZ
CAPABILITIES
Performance
Entry width 12.5”
Pouch thickness (min.) 3 mil (per side)
1PVDIUIJDLOFTTNBY NJMQFSTJEF
Estimated heat-up time 1 minute
$PPMEPXOUJNF NJOVUFT
-BNJOBUJPOTQFFE VQUPwNJO
/VNCFSPGSPMMFST
Ready indication Light & beep
3FWFSTF"VUPSFWFSTF :FT:FT
$MFBS1BUI"OUJKBNFOHJOF :FT
Auto Shut-off Yes (30 mins)
Photo-capable Yes
Carrier-free Yes
&YJUUSBZ :FT
Technical Data
7PMUBHF 7"$
'SFRVFODZ )[
Wattage 1300 Watts
Amps 11 Amps
%JNFOTJPOT)Y8Y% wYwYw
/FUXFJHIU MC
.BYEPDVNFOUUIJDLOFTT wNN
- The machine is for indoor use only. Plug the machine into an easily accessible outlet.
- To prevent electrical shock - do not use the appliance close to water, do not spill water on to the appliance, power cord or wall
socket.
DO ensure the machine is on a stable surface.
DO test laminate scrap sheets and set the machine before final
laminations.
DO remove staples and other metal articles prior to laminating.
DO keep the machine away from heat and water sources.
DO turn off the machine after each use.
DOVOQMVHUIFNBDIJOFXIFOOPUJOVTFGPSBOFYUFOEFEQFSJPE
DO use pouches designed for use at the appropriate settings.
DO keep away from pets, while in use.
DO NOT leave the power cord in contact with hot surfaces.
DO NOT leave power cord hanging from cupboards or shelves.
DO NOT use appliance if the power cord is damaged.
DO NOT attempt to open or otherwise repair the machine.
DO NOTFYDFFEUIFNBDIJOFTRVPUFEQFSGPSNBODF
DO NOT allow minors to use this machine.
DO NOTMBNJOBUFTIBSQPSNFUBMPCKFDUTFHTUBQMFTQBQFS
clips).
DO NOT laminate heat-sensitive documents (eg: tickets,
ultrasounds etc) on hot settings.
DO NOT laminate an empty pouch.

FEATURES & TIPS
Advanced Pouch Tracking System
This feature will detect and alert the user if there is a mis-feed or the
document has not gone completely through the machine in normal
PQFSBUJOHUJNFBOEBVUPNBUJDBMMZSFWFSTFUIFEPDVNFOUVOUJMUIFKBN
is cleared.
AutoSense
6OJRVFTZTUFNEFUFDUTQPVDIUIJDLOFTTBOETFMGBEKVTUTUPPQUJNBM
lamination setting.
’Reverse’ function
5PFKFDUUIFMBNJOBUJOHQPVDIEVSJOHVTFQSFTTBOEIPMEEPXOUIF
SFWFSTFCVUUPOVOUJMUIFQPVDIIBTFKFDUFEGSPNUIFNBDIJOF
‘Auto Shut-Off’ function
If the machine is not active for 30 minutes, the ‘Sleep Mode’ function
will place the machine into standby mode. To operate the machine,
press the ‘Power On’ button on the control panel.
t For best results, use Fellowes ® brand thermal pouches:
3, 5, 7 or 10 mil Cold Pouches.
t This machine does not need a carrier to laminate. It is a carrier-
free mechanism.
t Always put the item to be laminated into the appropriate sized
pouch.
t Always test laminate with a similar size and thickness before
final process.
t Prepare pouch and item for lamination. Place item within pouch
centered and touching the leading sealed edge. Ensure the
pouch is not too large for the item.
t *GSFRVJSFEUSJNFYDFTTNBUFSJBMGSPNBSPVOEUIFJUFNBGUFS
lamination and cooling.
5
BEFORE LAMINATING
Ensure the machine is on a stable surface.
Check there is enough clear space (min 20”) behind the machine
to allow items to pass through freely.
Plug the machine into an easily accessible main outlet.
&RVJQUIF&YJU5SBZGPSCFTUMBNJOBUJOHSFTVMUT
STEPS TO LAMINATE
Switch the power on (located at the rear right side of the machine).
The control panel buttons will flash once as part of a check light
system to ensure proper function.
The Standby button will turn on with a soft blue glow. The machine
is automatically warming up to hot lamination. Note: the laminator
features AutoSense which automatically recognizes the pouch
thickness you insert into the laminator.
When the machine is ready, the green “Ready”
LED and
entry tray LED’s will come on and the machine will beep to indicate
that it is ready for lamination.
To toggle between Cold and Hot lamination, press and hold the
“Ready” button for 2 seconds. The Ready icon will blink 3 times in
“Blue” when initially switched to the Cold mode to indicate that the
mode has been switched then the Ready light will turn off until the
machine is ready for cold lamination. Note: to use the cold setting
after hot lamination you may have to wait for the laminator to cool
EPXOGPSoNJOVUFT
When the machine is ready for Cold Lamination the “Ready” LED will
illuminate “Blue” and the machine will beep.
To switch back to hot pouch laminating after cold laminating, press
and hold the “Ready” LED. Wait until the ready light turns green to
indicate it’s ready for hot lamination before inserting pouch.
1MBDFUIFQPVDITFBMFEFEHFmSTUJOUPUIFQPVDIEPDVNFOUFOUSZ
,FFQUIFQPVDITUSBJHIUBOEDFOUFSFEXJUIJOUIFEPDVNFOUFOUSZOPU
POBOBOHMF6TFUIFFOUSZNBSLJOHTBTBHVJEF
This unit is equipped with an Advanced Pouch Tracking System that
XJMMEFUFDUBOEBMFSUUIFVTFSJGUIFSFJTBNJTGFFE*GBKBNJTEFUFDUFE
the machine will automatically reverse the document to help clear the
KBN5IFSFWFSTFCVUUPOXJMMDPNFPOXIJMFBVUPSFWFSTFJTFOHBHFE
"GUFSUIJTJGUIFKBNJTOPUDPNQMFUFMZDMFBSFEUIF3FWFSTFCVUUPOXJMM
CMJOLnBTI1SFTTBOEIPMEUIFSFWFSTFCVUUPOXIJMFQVMMJOHPOUIF
pouch to completely remove the laminate from the machine. Once the
KBNJTDMFBSFEUIFVOJUXJMMSFUVSOUPOPSNBMPQFSBUJPO
6QPOFYJUUIFMBNJOBUFEQPVDINBZCFIPUBOETPGU'PSUIFCFTU
RVBMJUZBOEUPQSFWFOUKBNNJOHSFNPWFUIFQPVDIJNNFEJBUFMZ1MBDF
the pouch on to a flat surface to cool. Take care when handling a
IPUQPVDI"MXBZTSFNPWFMBNJOBUFEEPDVNFOUCFGPSFTUBSUJOHOFYU
MBNJOBUF'PSCFTUQFSGPSNBODFSFTVMUTVTFUIF&YJU5SBZ
Turning off the Machine – If the top power button is pushed, the
machine will go into cool-down mode. The heaters will turn off, but
the rollers will still run until the unit reaches the desired temperature
to turn off completely. This functionality reduces long term wear and
tear to the unit.
1.
2.
3.
5.
6.
7.
8.
9.
11.
12.
10.
4.
13.
14.

6
TROUBLESHOOTING
STORAGE & CLEANING
Problem Possible cause Solution
No glowing ‘blue’ Power on LED Machine not switched on
Switch on machine at right rear side and at wall
socket. Press power standby button
Pouch does not completely seal
the item
Item may be too thick to laminate
.BYJNVNEPDVNFOUUIJDLOFTTFRVBMT1BTT
through laminator a second time
Pouch is lost in the machine
1PVDIJTKBNNFE
Machine will automatically reverse the document.
*GKBNJTOPUDPNQMFUFMZDMFBSFE3FWFSTFCVUUPO
XJMMCMJOLnBTI1SFTTBOEIPMESFWFSTFCVUUPO
while pulling on pouch to completely remove
pouch.
Pouch was inserted open end first
Pouch was not centered on entry
Pouch was not straight upon entry
Empty pouch was used
Damaged rollers or adhesive on rollers
Pouch is damaged after lamination Damaged rollers or adhesive on rollers
Pass cleaning sheets through the machine to test
and clean rollers
Turning off the Machine – If the top power button is pushed, the machine will go into cool-down mode.The heaters will turn off, but
the rollers will still run until the unit reaches the desired temperature to turn off completely. This functionality reduces long term wear
BOEUFBSUPUIFVOJU6OQMVHUIFNBDIJOFBUUIFXBMM5IFPVUTJEFPGUIFNBDIJOFDBOCFDMFBOFEXJUIBEBNQDMPUI%POPUVTFTPMWFOUT
or flammable materials to polish the machine. Cleaning sheets can be purchased for use with the machine. When the machine is warm
– run the sheets through the machine to clean any residue off the rollers. For optimum performance, it is recommended that cleaning
TIFFUTBSFVTFEXJUIUIFNBDIJOFSFHVMBSMZ$MFBOJOHTIFFUPSEFSDPEF
NEED HELP?
LFUPVSFYQFSUTIFMQZPVXJUIBTPMVUJPO
Customer Service...
www.fellowes.com
Always call Fellowes before contacting your place of purchase, see the rear cover for contact details.
$POTJEFSSFHJTUFSJOHZPVSNBDIJOFBUXXXGFMMPXFTDPNSFHJTUFSUPSFDFJWFVQEBUFTBOEBEEJUJPOBMJOGPSNBUJPO

LES COMMANDES DE LA PLASTIFIEUSE
INSTRUCTIONS DE SÉCURITÉ IMPORTANTES - CONSERVER POUR UN USAGE FUTUR
7
FRANÇAIS
F
A *OUFSSVQUFVS.BSDIF"SSÐU
B 5PVDIFEFNJTFFOWFJMMFNBSDIF
C 5PVDIFËBVUPNBUJRVFËDIBVEËGSPJE
D Touche de marche arrière
E Poignées pour le transport
F -PHFNFOUEFOUSÏFEFTQPDIFUUFTEPDVNFOUT
G Étagère d’entrée (éclairée)
H 4PSUJFEFTQPDIFUUFTEPDVNFOUT
I Interface utilisateur lumineuse
J Plateau de sortie
CAPACITÉS
Performance
Largeur d’entrée 12,5 po
Épaisseur des pochettes (min.) 3 mm (par côté)
²QBJTTFVSEFTQPDIFUUFTNBY NNQBSDÙUÏ
Temps de chauffe prévu 1 minute
5FNQTEFSFGSPJEJTTFNFOU NJOVUFT
7JUFTTFEFQMBTUJmDBUJPO KVTRVËQPNJO
/PNCSFEFSPVMFBVY
7PZBOUEJOEJDBUJPO 4JHOBMMVNJOFVYFUCJQ
sonore
Fonction de marche arrière
automatique Oui
Fonction de marche arrière
manuelle Oui
Moteur de dégagement
EVDIFNJOBOUJCPVSSBHF 0VJ
Interface à diodes Oui
Mode veille Oui (30 min.)
Compatible avec les photos Oui
Sans carton de transport Oui
Plateau de sortie Oui
Spécifications techniques
5FOTJPO ø7$"
'SÏRVFODF )[
Courant 1 300 watts
Ampères 11 ampères
%JNFOTJPOT)Y-Y1 QPYQPYQP
1PJETOFUø LH
²QBJTTFVSNBYJNBMF
EFTEPDVNFOUT QPNN
- La machine est réservée à un usage à l’intérieur. Brancher la machine dans une prise facilement accessible.
- Pour éviter tout risque d’électrocution - ne pas utiliser l’appareil près de l’eau, ne pas renverser d’eau sur l’appareil, le cordon
d’alimentation ou la prise murale.
IL FAUT s’assurer que l’appareil soit sur une surface stable.
IL FAUT faire un essai de plastification sur des feuilles de rebut et
BKVTUFSMBQQBSFJMBWBOUEFQMBTUJmFSMFTEPDVNFOUTmOBVY
IL FAUT enlever les agrafes et autres pièces métalliques avant de plastifier.
IL FAUT garder l’appareil loin de toutes sources de chaleur et d’eau.
IL FAUT éteindre l’appareil après chaque usage.
IL FAUT débrancher l’appareil quand il n’est pas utilisé pour une
période prolongée.
IL FAUT utiliser les pochettes conçues pour l’utilisation avec des
réglages appropriés.
IL FAUTHBSEFSMBQQBSFJMMPJOEFTBOJNBVYEPNFTUJRVFTRVBOEJM
est utilisé.
IL NE FAUT PAS laisser le cordon d’alimentation en contact avec
des surfaces chaudes.
IL NE FAUT PAS laisser pendre le cordon d’alimentation des
armoires ou des étagères.
IL NE FAUT PAS utiliser l’appareil si le cordon d’alimentation est
endommagé.
IL NE FAUT PAS tenter d’ouvrir ou de réparer l’appareil.
IL NE FAUT PAS dépasser les caractéristiques de fonctionnement
citées de l’appareil.
IL NE FAUT PASMBJTTFSMFTKFVOFTFOGBOUTVUJMJTFSDFUUFNBDIJOF
IL NE FAUT PASQMBTUJmFSEFTPCKFUTDPVQBOUTPVNÏUBMMJRVFT
FYBHSBGFTUSPNCPOFT
IL NE FAUT PAS plastifier des documents sensibles à la chaleur
FYCJMMFUTVMUSBUTPOTFUDTVSEFTTVQQPSUTDIBVET
IL NE FAUT PAS plastifier une pochette vide.

CARACTÉRISTIQUES ET CONSEILS
Système avancé de suivi de pochette
Cette fonction détecte les bourrages de papier et avertit l’utilisateur
lorsqu’un tel bourrage se produit ou lorsqu’un document tarde à sortir
de la machine. De plus, cette fonction inverse automatiquement le
EPDVNFOUUBOURVJMFYJTUFVOCPVSSBHFEFQBQJFS
AutoSense
-FTZTUÒNFVOJRVFEÏUFDUFMÏQBJTTFVSEFTQPDIFUUFTFUTBKVTUF
automatiquement pour un réglage optimal de la plastification.
Fonction Marche arrière
1PVSFYQVMTFSMBQPDIFUUFQMBTUJmÏFQFOEBOUMVUJMJTBUJPOBQQVZF[TVS
MFCPVUPOEFNBSDIFBSSJÒSFFUNBJOUFOF[KVTRVËDFRVFMBQPDIFUUF
soit sortie de l’appareil.
Fonction «Arrêt automatique»
4JMBNBDIJOFSFTUFJOBDUJWFQFOEBOUNJOVUFTMBGPODUJPO7FJMMFMB
place en mode veille. Pour faire fonctionner la machine, appuyez sur le
bouton « Marche » du panneau de commandes.
t 1PVSEFTSÏTVMUBUTPQUJNBVYVUJMJTF[EFTQPDIFUUFTUIFSNJRVFT
de marque Fellowes ®:
Pochettes de plastification à froid 3, 5, 7 ou 10 mil.
t Cette machine n’a pas besoin de carton transporteur pour
plastifier. Il s’agit d’un mécanisme sans carton transporteur.
t 1MBDF[UPVKPVSTMBSUJDMFËQMBTUmFSEBOTVOFQPDIFUUFEFUBJMMF
appropriée.
t 'BJUFTUPVKPVSTVOFTTBJEFQMBTUJmDBUJPOBWFDMFTNÐNFTEJNFOTJPOT
FUÏQBJTTFVSBWBOUEFQSPDÏEFSBWFDMFTEPDVNFOUTmOBVY
t Préparez la pochette et l’article à plastifier. Placez l’article au
centre de la pochette et appuyez sur le bord scellé avant. Assurez-
vous que la pochette n’est pas trop grande pour l’article.
t $PVQFSMFNBUÏSJFMFYDÏEFOUBVUPVSEVEPDVNFOUBQSÒTMB
plastification et le refroidissement.
8
AVANT LA PLASTIFICATION
Assurez-vous que la machine est sur une surface stable.
7ÏSJmF[RVJMZBJUTVGmTBNNFOUEFTQBDFMJCSFQPNJOJNVN
EFSSJÒSFMBNBDIJOFQPVSQFSNFUUSFBVYBSUJDMFTEFQBTTFSMJCSFNFOU
Branchez l’appareil dans une prise principale facilement accessible.
Installez le Plateau de sortie pour une plastification optimale.
ÉTAPES DE LA PLASTIFICATION
1.
2.
3.
4.
Allumez la machine (le bouton se trouve sur le côté arrière droit
de la machine). Les boutons du panneau de configuration, qui font
partie du système de voyants de vérification, clignotent une fois pour
indiquer à l’utilisateur que le système fonctionne correctement.
Le bouton de veille (Standby) s’éclaire en bleu pâle. La machine
chauffe automatiquement pour procéder à une plastification à
chaud. Remarque : la plastifieuse offre une fonction de capteur
automatique qui reconnaît automatiquement l’épaisseur de la
pochette insérée dans la plastifieuse.
-PSTRVFMBNBDIJOFFTUQSÐUFMFWPZBOU-&%WFSUj1SÐUx
et les voyants LED du plateau d’entrée s’allument et un bip émis
par la machine se fait entendre pour indiquer que la machine est
QSÐUFËFGGFDUVFSVOFQMBTUJmDBUJPO
Pour basculer entre la plastification à froid et la plastification à
DIBVEBQQVZF[TVSMFCPVUPOj1SÐUx3FBEZQFOEBOUTFDPOEFT
1PVSJOEJRVFSMFDIBOHFNFOUEFNPEFMJDÙOF1SÐUDMJHOPUFGPJTFO
bleu lors du passage initial en mode Froid, puis le voyant
j1SÐUx3FBEZTÏUFJOUMPSTRVFMBNBDIJOFFTUQSÐUFËFGGFDUVFS
une plastification à froid. Remarque : pour utiliser la fonction de
plasticication à froid après une plastification à chaud, vous devez
MBJTTFSMBQMBTUJmFVTFSFGSPJEJSQFOEBOUËNJOVUFT
Le voyant LED s’allume en bleu et la machine émet un bip
MPSTRVFMMFFTUQSÐUFQPVSMBQMBTUJmDBUJPOËGSPJE
Pour revenir à la plastification de pochette à chaud après une
QMBTUJmDBUJPOËGSPJEBQQVZF[TVSMFWPZBOU-&%j1SÐUx3FBEZ
et maintenez-le enfoncé. Avant d’insérer une pochette, patientez
UBOURVFMFWPZBOU1SÐUOFEFWJFOUQBTWFSUQPVSJOEJRVFSRVFMB
NBDIJOFFTUQSÐUFËFGGFDUVFSVOFQMBTUJmDBUJPOËDIBVE
Placez la pochette, côté scellé en premier, dans la voie d’entrée
EFQPDIFUUFEPDVNFOU.BJOUFOF[MBQPDIFUUFCJFOESPJUFFUBV
centre de la voie d’entrée du document ; ne la maintenez pas de
CJBJT6UJMJTF[MFTNBSRVBHFTEFOUSÏFDPNNFHVJEFT
Cette machine est équipée d’un Système avancé de suivi de
pochette qui détecte les bourrages de papier et avertit l’utilisateur
si un bourrage se produit. Lorsqu’un bourrage de papier est
détecté, la machine inverse automatiquement le document
pendant pour faciliter l’élimination du bourrage. Le bouton
d’inversion s’allume au déclenchement de l’inversion automatique.
Après quoi, si le bourrage de papier n’est pas complètement
ÏMJNJOÏMFCPVUPO*OWFSTFS3FWFSTFDMJHOPUFnBTIF"QQVZF[TVS
le bouton d’inversion et maintenez-le enfoncé tout en tirant sur la
pochette pour retirer complètement de la machine le document à
QMBTUJmFS6OFGPJTMFCPVSSBHFÏMJNJOÏMBNBDIJOFSFDPNNFODFË
fonctionner normalement.
®TBTPSUJFMBQPDIFUUFQMBTUJmÏFQFVUÐUSFDIBVEFFUNPMMF1PVS
EFTSÏTVMUBUTPQUJNBVYFUQPVSQSÏWFOJSUPVUCPVSSBHFSFUJSF[MB
pochette immédiatement. Placez la pochette sur une surface plane
pour lui permettre de refroidir, Manipulez toute pochette chaude
BWFDQSÏDBVUJPO3FUJSF[UPVKPVSTMFEPDVNFOUQMBTUJmÏBWBOUEF
MBODFSMBQMBTUJmDBUJPOTVJWBOUF1PVSPCUFOJSEFTQFSGPSNBODFT
SÏTVMUBUTPQUJNBVYVUJMJTF[MFQMBUFBVEFTPSUJF&YJU
Éteindre la machine : si vous appuyez sur le bouton d’alimentation
supérieur, la machine passe en mode de refroidissement.
-FTÏMÏNFOUTEFDIBVGGBHFTFEÏTBDUJWFOUNBJTMFTSPVMFBVY
continuent de fonctionner tant que la température n’atteint pas la
valeur souhaitée pour la désactivation totale. Cette fonctionnalité
réduit l’usure à long terme de la machine.
5.
6.
7.
8.
9.
11.
12.
10.
13.
14.

9
DÉPANNAGE
ENTREPOSAGE ET NETTOYAGE
Problème Cause possible Solution
Diode d’alimentation non allumée
en « bleu »
La machine n’est pas allumée
Allumez la machine sur le côté arrière droit et à
la prise murale. Appuyez sur le bouton de veille
de l’alimentation
La pochette ne ferme pas
DPNQMÏUFNFOUMPCKFU
-PCKFUQFVUÐUSFUSPQÏQBJTQPVSÐUSFQMBTUJmÏ
-ÏQBJTTFVSNBYJNBMFEPJUÐUSFEFQP
Plastifiez une seconde fois.
La pochette est perdue dans la
machine
La pochette est bloquée
La machine inverse automatiquement le
document. Si le bourrage de papier n’est pas
complètement éliminé, le bouton Inverser
3FWFSTFDMJHOPUFnBTIF"QQVZFSTVSMF
bouton d’inversion et maintenez-le enfoncé
tout en tirant sur la pochette pour la retirer
complètement.
-BQPDIFUUFBÏUÏJOTÏSÏFBWFDMFYUSÏNJUÏ
ouverte d’abord
La pochette n’était pas centrée à l’entrée
La pochette n’était pas droite à l’entrée
6OFQPDIFUUFWJEFBÏUÏVUJMJTÏF
3PVMFBVYFOEPNNBHÏTPVDPMMFTVSMFT
SPVMFBVY
La pochette est endommagée après
la plastification
3PVMFBVYFOEPNNBHÏTPVDPMMFTVSMFT
SPVMFBVY
Passez des feuilles de nettoyage dans la machine
QPVSUFTUFSFUOFUUPZFSMFTSPVMFBVY
Éteindre la machine : si vous appuyez sur le bouton d’alimentation supérieur, la machine passe en mode de refroidissement. Les
ÏMÏNFOUTEFDIBVGGBHFTFEÏTBDUJWFOUNBJTMFTSPVMFBVYDPOUJOVFOUEFGPODUJPOOFSUBOURVFMBUFNQÏSBUVSFOBUUFJOUQBTMBWBMFVS
souhaitée pour la désactivation totale. Cette fonctionnalité réduit l’usure à long terme de la machine. Débranchez la machine de la prise
NVSBMF"UUFOESFRVFMBNBDIJOFTFSFGSPJEJTTF-FYUÏSJFVSEFMBNBDIJOFQFVUÐUSFOFUUPZÏBWFDVOMJOHFIVNJEF/VUJMJTF[QBTEFTPMWBOUT
PVEFNBUJÒSFTJOnBNNBCMFTQPVSOFUUPZFSMBQQBSFJM*MFTUQPTTJCMFEBDIFUFSEFTGFVJMMFTEFOFUUPZBHFËVUJMJTFSBWFDMBQQBSFJM2VBOE
MBNBDIJOFFTUDIBVEFJOTÏSF[MFTGFVJMMFTEFOFUUPZBHFEBOTDFMMFDJQPVSOFUUPZFSMFTSPVMFBVYEFUPVUSÏTJEV1PVSEFTQFSGPSNBODFT
optimales, il est recommandé d’utiliser régulièrement des feuilles de nettoyage sur la machine. (Code de commande des feuilles de nettoy-
BHF/¡
VOUS AVEZ BESOIN D’AIDE ?
-BJTTF[OPTFYQFSUTWPVTBJEFSBWFDVOFTPMVUJPO
Service clientèle...
www.fellowes.com
7FVJMMF[UPVKPVSTBQQFMFS'FMMPXFTBWBOUEFDPOUBDUFSMFNBHBTJO7PJSËMBSSJÒSFEVDPVWFSDMFQPVSMFTDPPSEPOOÏFT
&OWJTBHF[EFOSFHJTUSFSWPUSFNBDIJOFËMBESFTTFXXXGFMMPXFTDPNSFHJTUFSQPVSSFDFWPJSEFTNJTFTËKPVSFUEFTJOGPSNBUJPOTTVQ-
plémentaires.

CONTROLES DE LA PLASTIFICADORA
INSTRUCCIONES DE SEGURIDAD IMPORTANTES - GUARDAR PARA REFERENCIA FUTURA
10
ESPAÑOL
S
A *OUFSSVQUPSEFFODFOEJEPBQBHBEP
B #PUØOEFFTQFSBFODFOEJEP
C #PUØOEFBVUPNÈUJDPGSÓPDBMJFOUF
D Botón de reversa
E Asas de desplazamiento
F 3BOVSBEFFOUSBEBEFCPMTBEPDVNFOUP
G #BOEFKBEFFOUSBEBJMVNJOBEB
H 4BMJEBEFCPMTBEPDVNFOUP
I Interfaz de usuario iluminada
J #BOEFKBEFTBMJEB
CAPACIDADES
Rendimiento
Ancho de entrada 12,5”
(SPTPSEFMBCPMTBNÓOJNP NJMQPSMBEP
(SPTPSEFMBCPMTBNÈYJNP NJMQPSMBEP
Tiempo estimado
de calentamiento 1 minuto
5JFNQPEFFOGSJBNJFOUP EFBNJOVUPT
7FMPDJEBEEFQMBTUJmDBEP IBTUBwNJO
/ÞNFSPEFSPEJMMPT
Indicador de Listo Luz y señal sonora
Función de reversa automática Sí
Función de reversa manual Sí
$MFBS1BUINPUPSBOUJBUBTDP 4Ó
Interfaz de luces LED Sí
Modo de suspensión Sí (30 min.)
Capacidad para fotografías Sí
Sin transporte Sí
#BOEFKBEFTBMJEB 4Ó
Datos técnicos
5FOTJØO 7$"
'SFDVFODJB )[
Potencia 1300 vatios
"NQFSBKF BNQFSJPT
Dimensiones
BODIPYQSPGVOEJEBEYBMUVSB wYwYw
1FTPOFUP LH
(SPTPSNÈYJNPEFMEPDVNFOUP wNN
- La máquina fue diseñada para usarse únicamente en interiores. Conecte la máquina a un tomacorriente de fácil acceso.
- Para evitar una descarga eléctrica, no utilice el aparato cerca de fuentes de agua; no derrame agua sobre el aparato, el cable de
alimentación o el tomacorriente.
ASEGÚRESE de que la máquina se encuentre sobre una
superficie estable.
PRUEBEFMQMBTUJmDBEPFOIPKBTEFEFTFDIPZDPOmHVSFMB
máquina antes del plastificado final.
RETIREMBTHSBQBTZPUSPTPCKFUPTEFNFUBMBOUFTEFQMBTUJmDBS
MANTENGAMBNÈRVJOBBMFKBEBEFGVFOUFTEFDBMPSZBHVB
APAGUE la máquina después de cada uso.
DESCONECTE la máquina del tomacorriente cuando no vaya a
ser utilizada por un período prolongado.
UTILICE las bolsas diseñadas para el uso con la configuración
apropiada.
MANTENGAMBNÈRVJOBBMFKBEBEFNBTDPUBTDVBOEPTFFTUÏ
utilizando.
NOEFKFFMDBCMFEFBMJNFOUBDJØOFODPOUBDUPDPOTVQFSmDJFTDBMJFOUFT
NOEFKFFMDBCMFEFBMJNFOUBDJØODPMHBOEPEFBSNBSJPTPSFQJTBT
NO utilice el aparato si el cable de alimentación está dañado.
NO intente abrir o reparar la máquina de ninguna manera.
NO supere el rendimiento previsto de la máquina.
NO permita que los menores utilicen este aparato.
NOQMBTUJmRVFBSUÓDVMPTBmMBEPTPEFNFUBMQFKHSBQBTDMJQT
para papeles).
NOQMBTUJmRVFEPDVNFOUPTTFOTJCMFTBMDBMPSQFKCPMFUPT
ultrasonidos, etc.) en configuraciones en caliente.
NO plastifique una bolsa vacía.

CARACTERÍSTICAS Y CONSEJOS
Sistema automático de seguimiento de bolsas
Esta función permite detectar e indicar al usuario si el documento no
ha sido alimentado correctamente o no ha pasado completamente
por la máquina en un tiempo de funcionamiento normal. La máquina
retrocederá el documento automáticamente hasta liberar el atasco.
AutoSense
&YDMVTJWPTJTUFNBRVFEFUFDUBFMHSPTPSEFMBCPMTBZTFBKVTUB
automáticamente a una configuración de plastificado óptima.
Función de reversa
1BSBFYQVMTBSMBCPMTBEFQMBTUJmDBEPEVSBOUFFMVTPPQSJNB
y sostenga el botón de reversa hasta que la bolsa haya salido
completamente de la máquina.
Función de modo de suspensión
4JMBNÈRVJOBEFKBEFGVODJPOBSEVSBOUFNJOVUPTMBGVODJØOA.PEP
de suspensión’ pondrá a la máquina en modo de espera. Para activar
la máquina, presione el botón de encendido en el panel de control.
t 1BSBPCUFOFSNFKPSFTSFTVMUBEPTVUJMJDFMBTCPMTBT'FMMPXFT¥
bolsas de 3, 5, 7 o 10 mil.
t Esta máquina no necesita un transporte para plastificar. Es un
mecanismo sin transporte.
t Siempre coloque el documento a plastificar en la bolsa de
tamaño adecuado.
t Pruebe siempre el plastificado con un tamaño y grosor
similares antes del proceso final.
t 1SFQBSFMBCPMTBZFMBSUÓDVMPBQMBTUJmDBS$PMPRVFFMPCKFUP
DFOUSBEPFOMBCPMTBUPDBOEPFMFYUSFNPDFSSBEPEFMBNJTNB
"TFHÞSFTFEFRVFMBCPMTBOPTFBEFNBTJBEPHSBOEFQBSBFMPCKFUP
t 4JFTOFDFTBSJPSFUJSFFMFYDFTPEFNBUFSJBMEFBMSFEFEPSEFM
PCKFUPUSBTFMQMBTUJmDBEPZFMFOGSJBNJFOUP
11
ANTES DE PLASTIFICAR
Asegúrese de que la máquina esté sobre una superficie estable.
Compruebe que haya suficiente espacio (mínimo 20 pulg.) detrás
EFMBNÈRVJOBQBSBQFSNJUJSRVFMPTPCKFUPTQBTFODØNPEBNFOUF
Conecte la máquina a un tomacorriente de fácil acceso.
&RVJQFMBCBOEFKBEFTBMJEBQBSBMPHSBSVOQMBTUJGJDBEPØQUJNP
CÓMO PLASTIFICAR
1.
2.
3.
4.
Encienda la máquina presionando el interruptor (ubicado en la
parte trasera derecha de la máquina). Los botones del panel de
control parpadearán una vez como parte de un sistema luminoso de
verificación para garantizar un funcionamiento correcto del equipo.
El botón de modo de espera se encenderá con un azul tenue. La
máquina se calentará automáticamente para la plastificación en
caliente. Nota: la plastificadora tiene una función de detección
automática que reconoce automáticamente el espesor de la bolsa
que está insertando en la máquina.
Cuando la máquina esté lista, el LED “Listo”
verde y el
-&%EFMBCBOEFKBEFFOUSBEBTFFODFOEFSÈOZMBNÈRVJOBFNJUJSÈ
un sonido para indicar que está lista para la plastificación.
Para alternar entre la plastificación en caliente y la plastificación
en frío, mantenga presionado el botón “Listo” (Ready) durante
2segundos. El icono parpadeará 3 veces en azul cuando lo cambie
por primera vez al modo de plastificación en frío, para indicar que se
ha cambiado el modo. A continuación, la luz de Listo se apagará hasta
que la máquina esté lista para la plastificación en frío. Nota: para usar
FMBKVTUFFOGSÓPEFTQVÏTEFMBQMBTUJGJDBDJØOFODBMJFOUFRVJ[ÈTEFCB
FTQFSBSIBTUBRVFMBQMBTUJGJDBEPSBTFFOGSÓFQPSBNJOVUPT
Cuando la máquina esté lista para la plastificación en frío, se
encenderá el LED “Listo” en color azul y se emitirá un sonido.
Para regresar a la plastificación en caliente después de usar la
plastificación en frío, mantenga presionado el LED “Listo”. Antes
de insertar la bolsa, espere a que la luz se encienda en verde. Esto
indica que la máquina está lista para la plastificación en caliente.
$PMPRVFMBCPMTBFMMBEPTFMMBEPQSJNFSPFOMBFOUSBEBEFCPMTBT
documentos. Mantenga la bolsa derecha y centrada dentro de la
FOUSBEBEFMEPDVNFOUPOPFOGPSNBEJBHPOBM6TFMBTNBSDBTEF
entrada como guía.
Esta unidad está equipada con un sistema automático de
seguimiento de bolsas, que permite detectar e indicar al usuario si
el documento no ha sido alimentado correctamente. Si se detecta
un atasco, la máquina retrocederá el documento automáticamente
durante para liberar el atasco. Se encenderá el botón de reversa
mientras la función de reversa automática esté activa. Después de
esto, si no es posible liberar el atasco por completo, el botón Reversa
comenzará a parpadear. Mantenga presionado el botón de reversa;
al mismo tiempo, tire hacia atrás la bolsa para quitar la plastificación
DPNQMFUBNFOUFEFMBNÈRVJOB6OBWF[RVFTFIBZBMJCFSBEPFM
atasco, la unidad volverá al funcionamiento normal.
Cuando recién sale de la máquina, la bolsa plastificada puede
estar caliente y blanda. Para lograr una calidad óptima y evitar
atascos, quite la bolsa de inmediato. Coloque la bolsa sobre una
superficie plana hasta que se enfríe. Sea cuidadoso al manipular
bolsas calientes. No olvide quitar el documento plastificado antes
de iniciar un nuevo proceso de plastificación. Para lograr un
SFOEJNJFOUPZSFTVMUBEPTØQUJNPTVUJMJDFMBCBOEFKBEFTBMJEB
Apagado de la máquina: si presiona el botón de encendido
superior de la máquina, se activará el modo de enfriamiento. Los
calefactores se apagarán, pero los rodillos seguirán funcionando
hasta que la unidad alcance la temperatura deseada para apagarse
completamente. Esta funcionalidad reduce el desgaste a largo plazo
de la unidad.
5.
6.
7.
8.
9.
11.
12.
10.
13.
14.

12
SOLUCIÓN DE PROBLEMAS
ALMACENAMIENTO Y LIMPIEZA
Problema Posible causa Solución
No brilla la luz LED ‘azul’ de
encendido
La máquina no está encendida
Encienda la máquina en la parte trasera derecha
y en el tomacorriente de pared. Presione el
botón de encendido en modo de espera.
La bolsa no sella el artículo por
completo
Es posible que el artículo sea demasiado
grueso para ser plastificado
&MHSPTPSNÈYJNPEFMEPDVNFOUPFRVJWBMFB
1ÈTFMPQPSMBQMBTUJmDBEPSBOVFWBNFOUF
La bolsa se ha perdido en la
máquina
La bolsa está atascada
La máquina retrocederá el documento
automáticamente. Si no es posible liberar
el atasco por completo, el botón Reversa
comenzará a parpadear. Mantenga presionado
el botón de reversa; al mismo tiempo, tire hacia
atrás la bolsa para quitarla completamente.
4FJOUSPEVKPQSJNFSPFMFYUSFNPBCJFSUPEF
la bolsa
La bolsa no estaba centrada al entrar
La bolsa no estaba derecha al entrar
Se utilizó una bolsa vacía
Los rodillos están dañados o tienen adhesivo
Después del plastificado, la bolsa
queda dañada
Los rodillos están dañados o tienen adhesivo
Pase toallitas limpiadoras por la máquina para
comprobar el correcto funcionamiento y la
limpieza de los rodillos
Apagado de la máquina: si presiona el botón de encendido superior de la máquina, se activará el modo de enfriamiento. Los
calefactores se apagarán, pero los rodillos seguirán funcionando hasta que la unidad alcance la temperatura deseada para apagarse
DPNQMFUBNFOUF&TUBGVODJPOBMJEBESFEVDFFMEFTHBTUFBMBSHPQMB[PEFMBVOJEBE%FTFODIVGFMBNÈRVJOB%FKFFOGSJBSMBNÈRVJOB4F
QVFEFMJNQJBSMBQBSUFFYUFSJPSEFMBNÈRVJOBDPOVOUSBQPIÞNFEP/PVUJMJDFEJTPMWFOUFTOJNBUFSJBMFTJOnBNBCMFTQBSBMJNQJBSMB
máquina. Se pueden comprar toallitas limpiadoras para utilizar en la máquina. Cuando la máquina esté caliente, pase las toallitas por
la máquina para limpiar los residuos de los rodillos. Para un desempeño óptimo, se recomienda que las toallitas limpiadoras se usen
SFHVMBSNFOUFQBSBMJNQJBSMBNÈRVJOB$ØEJHPEFQFEJEPEFMBTUPBMMJUBTMJNQJBEPSBT/ø
¿NECESITA AYUDA?
%FKFRVFOVFTUSPTFYQFSUPTMPBZVEFODPOVOBTPMVDJØO
Servicio de Atención al Cliente...
www.fellowes.com
Siempre llame a Fellowes antes de ponerse en contacto con el lugar de la compra. Consulte la cubierta trasera para obtener los
detalles de contacto.
$POTJEFSFSFHJTUSBSTVNÈRVJOBFOXXXGFMMPXFTDPNSFHJTUFSQBSBSFDJCJSBDUVBMJ[BDJPOFTFJOGPSNBDJØOBEJDJPOBM

ORDER NUMBER
NÚMERO DE COMMANDE
/6.²30%&1&%*%0
DESCRIPTION | DESCRIPCIÓN | DESCRIPCIÓN
ImageLast pouch, 3 mil Letter, 100 pack
Pochette ImageLast, 3 mil, Format lettre, paquet de 100
Bolsa ImageLast, tamaño carta, 3 mil, paquete de 100
ImageLast pouch, 5 mil Letter, 100 pack
Pochette ImageLast, 5 mil, Format lettre, paquet de 100
Bolsa ImageLast, tamaño carta, 5 mil, paquete de 100
5200509
ImageLast pouch, 3 mil Letter, 150 pack
Pochette ImageLast, 3 mil, Format lettre, paquet de 150
Bolsa ImageLast, tamaño carta, 3 mil, paquete de 150
ImageLast pouch, 5 mil Letter, 150 pack
Pochette ImageLast, 5 mil, Format lettre, paquet de 150
Bolsa ImageLast, tamaño carta, 5 mil, paquete de 150
ImageLast pouch, 3 mil Letter, 200 pack
Pochette ImageLast, 3 mil, Format lettre, paquet de 200
Bolsa ImageLast, tamaño carta, 3 mil, paquete de 200
ImageLast pouch, 5 mil Letter, 200 pack
Pochette ImageLast, 5 mil, Format lettre, paquet de 200
Bolsa ImageLast, tamaño carta, 5 mil, paquete de 200
For best quality, use Fellowes Thermal Laminating pouches | Pour optimiser la qualité, utiliser les
pPDIFUUFTEFQMBTUJmDBUJPOUIFSNJRVF'FMMPXFT]1BSBPCUFOFSMBNFKPSDBMJEBEVTFQMBTUJmDBEPUÏSNJDP'FMMPXFT
t1SFNJVNNBUFSJBMTGPSIJHIFTUDMBSJUZ.BUÏSJBVYIBVUEFHBNNFQPVSMBNFJMMFVSFDMBSUÏ.BUFSJBMFTEFQSJNFSB
DBMJEBEQBSBNÈYJNBDMBSJEBE
t#VJMUJO67QSPUFDUJPOQSFWFOUTGBEJOH-BQSPUFDUJPO67JOUÏHSÏFFNQÐDIFMFUFSOJTTFNFOU1SPUFDDJØOVMUSBWJPMFUB
integrada para prevenir eldescoloramiento
t%JSFDUJPOBMBSSPXHVJEBODFGPSDPSSFDUQPVDIJOTFSUJPOFlèche de guidage directionnel permettant une insertion
DPSSFDUFEFMBQPDIFUU'MFDIBJOEJDBEPSBEFEJSFDDJØOQBSBMBJOTFSDJØODPSSFDUBEFMBCPMTB

1789 Norwood Avenue, Itasca, Illinois 60143
t
1-800-955-0959
t
www.fellowes.com
Brands
© 2017 Fellowes, Inc. | Part #406813 Rev F
United States: 1-800-955-0959
Canada: 1-800-665-4339
Mexico: 001-800-514-9057
CUSTOMER SERVICE & SUPPORT
www.fellowes.com
FCC CLASS B NOTICE
Note: This equipment has been tested and found to comply with the limits for a Class B digital device, pursuant to part 15 of the FCC
Rules. These limits are designed to provide reasonable protection against harmful interference in a residential installation. This equip-
ment generates, uses and can radiate radio frequency energy and, if not installed and used in accordance with the instructions, may
cause harmful interference to radio communications. However, there is no guarantee that interference will not occur in a particular
installation. If this equipment does cause harmful interference to radio or television reception, which can be determined by turning the
equipment off and on, the user is encouraged to try to correct the interference by one or more of the following measures:
t3FPSJFOUPSSFMPDBUFUIFSFDFJWJOHBOUFOOB
t*ODSFBTFUIFTFQBSBUJPOCFUXFFOUIFFRVJQNFOUBOESFDFJWFS
t$POOFDUUIFFRVJQNFOUJOUPBOPVUMFUPOBDJSDVJUEJGGFSFOUGSPNUIBUUPXIJDIUIFSFDFJWFSJTDPOOFDUFE
t$POTVMUUIFEFBMFSPSBOFYQFSJFODFESBEJP57UFDIOJDJBOGPSIFMQ
$"/"%"$-"44#/05*$&"7*4$"/"%"$-"44&#
This Class B digital apparatus complies with Canadian ICES-003.
Cet appareil numérique de la classe B est conforme à la norme NMB-003 du Canada.
MODIFICATIONS
"OZNPEJmDBUJPOTNBEFUPUIJTEFWJDFUIBUBSFOPUBQQSPWFECZ'FMMPXFTNBZWPJEUIFBVUIPSJUZHSBOUFEUPUIFVTFSCZUIF'$$BOEPS
by Industry Canada to operate this equipment.
5PVUFTNPEJmDBUJPOTBQQPSUÏFTËDFEJTQPTJUJGFUOPOBQQSPVWÏFTQBS'FMMPXFTBOOVMFSPOUMFESPJUBDDPSEÏËMVUJMJTBUFVSQBSMF'$$FUPV
par Industrie Canada de faire fonctionner cet équipement.