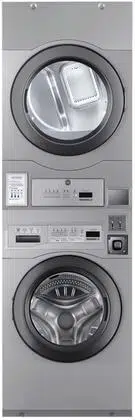
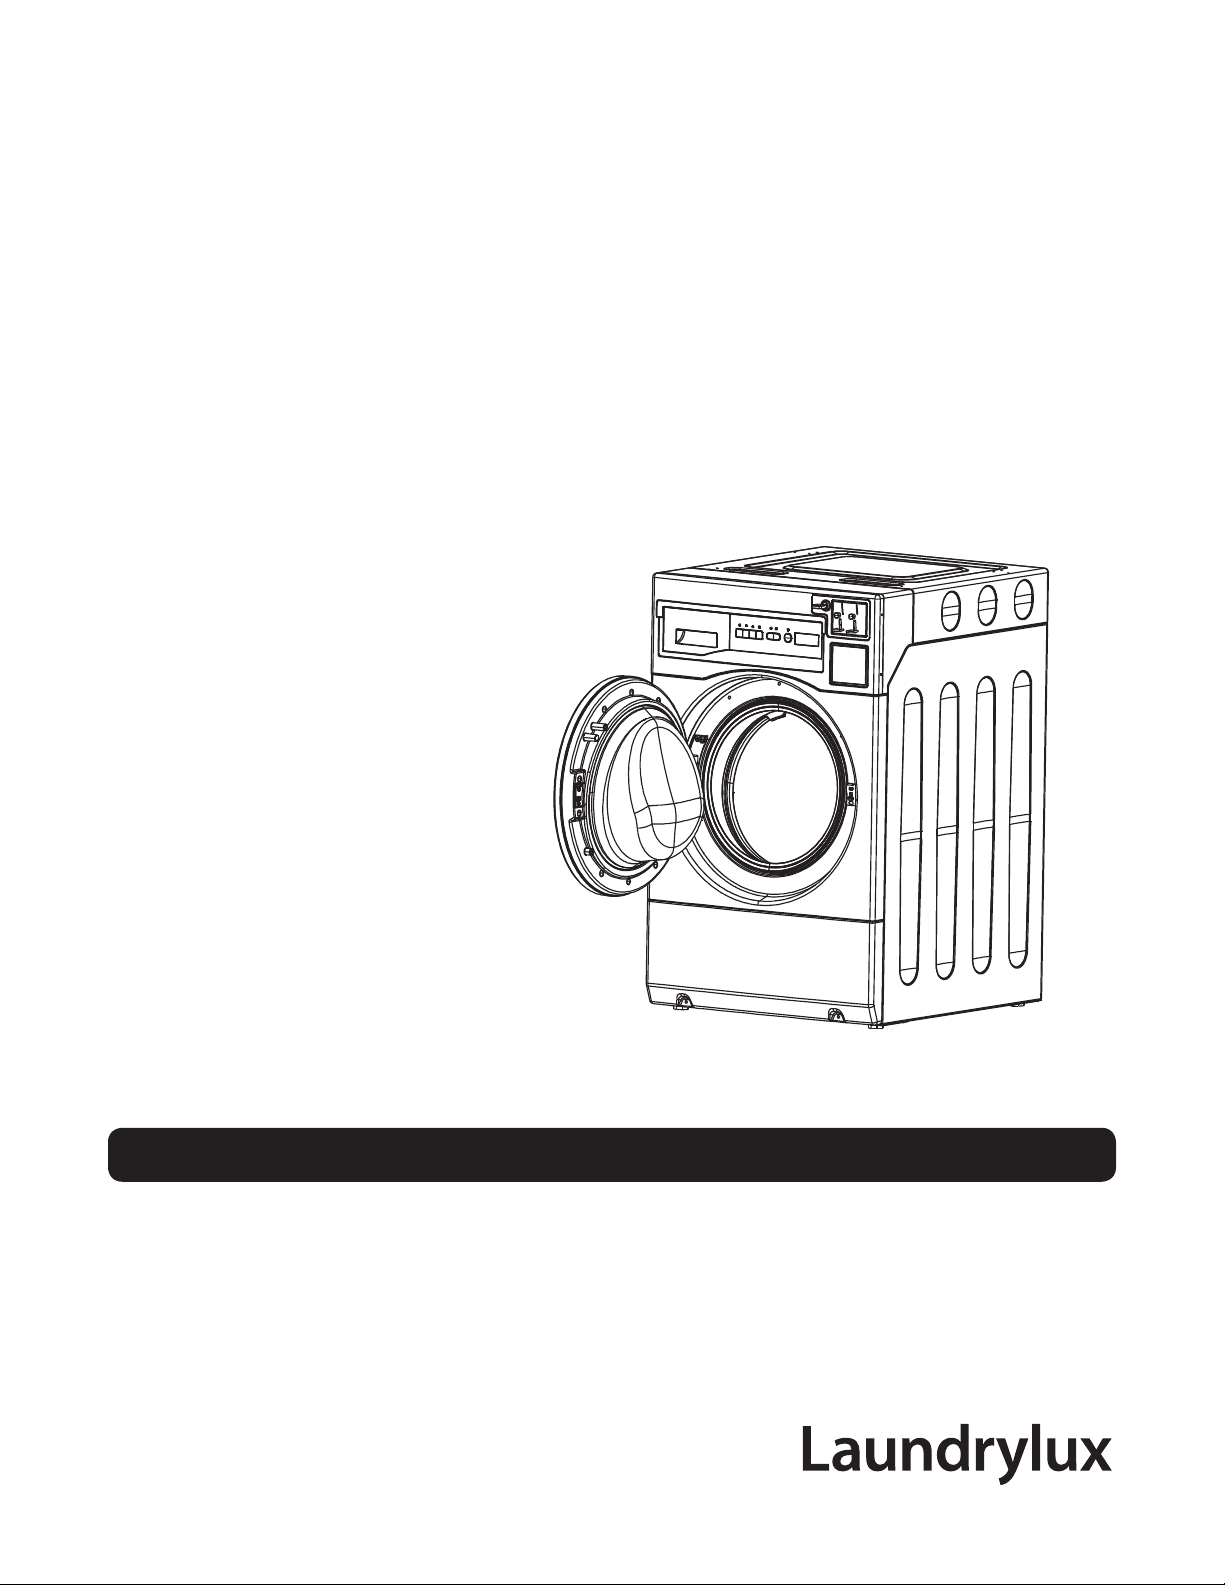
CROSSOVER 2.0 SERIES
In a class by itself
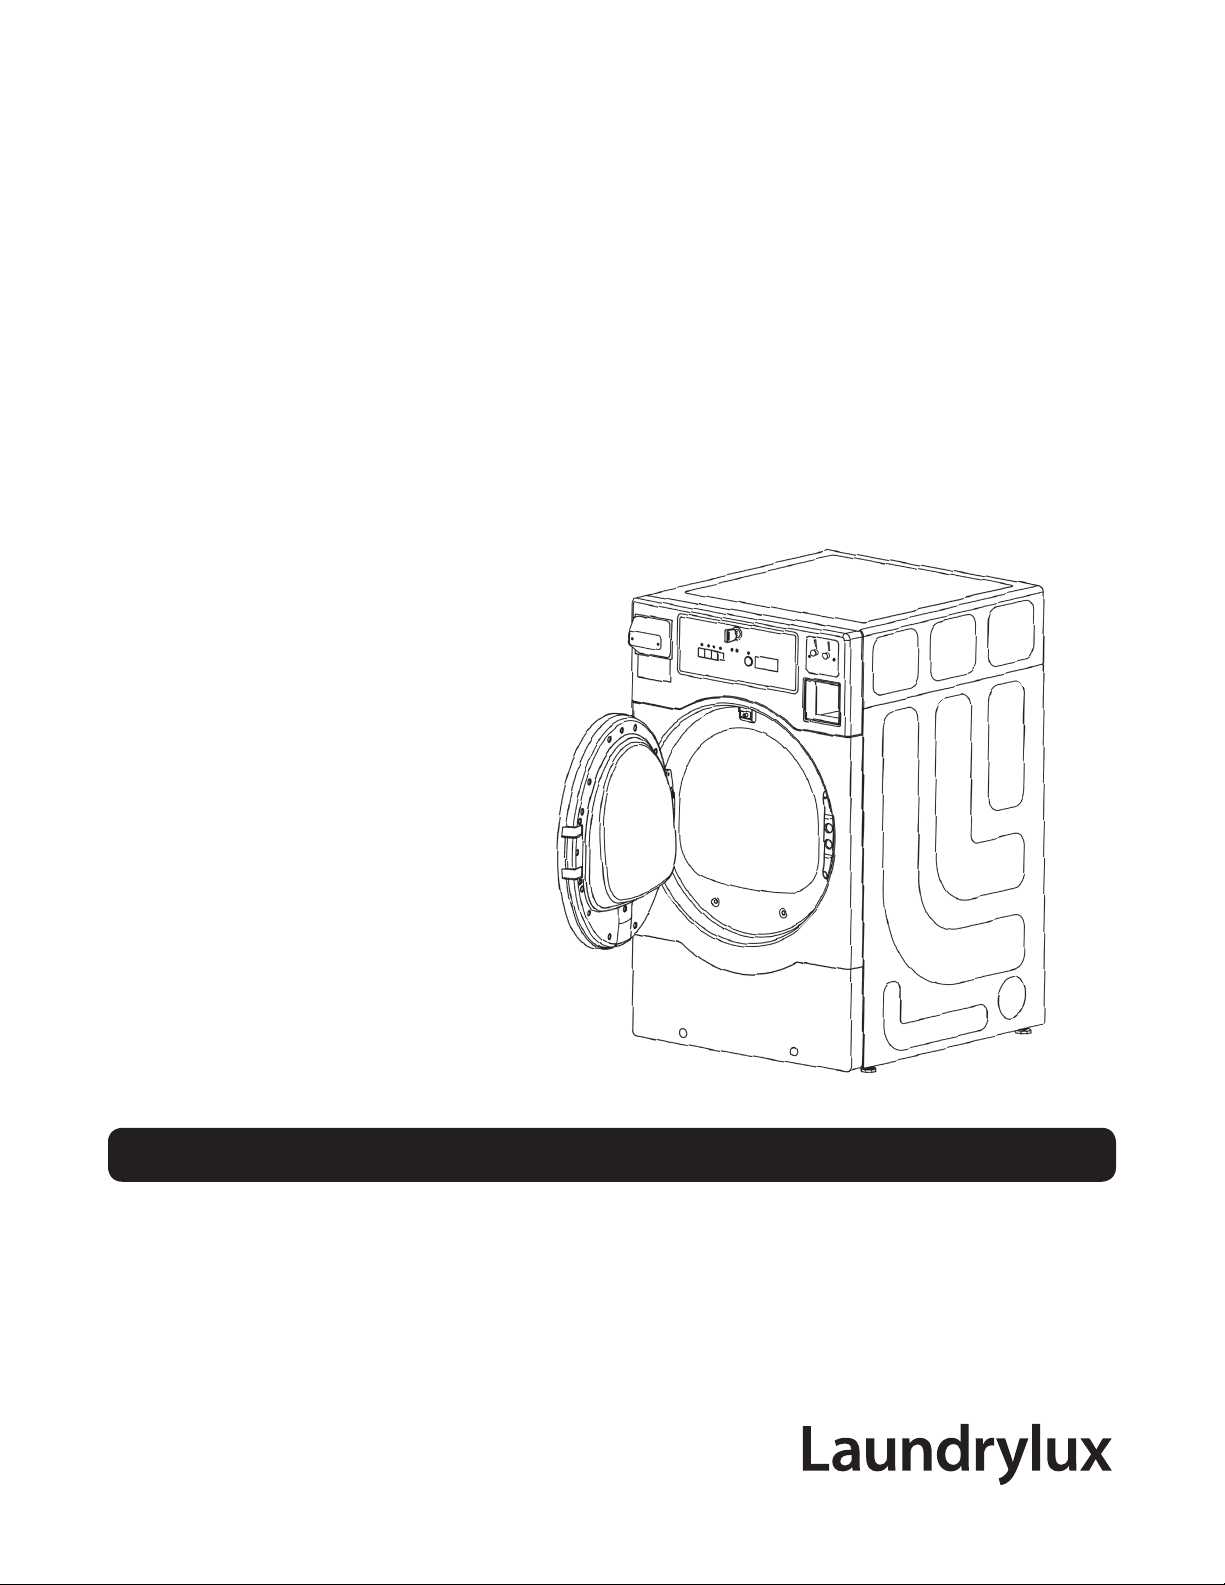
DRYER OPERATING MANUAL
DOC. NO. 098538
EDITION 4.2018
DRYER OPERATING MANUAL
DOC. NO. 098538
EDITION 4.2018

To reduce the risk of re, electric shock, or injury to persons when using your appliance,
follow basic precautions, including the following:
• Read all instructions before using the appliance.
• Do not dry articles that have been previously cleaned in, washed in, soaked in,
or spotted with gasoline, dry-cleaning solvents, or other ammable or explosive
substances, as they give off vapours that could ignite or explode.
• Do not allow children to play on or in the appliance. Close supervision of children is
necessary when the appliance is used near children.
• Before the appliance is removed from service or discarded, remove the door to the
drying compartment.
• Do not reach into the appliance if the drum is moving.
• Do not install or store this appliance where it will be exposed to the weather.
• Do not tamper with controls.
• Do not repair or replace any part of the appliance or attempt any servicing unless
specically recommended in the user-maintenance instructions or in published user-
repair instructions that you understand and have the skills to carry out.
• Do not use fabric softeners or products to eliminate static unless recommended by the
manufacturer of the fabric softener or product.
• Do not use heat to dry articles containing foam rubber or similarly textured rubber-like
materials.
• Clean lint screen before or after each load.
• Keep area around the exhaust opening and adjacent surrounding areas free from the
accumulation of lint, dust, and dirt.
• The interior of the appliance and exhaust duct should be cleaned periodically by
qualied service personnel.
• Do not place items exposed to cooking oils in your dryer. Items contaminated with
cooking oils may contribute to a chemical reaction that could cause a load to catch re.
SAVE THESE INSTRUCTIONS
WARNING
IMPORTANT SAFETY INSTRUCTION
MANUFACTURED BY HAIER EXCLUSIVELY FOR LAUNDRYLUX
FIRE OR EXPLOSION HAZARD
• Failure to follow safety warnings exactly could result in serious injury, death or
property damage.
• Do not store or use gasoline or other ammable vapors and liqids in the vicinity
of this or any other appliance.
WHAT TO DO IF YOU SMELL GAS:
• Do not light the gas appliance; Do not touch any electrical switch.
• Do not use any phones in your building.
• Clear the room, building, or area of all occupants.
• Immediately call your gas supplier from a neighbor’s phone. Follow the gas
supplier’s instructions.
• If you cannot reach your gas supplier, call the re department.
• Installation and service must be performed by a qualied installer, service
agency, or gas supplier.
GROUNDING INSTRUCTIONS
This appliance must be connected to a grounded metal, permanent wiring
system, or an equipment-grounding conductor must be run with the circuit
conductors and connected to the equipment-grounding terminal or lead on the
appliance.
FIRE HAZARD:
• Failure to follow safety,warnings exactly could result in serious injury, death or
property damage.
• Do not install a booster fan in the exhaust duct.
• Install all clothes dryers in accordance with the installation instructions of the
manufacturer of the dryer.
Do not store or use gasoline or other ammable vapors and liquids in the vicinity
of this or any other appliance.
WARNING
WARNING
WARNING
FOR YOUR SAFETY

Model Numbers
Electric
DLHF0817EMI
DLHF0817E
DLHS0817EMI
DLHS0817E
Gas
DLHF0817GMI
DLHF0817G
DLHS0817GMI
DLHS0817G

Operating Manual
WARNING: ALL OPERATING AND MAINTENANCE PROCEDURES SHOWN IN THIS
MANUAL MUST BE FOLLOWED AT THE FREQUENCY SPECIFIED FOR PROPER
OPERATION OF YOUR MACHINE.
PLEASE ENTER THE FOLLOWING INFORMATION AS IT APPEARS ON THE
MACHINE(S) DATA PLATE(S).
KEEP THIS MANUAL FOR FUTURE REFERENCE.
MACHINE MODEL
MACHINE TYPE (GAS / ELECTRIC)
MACHINE SERIAL NUMBER

Contents
Control Panels + Instructions for Use ............................................................... 1:1
Coin Meter ........................................................................................................2:1
Fault Codes ......................................................................................................3:1
Services Code .................................................................................................. 4:1
Preventive Maintenance ...................................................................................5:1
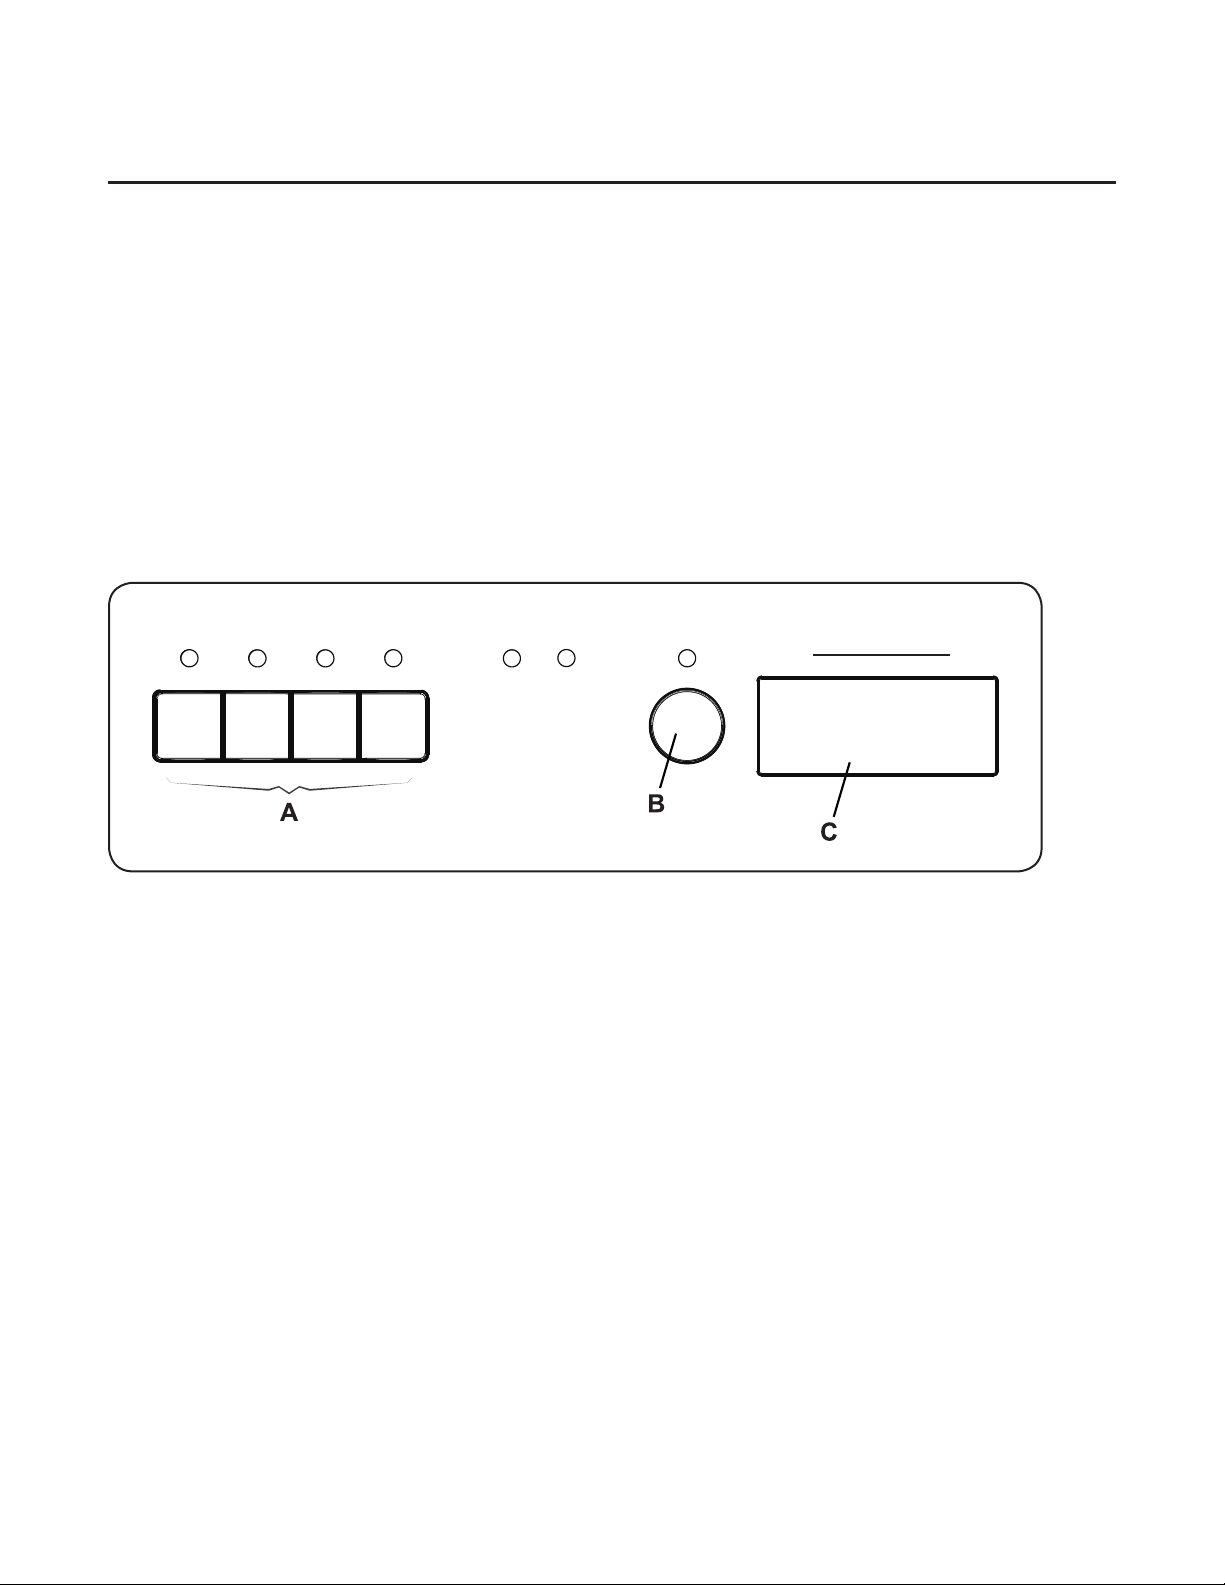
Control Panel
1:1
The display control panel allows the selection of the main drying programs.
The panels consist of program selection buttons (A), a start button (B) and a display (C) which
shows the price for each program and the drying time designated for each program.
In the event of faults, error codes will be displayed. See the fault codes section of this manual.
Explanation of the control panel.
A – Program selection buttons
B – Start Button
C – Display indicating program time and price of the programs
Price/Time Remaining
Start
Precio/Tiempo
Comienzo
Cooling
Enfriando
Heating
Calentando
No Heat
Aire Frio
Low
Baja
Medium
Media
High
Alta
Instruction for Use
1:2
Dryer Operation
Load garments into machine and close the door. Do not overload the dryer.
Press the button for the desired program.
Program Description
The machine is equipped with four programs adapted to the range of use to which the machine is
intended.
The machine offers four standard drying programs. These programs are labeled on the control
panel as High, Medium, Low, and No Heat. For coin operated machines, “Price per program”, “Time
for each program”, and “Time for additional coin(s) or press” settings can be assigned to each
program individually.
High, Medium, and Low drying programs are divided into two segments: a Heating period and a
Cool Down period. Drying time and temperature settings for each program can be adjusted with
the service menu registers. Heating and Cool Down times can also be adjusted using the registers
in the service menu. During heating, the display shows “d xx” where “xx” are the remaining drying
time minutes. During cool down the display shows “c xx” where xx is the remaining cool down time.
The program stops at “c 00.”
For machines in “free” mode the additional drying time can be added to the initial time by pressing
the respective program buttons to add Time for ATS.
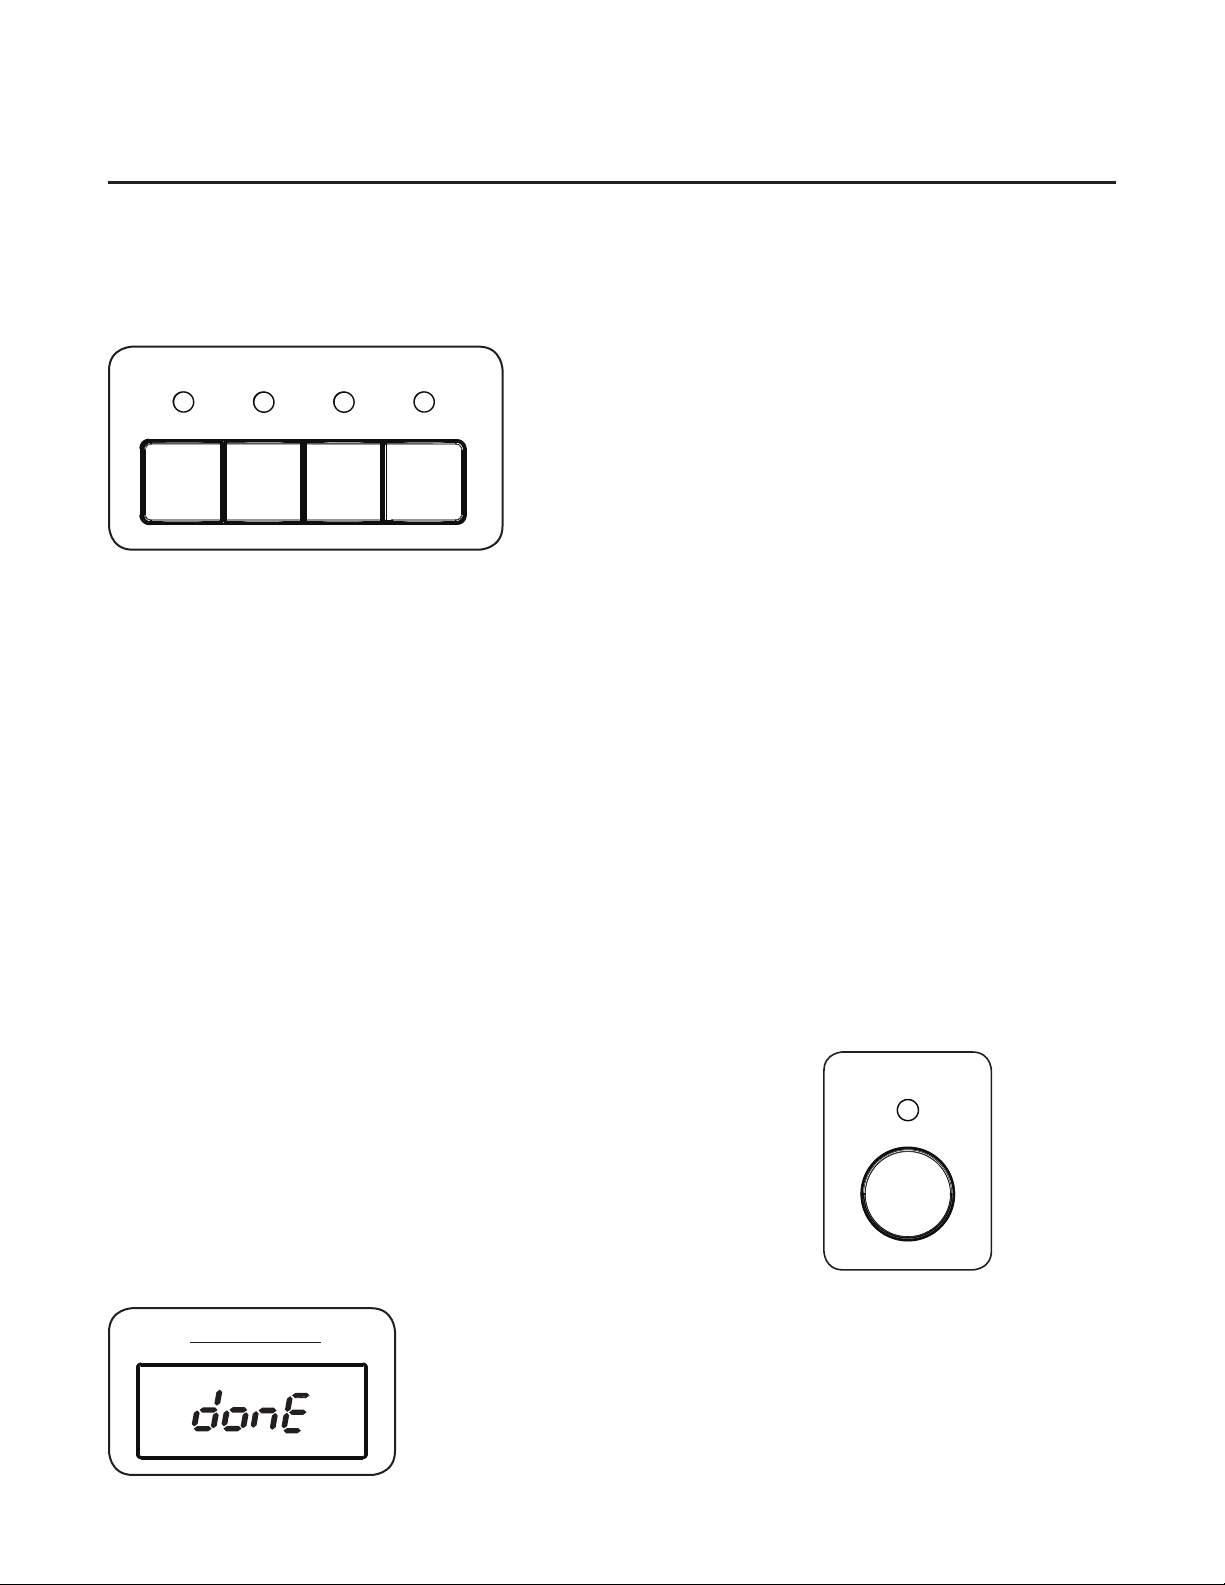
Press Start Button
Press Start to start one of the program described above in Program
Description.
Program End
The display will show “donE” when the program ends.
Price/Time Remaining
Precio/Tiempo
Price/Time Remaining
Start
Precio/Tiempo
Comienzo
Cooling
Enfriando
Heating
Calentando
No Heat
Aire Frio
Low
Baja
Medium
Media
High
Alta
Price/Time Remaining
Start
Precio/Tiempo
Comienzo
Cooling
Enfriando
Heating
Calentando
No Heat
Aire Frio
Low
Baja
Medium
Media
High
Alta

Coin Operation
In coin operated machines prices for programs and other operational parameters must be
programmed during machine setup.
Prices can be programmed as dollars and cents or as the number of coins or tokens required to
start and to add additional drying time.
There are four drying programs High, Medium, Low, and No Heat. These four programs can be
programmed for different prices and times. When the machine is in standby mode (i.e. before the
drying program begins), the selected drying program may be changed. Once a drying program has
started, the program may be changed only if all the programs High, Medium, Low and No Heat
have identical settings for price, drying time, and time added for each additional coin or press.
After the initial drying time has been purchased for a selected program, additional drying time may
be added by inserting more coins. The amount of extra time per coin inserted for the selected
program can be programmed in the service registers. Additional drying time up to the maximum
allowed may be purchased.
Price Programming & Drying Time Program Setup
Amount to Start (ATS) service registers 040-043 dene the price that must be paid before a
selected program may be started.
The ATS price is displayed when the machine is idle. As each coin is deposited the display will
count down by the “Coin 1 Value” or “Coin 2 Value” as the coin pulses are received. The following
instructions show how to set up prices for drying programs
1. To enter programming mode, unlock and remove the coin box.
2. Press and release the Service Switch located in the rear of the coin vault to enter service mode.
The display will light up all the LED’s in the display.
3. Press the Start button and the display will show “SE” conrming access to the service registers.
4. Use the “Low” and “No Heat” buttons to navigate to the desired register.
5. Go to register 40, High heat and press Start to enter. The current price will be shown in the
display, blinking.
6. Use the three program selection buttons; Medium, Low, and No Heat to change each of the
three digits in the price display. Each button increments a corresponding digit, left to right, in the
price. Each digit rolls over from 9 to 0 without affecting the other digits. Once the desired price
has been set in the register, press the Start button to save the value and exit the register.
7. If registers 041, 042, and 043 = “0.00” the values of these registers will be set to the same value
as register “040”. If different pricing is desired, program each register separately repeating steps
4-5.
8. Press the Service Switch in the vault to exit service mode.
9. Check the newly entered prices by selecting each program.
Register 030 (Coin / Token Mode) determines how prices are displayed by the machine. When set
to “00” (default), prices are set and displayed with a decimal (e.g. “3.00”). When set to “01”, the
2:1
Coin Meter

Coin Meter
2:2
decimal point is turned off, and prices are set and displayed as “number of coins or tokens” required
(e.g. “12”). In either case, the value of each coin drop is stored in Register 031 “Coin Value 1” and
Register 032 “Coin Value 2” and determine how much the remaining price will be reduced each
time a coin is deposited. The coin-value registers can be adjusted to accommodate any currency.
Free Dry / OPL Mode
When the Amount To Start (ATS) register for a program is set to 0.00 (00 in “token mode”), the
program operates in “Time per push mode” (this is free dry mode). In this mode, each time a
program button is pressed, the remaining time is incremented. The rst press adds the “Time for
Amount to Start” register value (Register 044 – 047) to the drying time, and then each additional
press continues to add the “Time per Push or Coin” (Register 048 – 051) to the drying time. These
registers are only accessible in Full Service Mode. In no case shall the displayed remaining dryer
time be greater than the “Max drying time” for that program.
Each program (temperature) button has a group of registers (040-055) assigned for setting vend
time, price, and maximum allowable time. The registers are organized to provide maximum
exibility for vended operations, yet simple programming for non-vended applications (Free dry).
Price and Time Registers
Time for Amount to Start
The time for amount to start registers Register (044 – 047) denes the time credited when the
amount to start has been paid or the base time of the drying program when Amount to start = 0.00
(00 in token mode). This time is credited when a program-selection (temperature) button is pressed
for the rst time if the remaining drying time = 0. These registers are only accessible in Full Service
Mode.
Time Per Coin (or Push In Free Dry Mode)
Register (048 – 051) denes the time, in minutes, that is credited when a coin pulse is received
from a payment device or when a program button is pressed when amount to start (ATS) Register
(040 -043) = 0, AFTER the initial “Time for amount to start” has been credited, whether the
machine is idle or operating. This register is only accessible in Full Service Mode. Once these
registers are set, the control vends the same amount of time for each coin pulse received from
the payment device (or push of a program button if Amount to start = 0 for that program), up to the
Maximum drying time specied for the particular program.
DISCOUNT PRICE “PROMOTION” PROGRAMMING
The dryer can apply “Promotion” percentage discount to the vend price of a program selection at
specied times and days. Up to four different Promotion discount events and percentages can be
selected using the dryer’s built-in Real Time Clock (RTC) or one promotion event can be selected
using an optionally-installed, external signal provided by a clock-driven relay or switch. This signal
can activate multiple dryers. Both options require setup via the service registers, access to which is
described in the Service Mode section of this manual.
During machine setup, the promotional discount is represented by a three-digit percentage (%%%)
and can range from 000% (no discount) to “999” = 999%. It denes the percentage by which

Coin Meter
2:3
credited time shall be increased before being added to the base price of the drying program. For
example, if “Time for amount to start”, (Register 044 – 047) = 30 and Time for additional coin or
push, register (048 – 051) = 10 and promotion percentage = 50, then 45 minutes shall be credited
when the Amount to start is paid and 15 minutes shall be credited when additional coin 1 pulses are
received. Setting the promotion to “A00” sets the machine to free dry mode.
Note that the remaining drying time will not exceed the Maximum Drying Time established for each
program in the Maximum Drying Time registers (052-055).
PROMOTION PRICING VIA THE REAL TIME CLOCK (RTC)
The RTC and Promotion pricing times are set and displayed in 24hr format. (e.g. 1:15 PM = 13:15).
The promotion days of the week are represented by a two digit number (nn). The RTC’s built in
calendar adjusts for leap years. Promotion pricing set up requires setting the RTC and up to four
pairs of Promotional start and stop times and percentages.
RTC and Promotional Pricing Setup
1. Navigate to Register 72 (RTC set-up) as explained in the Service Mode section.
2. Press START, this will stop the clock. The year will be displayed as a four digit number (yyyy).
Edit these values using the HIGH, MEDIUM, LOW, and NO HEAT buttons.
3. Press START, the Month and Day will be displayed as two-digit numbers (mm.dd). Edit these
values using the HIGH, MEDIUM, LOW, and NO HEAT buttons.
4. Press START, the Hour and Minutes will be displayed in 24 hr format as two digit numbers (hh.
mm). Edit these values using the HIGH, MEDIUM, LOW, and NO HEAT buttons.
5. Press START to save the changes and exit register 72. This will reset the clock to the set time,
reset the clock’s seconds digit to “00”, and restart the clock. This allows synchronizing the
clocks on multiple machines to a master clock such as a wall clock, wristwatch, or cell phone.
6. Navigate to Register “73” (RTC Promotion #1 START) to set the percentage discount, day of the
week and start time for promotion #1.
7. Press START, a two-digit day number (“0d”) for which the start day(s) of the week for promotion
#1 will be displayed. (1=Sunday, 2=Monday, ... 7=Saturday, 8=All days, 9=Monday-Friday only,
A=Saturday and Sunday only, 0=promotion is inactive.) Edit this number using the NO HEAT
button to cycle through the allowed values.
8. Press START, the Hours and Minutes in 24 hr format for the start of Promotion #1 will be
displayed (hh.mm). Edit these values using the HIGH, MEDIUM, LOW, and NO HEAT buttons.
9. Press START, the promotion percentage discount will be displayed as three digits (%%%). The
discount can range from “000” = 000% to “999%” = 999%. Setting the promotion to = “A00” will
allow free drying). Edit this number using the Medium, Low and No Heat buttons. Note, pressing
the Medium button ten times will cycle the value to “A00”.
10. Press START to save the changes and exit Register “73”
11. Navigate to Register “74” (RTC Promotion #1 END”). This will allow you to set the end time for
promotion #1.
12. Press START, the promotion end time in hours and minutes in 24 hr format will be displayed
(hh.min). Edit these values using the HIGH, MEDIUM, LOW, and NO HEAT buttons.

Coin Meter
2:4
13. Press START, this will save the changes and exit register 74.
14. Program the three other Promotion times and percentages as desired using register pairs:
075 & 076 (Promotion #2), 077 & 078 (Promotion #3), and 079 & 080 (Promotion #4). Each
promotion can have a different percent reduction. They must not overlap with each other.
15. Exit Service Mode.
PROMOTION PRICING VIA EXTERNAL CLOCK-DRIVEN RELAY OR SWITCH
This dryer can apply a Promotion price discount using an external clock-driven relay or manual
switch. To use this feature the dryer requires an optional external price reduction harness kit be
installed. Refer to the kit’s installation manual for information regarding connecting this signal to the
dryer to activate discounts.
Price Promotion Setup Via External Signal
1. Navigate to Register 081 (Promotion %%% for discount input signal) as explained in the Service
Mode section.
2. Press START the promotion percentage discount will be displayed as three digits (%%%). The
discount can range from “000” = 0% to “999” = 999% Setting to “A00” will allow free drying. Edit
this number using the Medium, LOW and NO HEAT buttons.
3. Press START, this will save the changes and exit register 081 and save the changes.
4. Exit Service Mode.
When the external signal is activated, the DRYER will apply Promotion set in register 081, to
increase the drying time as explained elsewhere in this manual.
Please contact Laundrylux’s Technical Support team at 516-371-0700 if you have any questions or
need assistance with price programming or implementing promotion events.

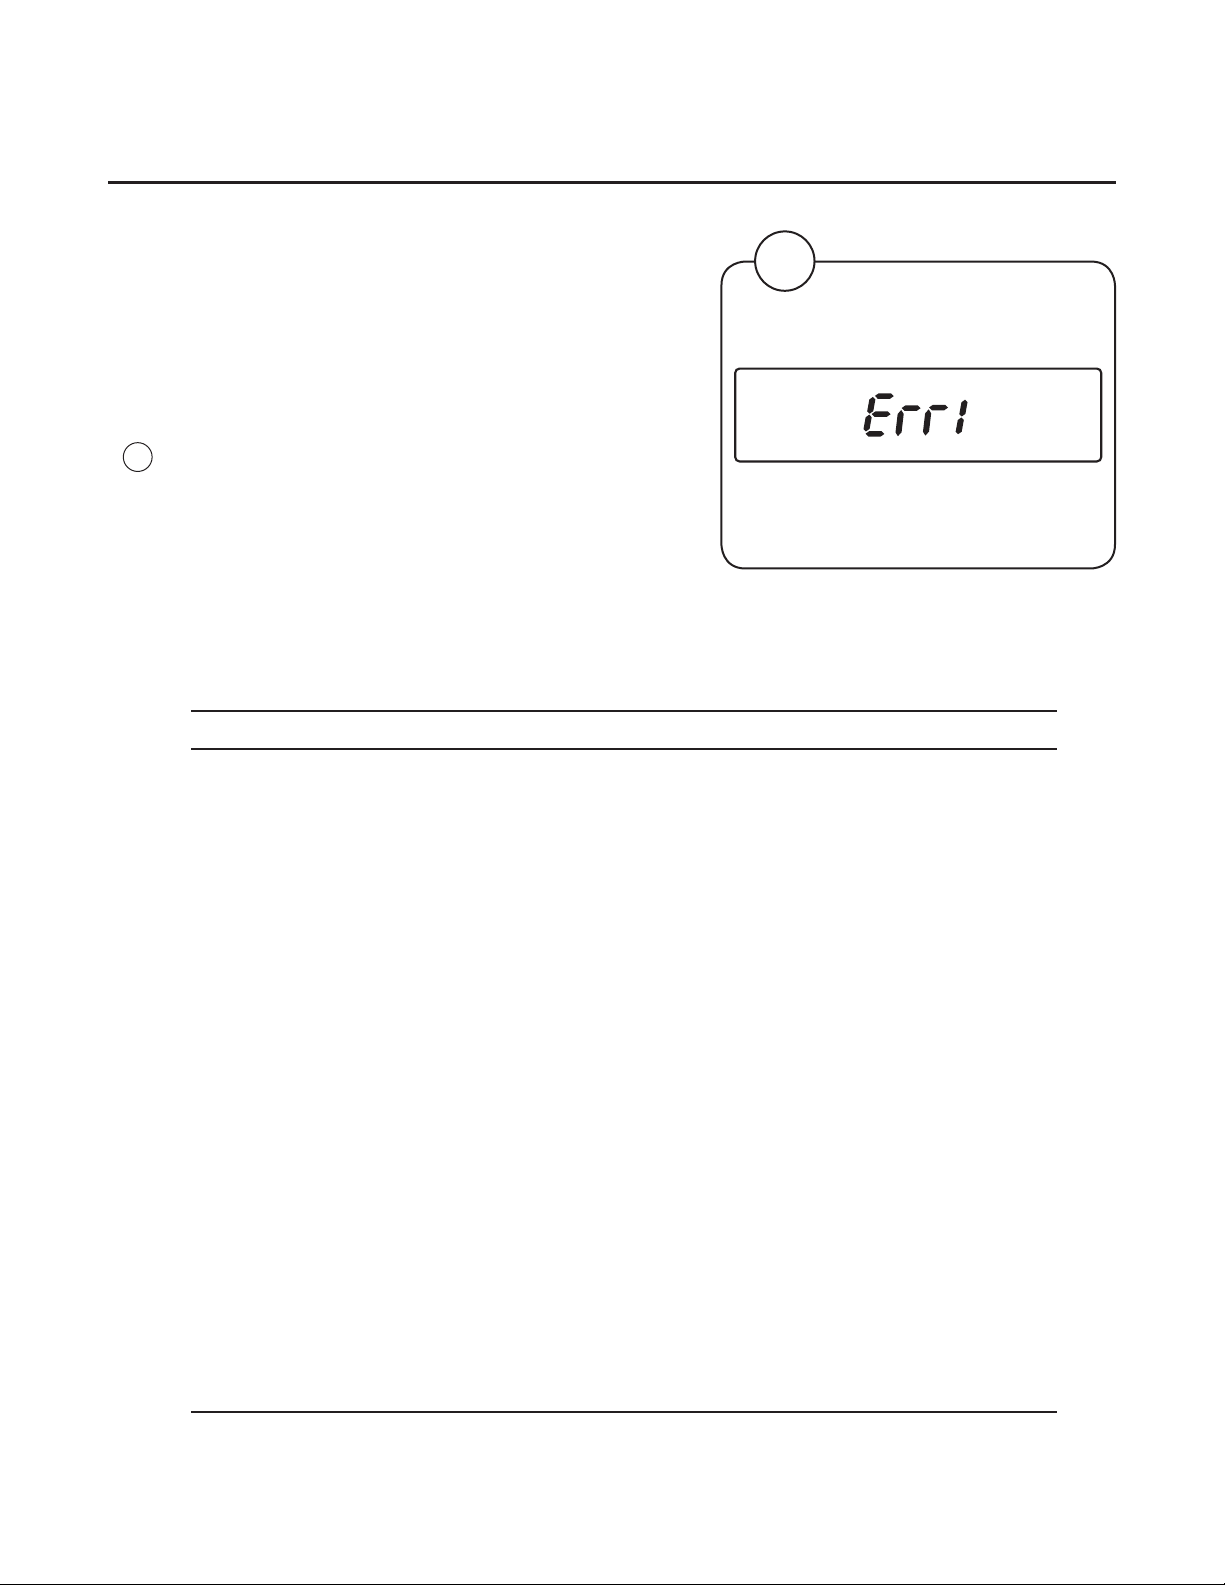
Fault Codes
3:1
Faults/errors in the program or machine are indicated by a numerical error code on the panel
display. Some error codes are cleared automatically when the Start button is pressed and some
when the door is opened. For other error codes, a service technician must be called.
Error Code Cause / Action
E 00 Machine out of operation.
E 01 Inlet air temperature limit exceeded.
E 02 Outlet air temperature limit exceeded.
E 03 Inlet thermistor short circuit.
E 04 Outlet thermistor short circuit.
E 14 Heating not working.
E 17 Inlet thermistor open circuit.
E 18 Outlet thermistor open circuit.
E 21 Connectivity malfunction between Wi-Fi and Control Panel
(Reserved for Future Use)
E 28 Inlet air temperature exceeded during previous cycle.

Service Mode
4:1
To activate Service Mode for machines with coin meters:
1. Remove the coin box.
2. Press and release the SERVICE MODE plunger switch at the rear of the coin vault. The screen
will display “8888”.
3. Press the START button. “SE” appears in the display.
4. Use the LOW and NO HEAT buttons to navigate to the desired register.
5. Press START to access the register or activate the function.
6. Use LOW and NO HEAT to change values, as appropriate. Some registers require using the
HIGH, MEDIUM, LOW and NO HEAT buttons to edit settings.
7. Press START to save new values, as appropriate.
8. Press the SERVICE MODE switch to exit. SM exits automatically after 60 seconds of inactivity
with all service functions are off.
To activate Limited Service Mode:
1. Press and hold HIGH, NO HEAT and then START buttons for three seconds.
2. Use the program buttons to enter the PIN code (default is “1234”).
3. Press START. The display shows “10” (the rst register available in LSM)
4. Use the LOW and NO HEAT buttons to navigate to the desired register.
5. Press START to access the register or activate the function.
6. Use LOW and NO HEAT to change values, as appropriate. Some registers require using the
HIGH, MEDIUM, LOW and NO HEAT buttons to edit settings.
7. Press START to save new values, as appropriate.
8. LSM exits automatically after 60 seconds of inactivity with all service functions off.
PARAMETER MEMORY REGISTER ASSIGNMENTS
000-019 Statistics: These are non-resettable counters and log registers for tracking machine usage,
coin vault access, and error codes.
020-029 Machine test functions.
030- Editable payment, drying, and control parameters.
Notes:
1. The “>” in string following register descriptions denotes one press of the “Start” button to
advance to the next value in a sequence.
2. In the “Register Assignments” section, all temperature values are specied in °C, for simplicity.
3. Register contents value shall blink at 1Hz when displayed, even if value is read-only.

Service Mode
4. Service mode automatically terminates if no pushbutton is pressed for 60 seconds whenever
the machine is not running.
5. When service modes 20, 21, 22 or 23 are activated a “background timer is started and shall
be used to stop the dryer after running for 90 continuous minutes if the machine has not been
stopped by a press of the Start button.
6. A CPU reset will return the machine’s registers and temperature settings to default values.
The machine will be set to COIN mode and pricing cleared. The statistics (00-19) and RTC/
Promotion registers (72-81) will be unaffected.
Register Assignments
Machine usage registers (default values= “0000” for registers 00-14).
000 Running hour counter for High temp program. (Range: 0000 to F999).
001 Running hour counter for Medium temp program. (Range: 0000 to F999).
002 Running hour counter for Low temp program. (Range 0000 to F999).
003 Running hour counter for No Heat temp program. (Range 0000 to F999).
004 Total hour counter = 00+01+02+03. (Range 0000 to F999).
005 Total collections counter - rst 4 digits. (Range 0000 to F999).
006 Total collections counter - last 4 digits (Range 00.00 - 99.99)
(Decimal suppressed in “token” mode).
Error log and coin vault access time stamp registers (time in 24 hour format):
*010 Error code register 1 (Newest error: “010”>E##>yyyy>mm.dd>hh.mm>(r004)>”010”).
*011 Error code register 2.
*012 Error code register 3.
*013 Error code register 4.
*014 Error code register 5 (Oldest error: “014”>E##>yyyy>mm.dd>hh.mm>(r004)>”014”).
015 Coin vault access 1: (Most recent access: “015”>yyyy>mm.dd>hh.mm>”015”).
016 Coin vault access 2: time stamp 2.
017 Coin vault access 3: time stamp 3.
018 Coin vault access 4: time stamp 4.
019 Coin vault access5: (Oldest access: “019”>yyyy>mm.dd>hh.mm>”019”).
Note: “(r004)” in error-log time stamp indicates that the value of the total hour counter register 004
shall be displayed in this position of the sequence.
4:2

Service Mode
4:3
Operating Test Registers:
Note: Activation of test 020-023 clears previous value stored in register 028.
*020 Run, Heat to 65°C (display shows outlet temperature blinking, while operating).
*021 Run, Heat to 57°C (display shows outlet temperature blinking, while operating).
*022 Run, Heat to 49°C (display shows outlet temperature blinking, while operating).
*023 Motor ON, Runtime 60 minutes, No heating (display shows outlet temperature blinking,
while operating).
NOTE: When registers 020-023 are active, press and hold “High “temperature pushbutton to
show actual INLET air temperature. Release High temperature button to return to display of actual
OUTLET air temperature. When outlet air temperature reaches value specied for register 020-022,
cool-down shall be executed with outlet temperature displayed, just as if a regular drying program
were running. When cool-down completes, machine stops.
*024 Buzzer test
*025 Display test
*026 Coin meter test. (Each dropped coin adds 1 to displayed total - registers 005 and 006
are not incremented).
*027 Displays current time: “027”>yyyy>mm.dd>hh.mm>”027”. (Read only).
*028 Recorded rate of inlet air temperature rise (degrees per minute) during most recent test
(Reserved for future use)
Payment Conguration Registers:
030 Coin Mode/Token Mode. (range=0-1, default=”0” coin mode).
When set to “token mode” the decimal point in the display will be suppressed when
programming prices and when displaying cycle price information in standby mode.
031 Coin value 1 (range=”0.00”-”9.99”, default=”0.25”, omit decimal if register 030=”1”).
032 Coin value 2 (range=”0.00”-”9.99”, default=”1.00”, omit decimal if register 030=”1”).
033 Display price or “FILL” / price as standby (range “0”-”1”, default=”0” (price), “1”=”FILL” /
price alternating at 0.5 Hz).
034 Standby value blinks. (range”0”-”1”, default=”1” (blinking)).
035 Auto start paid. (range”0”-”1”, default=”0” (auto start paid disabled).
When Auto Start Paid is enabled, if the loading door is closed when drying time is added,
the machine shall start automatically.
Price and Time Settings:
040▼ Amount to start (ATS) for High heat program (range=0.00-9.99, default= 0.00).
041▲ Amount to start for Medium heat program (range=0.00-9.99, default=0.00).
042▲ Amount to start for Low heat program (range=0.00-9.99, default=0.00).
043▲ Amount to start for No heat program (range=0.00-9.99, default=0.00).
▼ means registers following (marked with ▲) will be automatically set to the same value entered
into this register IF they are presently zero.

Service Mode
4:4
044 Time for ATS for High heat(range=1-90, default=40).
045 Time for ATS for Medium heat(range=1-90, default=40).
046 Time for ATS for Low heat(range=1-90, default=40).
047 Time for ATS for No heat(range=1-90, default=40).
048 Time for additional coin or push for High heat (range = 0-90, default = 6).
049 Time for additional coin or push for Medium heat (range = 0-90, default = 6).
050 Time for additional coin or push for Low heat (range = 0-90, default = 6).
051 Time for additional coin or push for No heat (range = 0-90, default = 6).
052 Max drying time - High (range 1-90, default = 90).
053 Max drying time - Medium (range 1-90, default = 90).
054 Max drying time - Low (range 1-90, default = 90).
055 Max drying time – No Heat (range 1-90, default = 90).
Temperature and Cooling Settings:
060 Set temperature for High (range 0-80C,default=65°C/150°F).
061 Set temperature for Medium (range 0-80C,default=57°C/135°F).
062 Set temperature for Low (range 0-80C, default=49°C/120°F).
063 Set temperature for No Heat (range 0-80C, default=0°C/32°F).
064 Cool down time for High (minutes, range 01-10, default=01).
065 Cool down time for Medium (minutes, range 01-10, default=01).
066 Cool down time for Low (minutes, range 01-10, default=01 )
067 Cool down time for No Heat (minutes, range 01-10, default=01).
068 Cool down temperature for High (range 27-60°C, 80-140°F, default =49°C/120°F).
069 Cool down temperature for Medium (range 27-60°C, 80-140°F, default =49°C/120°F).
070 Cool down temperature for Low Heat (range 27-60°C, 80-140°F, default =49°C/120°F).
071 Cool down temperature for No Heat (range 27-60°C, 80-140°F, default =49°C/120°F).
During cool down time, display shows c 01 > c 00 (machine stops at 00).
During remaining wait time for cool down temperature, display shall show “c --”.
Real Time Clock and Promotion Settings:
072 RTC set-up:24 hr format,“072”>yyyy>D>mm.dd>hh.mm>”072”. Where: yyyy=year, D=day
of week (“1”=Sunday), mm.dd=month & date, hh.mm=24 hr time.
Note: During set up, the RTC shall be stopped. When “Start” is pressed to save new hh.mm
value, the seconds digits of the RTC shall be set to “00” without affecting the hours and
minutes values, and the RTC shall be re-started.

Service Mode
4:5
073 RTC promotion1 “073”>d>hh.mm>%%%>”073”
074 RTC promotion 1 END “074”>hh.mm>”074”
075 RTC promotion 2 START “075”>d>hh.mm>%%%>”075”
076 RTC promotion 2 END “076”>hh.mm>”076”
077 RTC promotion 3 START”077”>d>hh.mm>%%%>”077”
078 RTC promotion 3 END “078”>hh.mm>”078”
079 RTC promotion 4 START”079”>d>hh.mm>%%%>”079”
080 RTC promotion 4 END “080”>hh.mm>”080”
Note 073-080 ranges: d= day of week “0”-”A”; 0=promotion inactive, 1=Sunday,2=Monday,
...7=Saturday, 8=Every day, 9= Monday-Friday only, A=Saturday and Sunday only; hh=”00”
”23”; mm=”00”-”59”; %%% “000” –“999”, “A00” = Free, Default = “000”
081 Promotion %%% for discount input signal (range “000”-“999”; “A00” = Free, default = “000”
Miscellaneous Settings:
082 LSM PIN code (range=”0000”-”9999”, default=”1234”)
083 FSM PIN code (range=0000”-“9999”, default=”0000” (disabled))
084 Default program (range 0-3, 0=none,1=High, 2=Medium, 3=Low, 4=, No Heat, default=”1”)
085 Default program timeout (seconds, range 000-999, default=060)
086 Temperature displayed in °F or °C (0=°F,1=°C, default=0 (display °F))
087 Disable outlet air temperature display (range 0-1,default =0=enabled,1=disabled)
088 Disable buzzer (default =0=enabled,1=disabled)
089 Serial communication enabled (range 0-1, default = 0) (Reserved for future use)
*098 Machine address (range 000-999, default 000)
*099 Firmware version
*Function available in both “Limited Service Mode” and “Full Service Mode”.
Preventive Maintenance
5:1
Cleaning
A program and/or schedule should be established for periodic inspection, cleaning, and removal of
lint from various areas of the dryer, as well as throughout the ductwork system. The frequency of
cleaning can best be determined from experience at each location. Maximum operating efciency is
dependent upon proper airow. The accumulation of lint can restrict this airow.
• Clean the lint screen after each load.
Weekly
• Clean lint accumulation from lint chamber, and temperature sensor area. See illustration x-x.
• Clean the door gasket.
• Use a soft wash cloth and mild detergent to clean door.
Every Third Month
• Disconnect Power.
• Remove lint from gas valve burner area with a dusting brush or vacuum cleaner attachment.
• Vacuum make up air inlet holes. On removing the lint lter from the lint compartment, clean lint
in the lint compartment.
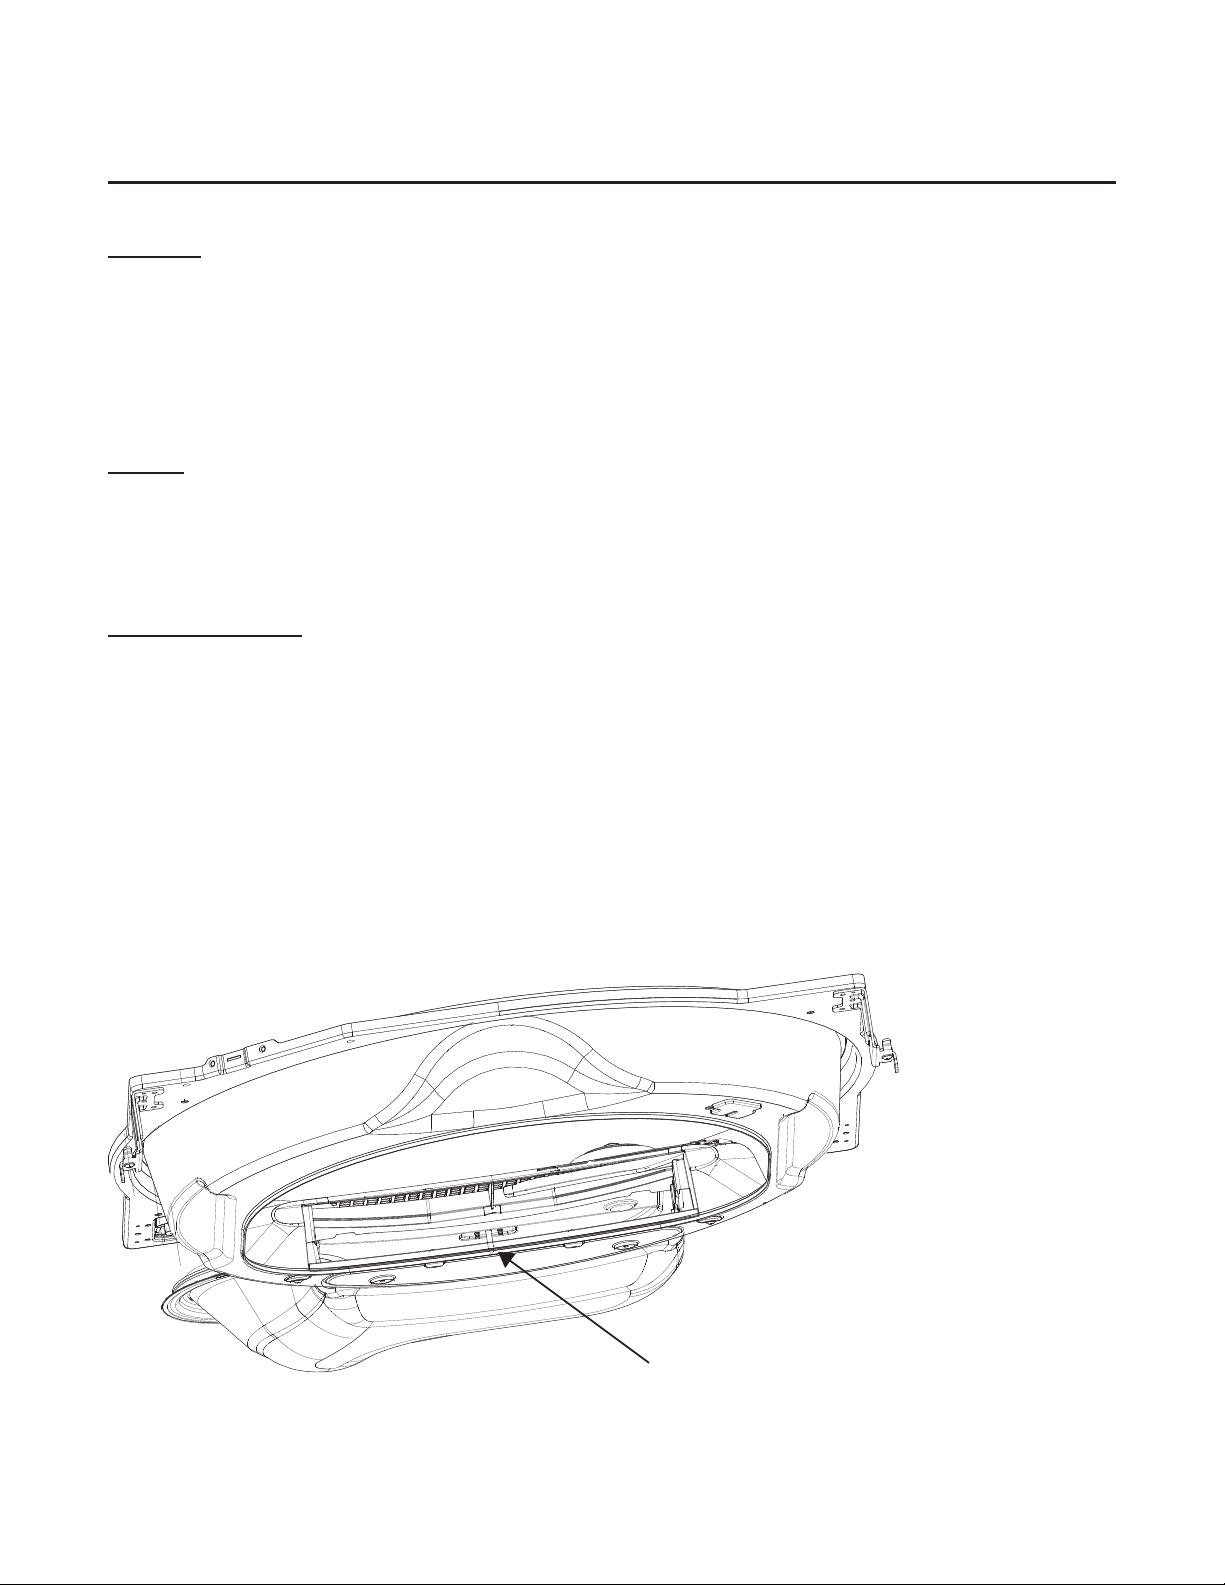
• Check to clear any accumulated lint around NTC – 1 (See Image below)
• Clean any lint accumulation in and around the motor(s) casing opening.
NOTE: To prevent damage, avoid cleaning and/or touching ignitor/ame-probe assembly located on
the gas burner assembly.
Outlet Thermistor (NTC - 1)

Preventive Maintenance
5:2
Every 6 Months (Refer this service to qualied personnel)
• Inspect and remove lint accumulation external exhaust ductwork and from dryer’s internal
exhaust ducting.
• The accumulation of lint in the exhaust ductwork can create a potential re hazard.
• Do not obstruct the ow of combustion and ventilation air. Check back draft dampers in the
exhaust ductwork. Inspect and remove any lint accumulation, which can cause the damper
to bind or stick. Obstructed ducting leads to longer drying times, higher energy consumption
and reduced motor life
• If ducting is highly obstructed with lint change to a shorter service interval such as every
three months.
• A back-draft damper that is sticking partially closed can result in slow drying and the
shutdown of heat circuit safety switches or thermostats.
• When cleaning the dryer cabinet, avoid using cleaners with harsh abrasives. A product
intended for appliance cleaning is recommended.
Every 12 Months
• A competent service professional should inspect bolts, nuts, screws, setscrews, grounding
connections and nonpermanent gas connections (unions, shutoff valves, and orices).
• Belts should be examined. Cracked or seriously frayed belts should be replaced.
• Complete an operational check of controls and valves.
• Complete an operational check of all safety devices (lint switch, door switch).
To be carried out by
qualied personnel.

Intentionally blank

Sales and Administration: (516) 371-4400
Spare Parts: (516) 371-2000
Technical Support: (516) 371-0700
En Mexico: 001-800-010-1010
461 Doughty Blvd., Inwood, NY 11096
laundrylux.com
CROSSOVER 2.0 SERIES
In a class by itself
WASHER OPERATING MANUAL
MODEL NO. WHLFP817M
WHLFP817MI
DOC. NO. 098030
EDITION 21.2018

Intentionally blank
Operating Manual
WHLFP817M
WHLFP817MI
WARNING: ALL OPERATING AND MAINTENANCE PROCEDURES SHOWN IN THIS MANUAL
MUST BE FOLLOWED DAILY FOR PROPER OPERATION OF YOUR MACHINE.
PLEASE ENTER THE FOLLOWING INFORMATION AS IT APPEARS ON THE MACHINE(S)
DATA PLATE(S).
KEEP THIS MANUAL IN A SECURE PLACE FOR FUTURE REFERENCE.
MACHINE MODEL
MACHINE SERIAL NUMBER(S)
ELECTRICAL CHARACTERISTICS: VOLTS, PHASE, HZ.
244824

Intentionally blank
SAFETY AND WARNINGS SIGNS
Replace If Missing Or Illegible
One or more of these signs must be afxed on each machine as
indicated, when not included as part of the front instruction panel.
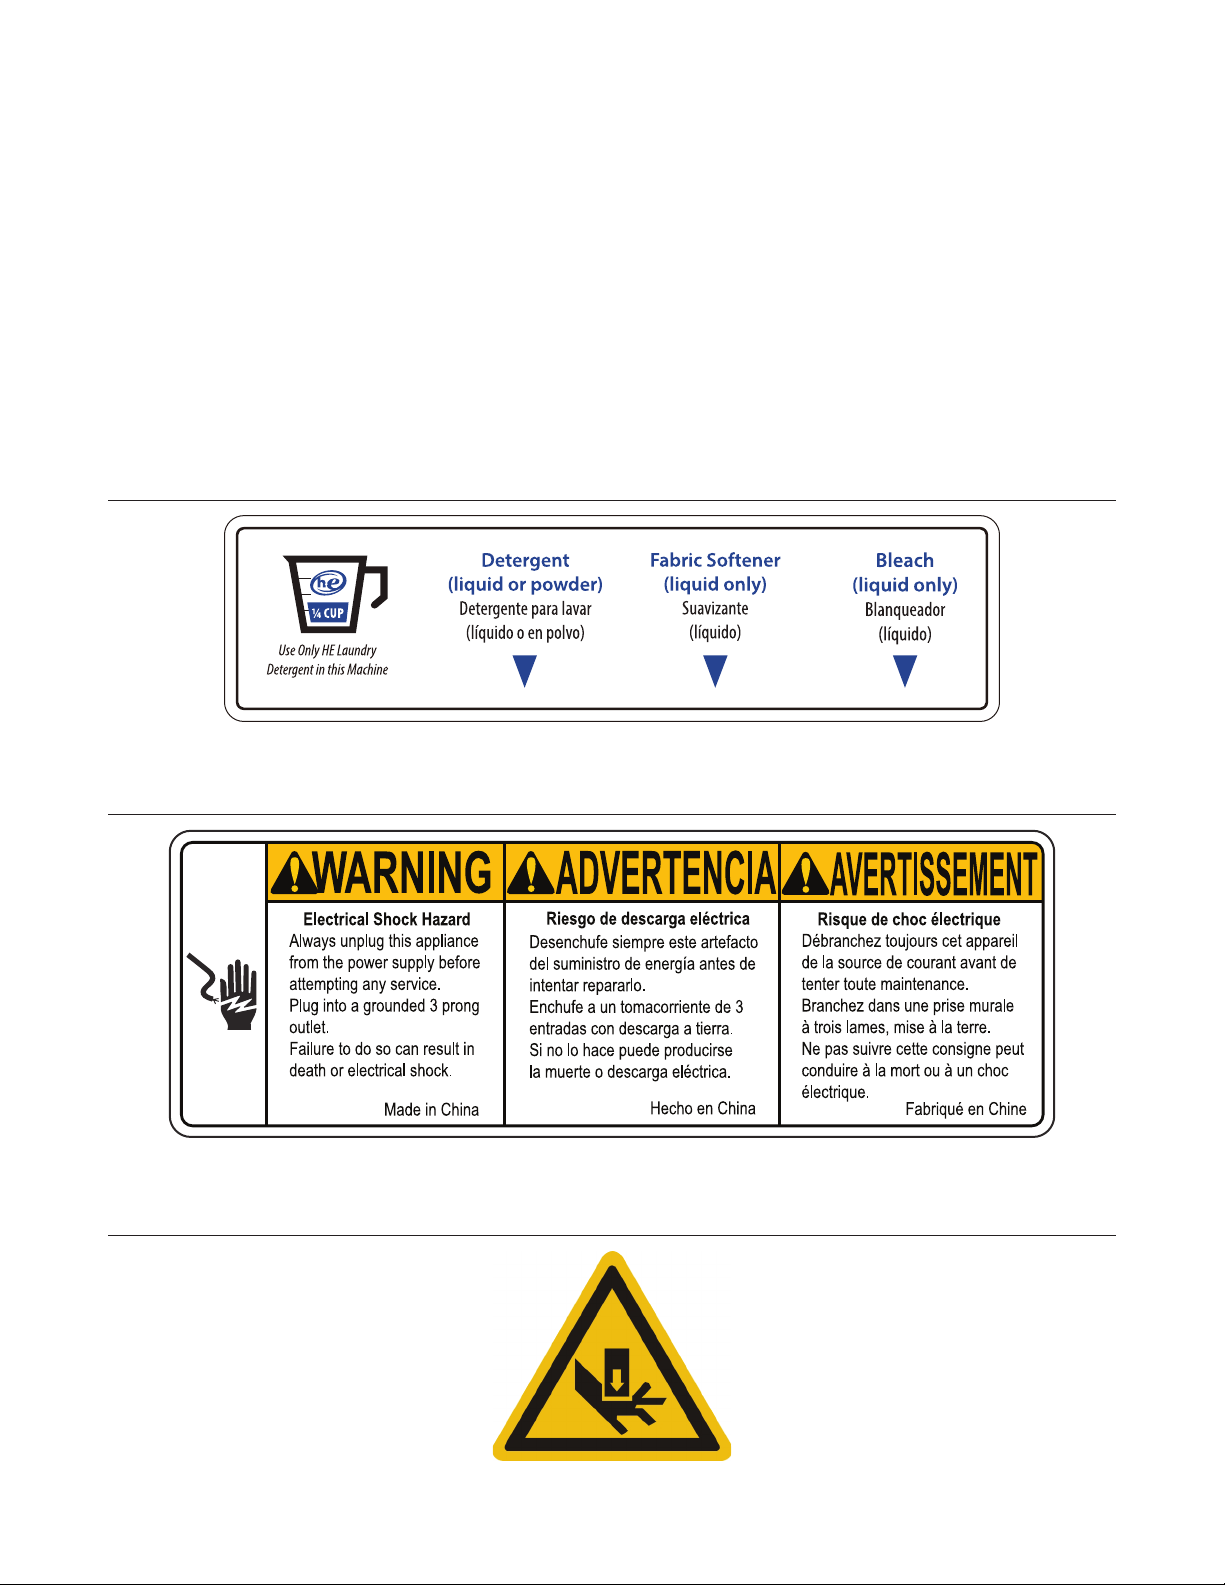
LOCATED ON THE FRONT OF THE DETERGENT DRAWER:
LOCATED AT THE REAR OF THE MACHINE:
LOCATED NEXT TO DOOR:
SAFETY AND WARNINGS SIGNS
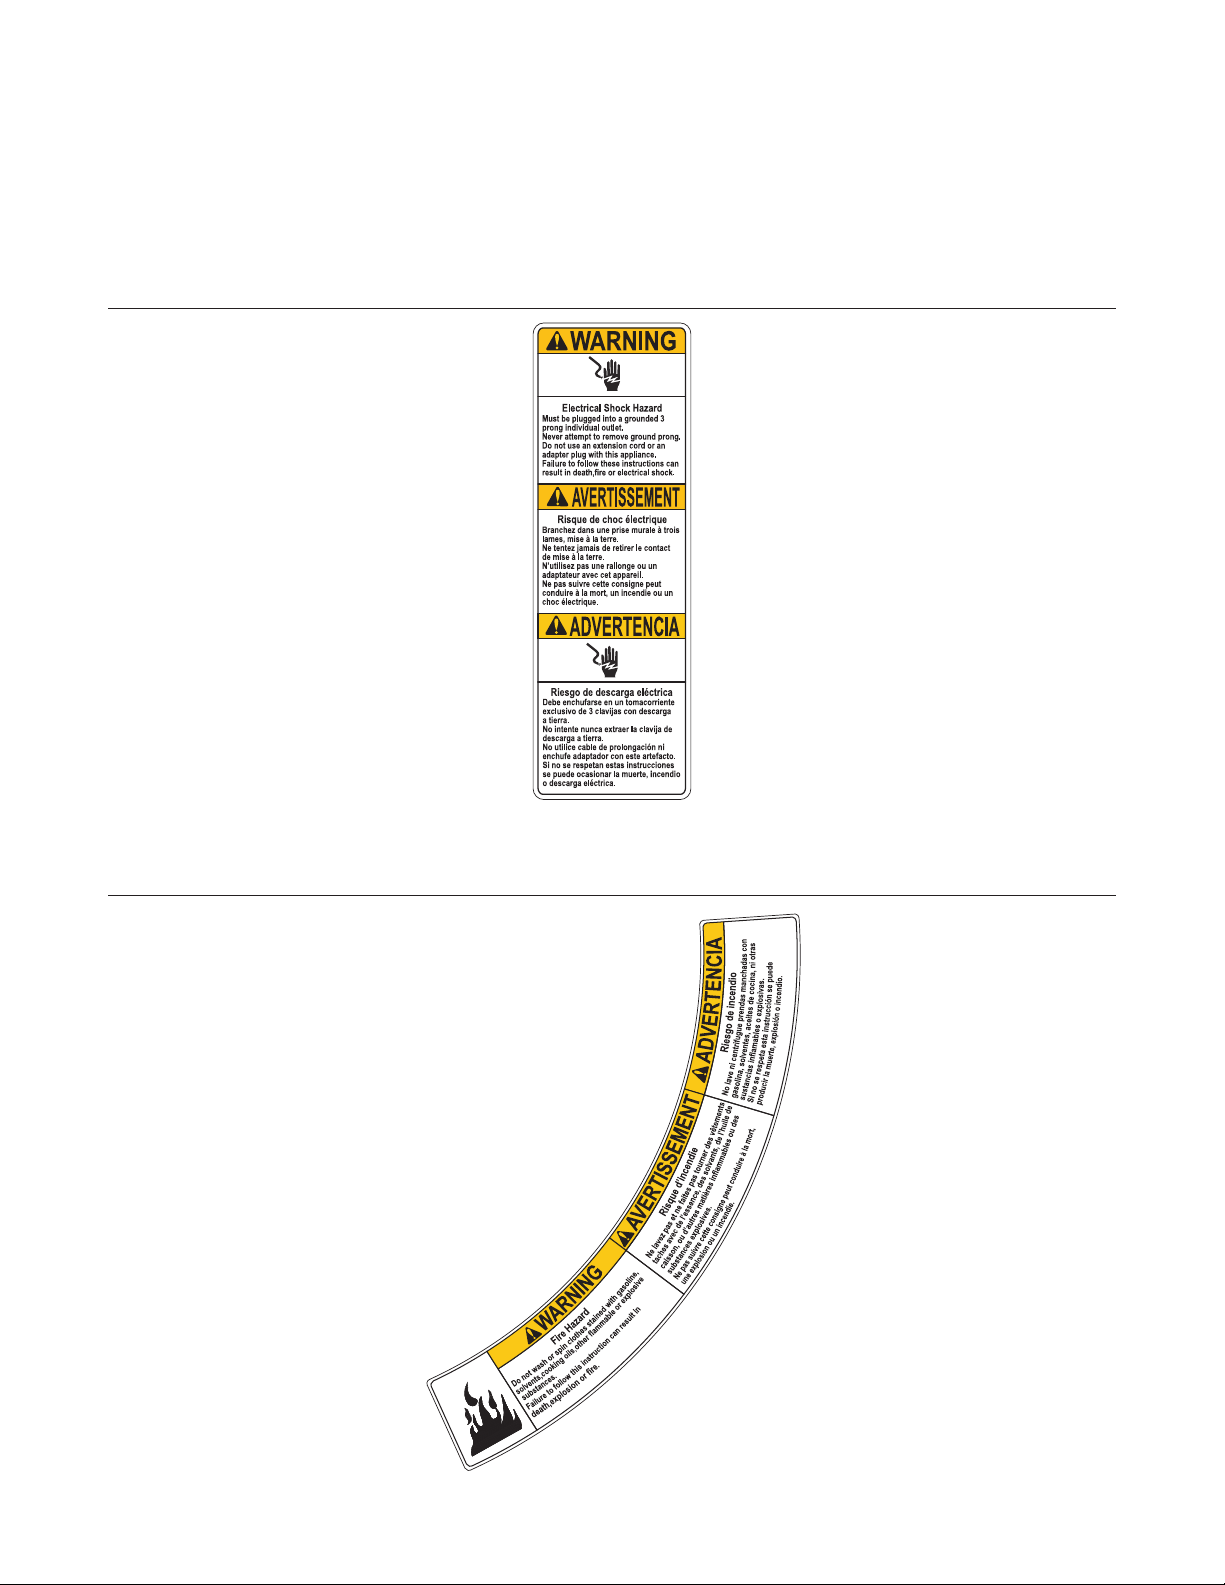
WARNING LABEL FOR POWER CABLE:
FIRE HAZARD LABEL ADJACENT TO DOOR:
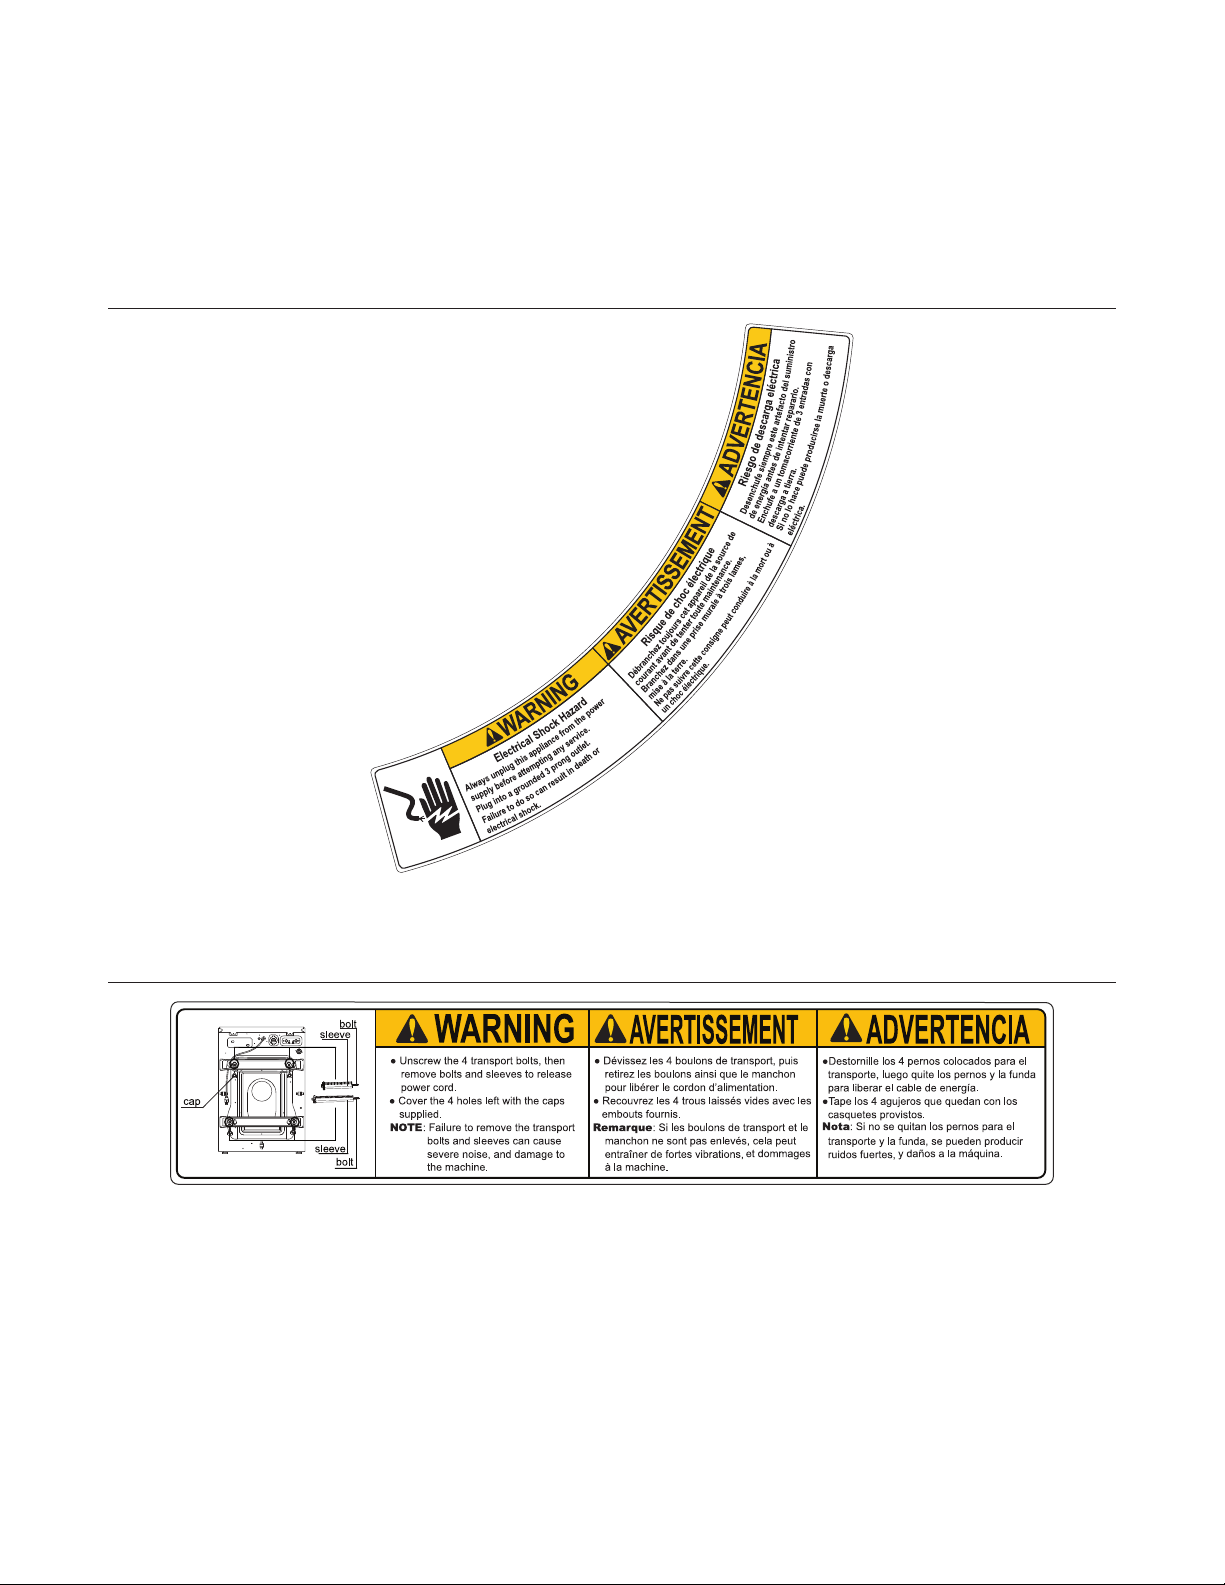
SAFETY AND WARNINGS SIGNS
ELECTRICAL HAZARD LABEL ADJACENT TO DOOR:
LOCATED ON THE REAR SHIPPING SECURITY BRACE:
If you need to order more safety or warning
signs, call the Laundrylux Parts Department
at (516) 371-2000, or call your local dealer.

IMPORTANT SAFETY INSTRUCTIONS
IMPORTANTES MESURES DE SECURITE
WARNING -
To reduce the risk of re, electric chock, or injury to persons when using your appliance:
AVERTISSEMENT -
Pour réduire les risques d´incendie, de choc électrique ou de blessure quand, I´appareil est utilisé:
1. Read all instructions before using the appliance.
Lire toutes les instructions avant d’utiliser l’appareil.
2. This machine must be installed according to the installation instructions.
Ce machine doit être visseé sur le plancher selon les instructions d’installation.
3. This machine MUST be serviced and operated in compliance with manufacturers instructions. CHECK DOOR LOCKS
EVERY DAY FOR PROPER OPERATION TO PREVENT INJURY OR DAMAGE. IF THE DOOR LOCK FAILS TO
OPERATE PROPERLY, PLACE THE MACHINE OUT OF ORDER UNTIL THE PROBLEM IS CORRECTED.
IL FAUT QUE cette appareil soit entretenue et actionnée conformement aux instructions du fabriquant. CONTROLEZ LA
SERRURE DE PORTE TOUS LES JOURS AFIN DE EVITER DES DOMMAGES OU DES RISQUES PERSONNELLES.
SI LA SERRURE DE PORTE NE FONCTIONNE PAS, IL FAUT METTRE LA MACHINE HORS SERVICE JUSQU’Á LE
PROBLEME SOIT CORRIGÉ.
4. Do not wash articles that have been previously cleaned in, washed in, soaked in, or spotted with gasoline, drycleaning
solvents, or other ammable or explosive substances, as they give off vapors that could ignite or explode.
Ne pas laver des articles qui ont été nettoyés ou lavés avec de l’essence, des solvants pour nettoyage à sec ou d’autres
substances inammables ou explosives, ou que l’on a fait tremper dans ces produits. Ces substances dégagent des
vapeurs qui peuvent s’enammer ou exploser.
5. Do not add gasoline, dry-cleaning solvents, or other ammable or explosive substances to the wash water. These
substances giveoff vapours that could ignite or explode.
Ne pas ajouter d’essence, de solvants pour nettoyage à sec ou d’autres substances inammables ou explosives à l’eau
de lavage. Ces substances dégagent des vapeurs qui peuvent s’enammer ou exploser.
6. Under certain conditions, hydrogen gas may be produced in a hot-water system that has not been used for 2 weeks or
more. HYDROGEN GAS IS EXPLOSIVE. If the hot-water system has not been used for such a period, before using a
washing machine, turn on all hot-water faucets and let the water ow from each for several minutes. This will release any
accumulated hydrogen gas. As the gas is ammable, do not smoke or use an open ame during this time.
De l’hydrogène peut être produit dans un système à eau chaude qui n’a pas été utilisé depuis deux semaines ou plus.
L’HYDROGÈNE EST EXPLOSIF. Si le système à eau chaude n’a pas été utilisé depuis un certain temps, ouvrir tous les
robinets d’eau chaude et laisser l’eau couler pendant plusieurs minutes avant d’utiliser une laveuse, l’hydrogène accu
mulé, le cas échéant, s’échappera. L’hydrogène étant inammable, ne pas fumer ou utiliser un appareil à amme nue
pendant que l’eau coule.
7. Do not allow children to play on or in the appliance. Close supervision of children is necessary when the appliance is
used near children.
Ne pas permettre aux enfants de jouer sur ou dans l’appareil. Surveiller ètriotement les enfants lorsqu’ils se trou veent
près d l’appareil qui fonctionne.
8. If the machine is to be discarded, remove the door to prevent accidental entrapment.
Avant de mettre l’appareil hors service ou de jeter, retirer la porte.
9. Do not reach into the appliance if the tub is moving.
Ne pas mettre la main dans l’appareil lorsque la cuve bougent.
10. Do not install or store this appliance where it will be exposed to the weather.
Ne pas installer ou placer cet appareil dans un endroit où il sera exposé aux intempéries.
11. Do not tamper with controls.
Ne pas traquer les commandes.
12. Do not repair or replace any part of the appliance or attempt any servicing unless specically recommended in the user
maintenance instructions or in published user-repair instructions that you understand and have the skills to carry out.
Ne pas réparer ou remplacer les pièces de l’appareil ou procéder à l’entretien de celui-ci sauf si les instructions visant
l’entretien et les réparations qui doivent être effectués par l’utilisateur le spécient, si vous comprenez bien ces instructi
si vous possédez les connaissances nécessaires.
MANUFACTURED BY HAIER EXCLUSIVELY FOR LAUNDRYLUX

NOTICE TO: OWNERS, OPERATORS AND DEALERS
IMPROPER INSTALLATION AND INADEQUATE MAINTENANCE, POOR HOUSEKEEPING AND WILLFUL NEGLECT OR
BYPASSING OF SAFETY DEVICES MAY RESULT IN SERIOUS ACCIDENTS OR INJURY. TO ASSURE THE SAFETY
OF CUSTOMERS AND/OR OPERATORS OF YOUR MACHINE, THE FOLLOWING MAINTENANCE CHECKS MUST BE
PERFORMED ON A DAILY BASIS.
NOTICE À L’ATTENTION DES PROPRIÉTAIRES, UTILISATEURS ET REVENDEURS
UNE INSTALLATION INCORRECTE ET UN ENTRETIEN INADÉQUAT, DE MÊME QUE LA NÉGLIGENCE OU LA
NEUTRALISATION DÉLIBÉRÉES DES DISPOSITIFS DE SÉCURITÉ, PEUVENT ÊTRE CAUSES DE BLESSURES OU
D’ACCIDENTS SÉRIEUX. POUR ASSURER LA SÉCURITÉ DES CLIENTS ET/OU DES UTILISATEURS DE VOTRE
MACHINE, IL EST INDISPENSABLE DE PROCÉDER CHAQUE JOUR AUX CONTRÔLES DE ROUTINE CI-APRÈS.
1. Prior to operation of the machine, check to make certain that all operating instructions and warning signs
are afxed to the machine and legible. (See the following page of this manual for description and location
of the signs.) Missing or illegible ones must be replaced immediately. Be sure you have spare signs and
labels available at all times. These can be obtained from your distributor or from Laundrylux.
2. Check the door safety interlock, as follows:
(a) OPEN THE DOOR of the machine and attempt to start in the normal manner:
For coin-operated models, insert the proper coins to start the machine.
For card-operated models, insert the card to start the machine.
THE MACHINE MUST NOT START
(b) CLOSE THE DOOR to start machine operation and, while it is operating, attempt to
open the door without exerting extreme force on the door handle. The door should
remain locked!
If the machine can start with the door open, or can continue to operate with the door
unlocked, the door interlock is no longer operating properly. The machine must be
placed out of order and the interlock immediately replaced.
3. DO NOT UNDER ANY CIRCUMSTANCES ATTEMPT TO BYPASS OR REWIRE ANY OF THE MACHINE
SAFETY DEVICES AS THIS CAN RESULT IN SERIOUS ACCIDENTS.
4. Be sure to keep the machine(s) in proper working order. Follow all maintenance and safety procedures.
Further information regarding machine safety, service and parts can be obtained from your dealer or from
Laundrylux through its Technical Support Hotline - (516) 371-0700.
All requests for assistance must include the model, serial number and electrical characteristics as
they appear on the machine identication plate. Insert this information in the space provided on the
previous page of this manual.
5. WARNING: DO NOT OPERATE MACHINE(S) WITH SAFETY DEVICES BYPASSED, REWIRED OR
INOPERATIVE! DO NOT OPEN MACHINE DOOR UNTIL DRUM HAS STOPPED ROTATING!
AVERTISSEMENT: NE PAS FAIRE FONCTIONNER LA (LES) MACHINE(S) AVEC UN DISPOSITIF
DE SÉCURITÉ NEUTRALISÉ, RECÂBLÉ OU NON OPÉRATIONNEL! NE PAS OUVRIR LA
MACHINE TANT QUE LE TAMBOUR NE S’EST PAS IMMOBILISÉ!

Intentionally blank

Contents
Control Panel + Instructions For Use ................................................................1:1
Heavy Soil + Extra Rinse ............................................................................2:1
Coin Meter ........................................................................................................3:1
Fault Codes ......................................................................................................4:1
Operating Mode ................................................................................................5.1
Service Mode ...................................................................................................6.1
Preventive Maintenance ...................................................................................7.1
Wash Programs ................................................................................................ 8.1
The manufacturer reserves the right to make changes to design, material
and/or specications without notice.

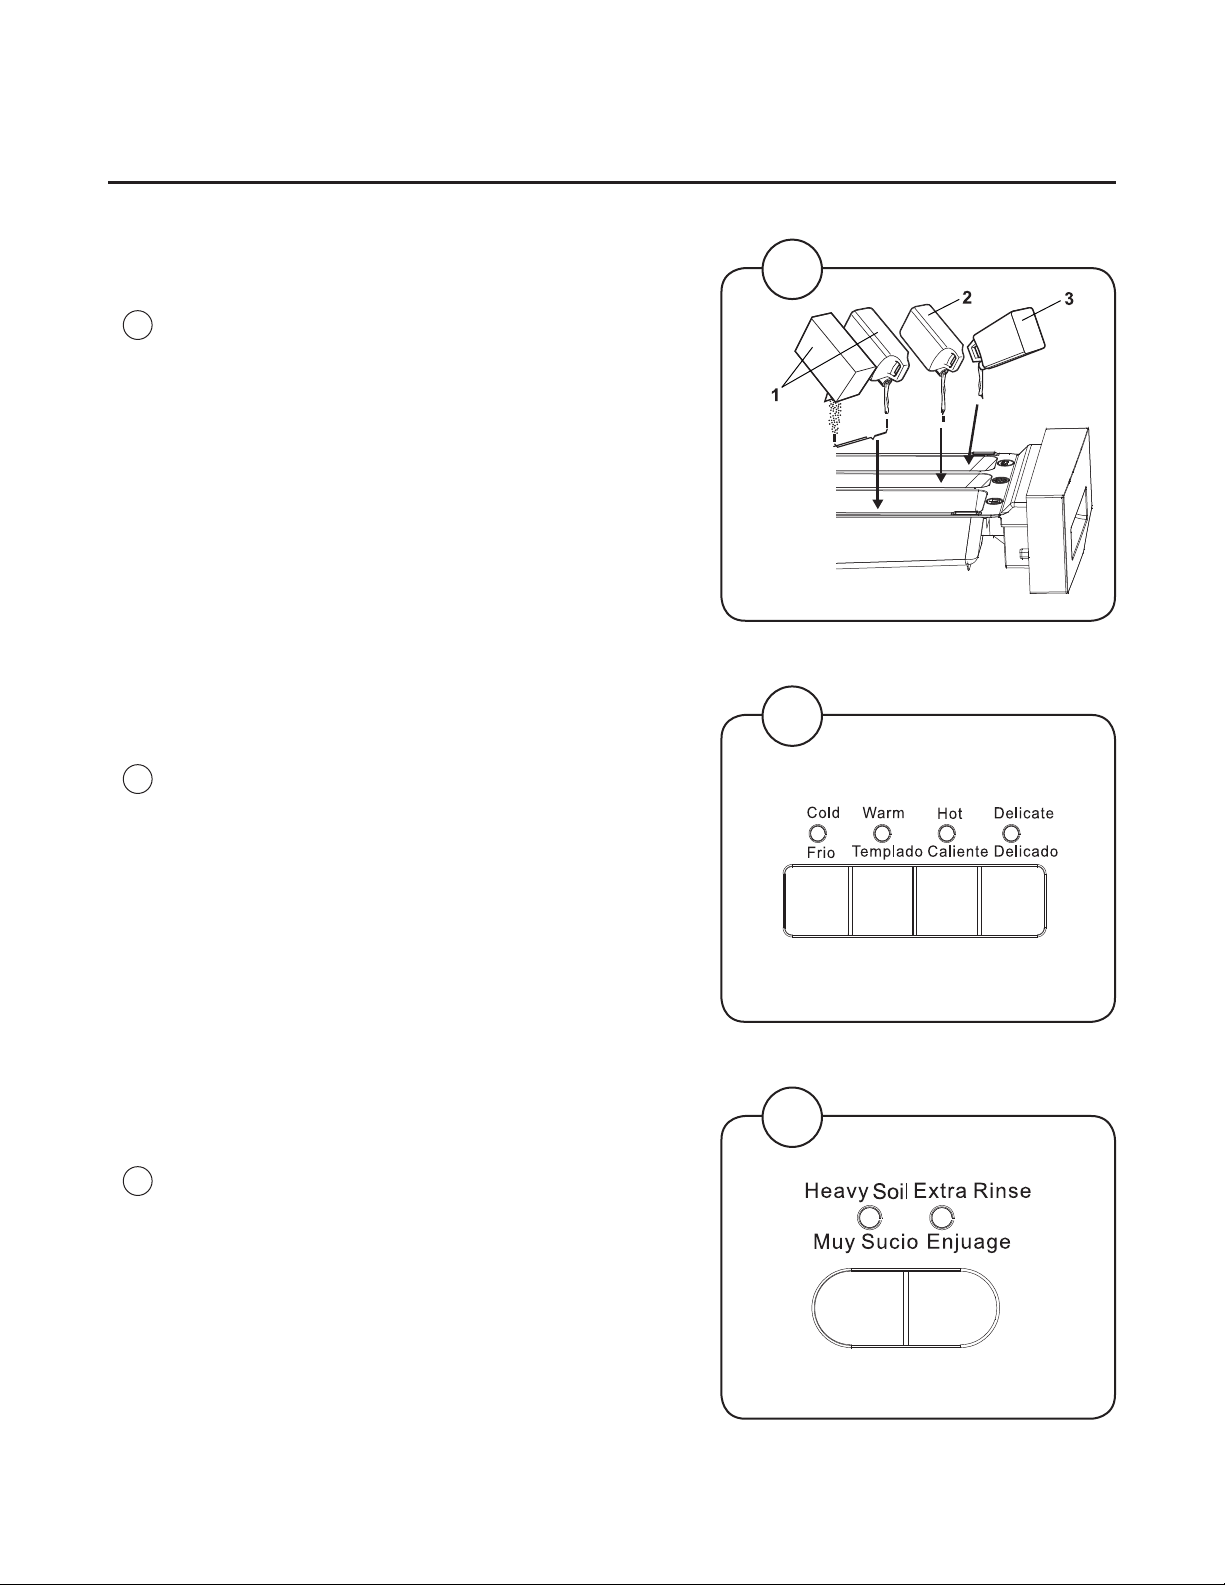
Control Panel
1:1
The display control panel allows the selection of the main wash programs. As desired,
options can be selected to modify the wash programs to adjust for load type and
soiling.
The control panel consists of program selection buttons (A), option buttons (B), a start
button (C), and a display (D) which shows the time remaining and the price for each
program.
In the event of faults, error codes will be displayed. See the “Fault Codes” section of
this manual.
Explanation of the control panel:
A Program selection buttons
B Option buttons
C Start button
D Display indicating program time remaining and price of programs.
Fig.
1
1
1:2
Instructions for Use
Washing
• Load garments into the machine and close
the door. Do not overload washer.
• Add liquid detergent, bleach, and fabric softener
as recommended on the product label. Do not
ll liquid bleach and softener above the “MAX”
level line.
Compartment 1 – Powder or liquid detergent
Compartment 2 – Liquid softener
Compartment 3 – Liquid bleach
• Press button for the desired program.
• Press buttons for desired option(s), if any.
• Pay the price indicated on the display by
inserting coins, tokens, or card depending
on the payment system in use.
For OPL applications no price is displayed.
2
3
4
Fig.
2
Fig.
3
Fig.
4
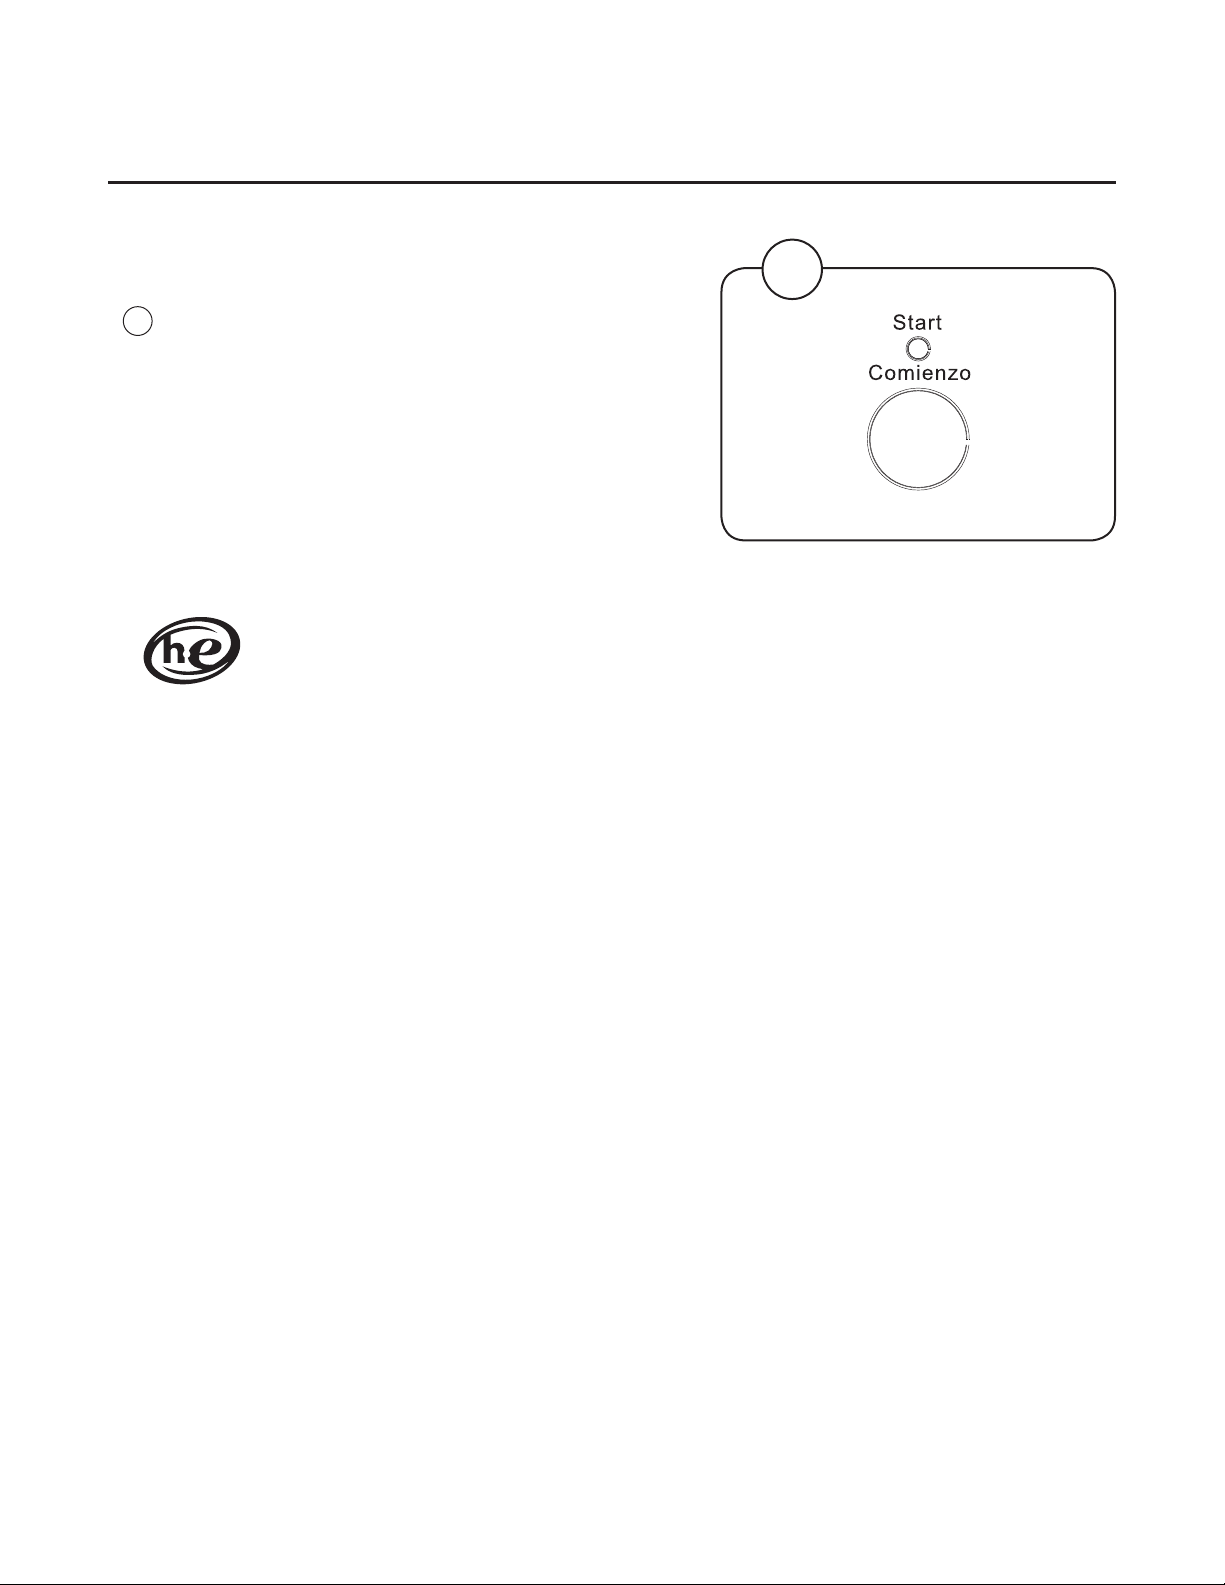
1:3
Instructions for Use
• Press the Start button.
5
Fig.
5
HE (High Efciency) Detergent and How
Your Washer Functions with Over Suds Conditions
Your washer is a high efciency front loading washer. It was specically designed to use less
water than top loading washers while achieving very high quality laundering results. However,
highly efcient front loading washers with laboratory veried water levels can still experience over
sudsing if regular detergent (liquid or powder) is used, especially if too much detergent is used.
We STRONGLY RECOMMEND using low sudsing detergent that is clearly marked “HE” and that
no more than 1/3 cup be used for a full load.
Bubbles and white suds do NOT clean clothes; in fact, excess suds are difcult to fully rinse away
and may remain in clothes at the end of the wash cycle. Detergent that is not rinsed away can
irritate skin and cause changes to clothing color when heated in a dryer.
Laundrylux has implemented a proprietary software algorithm in this washer to help distinguish
between over suds and clogged pump strainer basket conditions. Generally, this washer
will complete a wash cycle even if a moderate over sudsing or out-of-balance condition is
experienced. Excessive over sudsing, a clogged pump strainer basket (due to accumulated lint
and debris), or an extremely out-of-balance load are conditions which may cause a wash cycle to
not nish and an error code to be displayed.
If the wash cycle does not complete or you see an error code, the software is performing
properly to protect the washer from abnormal operating conditions. If necessary, from the lower
left front of the washer carefully remove the pump strainer basket to clean it out according to the
instructions in this manual. Please be careful to wait for any hot water in the drum to cool to a
safe temperature before removing the strainer since some water will be released.
If you have any questions about operating your washer, please contact your Authorized
Distributor or Laundrylux. We want you to enjoy your experience with this ne product and to
have the maximum benet from your purchase.

Intentionally blank
2.1
Instructions for Use
Wash Program Description
The machine offers four standard wash programs, and two optional features. The basic wash
programs are Cold, Warm, Hot, and Delicate. The optional features are Heavy Soil and Extra Rinse.
The options can be added to the basic wash programs (except for Delicate), in any combination. On
coin-operated models, a different price can be charged for each program, and an additional price
can be programmed for each of the two option buttons.
The Cold, Warm, and Hot wash programs are comprised of three program segments. These programs
begin with the Mainwash which lls to the LOW water level. The duration of the Mainwash can be
adjusted using the machine’s service mode. The Mainwash water temperature is cold in the COLD
program, warm in the WARM program, and hot in the HOT program. The Mainwash lls through the
detergent compartment of the detergent drawer. Approximately half way through the Mainwash, the
Bleach Compartment of the detergent dispenser is ushed for approximately 15 seconds.
The machine drains following the Mainwash and rells to the HIGH water level for each of the
two cold water Rinses that complete the basic programs. Each rinse is followed by a drain and
extraction, the nal extraction being six minutes in duration. The nal rinse ushes the softener
compartment of the detergent dispenser.
The Delicate program consists of a four-minute cold water Mainwash and two cold water rinses.
Heavy Soil and Extra Rinse options cannot be used with the Delicate program.
Two optional program segments can be added using service mode. The rst option is a two minute
Prewash that lls to the LOW water level through the Detergent compartment of the detergent
drawer. The water temperature is the same as the Mainwash temperature except in the HOT
program, which has a warm prewash. The second option is an extra Rinse that gets inserted
between the rst and last Rinse and also lls to the HIGH water level. LOW and HIGH water level
can also be adjusted in service mode.
For OPL use, a Rinse and Spin wash program is available by pressing the EXTRA RINSE button
with no wash programs selected. This optional program must be enabled during machine setup.
Rinse and Spin is comprised of a two minute cold water ll to the HIGH water level followed by a
four minute extraction. Pressing the DELICATE button deselects this wash program.
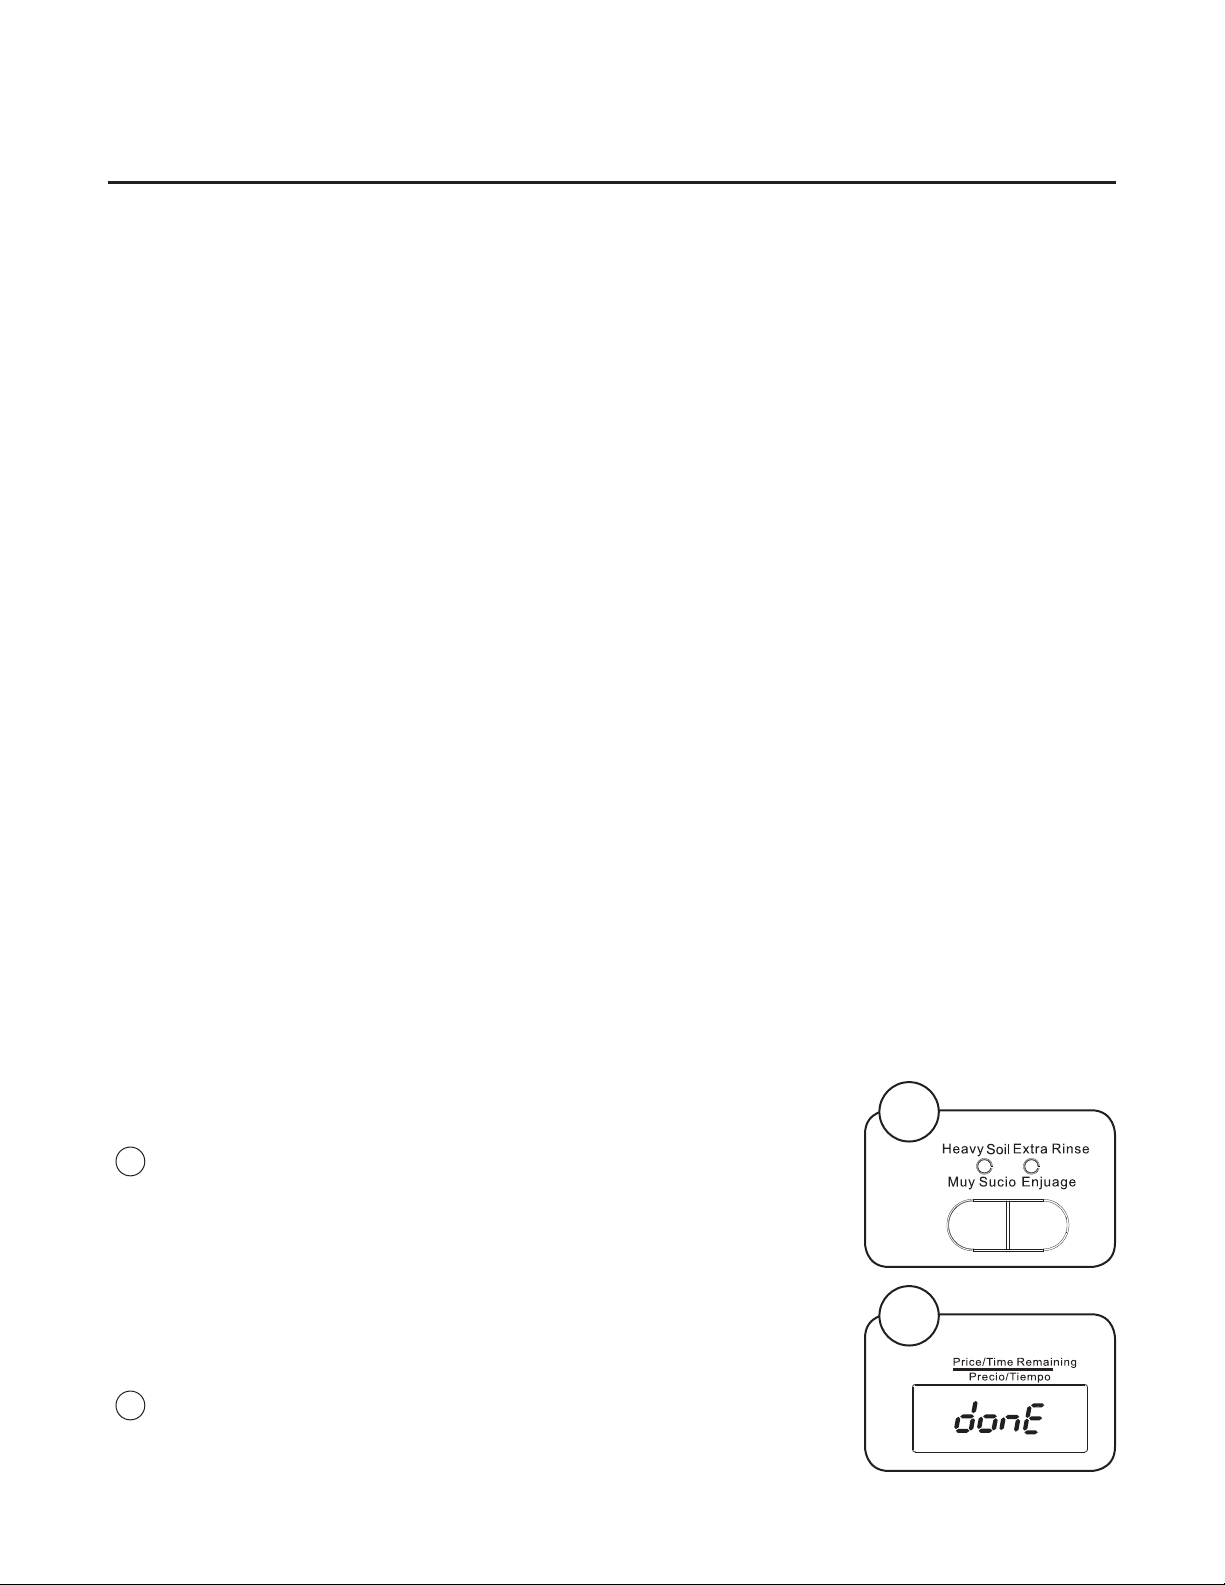
Heavy Soil Option
The Heavy Soil option adds a Prewash to any wash program.
Heavy Soil is not available when the Delicate Program is selected.
Extra Rinse Option
The Extra Rinse option adds one additional cold water rinse to any
wash program except the Delicate cycle. The extra rinse repeats the
second-to-last rinse.
Program End
The display will show “donE” when the program ends.
Then door can then be opened.
1
2
Fig.
1
Fig.
2

Intentionally blank

3.1
Coin Meter
Coin-Operated Machines
In coin-operated machines, prices for programs and options must be programmed during machine
setup, and can be modied at any time. The machine must be set to COIN MODE.
Prices can be programmed as dollars and cents or as the number of coins or tokens required to
start. There are four wash programs COLD, WARM, HOT, and DELICATE and two options HEAVY
SOIL and EXTRA RINSE that can be programmed to the same or different prices. The option
prices are added to the base prices of the COLD, WARM, and HOT programs. The options cannot
be added to the DELICATE program.
PRICE PROGRAMMING
1. To enter the programming mode unlock and remove the coin box.
2. Press and release the Service Switch located in the rear of the coin vault to enter service mode.
The display will go blank.
3. Select one of the six program or option buttons for which the price is to be programmed. The
current price for that selection is displayed.
4. Press the START button. The price will blink indicating it can be edited.
5. Use the four program selection buttons; COLD, WARM, HOT, and DELICATE to change each
of the four digits in the price display. Each button increments a corresponding digit, left to right,
in the price. Each digit rolls over from 9 to 0 without affecting the other digits. The left most digit
cannot be programmed to “0”, but can be blanked out completely.
6. When the desired price is displayed, press START. The display will stop blinking indicating the
new value has been saved.
7. Repeat steps 3 through 6 for each remaining wash program and option. The option buttons only
make adjustments to the basic programs, and are typically 0.25 or 0.50.
8. When all prices have been entered, press the Service Switch in the vault to exit service mode.
9. Check the newly entered prices by selecting each program without and with the option
selections.
Register 26 (“No Decimal in Price”) determines how prices are displayed by the machine. When
set to “00” (default), prices are set and displayed with a decimal (e.g. “3.00”). When set to “01”, the
decimal point is turned off, and prices are set and displayed as “number of coins or tokens” required
(e.g. “12”). In either case, the value of each coin drop is stored in Register 33 “Coin Value 1” and
Register 34 “Coin Value 2” and determine how much the remaining price will be reduced each time
a coin is deposited. The coin-value registers can be adjusted to accommodate any currency.

Coin Meter
3.2
DISCOUNT PRICE “PROMOTION” PROGRAMMING
The washer is capable of applying a “Promotion” percentage discount to the vend price of a
program selection at specied times and days. Up to four different Promotion discount events and
percentages can be selected using the washer’s built-in Real Time Clock (RTC) or one promotion
event can be selected using an optionally-installed, external signal provided by a clock-driven relay
or switch. This signal can activate multiple washers. Both options require setup via the service
registers, access to which is described in the Service Mode section of this manual.
During machine setup, the promotional discount is represented by a two digit percentage (%%) and
can range from 0% (no discount) to “A0” = 100% (free wash). When Promotion pricing is active,
the displayed vend price equals the sum of the discounted program price rounded up to the next
multiple of register “033” (Coin value 1) and the option price, which is not discounted. For example, if
Coin Value 1 = 0.25 and a 50% Promotion discount is applied to a COLD (1.00) wash program with
a HEAVY SOIL (0.25) option selected (1.25 total), the displayed vend price would be rounded up to
“0.75.”
To use Promotion percentage discount pricing the washer must be set to “COIN MODE” operation.
Promotion pricing can be used with the washer set to either Decimal or No Decimal in price, Reg 26
= “00” or “01”.
PROMOTION PRICING VIA THE REAL TIME CLOCK (RTC)
The RTC and Promotion pricing times are set and displayed in 24hr format. (e.g. 1:15 PM = 13:15).
The promotion days of the week are represented by a two digit number (nn). The RTC’s built in
calendar adjusts for leap years. Promotion pricing set up requires setting the RTC and up to four
pairs of Promotional start and stop times and percentages.
RTC and Promotional Setup
1. Navigate to Register 70 (RTC set-up) as explained in the Service Mode section.
2. Press START, this will stop the clock. The year will be displayed as a four digit number (yyyy).
Edit these values using the COLD, WARM, HOT, and DELICATE buttons.
3. Press START, a two day digit number “(0d)” for the day of the week will be displayed.
(01=Sunday, 02=Monday, ... 07=Saturday.) Edit this value using the DELICATE button.
4. Press START, the Month and Day will be displayed as two digit numbers (mm.dd). Edit these
values using the COLD, WARM, HOT, and DELICATE buttons.
5. Press START, the Hour and Minutes will be displayed in 24 hr format as two digit numbers (hh.
mm). Edit these values using the COLD, WARM, HOT, and DELICATE buttons.
6. Press START to save the changes and exit register 70. This will reset the clock to the set time,
reset the clock’s seconds digit to “00”, and restart the clock. This allows synchronizing the
clocks on multiple machines to a master clock such as a wall clock, wristwatch, or cell phone.
7. Navigate to Register “71” (RTC Promotion #1 START) to set the percentage discount, day of the
week and start time for promotion #1.

Coin Meter
3.3
8. Press START, a two digit day number (“0d”) for which the start day(s) of the week for promotion
#1 will be displayed. (01=Sunday, 02=Monday, ...07=Saturday, 08=All days, 09=Monday-Friday
only, 0A=Saturday and Sunday only, 00=promotion is inactive.) Edit this number using the
DELICATE button to cycle through the allowed values.
9. Press START, the Hours and Minutes in 24 hr format for the start of Promotion #1 will be
displayed (hh.mm). Edit these values using the COLD, WARM, HOT, and DELICATE buttons.
10. Press START, the promotion percentage discount will be displayed as two digits (%%).The
discount can range from “00” = 0% to “A0” = 100% (e.g. Free Wash). Edit this number using the
HOT and DELICATE buttons. Note, pressing the HOT button ten times will cycle the value to
“A0”.
11. Press START to save the changes and exit Register “71”
12. Navigate to Register “72” (RTC Promotion #1 END”). This will allow you to set the end time for
promotion #1.
13. Press START, the promotion end time in hours and minutes in 24 hr format will be displayed (hh.
min). Edit these values using the COLD, WARM, HOT, and DELICATE buttons.
14. Press START, this will save the changes and exit register 72.
15. Program the three other Promotion times and percentages as desired using register pairs: 073 &
074 (Promotion #2), 075 & 076 (Promotion #3), and 077 & 078 (Promotion #4). Each promotion
can have a different percent reduction. They must not overlap with each other.
16. Exit Service Mode.
PROMOTION PRICING VIA EXTERNAL CLOCK-DRIVEN RELAY OR SWITCH
This washer can apply a Promotion price discount using an external clock-driven relay or manual
switch. To use this feature the washer requires an optional external price reduction harness kit be
installed. Refer to the product installation manual for information regarding connecting this signal to
the washer to activate discounts.
External Signal and Promotional Firmware Setup
1. Navigate to Register 79 (Promotion %% for discount input signal) as explained in the Service
Mode section.
2. Press START the promotion percentage discount will be displayed as two digits (%%).The
discount can range from “00” = 0% to “A0” = 100% (e.g. Free Wash). Edit this number using the
HOT and DELICATE buttons. Note, pressing the HOT button ten times will cycle the value to
“A0”.
3. Press START, this will save the changes and exit register 79.
4. Exit Service Mode.
When the external signal is activated, the washer will apply a promotion percentage discount, set in
register 79, to the displayed vend price.
Please contact Laundrylux’s Technical Support team at (516) 371-0700 if you have any questions or
need assistance with price programming or implementing discount price programming.
Fault Codes
4.1
Fault Codes
If power to the machine is accidentally cut, the
machine will restart automatically when power is
restored. The machine will resume the program it
was running at the point the power was cut.
Faults/errors in the program or machine are
indicated by a numerical error code on the panel
display.
Some error codes are cleared automatically when
the Start button is pressed to restart the machine
and some when the door is opened.
For the other error codes, a service technician must be called.
Fig.
1
1
Error Code Cause/Action
Er1A Door fails to lock on wash program start.
Er1b Doorlock error during wash program.
Er1C Door fails to unlock at the end of wash program.
Er1d Door switch opened during wash program. Make sure machine was not
overloaded.
Er1E INTERLOCK circuit failure (inverter).
Err2 Drain error. Water is not emptied in 10 minutes. Check pump strainer for
clog.
Err5 Water level not reached within 8 minutes. Check water inlet screens for
debris or clog.
Er7A Motor overheat.
Er7b No Tachometer signal. Motor harness disconnected.
Err8 Water Level above parameter set for safety during a wash program.
Pump activates automatically.
Er10 Water level sensor error.
EuAr Communication error between display and power modules.
Unb Load cannot be balanced during extraction. Open door and manually
rebalance clothes and press Start within two minutes.

5:1
Operating Mode
The washer is capable of accepting payment using coins or tokens in COIN MODE or using
payment cards in CARD MODE (serial). Setting the machine to COIN MODE and setting all
wash program and option prices to “0.00” will allow the machine to operate for free in OPL
mode.
COIN OR SERIAL MODE CONFIGURATION
1. In Metered machines unlock and remove the coin box. Press and release the Service
Switch located in the rear of the coin vault to enter service mode. In Non-Metered
machines the Service Switch is located behind the front console locking plate.
2. The display will go blank.
3. Press the “HEAVY SOIL” and “EXTRA RINSE” buttons simultaneously. This display
shows “0 00” if the machine is in COIN MODE or “1 00” if the machine is in CARD
MODE.
4. Press the START button. The display ashes.
5. Press the COLD program button to change the operating mode. The left-most digit
changes 0 → 1 or 1 → 0, indicating the new mode (0 = COIN=default, 1 = CARD).
6. Press the START button. The display stops ashing.
7. Press the service mode button to exit the service mode.
8. Disconnect and reconnect power.

6:1
The machine’s software provides a “Service Mode” (SM) to adjust operating parameters
and view usage statistics. The service mode also allows a technician to activate individual
components of the machine, for troubleshooting. The software also provides a “Limited Service
Mode” (LSM) that allows a technician to activate machine components, via PIN entry, without
having access to the coin vault service switch. If desired on machine setup, LSM via PIN entry
can be disabled or allowed to have full SM functionality without requiring access to the coin vault.
To activate Service Mode for machines with coin meters:
1. Remove the coin box.
2. Press and release the SERVICE MODE plunger switch at the rear of the coin vault. The
screen will display “8888”.
3. Press the START button. “SE” appears in the display.
4. Use the HEAVY SOIL & EXTRA RINSE buttons to navigate to the desired register.
5. Press START to access the register or activate the function.
6. Use HEAVY SOIL & EXTRA RINSE to change values, as appropriate. Some registers
require using the COLD, WARM, and HOT, DELICATE buttons to edit settings.
7. Press START to save new values, as appropriate.
8. Press the SERVICE MODE switch to exit. SM exits automatically after 60 seconds of
inactivity with all service functions off.
For Non Metered machines, the SERVICE MODE plunger switch is located behind the front
console locking plate.
To activate Limited Service Mode:
1. Press and hold COLD, DELICATE, and START buttons for three seconds.
2. Use the program buttons to enter the PIN code (default is “1234”).
3. Press START. The display shows “011” (the rst register available in LSM).
4. Use the HEAVY SOIL & EXTRA RINSE buttons to navigate to the desired register.
5. Press START to access the register or activate the function.
6. Use HEAVY SOIL & EXTRA RINSE to change values, as appropriate.
7. Press START to save new values, as appropriate.
8. LSM exits automatically after 60 seconds of inactivity with all service functions off.
Service Mode Register Groups:
00-19 Statistics: These are non-resetable auditing counters and log registers for tracking
machine usage, the four latest errors, and the four latest coinbox opening time stamps.
20-39 Wash Program Parameters: These registers are used to adjust water levels and program
structure.
40-59 Activate Machine Functions: In this group, the register address appears in the rst two
digits of the display, and the current setting appears in the right digit (“0” = deactivated, “1” =
activated). Press the START button to toggle the state.
70-79 Real Time Clock, calendar, and time-of-day discount promotion setup: These registers set
up the internal clock, calendar, and promotion pricing.
Service Mode

Service Mode
6:2
STATISTICS (NON-RESETTABLE):
000 - Cold program counter. Range: 0000 to F999, (A=10, ... F=15 e.g. “B101” = 11,101)
001 - Warm program counter. Range: 0000 to F999
002 - Hot program counter. Range: 0000 to F999
003 - Delicate program counter. Range: 0000 to F999
004 - Rinse and Spin program counter. Range 0000 to F999
005 - Heavy soil option (only) counter. Range: 0000 to F999
006 - Extra rinse option (only) counter. Range: 0000 to F999
007 - Heavy Soil & Extra Rinse counter both options selected Range: 0000 to F999
008 - Total program counter i.e. 00+01+02+03+04 . Range from 0000 to F999
009 - Coin totalizer - rst 4 digits, from 0000 to 9999
010 - Coin totalizer - last 4 digits, from 00.00 - 99.99
*011 - Newest error and time stamp. “011”>E ##>yyyy>mm.dd>hh.mm>(reg 8)>”010”
*012 - 2nd latest error and time stamp.
*013 - 3rd latest error and time stamp.
*014 - Oldest error and time stamp. “014”>E ##>yyyy>mm.dd>hh.mm>(reg 8)>”010”
015 - Coin box access 1 time stamp: (Most recent access)
016 - Coin box access 2 time stamp:
017 - Coin box access 3 time stamp:
018 - Coin box access 4 time stamp: (Oldest access).
*019 - Firmware version.
Statistics (000-010): Program and option counts are updated when the cycle ends. When in coin
mode (decimal in price), registers 009-010 shows the value of the amount collected. When in no-
decimal mode (token), 009-010 shows the number of coins collected. When both program options
have been selected for a program, register 007 is incremented but not registers 005 and 006.
Error Codes (011-014): Selecting an error register displays the error code. Each successive press
of the START button (>) advances the display: Year > Month.Day > Hour.Minutes > Total Program
Count > Register Exit. As new errors occur, they are saved in register 011 and the older records
shift up by one register location. The original contents of register 014 are discarded.
Coin Box Access (015-018): Each successive press of the START button (>) advances the display:
Year > Month.Day> Hour.Minutes> Register Exit. With each opening of the coin box, the register
time stamps are saved in register 015 and the older records shift up by one register location. The
original contents of register 018 are discarded.
Wash Program Parameters:
020 - Low water level (prewash & wash): range 5-32 (Approximate volume in liters, default = 07”).
021 - High water level (rinse): range 5-32 (Approximate volume in liters, default = 10”).
022 - Delete rinse 2: range “00” or “01”, default=“01” (rinse 2 deleted).
023 - Delete prewash: range “00” or “01”, default=“01” (prewash deleted).
024 - Default program selection:
00= No cycle selected (display “----“). Enables RINSE&SPIN program selection.
01= COLD cycle is default (This is the factory default)
02= WARM cycle is default
03= HOT cycle is default
04= DELICATE cycle is default.

Service Mode
6:3
025 - Mainwash time: from 0-999 seconds, default=”360”, i.e. six minutes.
026 - Decimal in price: “00”= default=decimal displayed, ”01”= no decimal (token).
027 - Silence buzzer: Range: “00”=default=enabled, “01” = disabled.
028 - Regret Time: The allowable time, after program start, that a user can change the wash
program/options or add items to the wash. 0000-9999 seconds. “0000” = disabled,
Default = 030. “9999” = unrestricted.
Press the START button, to pause the cycle and unlock door. If the new program/option
selection has a higher vend value, the user will be prompted to insert additional payment.
Upon pressing the start button with the door closed, the door will relock and the cycle
resumes.
030 - COLD cycle maximum nal extract speed RPM: (“0700” or “1000”=default)
031 - WARM cycle maximum nal extract speed RPM: (“0700” or “1000”=default)
032 - HOT cycle maximum nal extract speed RPM: (“0700” or “1000”=default)
033 - Coin value 1: “0000-9999”, default = ”0025”
034 - Coin value 2: “0000-9999”, default = ”0100”
035 - Limited Service Mode PIN setting: Default = “1234”. (“0000” disables LSM).
036 - Full Service Mode via PIN entry setting: Default = ’0000” (Disabled).
037 - Network address: “0000 - 9999”, “0000”= default
Activate Machine Functions (door closed):
*040 - Door lock.
*041 - Cold water - detergent compartment (Y11).
*042 - Warm water - detergent compartment (Y11 + Y13).
*043 - Hot water - detergent compartment (Y13).
*044 - Cold water - bleach compartment (Y21).
*045 - Cold water, softener compartment (Y11 + Y21).
*046 - Drain pump.
*047 - Drum clockwise wash rotation, 50 RPM.
*048 - Drum counter-clockwise wash rotation, 50 RPM.
*049 - Drum clockwise distribution rotation, 95 RPM.
*050 - Drum counter-clockwise distribution rotation, 95 RPM.
*051 - Drum 400 RPM.
*052 - Drum 600 RPM.
*053 - Drum 1000 RPM.
*054 - Display test.

Service Mode
6:4
*055 - Buzzer test.
*056 - Detergent pump trigger signal.
*057 - Bleach pump trigger signal.
*058 - Softener pump trigger signal.
*059 - Coin meter test, each dropped coin adds 1 to displayed total. Registers 009 and 010
unaffected.
Real Time Clock (RTC), Calendar and Time-of-day Discount Promotion.
070 - RTC set-up: 24hr format, “070”>yyyy>mm.dd>hh.mm>”070”. During set up, the RTC is
stopped. When the “START” button is pressed to save hh.mm and exit register 70, the
seconds digits of the RTC is set to “00” without affecting the hours and minutes values,
and the RTC re-started.
071 - RTC promotion 1 START: “071”>D>hh.mm>%%>”071”
072 - RTC promotion 1 END: “072”>hh.mm>”072”
073 - RTC promotion 2 START “073”>D>hh.mm>%%>”073”
074 - RTC promotion 2 END “074”>hh.mm>”074”
075 - RTC promotion 3 START “075”>D>hh.mm>%%>”075”
076 - RTC promotion 3 END “076”>hh.mm>”076”
077 - RTC promotion 4 START “077”>D>hh.mm>%%>”077”
078 - RTC promotion 4 END “078”>hh.mm>”078”
079 - Promotion %% for discount input signal (range “00”-”A0”, default=”00”, “A0” = 100%)
Select a value identifying the day(s) “D” for which the promotion will be active, as follows:
➣ 00=promotion is inactive.
➣ 01=Sunday, 02=Monday, ...07=Saturday.
➣ 08=All days, 09=Monday-Friday only, 0A=Saturday and Sunday only.
Use COLD, WARM, HOT, & DELICATE to edit “yyyy”, “mm.dd”, & “hr.min” values. Press START
to advance to the next entry within the register.
Use HOT and DELICATE to edit the discount percentage “%%”. If percentage = 90-99 pressing
DELICATE will set the percentage to “A0” = 100%.
Note:
* = Registers can be accessed in Limited Service Mode.
Resetting the display controller will restore all applicable rmware settings to factory default. The
machine will be set to COIN MODE with all wash program and option prices = 0.00.
Preventive Maintenance
7:1
To keep your machine in proper working order, follow the preventive maintenance
recommendations provided below.
The maintenance interval should be adjusted according to machine usage.
Leave the loading door open when the machine is not in use.
Daily
• Check the door and door lock:
- Open the door and try starting the machine. The machine MUST NOT START.
- Close the door, start the machine and try opening the door using reasonable
force. IT MUST NOT BE POSSIBLE TO OPEN THE DOOR WHILE THE
MACHINE IS OPERATING!
- Check that the door does not leak.
- Clean the door seal, removing any detergent and lint.
• Check that there are no indications of leaks behind or around the machine.
• Clean out any residue remaining in the detergent dispenser.
• Use a soft wash cloth and mild detergent to clean door and plastic panels.
• Inspect liquid chemical tubing and connections for leaks. Repair as necessary.
Every Third Month (refer this service to qualied personnel)
• Check the drain pump strainer and remove any accumulated lint and debris.
• Inspect the interior of the machine (during an actual wash cycle to ensure that no
leaks are noticed) by:
- Turning off the main power switch of the machine.
- Remove the top panel.
- Start a wash program.
- KEEP CLEAR OF MOVING PARTS WHILE MACHINE IS OPERATING!!
- Inspect all internal hoses, seals and gaskets for signs of leakage.
Repair as necessary.
- Stop the machine and disconnect the power. Turn off the water supply and check
that the water inlet screens are clear of debris. Dirty screens result in longer ll
times, reducing productivity.
- Inspect the drive belt. Adjust the tension or replace as necessary.
- Check that there are no signs of leakage on the oor beneath the machine. Locate
and repair any leak.
Contact your local dealer, or Laundrylux Technical Support at (516) 371-0700 if you
have questions regarding installation, operation, or maintenance of your machine.
To be carried out by
qualied personnel.

8.1
Wash Programs
Agitation 12 sec on / 3 sec off
COLD
PROGRAM NO OPTION
HEAVY
SOIL
EXTRA
RINSE
HEAVY SOIL
EXTRA RINSE
PreRinse - - - 2 min C low - - - 2 min C low
Drain - - - Y - - - Y
Prewash 3 min C low 3 min C low 3 min C low 3 min C low
Drain Y Y Y Y
Mainwash 6 min C low 6 min C low 6 min C low 6 min C low
Drain Y Y Y Y
Rinse 1 1 min C high 1 min C high 1 min C high 1 min C high
Drain Y Y Y Y
Spin 30 sec / 400RPM 30 sec / 400RPM 30 sec / 400RPM 30 sec / 400RPM
Rinse 2 1 min C high 1 min C high 1 min C high 1 min C high
Drain Y Y Y Y
Spin 30 sec / 400RPM 30 sec / 400RPM 30 sec / 400RPM 30 sec / 400RPM
Rinse 3 - - - - - - 1 min C high 1 min C high
Drain - - - - - - Y Y
Spin 30 sec / 400RPM 30 sec / 400RPM 30 sec / 400RPM 30 sec / 400RPM
Rinse Soft 2 min C high 2 min C high 2 min C high 2 min C high
Drain Y Y Y Y
Spin 6 min 6 min 6 min 6 min
COLD
NOTES:
All segment times are measured from completion of ll.
C = COLD valve open
H = HOT valve open
CH = COLD and HOT valves open
low = LOW level
high = HIGH level
Y = Yes

8.2
Wash Programs
Agitation 12 sec on / 3 sec off
WARM
PROGRAM NO OPTION
HEAVY
SOIL
EXTRA
RINSE
HEAVY SOIL
EXTRA RINSE
PreRinse - - - 2 min CH low - - - 2 min CH low
Drain - - - Y - - - Y
Prewash 3 min CH low 3 min CH low 3 min CH low 3 min CH low
Drain Y Y Y Y
Mainwash 6 min CH low 6 min CH low 6 min CH low 6 min CH low
Drain Y Y Y Y
Rinse 1 1 min C high 1 min C high 1 min C high 1 min C high
Drain Y Y Y Y
Spin 30 sec / 400RPM 30 sec / 400RPM 30 sec / 400RPM 30 sec / 400RPM
Rinse 2 1 min C high 1 min C high 1 min C high 1 min C high
Drain Y Y Y Y
Spin 30 sec / 400RPM 30 sec / 400RPM 30 sec / 400RPM 30 sec / 400RPM
Rinse 3 - - - - - - 1 min C high 1 min C high
Drain - - - - - - Y Y
Spin 30 sec / 400RPM 30 sec / 400RPM 30 sec / 400RPM 30 sec / 400RPM
Rinse Soft 2 min C high 2 min C high 2 min C high 2 min C high
Drain Y Y Y Y
Spin 6 min 6 min 6 min 6 min
WARM
NOTES:
All segment times are measured from completion of ll.
C = COLD valve open
H = HOT valve open
CH = COLD and HOT valves open
low = LOW level
high = HIGH level
Y = Yes

8.3
Wash Programs
Agitation 12 sec on / 3 sec off
HOT
PROGRAM NO OPTION
HEAVY
SOIL
EXTRA
RINSE
HEAVY SOIL
EXTRA RINSE
PreRinse - - - 2 min CH low - - - 2 min CH low
Drain - - - Y - - - Y
Prewash 3 min CH low 3 min CH low 3 min CH low 3 min CH low
Drain Y Y Y Y
Mainwash 6 min H low 6 min H low 6 min H low 6 min H low
Drain Y Y Y Y
Rinse 1 1 min CH high 1 min CH high 1 min CH high 1 min CH high
Drain Y Y Y Y
Spin 30 sec / 400RPM 30 sec / 400RPM 30 sec / 400RPM 30 sec / 400RPM
Rinse 2 1 min C high 1 min C high 1 min C high 1 min C high
Drain Y Y Y Y
Spin 30 sec / 400RPM 30 sec / 400RPM 30 sec / 400RPM 30 sec / 400RPM
Rinse 3 - - - - - - 1 min C high 1 min C high
Drain - - - - - - Y Y
Spin 30 sec / 400RPM 30 sec / 400RPM 30 sec / 400RPM 30 sec / 400RPM
Rinse Soft 2 min C high 2 min C high 2 min C high 2 min C high
Drain Y Y Y Y
Spin 6 min 6 min 6 min 6 min
HOT
NOTES:
All segment times are measured from completion of ll.
C = COLD valve open
H = HOT valve open
CH = COLD and HOT valves open
low = LOW level
high = HIGH level
Y = Yes

8.4
Wash Programs
Agitation 4 sec on / 12 sec off
DELICATE
PROGRAM NO OPTION
HEAVY
SOIL
EXTRA
RINSE
HEAVY SOIL
EXTRA RINSE
PreRinse - - - Not
Available
(DOUBLE
BEEP)
Not
Available
(DOUBLE
BEEP)
Not
Available
(DOUBLE
BEEP)
Drain - - -
Prewash - - -
Drain - - -
Mainwash 4 min C
Drain Y
Rinse 1 1 min C high
Drain Y
Spin 30 sec / 400RPM
Rinse 2 1 min C high
Drain Y
Spin 30 sec / 400RPM
Rinse 3 - - -
Drain - - -
Spin 30 sec / 400RPM
Rinse Soft 2 min C high
Drain Y
Spin 2 min
DELICATE
NOTES:
All segment times are measured from completion of ll.
C = COLD valve open
H = HOT valve open
CH = COLD and HOT valves open
low = LOW level
high = HIGH level
Y = Yes

8.5
Wash Programs
Agitation 12 sec on / 3 sec off
RINSE AND SPIN*
PROGRAM NO OPTION
HEAVY
SOIL
EXTRA
RINSE
HEAVY SOIL
EXTRA RINSE
PreRinse - - -
Drain - - -
Prewash - - -
Drain - - -
Mainwash - - -
Drain - - -
Rinse 1 4 min C
Drain Y
Spin - - -
Rinse 2 - - -
Drain - - -
Spin - - -
Rinse 3 - - -
Drain - - -
Spin - - -
Rinse Soft - - -
Drain - - -
Spin 6 min
RINSE AND SPIN
NOTES:
*Register 24 = “00”, No wash programs selected.
All segment times are measured from completion of ll.
C = COLD valve open
H = HOT valve open
CH = COLD and HOT valves open
low = LOW level
high = HIGH level
Y = Yes

Sales and Administration: (516) 371-4400
Spare Parts: (516) 371-2000
Technical Support: (516) 371-0700
En Mexico: 001-800-010-1010
461 Doughty Blvd., Inwood, NY 11096
laundrylux.com