Loading ...
Loading ...
Loading ...
•Snipe is more apparent when deeper cuts are taken
•Feed work in direction of grain Work fed against
grain will have chipped, splintered edges
Planer will operate best if kept in good condition and
properly adjusted
CHECK FOR WORN BLADES
•Condition of blades will affect precision of cut
Observe quality of cut which planer produces to
check condition of blades
•Dull blades will tear, rather than sever wood fibers
and produce fuzzy appearance
•Raised grain will occur when dull blades pound on
wood that has varying density Raised edge will also
be produced where blades have been nicked
•Blades on this planer are reversible Blades should
always be reversed or replaced as matched set
Keeping a spare set of blades on hand is recom-
mended
CHANGING BLADES
Refer to Figures 10-13 pages 8 and 9
WARNING: Always turn planer OFF and disconnect
from power source before starting any maintenance
work
•Loosen and remove thumb screws from blade guard
on the rear side of planer Remove blade guard
Figure 10 - Remove Blade Guard
• Carefully turn cutterhead by hand towards you until it
is stopped by the self-engaging latch
•Loosen and remove six bolts from gib
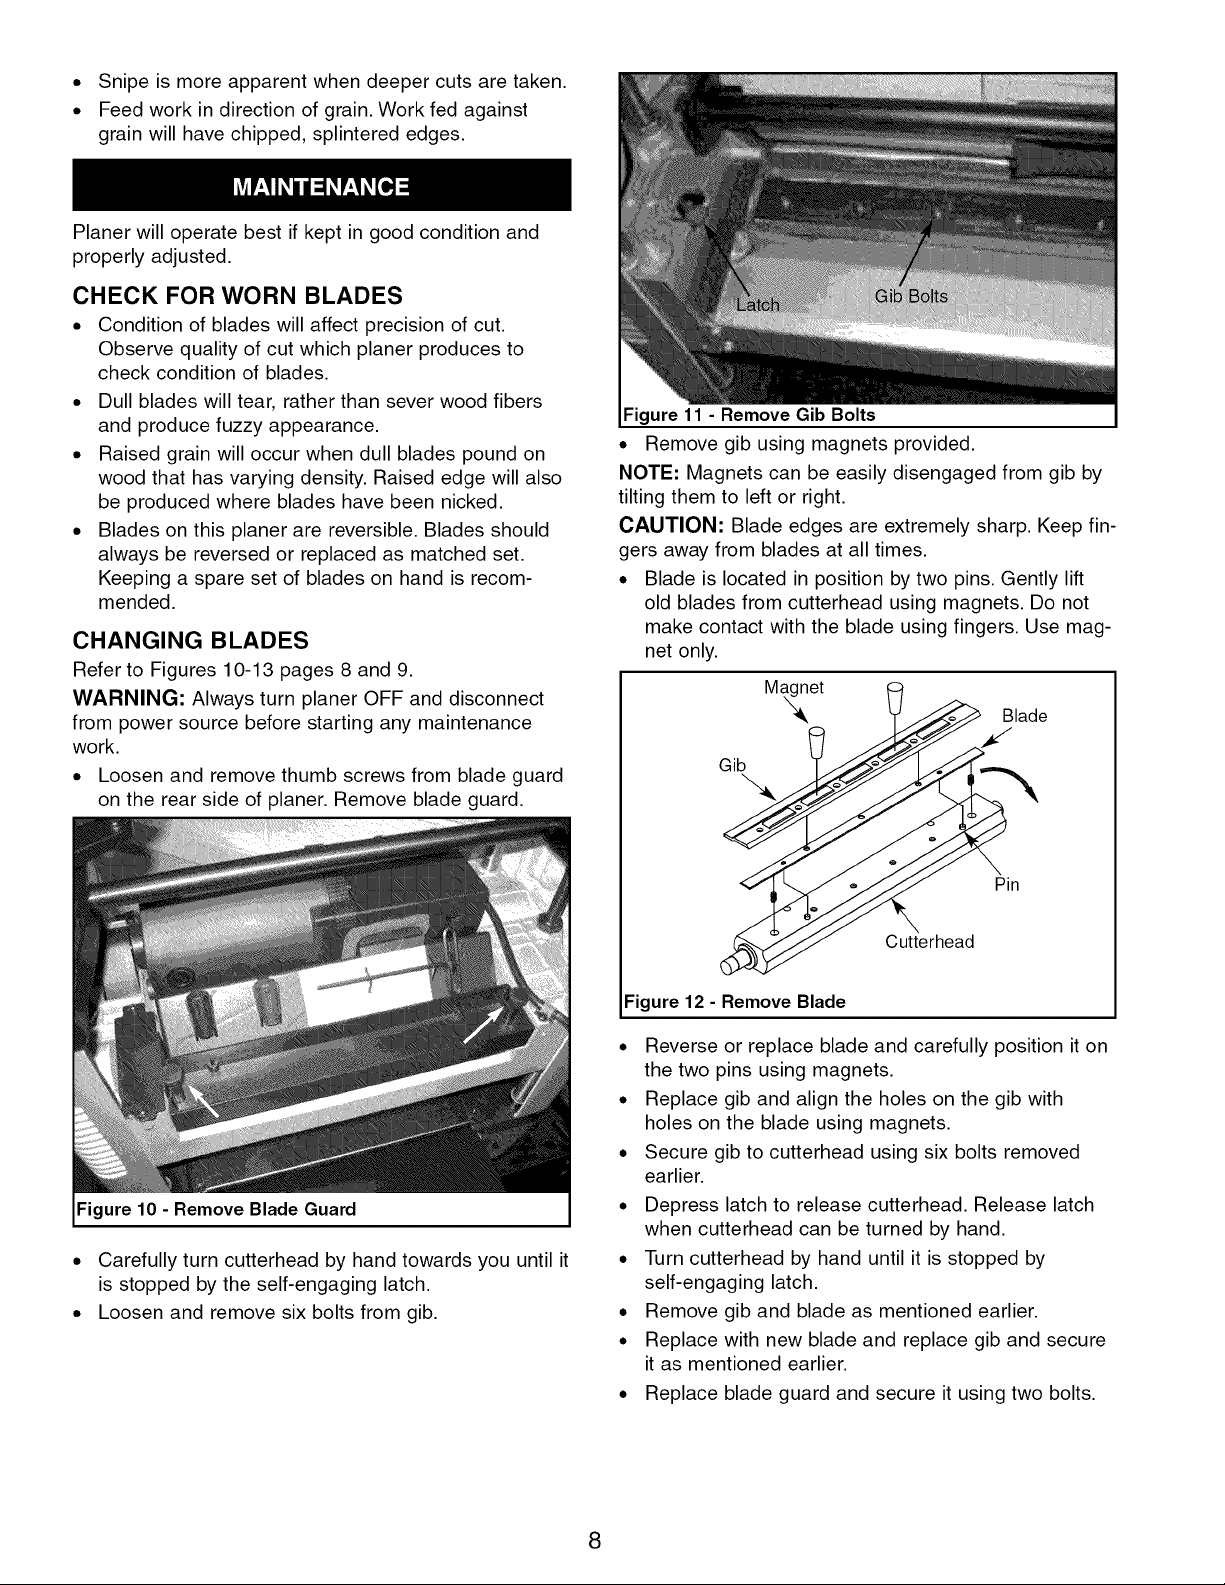
Figure 11 - Remove Gib Bolts
•Remove gib using magnets provided
NOTE: Magnets can be easily disengaged from gib by
tilting them to left or right
CAUTION: Blade edges are extremely sharp Keep fin-
gers away from blades at all times
•Blade is located in position by two pins Gently lift
old blades from cutterhead using magnets Do not
make contact with the blade using fingers Use mag-
net only
__ Blade
_rhead Pin
Figure 12 - Remove Blade
• Reverse or replace blade and carefully position it on
the two pins using magnets
• Replace gib and align the holes on the gib with
holes on the blade using magnets
• Secure gib to cutterhead using six bolts removed
earlier
• Depress latch to release cutterhead Release latch
when cutterhead can be turned by hand
• Turn cutterhead by hand until it is stopped by
self-engaging latch
• Remove gib and blade as mentioned earlier
• Replace with new blade and replace gib and secure
it as mentioned earlier
• Replace blade guard and secure it using two bolts
8
Loading ...
Loading ...
Loading ...