Loading ...
Loading ...
Loading ...
i##ii_izlii_#!i!i_iiiili!;!#i_i;#!i!iii!zlii!zlii!zi!i_i_!ii#:#_!_iiiiii_!i!ili!i
14 Setting for Best ResuRs
Upper over racks
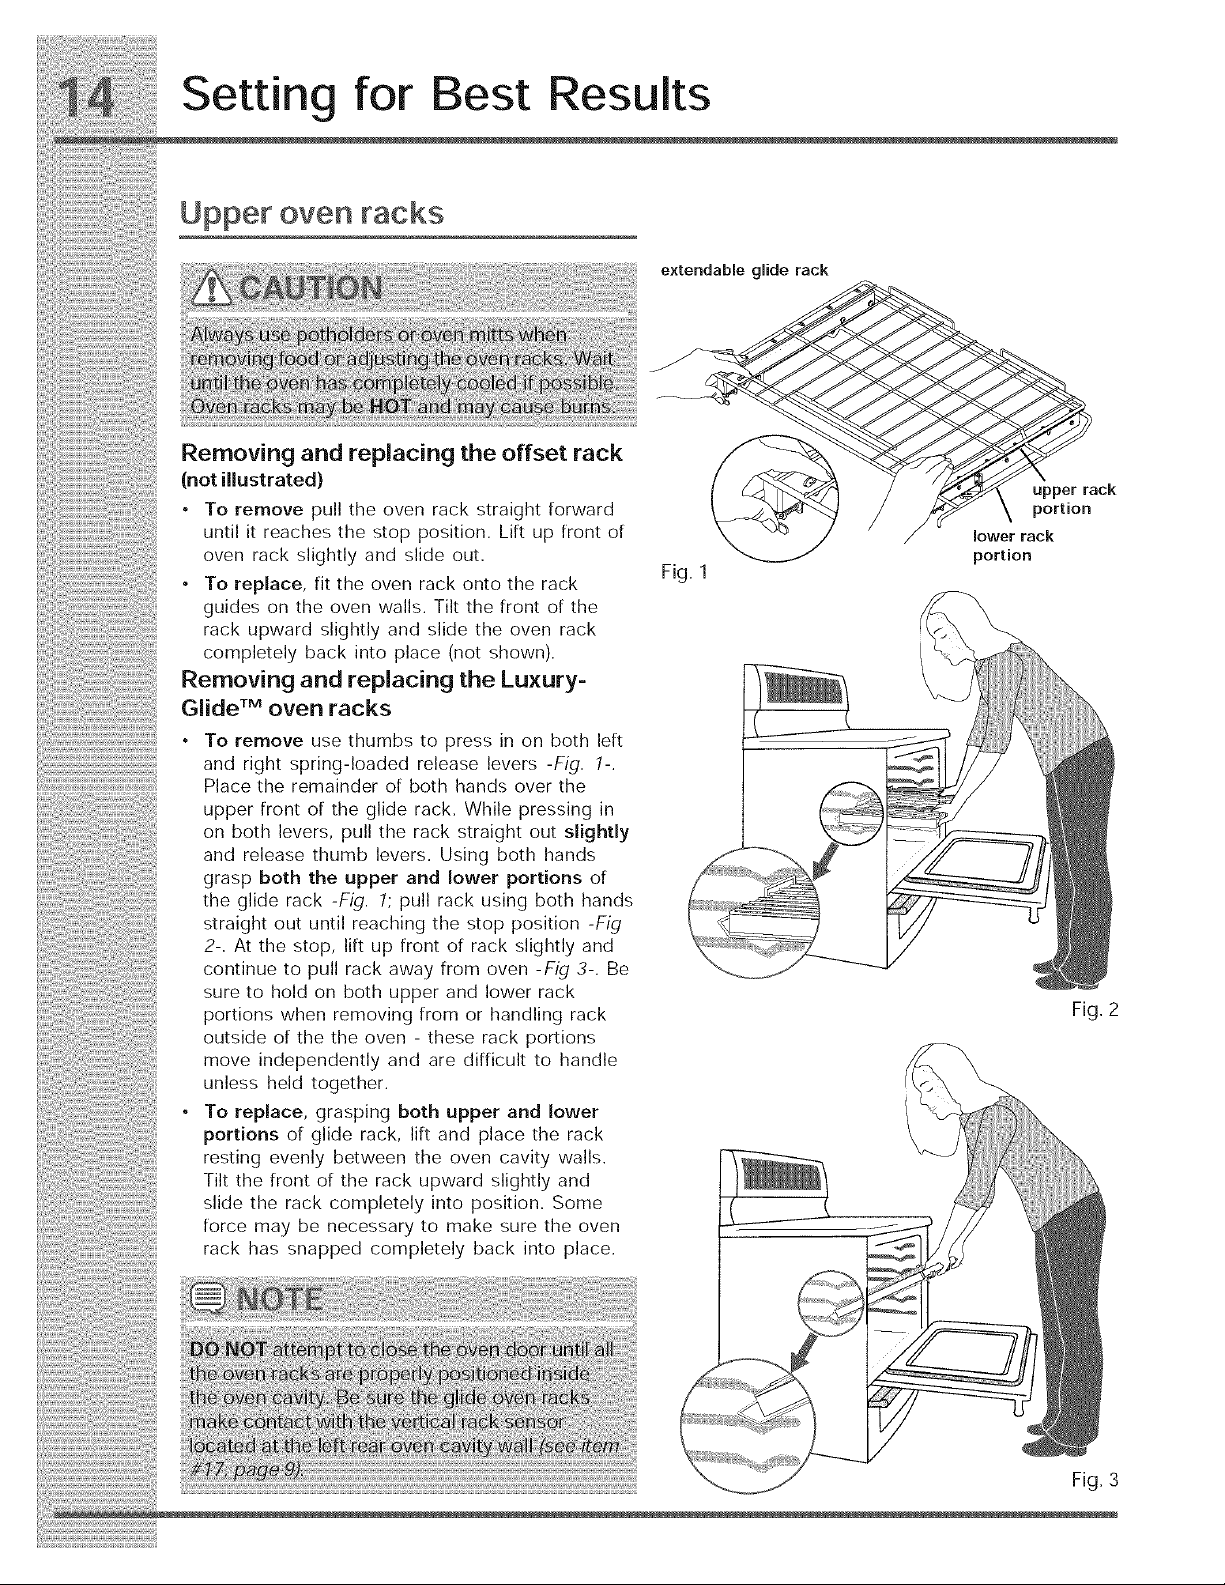
extendab e g de rack
0 J 0 re00 _[ te [_ , __
Removing and replacing the offset rack __
(not illustrated) "_ uXpperu-_err_rack
To remove pull the oven rack straight forward /_ \ portion
until it reaches the stop position. Lift up front of ° lower rack
oven rack slightly and slide out. portion
. F g 1
To repJace, fit the oven rack onto the rack
: ; guides on the oven walls. Tilt the front of the
rack upward slightly and slide the oven rack
::: : completely back into place (not shown).
Removing and replacing the Luxury-
Glide TM oven racks
• To remove use thumbs to press in on both left
...... and right spring-loaded release levers -Fig. 1-.
Place the remainder of both hands over the
upper front of the glide rack. While pressing in
on both levers, pull the rack straight out sJightly
and release thumb levers. Using both hands
grasp both the upper and lower portions of
the glide rack -Fig. 1; pull rack using both hands
straight out until reaching the stop position -Fig
2-. At the stop, lift up front of rack slightly and
continue to pull rack away from oven -Fig 3-. Be
sure to hold on both upper and lower rack
portions when removing from or handling rack Fig. 2
outside of the the oven - these rack portions
move independently and are difficult to handle
unless held together.
• To repJace, grasping both upper and lower
portions of glide rack, lift and place the rack
resting evenly between the oven cavity walls.
Tilt the front of the rack upward slightly and
slide the rack completely into position. Some
force may be necessary to make sure the oven
rack has snapped completely back into place.
Fig, 3
Loading ...
Loading ...
Loading ...