Loading ...
Loading ...
Loading ...
ADJUSTING THE WHEEL SUPPORT
BRACKET
Avoid accidental
WARNING: starting. Stop
motor
and disconnect
extension cord prior to adjusting the wheel
support bracket.
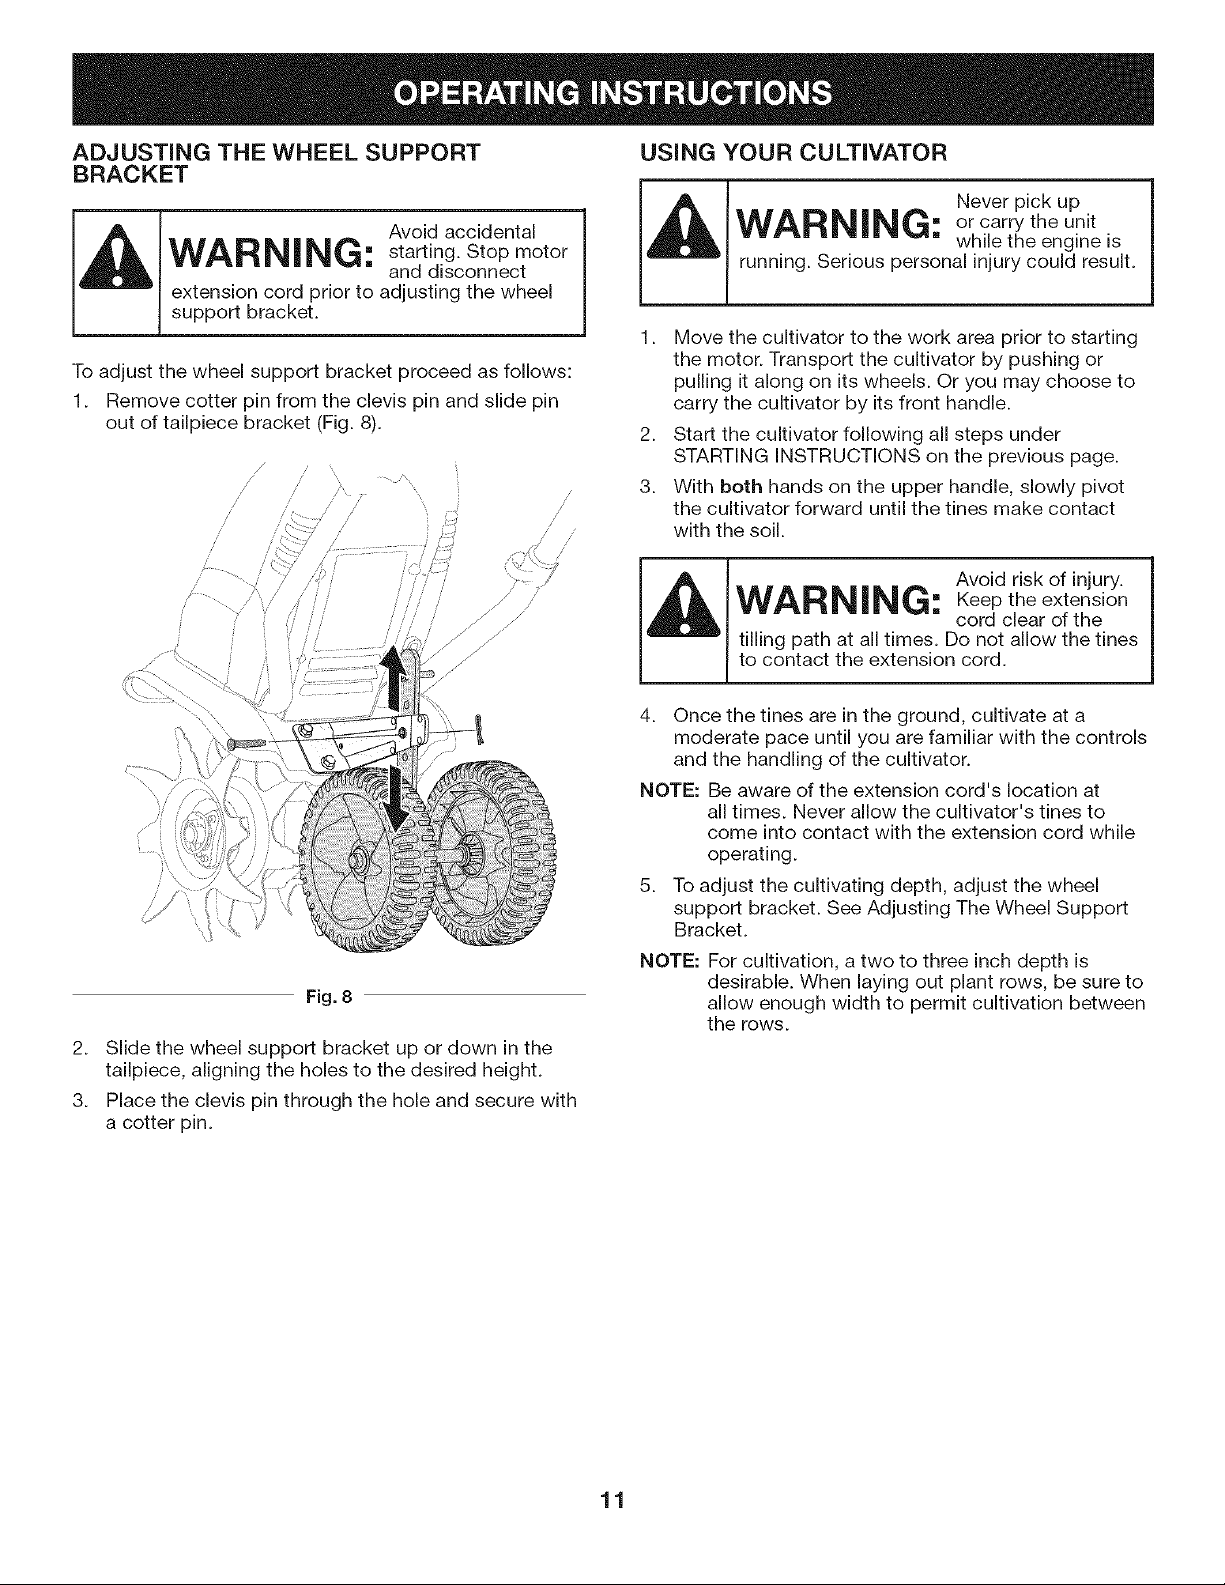
To adjust the wheel support bracket proceed as follows:
1. Remove cotter pin from the clevis pin and slide pin
out of tailpiece bracket (Fig. 8).
/
/
/
/
/
/
/
/
/
/
,J .....
/
J
/ /
,/ /
// /
,/ //
/
/
/
Fig. 8
2. Slide the wheel support bracket up or down in the
tailpiece, aligning the holes to the desired height.
3. Place the clevis pin through the hole and secure with
a cotter pin.
USING YOUR CULTIVATOR
Never pick up
WARNING: or carry the unit
while the engine is
running. Serious personal injury could result.
1. Move the cultivator to the work area prior to starting
the motor. Transport the cultivator by pushing or
pulling it along on its wheels. Or you may choose to
carry the cultivator by its front handle.
2. Start the cultivator following all steps under
STARTING INSTRUCTIONS on the previous page.
3. With both hands on the upper handle, slowly pivot
the cultivator forward until the tines make contact
with the soil.
Avoid risk of injury.
WARNING: Keep the extension
cord clear of the
tilling path at all times. Do not allow the tines
to contact the extension cord.
4. Once the tines are in the ground, cultivate at a
moderate pace until you are familiar with the controls
and the handling of the cultivator.
NOTE: Be aware of the extension cord's location at
all times. Never allow the cultivator's tines to
come into contact with the extension cord while
operating.
5. To adjust the cultivating depth, adjust the wheel
support bracket. See Adjusting The Wheel Support
Bracket.
NOTE: For cultivation, a two to three inch depth is
desirable. When laying out plant rows, be sure to
allow enough width to permit cultivation between
the rows.
11
Loading ...
Loading ...
Loading ...