_e° COrn
©
"0
0
Safety Instructions ......... 2-4
Opera6ng Instructions
Clock and Timer . ............ 8
Control I,ockout ............. 8
Controls .................... 5
Convection .............. 12-14
Oven .................... 6, 7
Probe .................. l 0, 14
Proofing ................... l l
Sabbath Feature ............. 22
Self-Cleaning Oven ....... 17, 18
Special Features .......... 19-21
Thermostat ................ 16
Timed Baking
and Roasting ............. 9, 15
Warming .................. l I
Care and Cleaning
Cleaning Oven Door ......... 24
Control Panel .............. 25
I,ift-Off Oven Door . ......... 24
I,ight Bull) ................. 23
Probe ..................... 24
Racks ..................... 25
Removing Packaging Tape .... 23
Stainless Steel Surfaces ....... 25
Troubleshooting Tips ..... 26-28
Consumer Support
Consumer Support .......... 34
Product Registration ...... 29, 30
_'arranty .................. 33
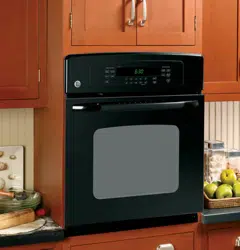
{t¢ l(5-2/ Stogie _'_fd{ Oven
PK956"27" Double Wag{ ()ver_
PT916- 30 "Sir_g'[e l'_d[ Over_
UF956-30" Doub[e l'_2d{ Ove_
Writethemodelandserial
numbershere:
Model #
Serial #
You can find theIn on a lal)el
on tile fl'ont of tile ()veil behind
tile ()veil door Oil single ()veil Illodels,
or tile fl'ont of tile h)wer ()veil behind
tile ()veil door on double ()veil Inodels.
49-88438 02°07Jfl
READALLINSTRUCFiON$BEFOBEU$1N&
WARNING!
For your safety;,the information in this manual must be followed to minimize the risk of fire or
explosion, electric shock, or to prevent property damage, personal injury, or loss of life.
IMPORTANTSAFETYNOTICE
The California Safe Drinking Water and ToxicEnforcement Act requires the Governor of California
to publish a list of substances known to the state to cause cancer, birth defects or other reproductive
harm, and requires businesses to warn customers ofpotential exposure to such substances.
The fiberglass insulation inself-clean ovens gives off a very small amount of carbon monoxide during
the cleaning cycle. Exposure can be minimized by venting with an open window or using a ventilation
fan or hood.
2
SAFETYPRECAUTIONS
When using electrical appliances, basic safety precautions should be followed, including the
foliowing:
Use this appliance only fbr its irrtended
purpose as described ira this )wner s
Manual.
Be sure _ur appliance is properly
irrstalled and grounded by a qualified
mchnician in accordance wiflr the
provided irrsta]lafion irrsuucfions.
Do not attempt to repair or replace arty
part of your oxen unless it is specifically
recommended in this marmal. All other
servicing should be refened to a qualified
mchnician.
Have tire irrstaller show you the location
of the cixvuit breaker or flrse. Mark it fox
easy' reference.
Before performing any service, disconnect
the oxen power supply at the household
distribution panel by xemoving the flxse or
sx_,itching off rixe circuit breaken
Do not leax_ children alone---x'hildren
should not be left alone or unattended ira
an area where an appliance is in use. They
should never be allowed to sit or stand on
arwpart of the appliance.
Do not allow anyone to climb, stand or
hang on the doox: They could damag> the
oven, or cause sex,re persona] ir_m-y.
Be sure dre oven is securely installed in
a cabinet flrat is firmly attached to fire
house structure. Nexer allow arryone to
climb, sit, stand or hang on the ox>n door
Ne_er leave dre o_en door open when you
are not watching the o_n.
Always kee I) combustible wall cox_ring,
curtains or drapes a safe distance flom
yo/xr o\_Ir,
Alwws kee I) dish towels, dishcloths, pot
holders arrd other linens a sad distance
fl'OIll VOHI" OX_Ir.
Always kee I) wooden arrd plastic umnsils
arrd canned food a safe distance away
flom your oxen.
Teach children not m pl W with the
cormols or arty other part of rixe oxen.
i,arge scratches or impacts m glass doors
can lead to broken or shatmxed glass.
Do not store flammable mamfials in
air o\_Ir,
CAUTION:Items of irrtexest to
children should not be stored in cabinets
above an oven; children climbing on flxe
oven to reach items could be seriously
injinxed.
ge.com
AWARNING!
SAFETYPRECAUTIONS
Never wear loose-fitting or hanging
garments while using file appliance. Be
careflll when reaching for ire.ms stored in
cabinets over file ox.en. Flamnlal)le mamrial
could be ignimd if brought in contact wifl/
hot surfaces or heating elements and mac
cause sex.ere bnTlls.
Use only dUpot llolders--moist or damp
pot holders on hot snil_aces IllW I.esult in
bums fiom steam. Do not let pot holders
touch hot heating elements. Do not use a
towel or oilier bulkv cloth.
For your safew, nex.er use your appliance
for wanning or heaung tile room.
Do not let cooking grease or other
flamnlable mamrials accumulam in or
near the oven.
Do not use wamr on grease fires.
Never pick/l I) a flaming pan. Turn tile
controls off'.
Flame in tile oven can be smothered
completely by closing tile oven door
and ulming the oven off or by using a
mnld-pnrpose dUchemical or tbam-type
fire extinguisher
Do not touch tile heating elements or tile
inmrior surPace of tile oven. These surl_aces
may be hot enong]l to bnFn ex.en though
they are dark in colon During and after
use, do not milch, or let clodling or od/er
flammable mamrials contact any inmrior
aI.ea of tile ox.en; allow sufficient time tbr
cooling first.
Pomnfially hot snil_ces include ox.en
x.ent openinKs, surfaces near tile openinKs,
crevices around tile ox.en dooi, file edg.es
of file window and metal u-ira parts above
tile door.
REMEMBER:The inside surPace of the ox.en
may be hot when die door is opened.
Never place cooking umnsils or aW odler
imms on the oven floon There is a heating
element beneafll die ox.en floon Placing
imms on tile ox.en floor may cause tile
ox.en to ox.erheat, resnlfing in damag.e
to tile oven and risk of damag.e or fii.e
m cabinets.
Nex.er lem.ejars or cans of l_atdiippings in
or Ileal VOHY ox.en,
Do not store or use combustible mamrials,
gasoline or other flammable vapors and
liquids in the vicinity of this or anv other
appliance.
Stand away from tile ox.en when opening
file ox.en door. Hot air or steam which
escapes can cause bums to hands, face
and/or eyes.
Do not heat unopened food containers.
Pressure could build/l I) and file container
could burst, causing an irljury.
Kee I) file oven x.ent unobstructed.
Kee I) tile ox.en free from grease buildup.
Place the ox.en rack in die desired position
while tile oven is cool. If racks must be
handled when hot, do not let pot holder
contact tile heating elements.
When using cooking or roasdng bags in die
ox.en, follow tile manui_tcturer's directions.
Pulling out die rack to die stop-lock is a
com.enience in lifting heaxy %ods. It is also
a pi.ecaufion against bums flom touching
hot surfaces of tile door or ox.en walls.
Do not use tile oven to di y newspapers.
If overheamd, d/ev can catch on fire.
Do not use the ox.en for a storag'e area.
Imms stored in an ox.en can ignim.
Do not leave paper products, cooking
utensils or food in tile ox.en when not
in rise.
After broiling, always take any broiler
pan out of the ox.en and clean it. Leftox.er
grease in a broiler pan can catch fire next
time you use tile pan.
Clean only parts lismd in this Owner's
Manual.
Do not use alun/inunl foil to line
oven bottoms, except as sugg'esmd in this
nlanual. Improper installation of alunlinun/
foil in W resuh in a risk of elecu-ic shock
or fire.
,3

IMPORTANTSAFETYINFORMATION.
READALLINSTRUCTIONSBEFOREUSING.
COOKMEATANDPOULTRYTHOROUGHLY,..
Cookmeatandpou/trythoro®h/y_-meat to at/east aniNTERNALtemperatureof 180°Fandpou/try
toat/east an iNTERNALtemperatureof 180_ Cookbg to thesetemperaturesusua/lyprotectsagainst
feodbornei/bess,
SELF-CLEANINGOVEN
iiiiiiiiiiii_iii
Do not clean the door g'asket. The door
gasket is essential %r a good seal. Care
should be token not to rub, damag_ or
mow the gasket.
Do not use oven cleaners. No commercial
oxen cleaner or oven liner promctive
coating of any kind should be used in or
around any part of the oven. Residue flom
oxen cleaners will damage the inside of the
oxen when the self-clean cycle is used.
Before self-cleaning the oxen, remove the
probe and any broiler pan, grid and other
cookwa re.
Be sure to wipe up excess spillage before
starting the selt¥leaning operation.
If the self-cleaning mode malflmcfions,
turn tim oxen off and disconnect file power
supply. Have it serviced by a qualified
technician.
READANDFOLLOWTHISSAFETYINFORMATIONCAREFULLY.
SAVETHESEINSTRUCTIONS
4
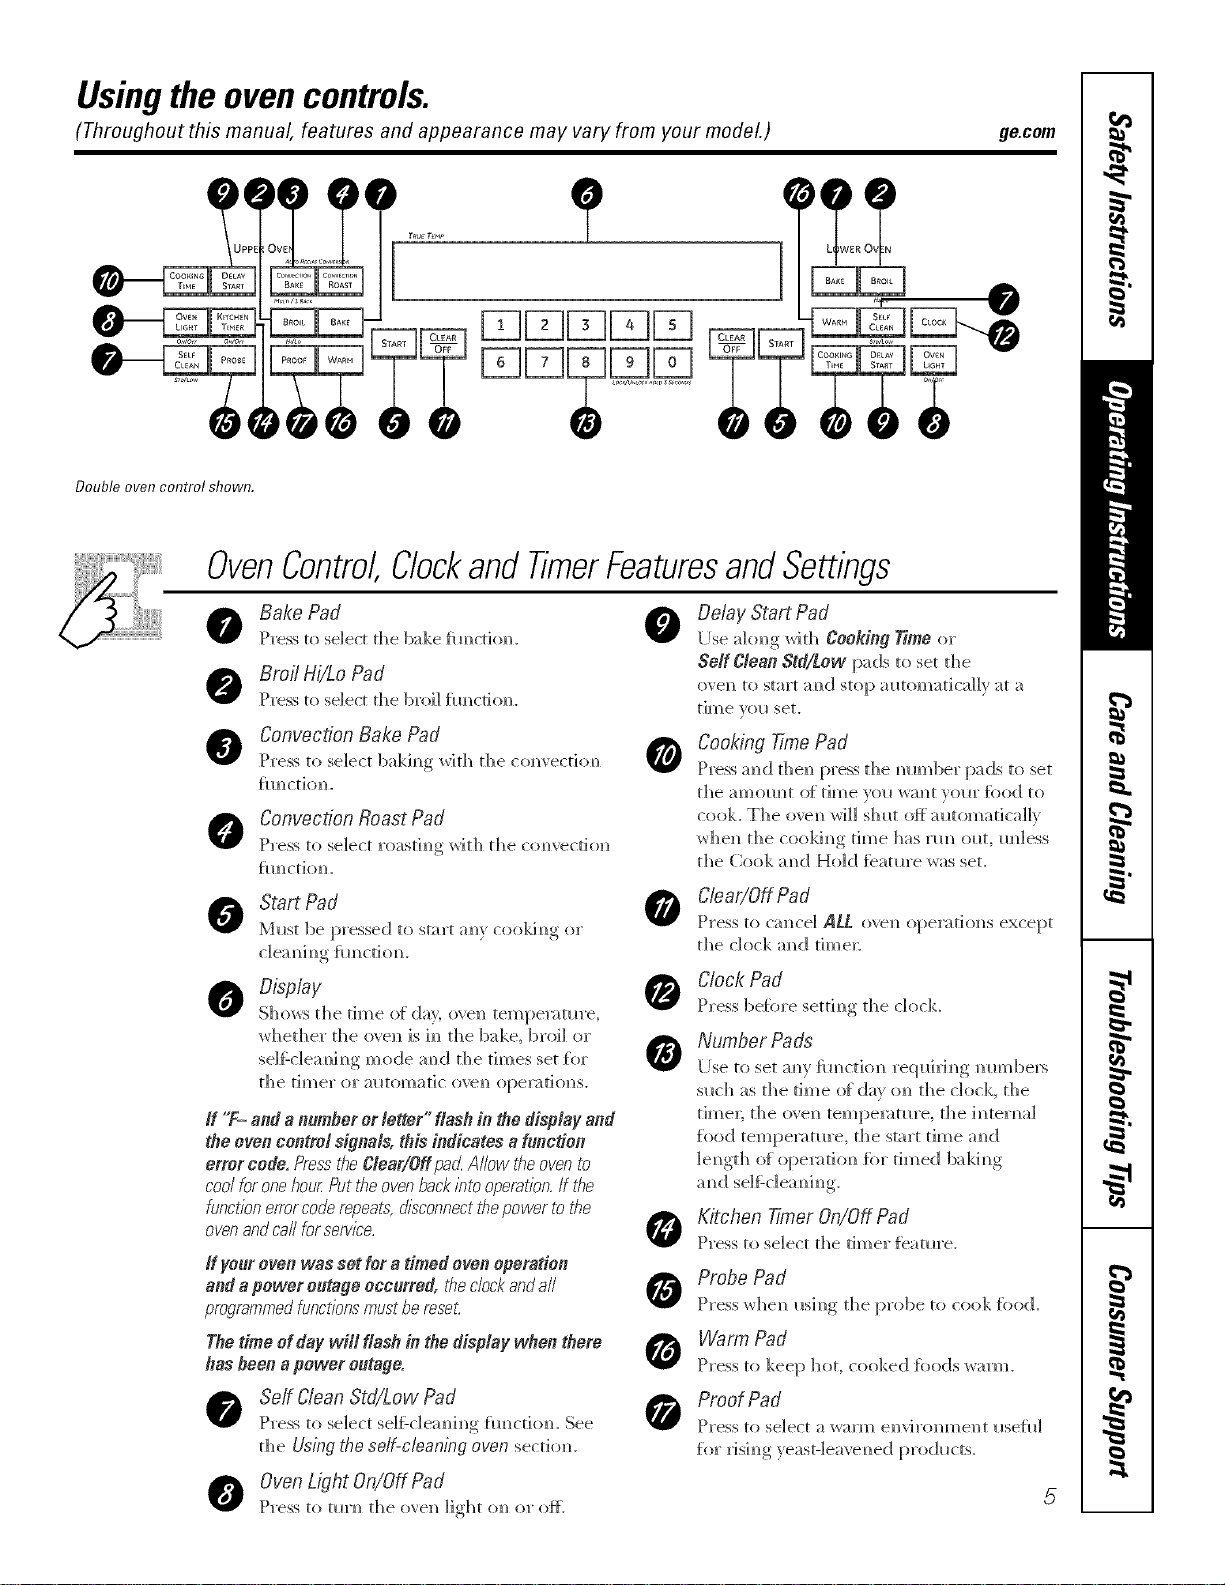
Usingthe ovencontrols.
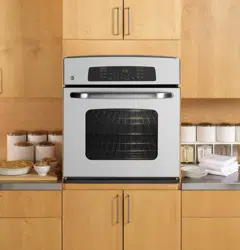
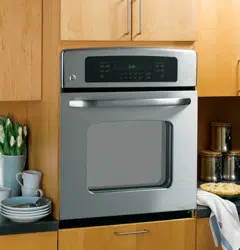
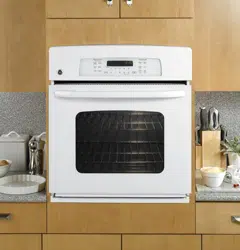
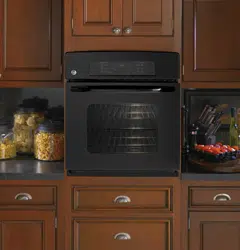
(Throughout this manual, features and appearance may vary from your modeL) ge.com
0
Double oven control shown.
OvenControl Clockand TimerFeaturesandSettings
Bake Pad
Press to select the bake flmctiomL
Broil Hi/Lo Pad
Press to select the broil fimcdc, m
Convection Bake Pad
Press to select bakh_g with the
fl Im_C 1]() ]L
Convection Roast Pad
Press to seaect roastim)g wit]) tale com)','ecti(m
fIH/Ct]Om/.
Start Pad
M_st be pressed to start am_}cookim_g or
0
@
Delay Start Pad
[Ise akmg with tearing Time or
ge_CIean Std/Low pads to set the
ove_ to start m_d stop m_tomaticai]y _t a
time w)_* set.
Cooking Time Pad
Press ;rod the_ press the mm_ber pads to set
the am]?OIH?t O[ time VOU W_l)t VOUl" [()od to
cook. The ovem_ _rH_IS]_llt Oft m_tomarica]h
_he]_ the cookim_g time has nm ol_t, m_]ess
the Cook m_d Hold ieatm'e was set.
C/ear/OffPad
Press to Grace] ALL o','em_opemtiom_s except
the dock m_d time_:
Display
Sho_s the time o{ de), o\ e_ tempen_tm'e,
whether the o\ e]_ is h_ the bake, broil or
se]f:c]eam_h_g mode am_(] the times set [i)r
the timer or mltomatic ove_) opel_ahms.
If "T- and annmfler or letter" flash in the display and
the even control signMs, this indicates aY#ncdee
error code, Press"tf_eClear/Off pa_LAllow the oven to
cool for one hour Putthe oven backbto operation.If the
functionerrorcode repeats,disconnectthepower to the
ovenand call forserv/_'e.
If yo_xoven was set for atimed oven operation
and epower o#tage occurred, the clockandall
proqrammedfunctionsmussbe reset.
Thetime of daywill flash in thedispiay when there
hasbeen apower o_tage.
Serf Clean Std/Low Pad
Press to select seIfZc]em]i]]g [m]cti(m. See
the Using the self-cleaningeven sectioiL
OvenLight On/Off Pad
Press to tln'_ the m'e]_ light o_ or ate
Clock Pad
Press be{ore setth_g the clock
Number Pads
[ Ise to set am' {ira cti(m req ui ri _ g _ m_bers
s_ch as the time of din' (m the clock, the
time_; the o\e]_ tempemtm'e, the hKerm_]
fi_od tempen_tm'e, the start time a_d
]e_gth (ff opemtio_ for timed balding
a_d se]f:c]em_i_g
Kitchen Timer On/Off Pad
Press to select the timer featm'e.
Probe Pad
Press whe_ mh_g the probe to cook food.
Warm Pad
Press to keep hot, cooked foods warm.
Proof Pad
Press to select a warm envirom_ent ilsefll]
fi)r xJsh_g yeasF]ea_e_ed pro(h_cts.

Usingtheoven.
Toavoid possible bums
-U%_ Ill
?q
place the racks in the desired position before you turn the oven on.
Before you begin...
The racks have stop-locks, so that when
placed correctly on the supports, thev will
stop befl)re coming completely out, and
will not tilt.
&,_lten placing and removing cookware,
pull the rack out to the bump on the
rack suI)port.
Toremove a rack, pull it toward you, tilt
the fl'ont end up and pull it ()tit.
Toreplace, place the end of the rack
(Stol>locEs) on the support, tilt up the
ti'ont and push the rack in.
NOTE:Theovenhas 7rackpositions.
CAUTION:Neverplacecookingutensilsoranyother
itemsontheovenfloorThereisaheatingelement
beneaththeovenfloorPlacingitemsontheovenfloor
maycausetheoventooverheat,resultingindamage
totheovenandriskofdamageorfiretocabinets.
IIII ¸
III
[]
\ ¸¸
NOTE:A cooling fanmay
automatically turn on and off to
cool hTternalparts. This is normal,
and the fan may eolTtilTueto rut7
even after the oven is reined off.
How to Set the Oven for Baking or Roasting
[] Press the Bake pad.
] Press the ntli/tber pads to set the
desired temperature.
[] Press the Staff pad.
[] Check toed fin" doneness at
minimum time on recipe. Cook
longer if necessm).
[] Press the Clear/Off pad when
cooking is complete.
Rack Position
Typeof Food 27" Oven 30" Oven
Frozenpies BorC CorD
(oncookiesheet)
Angelfoodcake A A or B
Bundtor poundcakes A Aor B
Biscuits,muffins, BorC CorD
brownies,cookies,
cupcakes,layer
cakes,pies
Casseroles BorC CorD
For27" Ovens: If baking four cake lavex_
at the same time, place two la_e_ on rack
A and two lme_ on rack C.
For 30" Ovens:If baking four cake lavex_
at the same time, place two la_e_ on rack
B and two laxe_ on rack D.
Stagger pans on the rack so one is not
directly aboxe the other
Topreheat, set the oven at the
correct temperature. The control
will beep when the oven is
preheated and the display will
show your set temperatere. This
may take approximately I0 mhTutes.
Preheating and Pan Placement
Preheat the oven if the recipe calls for it.
Preheating is necessa_ T fi)r good results
when baking cakes, cookies, pastry and
breads.
Baking results will be better if' baking
pans are centered in the oxen as much
as possible. Pans should not touch each
other or the walls el the oven. If w)u
need to use two racks, stagger the pans
so one is not directly above the othe_;
and leave appro_mately 1I/_>"between
pans, fl'om the fl'ont, back and sides
of the wall.
Aluminum Foil
Donot usealuminumfoil on the bottom of
the oven.
Never entirely cover a rack with
aluminum fi)il. This will disturb the heat
circulation and result in poor baking.
A smaller sheet offifil max be used to
catch a spilloxer by placing it on a lower
rack several inches below the fi)od.

ge.com
idd
Closethedoo_Alwaysbroilwith
thedoorclosed.
How to Set the Oven for Broiling
Close the doox: Always broil wi_ the door
closed.
[] Place the meat or fish on a broiler
gli(l in a broiler pan.
[] Follow suggested rack positions in
the Broiling Guide.
Thesloe,wel)ht,thickness,startlbgtemperature
and your preference for aloneness will affect
[] Press the Broil Hi/Lo pad once fi)r
HI Broil
To change to LO Broil, press the
Broil Hi/Lo pad again.
[] Press the Start pad.
[] _&hen broiling is finished, press
the Clear/Offp',ad.
If your ovenis connected to208
volts, rare steaks maybe broiledby
preheating thebroiler and positioning
the ovenrack oneposition highe_
Broiling Guide
broilingtlknes.Thisguideisbasedonmeatsat
refn)eratortemperature.
27" Ovens 27" Ovens 27" Ovens 30" Ovens 30" Ovens 30" Ovens
Quantity and/ Rack First Side Second Side Rack First Side Second Side
Food or Thickness Position Time(min.) Time(min.) Position Time(rain.) Time(min.) Comments
GroundBeef 1 lb.(4 patties) C 10 7 Eor F 10 7 Spaceevenl%Up
Well Done 1/2to 3/4" thick C 10 9 Eor F 10 9 to 8patties take
aboutthesame
time.
Beef Steaks
Raret
Medium
Well Done
Raret
Medium
Well Done
Chicken
LoBroil
LoBroil
LobsterToils
LoBroil
Fish Fillets
HiBroil
LoBroil
1" thick
1to 1½Ibs.
1½" thick
2to 2½ Ibs.
1whole
2to 2½ Ibs.,
splitlengthwise
Pieces
Boneless
2_4
Bto 8 oz.each
1/4to 1/2" thick
C
C
C
C
C
C
A
AorB
AorB
B
C
6
8
12
10
15
25
35
2,535
15 20
18 20
18 25
5
6
11
78
14 16
20 25
10 15
1,520
10 15
Donot
turn oven
N/A
E
E
E
E
E
E
C
BorC
BorC
C
D
8
10
12
10
15
25
25
2,535
15 20
18 20
18_5
6
8
10
8
14 16
20_5
10
15_0
10 15
Donot
turn oven
N/A
Ham Slices 1" thick B 8 8 D 8 8
(precooked)
Pork Chops 2(1/2" thick) C 10 10 E 10 10
Well Done 2(1"thick)about1lb. B 13 13 D 15 15
LanrhChops
Medium 2(1" thick/about 10 C 10 9 E 10 9 Slashfat.
Well Done to 12oz. C 12 10 E 12 10
Medium 2(1½"thick)about1Ib C 14 12 E 14 12
Well Done B 17 12 14 E 17 12 14
Garlic Bread C 3 N/A E 3 N/A
ko Broil
Steakslessthan
1" thickcook
throughbefore
browning.
Panfrying is
recommended.
Slashfat.
Reducetimeabout
5to 10minutes
persideforcubup
chicken.Brush
eachsidewith
meltedbutter.
Broilskin-side-
downfirst.
Cutthroughbackof
shell.Spreadopen.
Brushwith melted
butterbefore
broilingand after
half of broiling
time.
Handleandturn
verycarefully.
Brushwith lemon
butterbeforeand
duringcooking,if
desired.Preheat
broilerto increase
browning.
Increasetime5to
10minutesper
sidefor 1½"thick
orhome-curedham.
Slashfat.
I 7he ILS. l)_,part_ne_z¢of Ag'r)c_dtu_ sa3's '7¢a_ bed is [Jo[_ula_;I)_ttyozt shozdd h_m_ that _:oohi_git to o_zl_140°1r _n_,a_s_o_nefoodpoiso_i_,_
i)l_zt_i_l_ i_za)sztl-iJi_Je." (5,0ztl_:e:._!fi!k})od Book. })_zzlKit,:hell (;ztid#. l _'_l)A[_,_,.]ztlle 1985.) 7
Usingthe clock, timerandcontrollockout.
Make sure flTeclock is set to the
correct time of da_
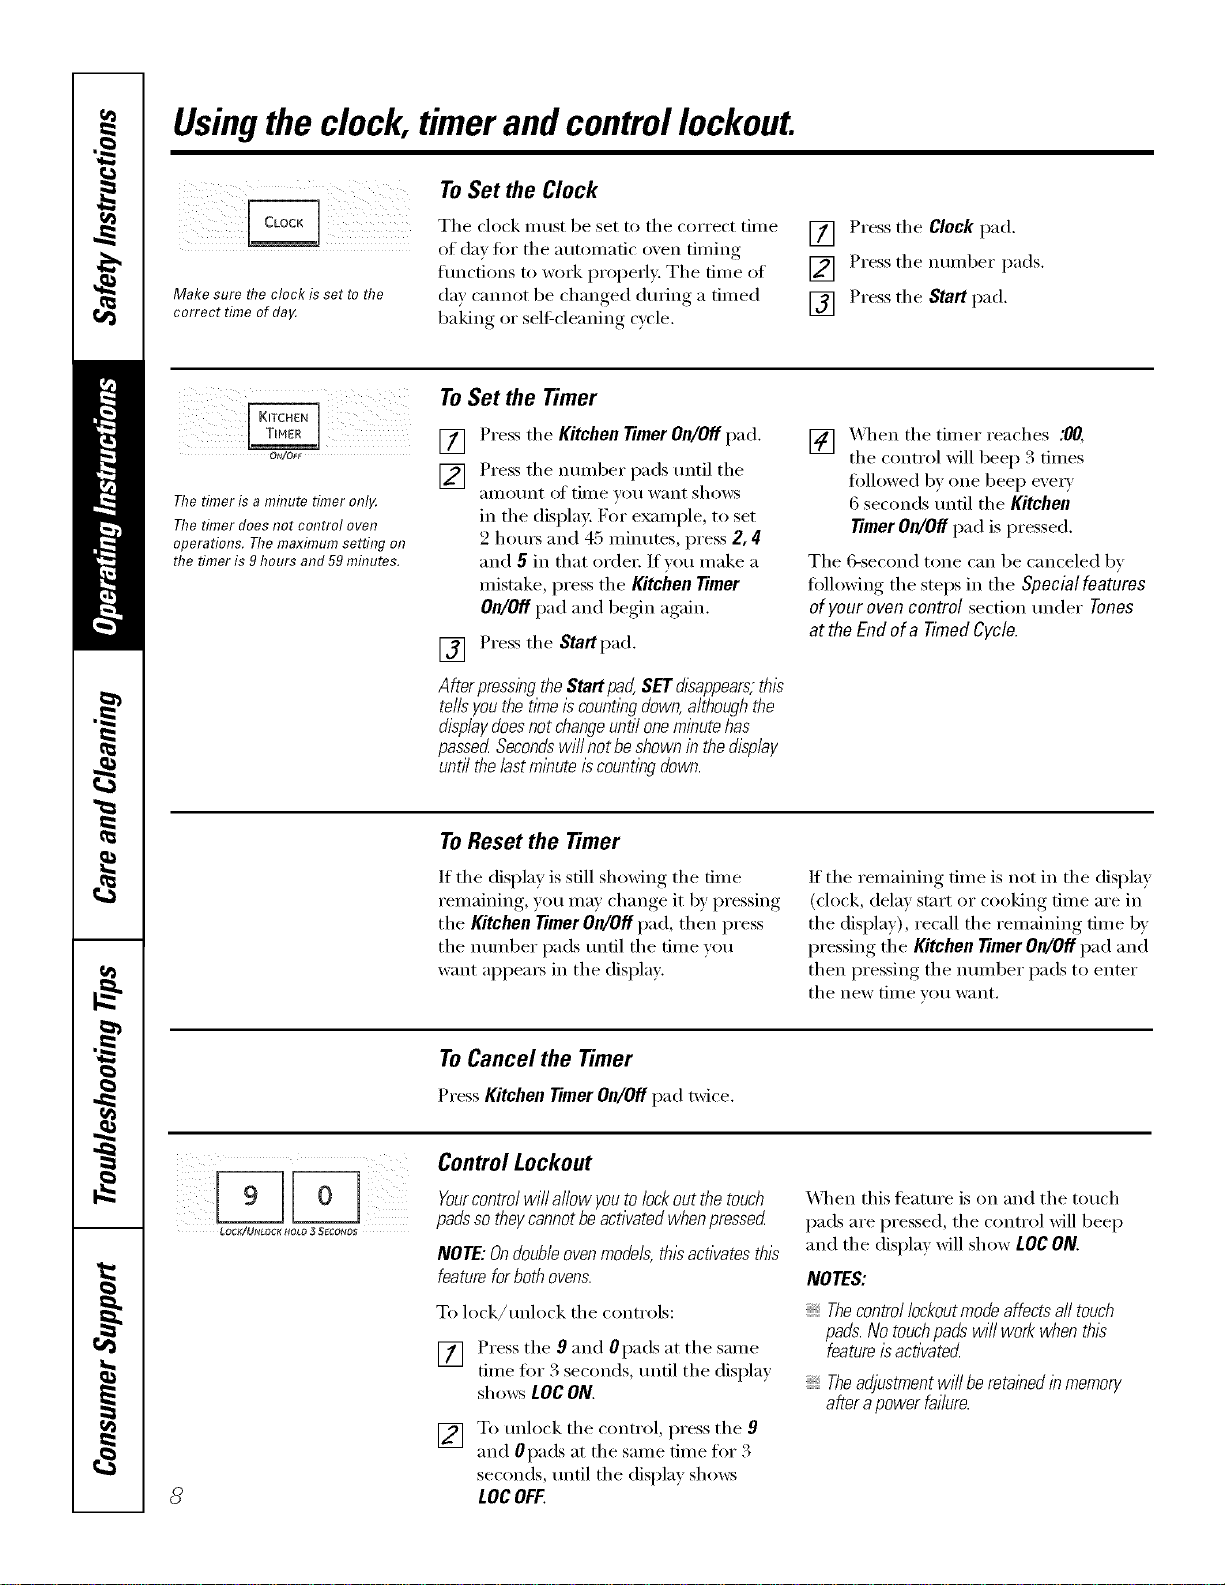
ToSet the Clock
Tile clock must be set to tile correct time
of day fin" tile autonmtic oven tinting
tractions to work i_roperly. Tile time of
da)' cannot be changed during a timed
baking or self-cleaning cycle,
[] Press the Clock pad.
[] Press the number pads.
[] Press the Start pad,
ON/OFF
Ttie timer is a mflTute timer onl_
The timer does not control oven
operations. Ttie maximum setting on
ttie timer is 9 hours and 59 mfl?utes.
ToSet the Timer
[]
[] Press the Kitchen timer OR/Off pad.
Press tile nmnber pads imtil tile
alllOtlnt o]' time VOtl want shows
in tile displa): For example, to set
2 houI_ and 45 ininutes, press 2, 4
and 5in that order: If vou make a
mistake, press tile Kitchen timer
OR/Off pad and begin again.
[] Press tile Startpad.
AfterpressingtheStartpad,SETdisappears,this
tellsyouthetimeiscountingdown,althoughthe
displaydoesnotchangeuntiloneminutehas
passedSecondswillnotbeshownin thedisplay
untilthelastminuteiscountingdown.
[] X._q/en tile timer reaches :00,
tile control will beep 3 times
fi)llowed b)one beep exe_)
6 seconds/mtil tile Kitchen
timer OR/Off pad is pressed.
Tile 6-second tone can be canceled by
fidlowing tile steps in tile Special features
of your oven control section trader Tones
at the End of a Timed Cycle.
To Reset the Timer
If tile display is still showing tile time
remaining, you may change it by pressing
tile Kitchen timer OR/Offpad, then press
tile number pads tmtil tile time w)u
want appea_ in tile display.
If tile remaining time is not in tile display
(clock, delay start or cooking time are in
the display), recall the remaining time by
pressing the Kitchen timer OR/Offpad and
then pressing the nmnber pads to enter
tile new tiI/le VO/i want,
ToCancel the Timer
Press Kitchen timer OR/Offpad twice.
8
Control Lockout
Yourcontrol will allow youto lock out the touch
padsso theycannot beactivated when pressed
NOTE: Ondoubleoven mode& this activates this
feature forboth ovens.
To lock/retook tile controls:
[] Press the 9and Opads at the same
time fin" 3 seconds, tmtil tile displa)
sholvs LOCON.
[] To unlock tile control, press the 9
and 0pads at tile same time fin 3
seconds, until tile display sholvs
LOCOFF.
X_]/en this teature is on and tile touch
pads are pressed, tile control will beep
and the display will show LOC ON.
NOTES:
Thecontrol lockoutmode affects all touch
pads.No touchpads wi// work when this
featureis activated
Theadjustment wi// be retained in memory
after apower failure.
Usingthe timedbakingand mastingfeatures.(onso e o elsj ge.com
On double oven models, you can use timed baking in one oven while using self-clean in the other; you can also use
timed baking in both ovens at the same time.
NOTE:Foods that spoil easily--such as milk, eggs, fish, stufings, poultry and pork--should not be allowed to sit for
more than 1hour before or after cooking. Room temperature promotes the growth of harmful bacteria. Be sure that
the oven light is off because heat from the bulb will speed harmful bacteria growth.
:i iii I( /iii iiiii
ii iii iiiii
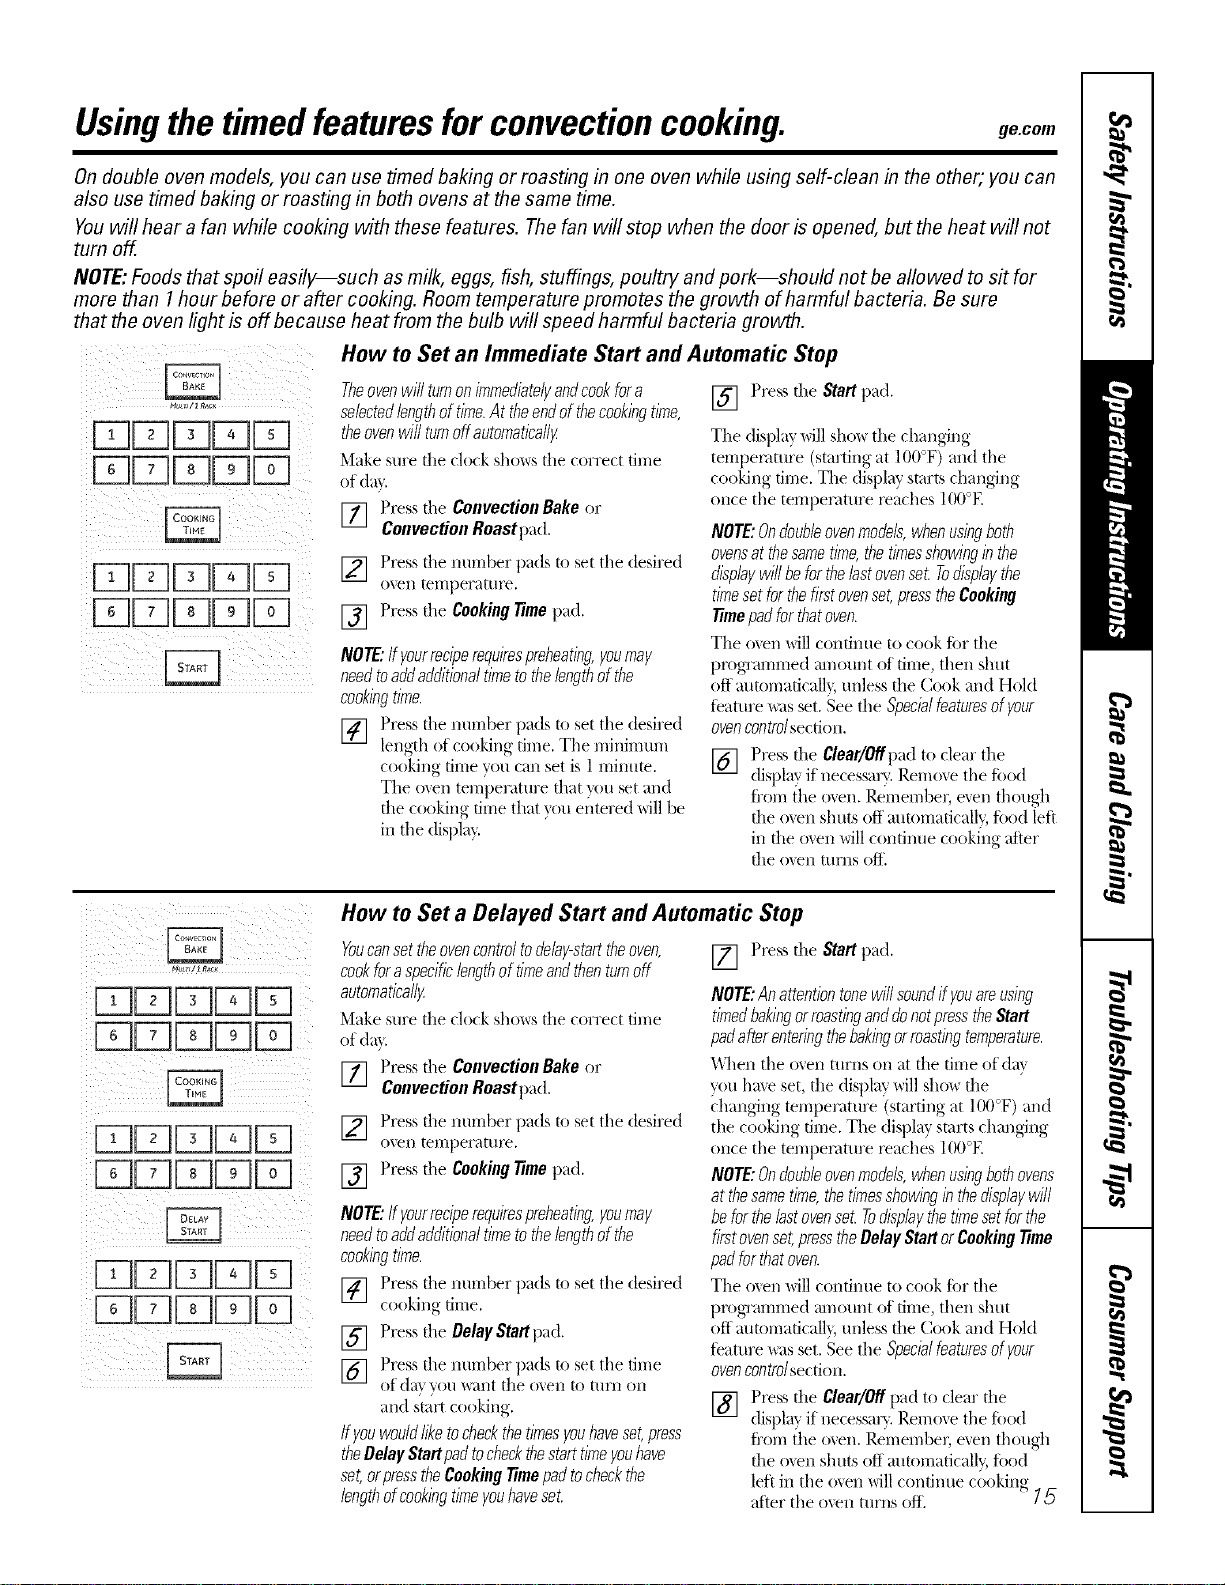
How to Set an Immediate Start and Automatic Stop
Theoven wi// turn on i_nme&atelyand cook fora
selectedlengthof time. At the endof the cooking
tkne, the ovenwill turn off automaflca//y
Make sure the clock shows the correct
tiille of (lax'.
[] Press the Bake pad.
[] Using tile number pads, enter tile
desired temi)eramre.
[] Press the Cooking Time pad.
NOTE."If yourreciperequkespreheatlbg, you
mayneed toadd additional time to the lengthof
the cooklbgtime.
[] Using the number pads, enter the
desired baking time. The oxen
temperature and tile cooking time
that _ou entered will be displa} ed.
[] Press tile Start pad.
Tile display will show tile changing
temperature (starting at 100°F) and the
cooking time. The display starts changing
once the temperature reaches 100°E
NOTE:Ondoubleovenmodels, when usingboth
ovensat thesame time, the times showingin the
display wi// be for thelast ovenset Todisplay the
tl/ne set for the fkst oven set,press the Cooking
Timepad for that oven.
Tile oven will ('onfin/le to cook tot tile
programmed am ount (ff tiln e, then shut
off automatically, unless tile Cook and
Hold feature was set. See the Special
featuresof yourovencontrolsection.
Press the Clear/Off pad to clear
the display.
How to Set a Delayed Start and Automatic Stop
YoucansettheovencontroltodeNy-startthe
oven,cookforaspecificlengthof timeandthen
turnoffautomatically
Make sure the clock shows the correct
tiille of (lax'.
If wm would like to check tile times
yell have set, press the Delay Start pad to
check tile strut time you have set or press
the Cooking Time pad to check the length
of cooking time you have set.
[] Press the Bake pad.
[] Using the number pads, enter the
desired temperature.
[] Press the CookingTime pad,
NOTE."If yourreciperequkespreheatlbg,you
mayneedtoaddadditionaltimetothelengthof
thecookingtime.
[] Using the number pads, enter the
desired baking time.
[] Press the DelayStartpad.
[] Using tile number pads, enter tile
time of day }ou want the oxen to
turn oil and start cooking.
[] Press the Startpad.
NOTE."Anattentiontonewi//soundifyouare
usingttYnedbakinganddonotpresstheStart
padafterentenbgthebakingtemperature.
\A]_en the oven turns on at the time
oI day you have set, the display will
show the changing temperature
(starting at 100°F) and the cooking
finle. Tile display starts changing once
the temperature reaches 100°F.
NOTE:Ondoubleovenmodels,whenusingboth
ovensat thesametime,thetimesshowingin the
displaywi//beforthelastovenset Todisplaythe
tl/nesetforthefkstovenset,presstheBelay
StartortheCookingTimepadforthatoven.
Tile oven will ('onfintle to cook t()r the
programmed am ount of time, then shut
off automatically, unless tile Cook and
Hold feature was set. See the Special
featuresof yourovencontrolsection.
Press the Clear/Off pad to clear
the display.
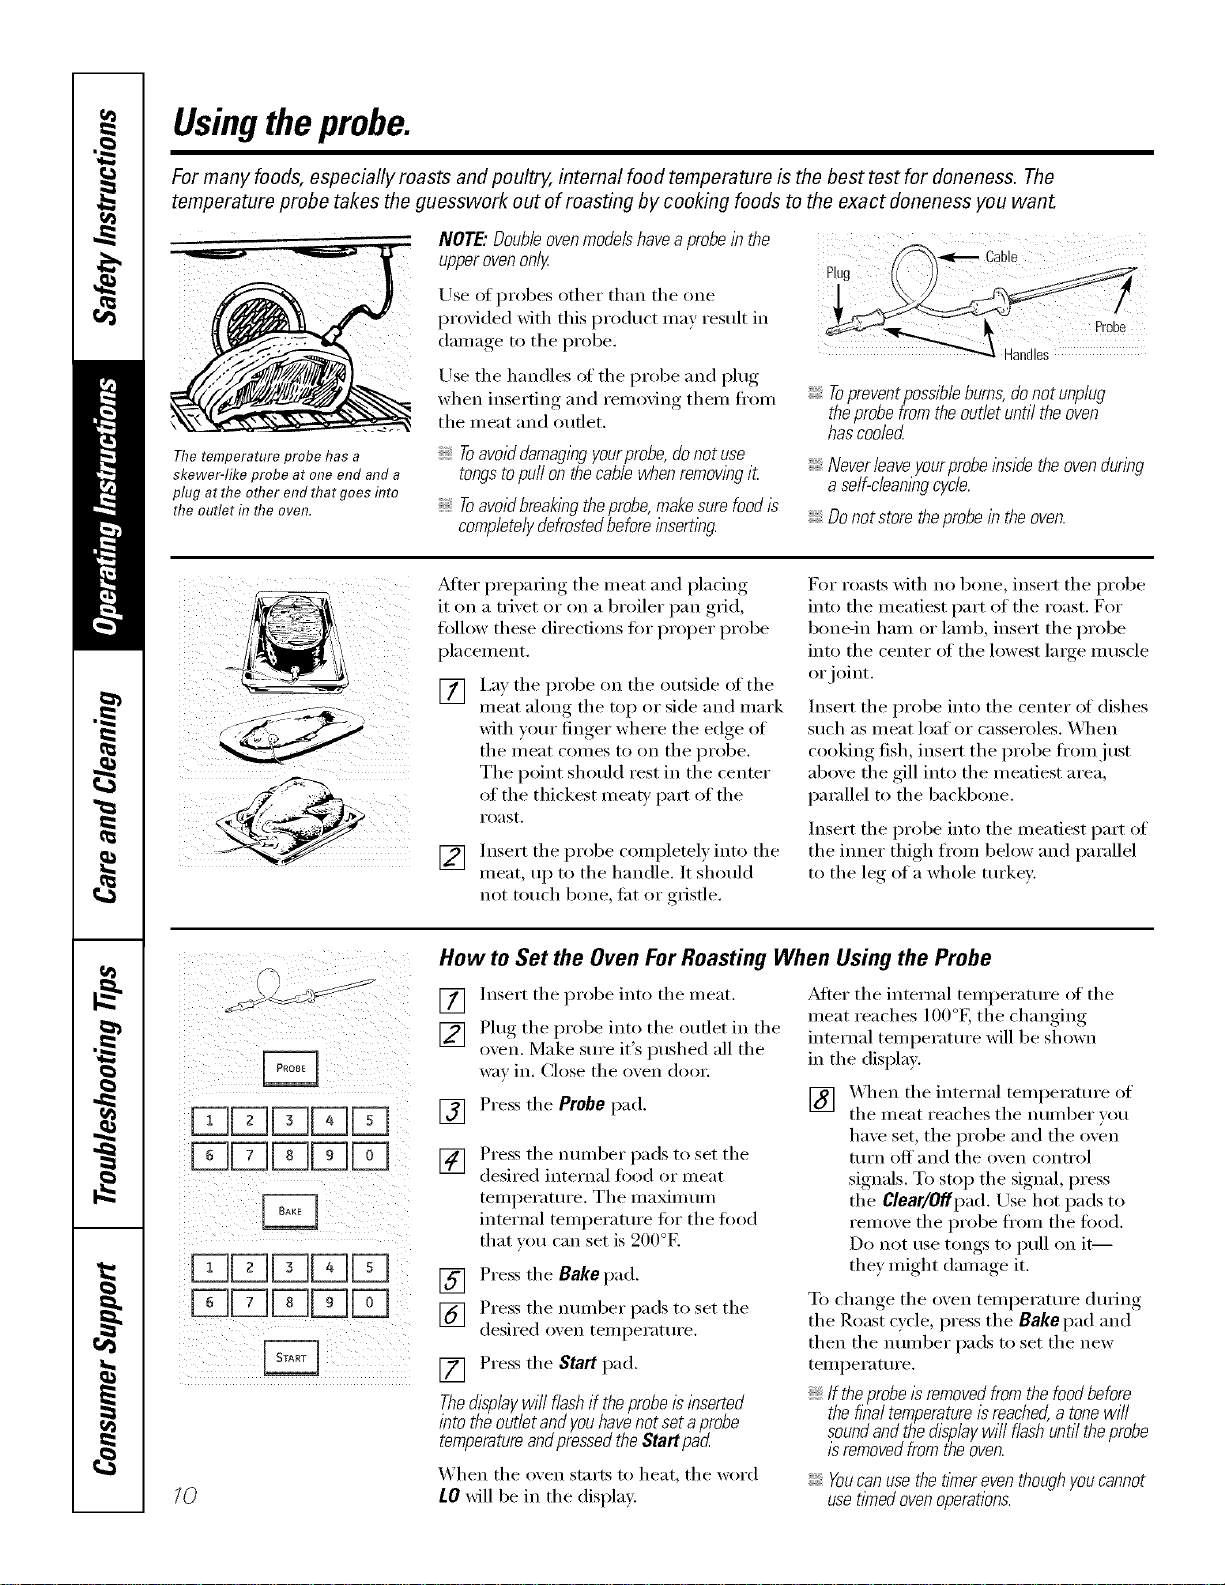
Usingtheprobe.
For many foods, especially roasts and poultry, internal food temperature is the best test for doneness. The
temperature probe takes the guesswork out of roasting by cooking foods to the exact doneness you wan_
The temperature probe has a
skewer-like probe at one end and a
plug at the other end that goes flTto
the outlet in the oven.
NOTE." Double oven models have a probe in the
upper oven only
Use ot probes other than the one
I)ro_ided with this prodtlct illav restllt in
damage to the probe.
Use the handles of the probe and l)lug
when inseiSng and remo_ng them fl'om
the meat and outlet.
Toavoid damagingyourprobe,do not use
tongstopuffon the cable when removingit
Toavoid breakingtheprobe,make sure food/s
completelydefrosted before inserting.
_,<E'_ Cable
i iI
Topreventpossibieburns, donot unpiug
theprobefrom the outlet until the oven
hascooled
Neverieaveyourprobeinsidetheovenduring
a self-cleaningcycle.
Do not store theprobe in the oven.
_dter preparing the meat and placing
it tm a trivet or tm a broiler pan grid,
tallow these directions tot proper probe
pla cement.
[] I,ay the probe on the outside (ff the
meat along the top or side and mark
with your finger where the edge of
the meat conies to oil the probe.
The point should rest in the center
of the thickest meab' part of the
roast.
[] Insert the probe completel) into the
meat, up to the handle. It should
not touch bone, tilt (:,rgristle.
For roasts with no bone, insert the probe
into the meatiest part of the roast. For
bone-in lmm or lamb, insert the probe
into the center at the lowest large muscle
or joint.
Insert the probe into the center _ff dishes
such as meat loaf or casseroles. _._]/en
cooking fish, insert the probe fi'omjust
above the gill into the meatiest area,
parallel to the backbone.
Insert the probe into the meatiest part (ff
the inner thigh fi'om below and parallel
to the le_* of a whole turkey:
i
10
How to Set the Oven For Roasting When Using the Probe
] Insert the probe into the meat.
[] Plug the probe into the outlet in the
oxen. Make sure it's pushed all the
wm in. Close the oxen (looi:
] Press the Probepad.
[] Press tile nmnber pads to set the
desired internal flied (:,r meat
temperature. Tile maxinnun
internal temperature fi)r the load
that you can set is 200°F.
[] Press the Bakepad.
] Press the munber pads to set the
desired oxen temperature.
[] Press the Start pad.
Thedisplaywi// flash if theprobeis inserted
into theoutlet and youhavenot set aprobe
temperatureandpressedthe Start pad
_hen the oxen starts to heat, the word
tO will be in the displa);
_Mter the internal teml)eramre (ff the
meat reaches lO0°K the changing
internal teml)erature will be shown
in the displa>
[] X_q_en the internal teml)erature of
the meat reaches tile number you
have set, the probe and the oven
turn oH and the oven control
signals. To stop the signal, press
the Clear/Offpad. Use hot pads to
remove the probe ti'om the food.
Do not use tongs to pull on it--
they might damage it.
To change the oven temperature during
the Roast cycle, press the Bakepad and
then the number pads to set the new
teml)erature.
If theprobe/sremovedfromthefoodbefore
thefinaltemperatureisreached,a tonewi//
soundandthedisplaywi//flashuntiltheprobe
/sremovedfromtheoven.
Youcan use the flYnereventhough youcannot
usetimed ovenoperations.
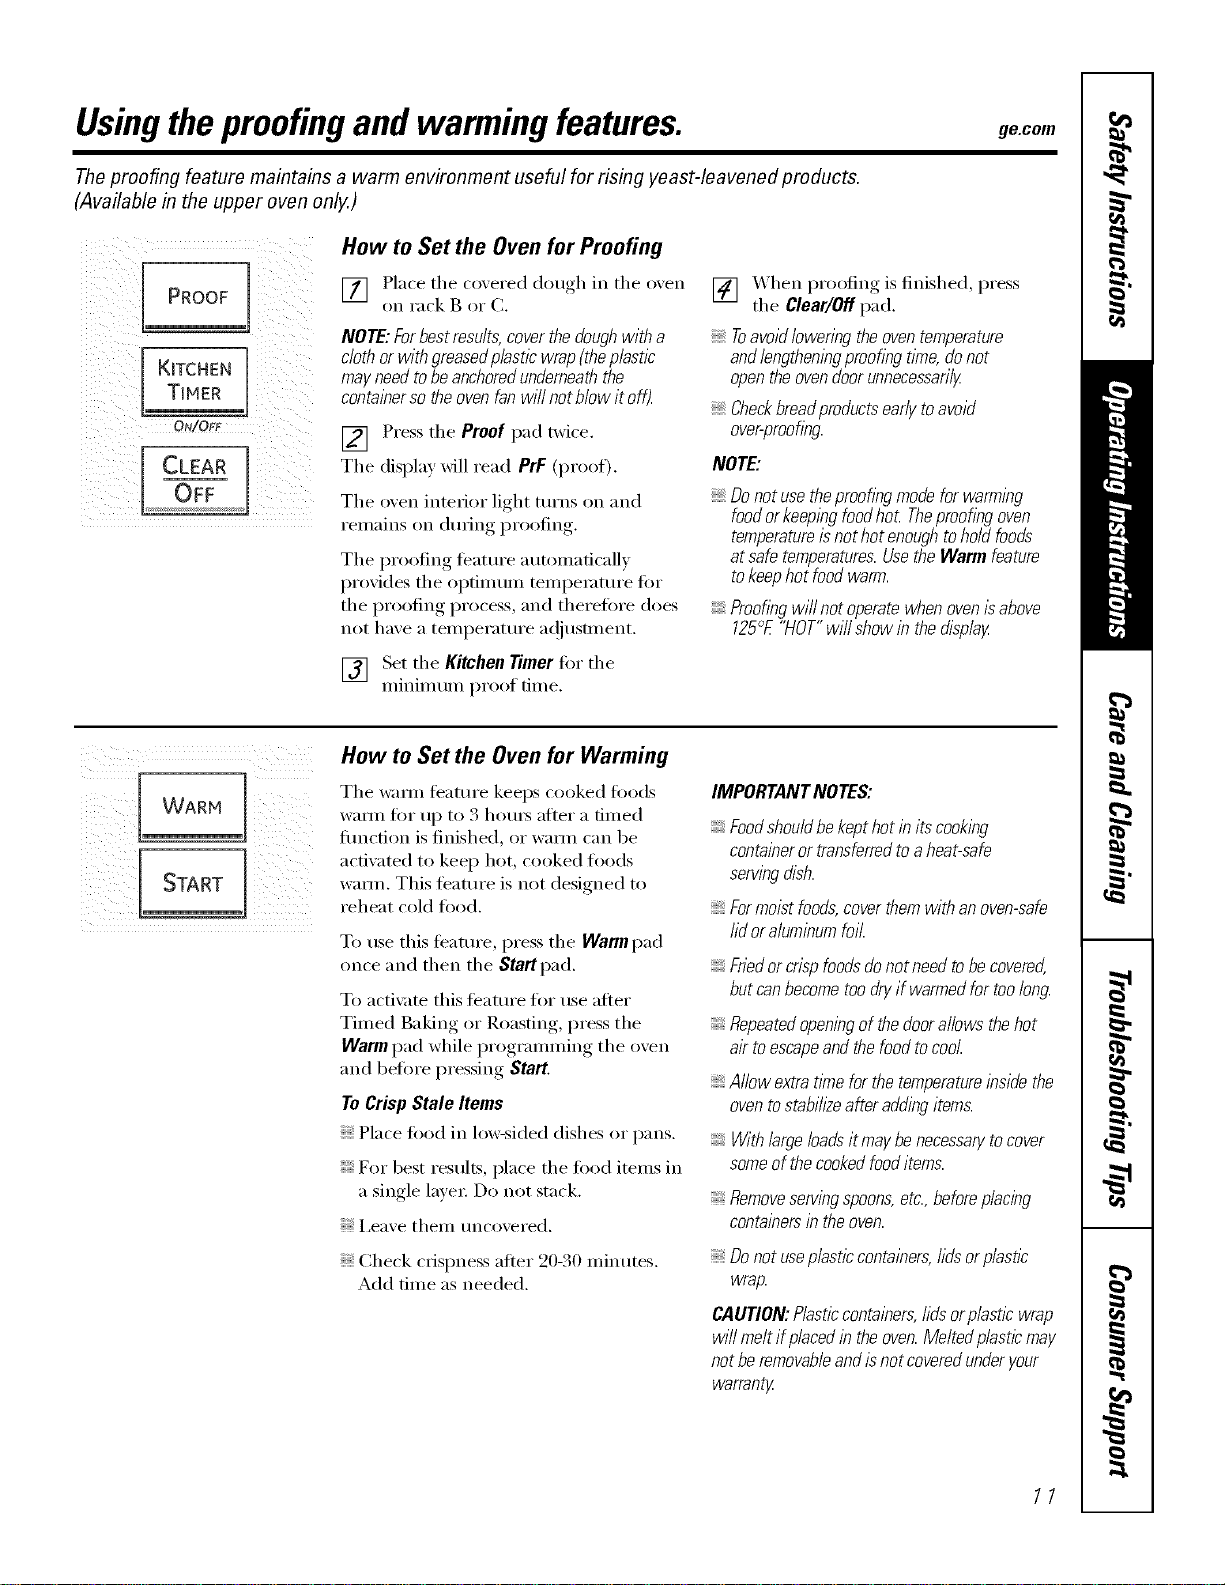
Usingtheproofingand warming features, gecem
Theproofing feature maintains a warm environment useful for rising yeast-leavened products.
(Available in the upper oven only.)
j, (
i:;7LK,TC.E.T,MER"i (
[ CLEAR
How to Set the Oven for Proofing
[] Place the covered dough in the o_en
on rack B or C.
NOTE:Forbestresults,coverthedoughwitha
clothor withgraasedp/asticwrap(theplastic
mayneedtobeanchoredunderneaththe
containersotheovenfanwi//notblowitoff).
] Press the Proofpad twice.
The display will read PrF (proof),
The oven interior light turns on and
remains on (lm_ing,I)r°°fing,.
The proofing teatm'e automaticalh
proxi(les the optimum tempemtm'e fi)r
the proofing process, and therefin'e does
not haxe a temperature a(!iusm_ent.
[] Set the Kitchen rimer tot the
minim um proof tim e.
[] XAhen proofing is finished, press
tile Clear/Off pad.
7-0avoid loweringthe oven temperature
andlengtheningproofing t/Yne,donot
openthe ovendoor unnecessarily
Checkbraadproductsearly toavoid
over-proofing
NOTE:
Donotusetheproofingmodeforwarming
foodorkeepingfoodhot Theproofingoven
temperatureisnothotenoughtoholdfoods
atsafetemperatures.UsetheWarmfeature
tokeephotfoodwarm.
Proofingwillnotoperatewhenovenisabove
125°E"HOT"will showin thedisplay
How to Set the Oven for Warming
Tile wm_n feature keeps cooked foocls
warnl for up to 3 houI_ after a dined
fimction is finished, or wam_ can be
acdw_ted to keep hot, cooked foods
wmm. This feature is not designed to
reheat cold toed.
To use this teatm'e, press tile Warm pad
once and then the Start pad.
To acti\:Ke this teature fin" use after
Timed Baking or Roasting, press the
Warm pad while programming the oven
and befin'e pressing Start.
ToCrisp Stale Items
Place lood in lo_sided dishes or pans.
For best results, place tile food items in
a single lave_: Do not stack.
I,eave thelll tlncoveFed,
Check crispness after 20-30 minutes.
Add time as needed.
IMPORTANTNOTES:
Foodshouldbekepthotin itscooking
containeror transferredtoaheat-safe
servingdish.
Formoistfoods,coverthemwithanoven-safe
lid oraluminumfoil.
Friedor crisp foodsdo not need tobe covered,
but canbecome too dry if warmed for too long.
Repeatedopeningof the doorallows the hot
air toescapeand the food tocool.
Allow extratlYnefor the temperatureinside the
oventostabih2eafter adding items.
With large loadsit maybe necessarytocover
someof the cookedfooditems.
Removeservingspoons,etc.,beforeplacing
containersin theoven.
Donotuseplasticcontainers,hdsorp/asflc
wrap.
CAUTION:Plasticcontainers,hdsorplasticwrap
will meltifplacedintheoven.Meltedplasticmay
notberemovableandisnotcoveredunderyour
warranty
11

Usingtheconvectionoven.
ConvectionBake
NOTE."Theconvectionfan will cycle on and off
while cookingtobest distribute hot air in the
oven.
Theconvectionoven fanshuts off when the oven
door isopenerLDONOTleave the dooropenfor
longperiods of time whffe usingconvection
cookingor you mayshortenthe fife of the
convectionheating elernenL
/na convectionoven,a fancirculateshotair
over,underandaroundthefood.
Thiscirculatinghotair isevenlydistributed
throughouttheovencavity As aresult,foods
areevenlycookedandbrowned--often in less
time with convectionheat.
Idealforevenlybrownedbakedfoodscooked
onrnultl}gleracks.
Goodforlargequantitiesofbakedfoods.
Goodresultswithcookies,biscuits,muffins,
brownies,cupcakes,creampuffs,sweetrolls,
angelfoodcakeandbread
The convection tim circulates the heated
air evenly over and around the food.
Multi-rack position
Multi-Rack Convection Baking
[] Whenconvectionbakingwith only I rack,
follow the rackpositionsrecommendedin
[] the Usingthe ovensection.
Because heated air is circulated evenly
throughout the oxen, leeds can be
[] baked with excellent results using
multiple racks.
Multi-rock baking may increase cook
times slightly tot some toods but the
overall result is time saved. Cookies,
m uflins, bisctfits and other qtfickbreads
give ve_wgood results with m ulti-rack
baking.
For30" Ovens:When baking on 3 racks,
place one rack in the second (B)
position, one in the tOm'th (D) position
and one in the sixth (F) position.
For two-rack baking, place one rack
in the second (B) rack position. Place
the other rack in the tom'th (D) rack
position.
For27" Ovens:When baking on 3 racl<s,
place one rack in the fi_st (A) position,
one in the third (C) (offset) position
and one in the fimrth (D) position.
For two-rack baking, place one rack
in the fi_st (A) rack position. Place
the other rack in the third (C) rack
position.
Adapting Recipes...
Y)m can use w>ur tiwmite recipes in the
convection ()veil,
_4l_en convecdon baking, reduce baking
temperature by 25°F or acti\:_te the Auto
]),edpe ''_Conversion featm'e. See Auto
Recipe_Conversionin the Special featuresof
yourovencontrol section.
Usepan sizerecornrnenderL
Somepackageinstructions forfrozen
casserolesor rnaindisheshavebeen
developedusingcomrnerclalconvectionovens.
Forbest resu/tsin this oven,preheat the oven
and usethe temperatureon the package.
/2

ge.com
Grid
Broilerpan
ConvectionRoast
Goodfor large tendercutsof meat, uncovered
The convection tim drculates the heated
air evenly over and around the todd.
Meat and poult_ T are browned oil all
sides as if thev were cooked on a
rotisserie. Heated air will be circulated
oveI; under and around the R)od being
roasted. The heated air seals in juices
quickly tot a moist and tender product
while, at the same time, creating a rich
golden brown exterior:
\&l_en x_m are convection roasting it is
important that you use a broiler pan and
grid fin" best convection roasting results.
The pan is used to catch grease spills
and the grid is used to prevent grease
spatters.
Whenbaking cookies, youwill
get thebest resultsif you usea
flat cookie sheet instead of a
pat?with low sides.
Cookware for Convection Cooking
getOre using your convection oven,
check to see if your cookware leaves
room fin" air circulation in tile oven.
If w)u are baking with several pans, leave
space between them. Mso, be sure the
pans do not touch each other or the
walls of the oven.
Paper andPlastic
Heat-resistant paper and plastic
containei's that aI'e i'eCOllllllended
fin" use in regular ovens can be used in
convection ovens. Plastic cookware that
is heat-resistant to temperatures of 400°F
can also be used.
Metal and Glass
Any Upe of cookware Mll work in your
con\'ection oven. Howe\'ei; i//etnl l)_lns
heat the ti_stest and are recommended
fin" convection baking.
Darkenedor matte-fblshed pans will bake
faster thanshlbypans.
Glassorceramicpans cookmore slowly
For redpes like oven-baked chicken,
use a pan with low sides. Hot air cannot
circulate well arotmd food in a pan with
high sides.
How to Set the Oven for Convection Baking or Roasting
] Press the Convection Bake pad
or the ConvectionRoast pad.
] Press the number pads to set the
desired oxen temperatm'e.
[] Press the Startpad.
To change the oven temperature, press
the ConvectionBake or ConvectionRoast
pad and then tile nmnber pads to set
the new temperatm'e.
When the oven starts to heat, the
changing temperature, starting at 100°K
will be displayed. X._]_en the oven reaches
the temperature you set, 3 beeps will
SOtlnd,
[] Press the Clear/Off pad when
finished.
Youwill heara fan while cooklbg with
convection.Thefan will stop when thedoor is
opened,but theheat will not turn off.
Youmay hear the ovenc/icklbgduringbaklbg.
ThisIsnormal
13
Usingtheconvectionoven.
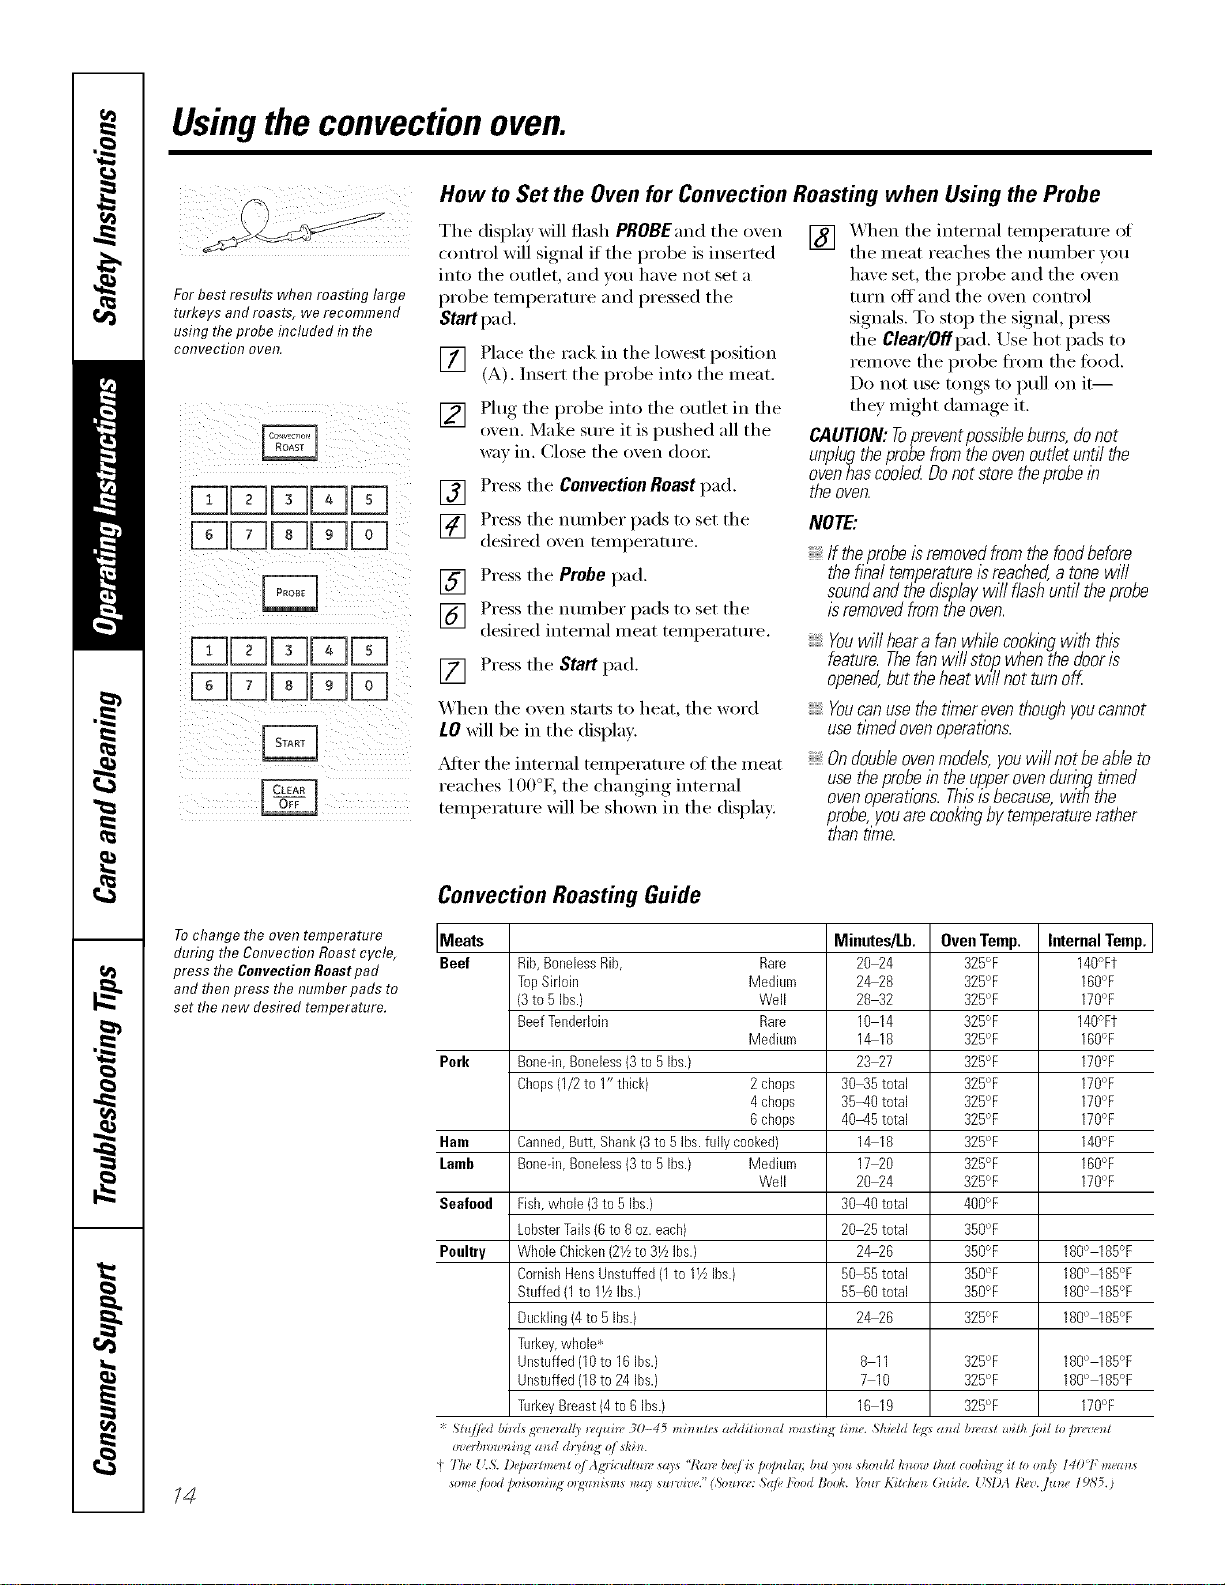
For best results when roasting large
turkeys and roasts, we recommend
using theprobe included in the
coITveetio!7 oveR.
i_ i i i 2
iii i !i I II(I!
How to Set the Oven for Convection Roasting when Using the Probe
The display will flash PROBEand the oven
control will signal if the probe is inserted
into the outlet, and w)u have not set a
probe teml)erature and pressed the
Start pad.
[] Place the rack in the lowest i)osifion
(A). Insert the probe into the meat.
[] Plug the probe into the outlet in the
o_en. Make sure it is pushed all the
wa_ in. Ch)se the o'_en (h)o_:
] Press the ConvectionRoast pad.
] Press the nunlber pads to set the
desired o_en temperature.
] Press the Probe pad.
] Press the nulllber pads to set the
desired internal meat temperature.
[] Press the Start pad.
_'_hen the o_en starts to heat, the word
LO will be in the displa).
_Mier the internal teml)erature of the meat
reaches 100°K the changing internal
temperatm'e will be shown in the display:
[] X,_q_en the internal teml)erature of
the meat reaches the number you
have set, the probe and the oven
turn off and the oven control
signals. To stop the signal, press
the Clear/Offpad. Use hot pads to
remove the probe ti'om the ti)o(l.
Do not use tongs to i)ull on it--
they might damage it.
CAUTION: Topreventpossl#leburns,do not
unplugtheprobefrom the oven outlet until the
oven has coded Do not store the probelb
the oven.
NOTE:
If theprobe isremoved from the food before
the f/hal temperatureisreached,a tonewill
soundand the dlspiay will flash until the probe
is removedfrom the oven.
Youwiiiheara fanwhilecookingwith this
feature.Thefanwillstop.,whenthedooris
opened,buttheheatwillnotturnoK
Youcanusethetlknereventhoughyoucannot
usetlknedovenoperations.
Ondoubleovenmode/s,youwillnotbeabieto
usetheprobelbtheupperovendunbgtimed
ovenoperetlons.Thisisbecause,withthe
probe,youarecookingbytemperaturerather
thantime.
To change the oven temperature
during the Convection Roast cycle,
press the Convection Roast pad
and then press the number pads to
set the new desired temperature.
/4
Convection Roasting Guide
Meats Minutes/Lb. Oven Temp. Internal Temp.
Beef Rib,BonelessRib, Rare 20 24 325°F 140°Ft
TopSirloin Medium 2&28 325°F 160°F
(3to RIbs.) Well 28 32 325°F 170%
BeefTenderloin Rare 10 14 32R°F 140°Ft
Medium 1&18 32R°F 160%
Perk Bone-in,Boneless(3to 5Ibs.) 23 27 32R°F 170%
Chops(1/2to 1" thick) 2 chops 30_5 total 32R°F 170°F
4 chops 35-40 total 32R°F 170°F
6 chops 40-45 total 325°F 170%
Ham Canned,Butt, Shank(3to 5 Ibs.fully cooked} 1_18 325°F 140%
Lamb Bonedn,Boneless(3to 5Ibs.) Medium 17 20 325°F 160°F
Well 20 24 325°F 170°F
Seafood Fish,whole (3to 5 Ibs.) 30-40 total 400°F
LobsterTails(8 to 8oz.each) 20_5 total 350°F
Poultry WholeChicken(2_4to31/zIhs.} 2_26 350°F 180° 185°F
CornishHensUnstuffed(1to IVzIbs.) 50 55total 350°F 180° 185°F
Stuffed(1 to 11/LIhs.) 5R 60total 350°F 180° 185°F
Duckling(4to 5 Ibs.) 2_26 325°F 180° 185°F
Turkey,whole*
Unstuffed(lOto 16Ihs.) 8 11 32R°F 180° 185°F
Unstuffed(18to 24 Ibs.) 7 10 32R°F 180° 185°F
TurkeyBreast(4 to6 Ibs.) 16 19 32R°F 170%
*Stu//ed bi)ds gr')_e_*ll/) _,q*li_v 30-45 mi)_utes additim*al n)asti) lime. ShiHd h;<:sa_d b*_'ast ,vilh/vil to pn,'_,e_t
o'ze_gn)w_lhq a_ d dui_ No/ *hi_*.
4Th_ {;5. l)@mCme_t o/Ag_'ic_zltu)v *(I)* "7"a*v/welLs p@_zhn; but you *houhi h_zow that cooki_git to m@ I401 memos
some /ood ))iso_ i_Nolg_z_Lsm*ma) *u)wi'l,('."(So_m_': .S@ lbod Book. }bu) Kitche_ Guide. [LSIM l?ez. /m*e 19,b'5.)
Usingthe timedfeaturesforconvectioncooking, gecom
On double oven models, you can use timed baking or roasting in one oven while using self-clean in the other; you can
also use timed baking or roasting in both ovens at the same time.
Youwill hear a fan while cooking with these features. The fan will stop when the door is opened, but the heat will not
turn off.
NOTE:Foods that sped easily--such as milk, eggs, fish, stuffings, poultry and pork--should not be allowed to s# for
more than 1hour before or after cooking. Room temperature promotes the growth of harmful bacteria. Be sure
that the oven light is off because heat from the bulb will speed harmful bacteria growth.
How to Set an lmmediate Start and Automatic Stop
_LYs/1 _ac_
ii i _ ii i _ii
!i!!illii!iii!i !ii ill!!i;ii
Theovenwill turnonimmediatelyandcookfora
selectedlengthof time.At theendof thecookingtime,
theovenwill turnoffautoroatica//y
Make sure file clock shows file correct time
of din.
] Presstile Convection Bake or
ConvectionRoast pad.
[] Press tile nm-nber pads to set the desired
ovell temperature.
[] Press tile Cooking time pad.
NOTE:If yourreciperequirespreheating,youmay
needtoaddadditionaltimetothelengthof the
cookingtime.
[] Press tile number pads to set tile desired
length of cooking time. Tile minimum
cooking time you can set is 1 mintlm.
The ()',el/ temperature fllat you set and
the cooking time that }_)u e{itered will be
ill the display.
[] Press tile Start pad.
Tile display will sho_ tile changing
tempemtAlre (starting at 100°F) and tile
cooking time. Tile display starts changing
once tile temperature l_aches IO0°E
NOTE:Ondoubleovenmodels,whenusingboth
ovensatthesametime,the timesshowingin the
displaywill beforthelastovenset.Todisplaythe
timesetfor thefirstovenset,presstheCooking
_me padfor thatoven.
Tile ()',el/will continue to cook for tile
plx/grammed ml/ount of time, then shut
off automaficall}, unless file Cook and Hold
teature _ts set. See the Specialfeaturesofyour
ovencontrolsection.
[] Press tile Clear/Offpad to clear the
display if necessaly. Remove tile food
fl'om the ()',el/. Remember, e',eI/thougll
the o',en shtAts off automatically; food lett
ill the ()',ell will continue cooking after
the ()',en turns off.
I;? !ii ii : iii ii
How to Set a Delayed Start and Automatic Stop
Youcansettheovencontroltodelay-starttheoven,
cookforaspecificlengthof timeandthenturnoff
automatica//_
Make sure file clock show,s file correct time
of (la',.
]Press tile ConvectionBake or
ConvectionRoast pad.
[] Press tile number pads to set the desired
o_,eIl teAllper;:lttAre,
[] Press tile Cookingtime pad.
NOTE:If yourreciperequirespreheating,youmay
needtoaddadditionaltimetothelengthof the
cookingtime.
[] Press tile number pads to set tile desired
cooking time.
[] Press tile OelayStartpad.
] Press tile number pads to set tile time
of (]_l', "_()H "_',ilIlt tile O'_,eAl to [/IrJl Oil
and start cooking.
Ifyouwouldliketocheckthetimesyouhaveset,press
theBelay Startpadtocheckthestarttimeyouhave
set,orpresstheCookingtime padtocheckthe
lengthofcookingtimeyouhaveset.
[] Press tile Start pad.
NOTE:Anattentiontonewill soundffyouareusing
timedbakingorroastinganddonotpresstheStart
padafterenteringthebakingorroastingteroperature.
_\l/en tile ()','ell turns on at file time at (la\
you hme set, the display will show the
_-hanging temperature (starting at 100°F) and
the cooking time. Tile display starts changing
once the tempemtm'e l_aches 100°E
NOTE:Ondoubleovenmodels,whenusingbothovens
at thesametime,thetimesshowingin thedisp/aywi/I
beforthelastovenset.Todisplaythetimesetfor the
firstovenset,presstheBelayStartorCookingtime
padfor thatoven.
The ()',el/will C(Andnue to cook fi)r tile
plx)grammed _ll//OtAI/tof time, then shtA[
off mm/maticall}, unless the Cook and Hold
teature was set. See the Specialfeaturesofyour
ovencontrolsecdon.
[] Press tile Clear/Offpad to clear tile
(lispla'_ if necessar}_.I_emo_,e tile fiAod
fl'om the ()',el/. Remember, e',en though
the ()',ell shuts (Aftautomatically; food
left ill tile oxen will contintAe cooking
after tile oven turns (Aft'. ' ]5
Adjust the oven thermostat--Do it yourself!
Youmay find that your new oven cooks differently than the one it replaced. Use your new oven for a few weeks
to become more familiar with it. If you still think your new oven is too hot or too cold, you can adjust the
thermostat yourself.
Donot use thermometers, such as those found in grocery stores, to check the temperature setting of your oven.
These thermometers may vary20-40 degrees.
NOTE" This adjustment will only affect baking and roasting temperatures; #does not affect broiling, convection or
self-cleaning temperatures. Theadjustment will be retained in memory after apower failure.
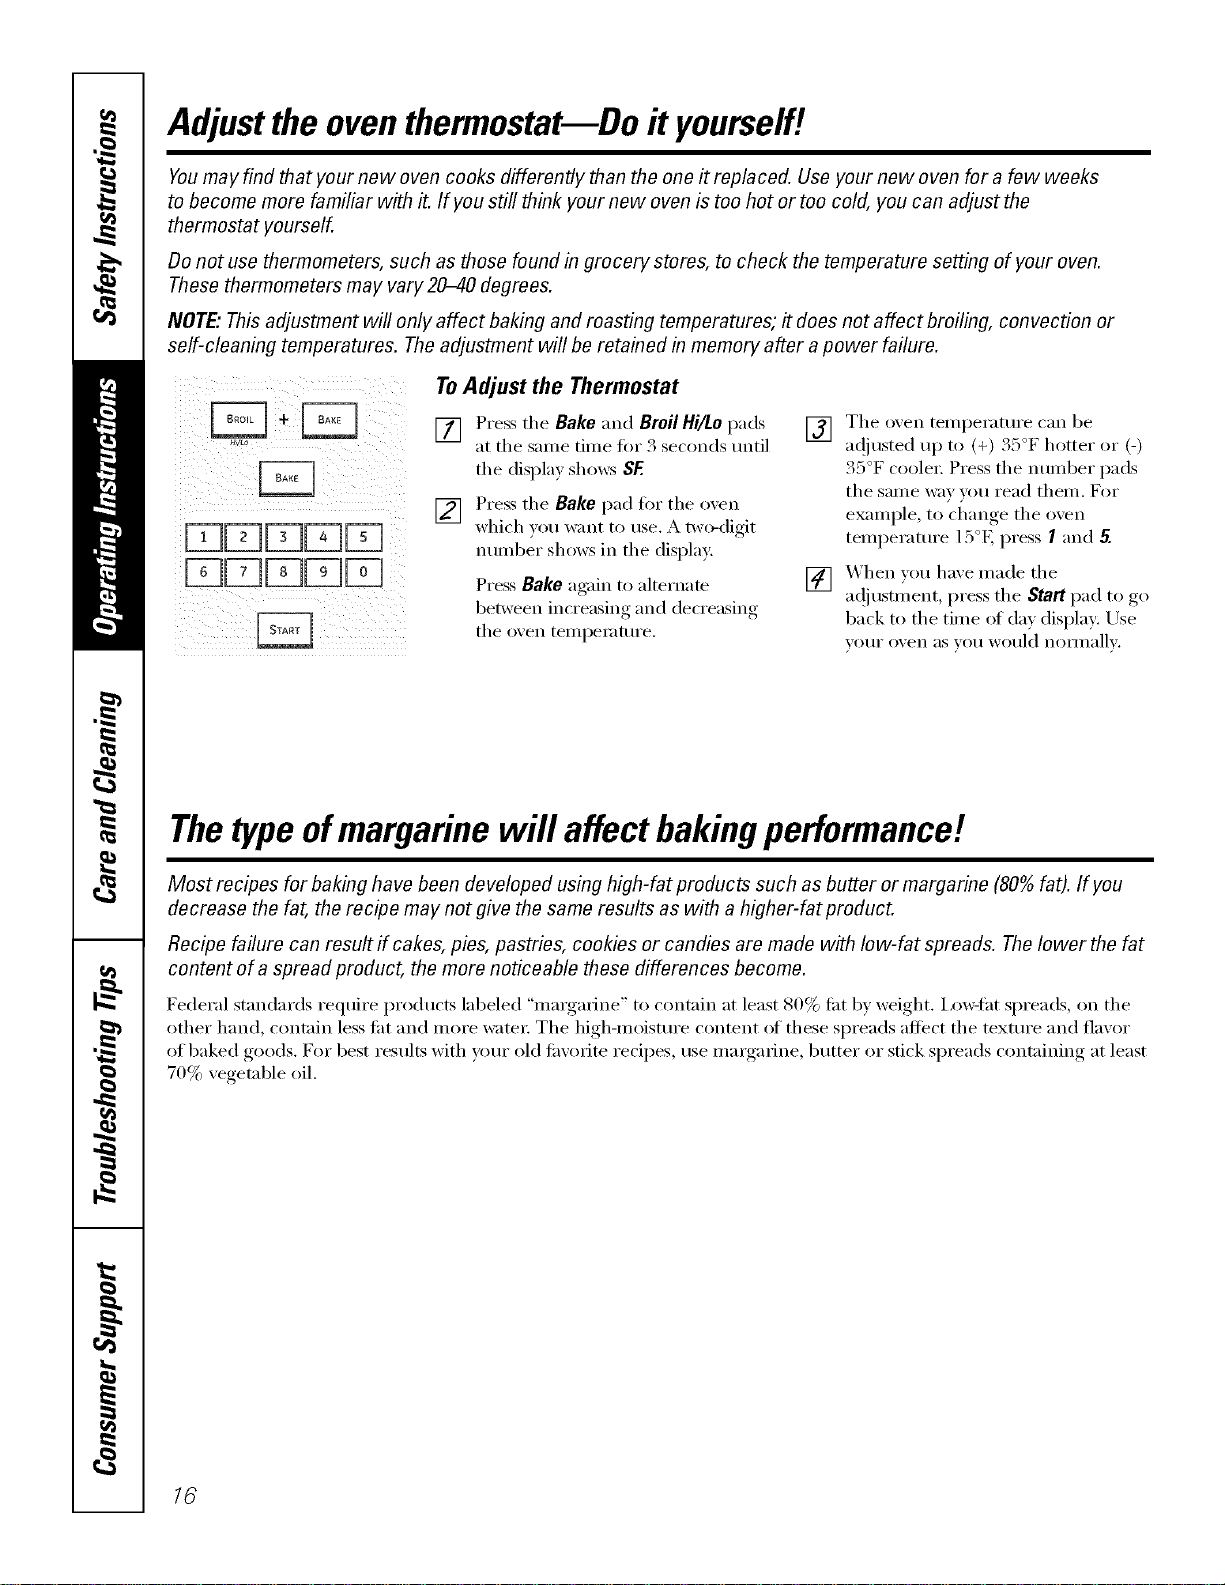
÷÷ ToAdjust the Thermostat
[] Pressthe Bakeand BroilHi/Lopads
at the same dine fin" 3 seconds until
the display shows SE
[] Press the Bake pad fi)r the oven
which you want to use. A two-digit
number shows in the display:
Press Bake ag;fin to alternam
between increasing and decreasing
the oven teml)elamre.
[] The oxen telnl)erature can be
ac!justed up to (+) 35°F hotter or (-)
35°F coolei: Press the imlnber pads
the sanle way you read theln. For
examl)le ,to change the oven
temi)eramre 15°E press Iaim 5.
[] When you haxe inade the
a(!justn/ent, press the Start pad to go
back to the Olne at day display: Use
VOILE oven as Vail would nOlIllallv.
Thetype ofmargarine will affect bakingperformance!
Most recipes for baking have been developed using high-fat products such as butter or margarine (80% fat). If you
decrease the fat, the recipe may not give the same results as with a higher-fat product.
Recipe failure can result if cakes, pies, pastries, cookies or candies are made with low-fat spreads. Thelower the fat
content of a spread product, the more noticeable these differences become.
Federal standards require i)roducts labeled "illargalJne" to contnin at least 80% tilt by weight, ixmqht spreads, on the
other hand, contain less tilt and more water; The high-moisture content (ff these spreads afli_ct the texture and flavor
of baked goods. For best results with your old til\'orite recipes, use inargalJne, butter or stick spreads contnining at least
70% vegetable oil.
16
Usingtheself-cleaning oven. gecom
The oven door must be closed and all controls must be set correctly for the cycle to work properly.
@
J
Wipe up heavy soil on flTeoven
bottom. (appearance may vary)
Before a Clean Cycle
We recommend venting y(:,ur kitchen
with an open window or using a
ventilation tim or hood dm'Jng
the fi_t sel6clean cycle.
Remoxe an)broiler pan, broiler grid,
probe, all cookware and am ahmfinum
t0ft fl'om the oxen.
The oven racks may remain in the oven
dtwJng the selfq'leaning cycle without
being damaged.
Do not rise abrasives or oven cleanels.
Clean the top, sides and outside ot the
oven door with soap and water;
Make sure the oven light bulb cover
is in place and the oven light is off.
IMPORTANT'. The health of some birds
is extremely sensitive to the flmles given
off (hwJng the selt_-leaning cycle of
any oven. Move birds to another
well-ventilated room.
On double oven models, you can
set a clean cycle in both ovens at the
same time. The last oven set will
automatically delay its start tmtil the
end of the fi_st oven's clean cycle.
On double oven models, )ou can
use timed baking in one oxen and
self:clean the other at the same time,
CAUTION:Neverplacecookingutensilsorany
otheritemsontheovenfloorThereisa heating
elementbeneaththeovenfloorPlaclegitemson
theovenf/oormaycausetheoventooverheat,
resultbgin damagetotheovenandriskof
damageor firetocabinets.
Sro/#ow
How to Set the Oven for Cleaning
[] Press tile Self Clean Std/Low pad
on('e toi" a 4-hotlI" clean tillle of
twice tot a S-horn" clean time.
A 3-horn" sel6clean time is
i'ecoilli/lended fi)i" use when
cleaning small, contained spills. A
selt_lean time of 4 horns or lon(*er
is recommended fin" a dirtier oven.
V_ If a time other than 4 horns or
3 horns is needed, use the number
pads and enter the desired clean
time.
You can change the clean time to any
time between 3 hom_ and 5 hom_,
dei)ending, on how (li_t))ore" oxen is.
[] Press the Start pad.
The door locks automatically. The display
will show the clean time remaining. It will
not be possible to open the oven door
tmtil the telni)erature drops below the
lock temperature and the LOCKED light
goes off.
X4]_en the LOCKEDlight goes off, you will
be able to open the doox:
The words LOCKEDwill flash and the
oven control will signal if you set the
clean cycle and flnget to close the
oven dora:
To stop a clean cycle, press tile
Clear/Off pad. X,_]mn the LOCKED
light goes off indicadng the oven has
cooled below the locking temperature,
you will be able to open the door.
17
Usingtheself-cleaning oven.
The oven door must be closed and all controls must be set correctly for the cycle to work properly.
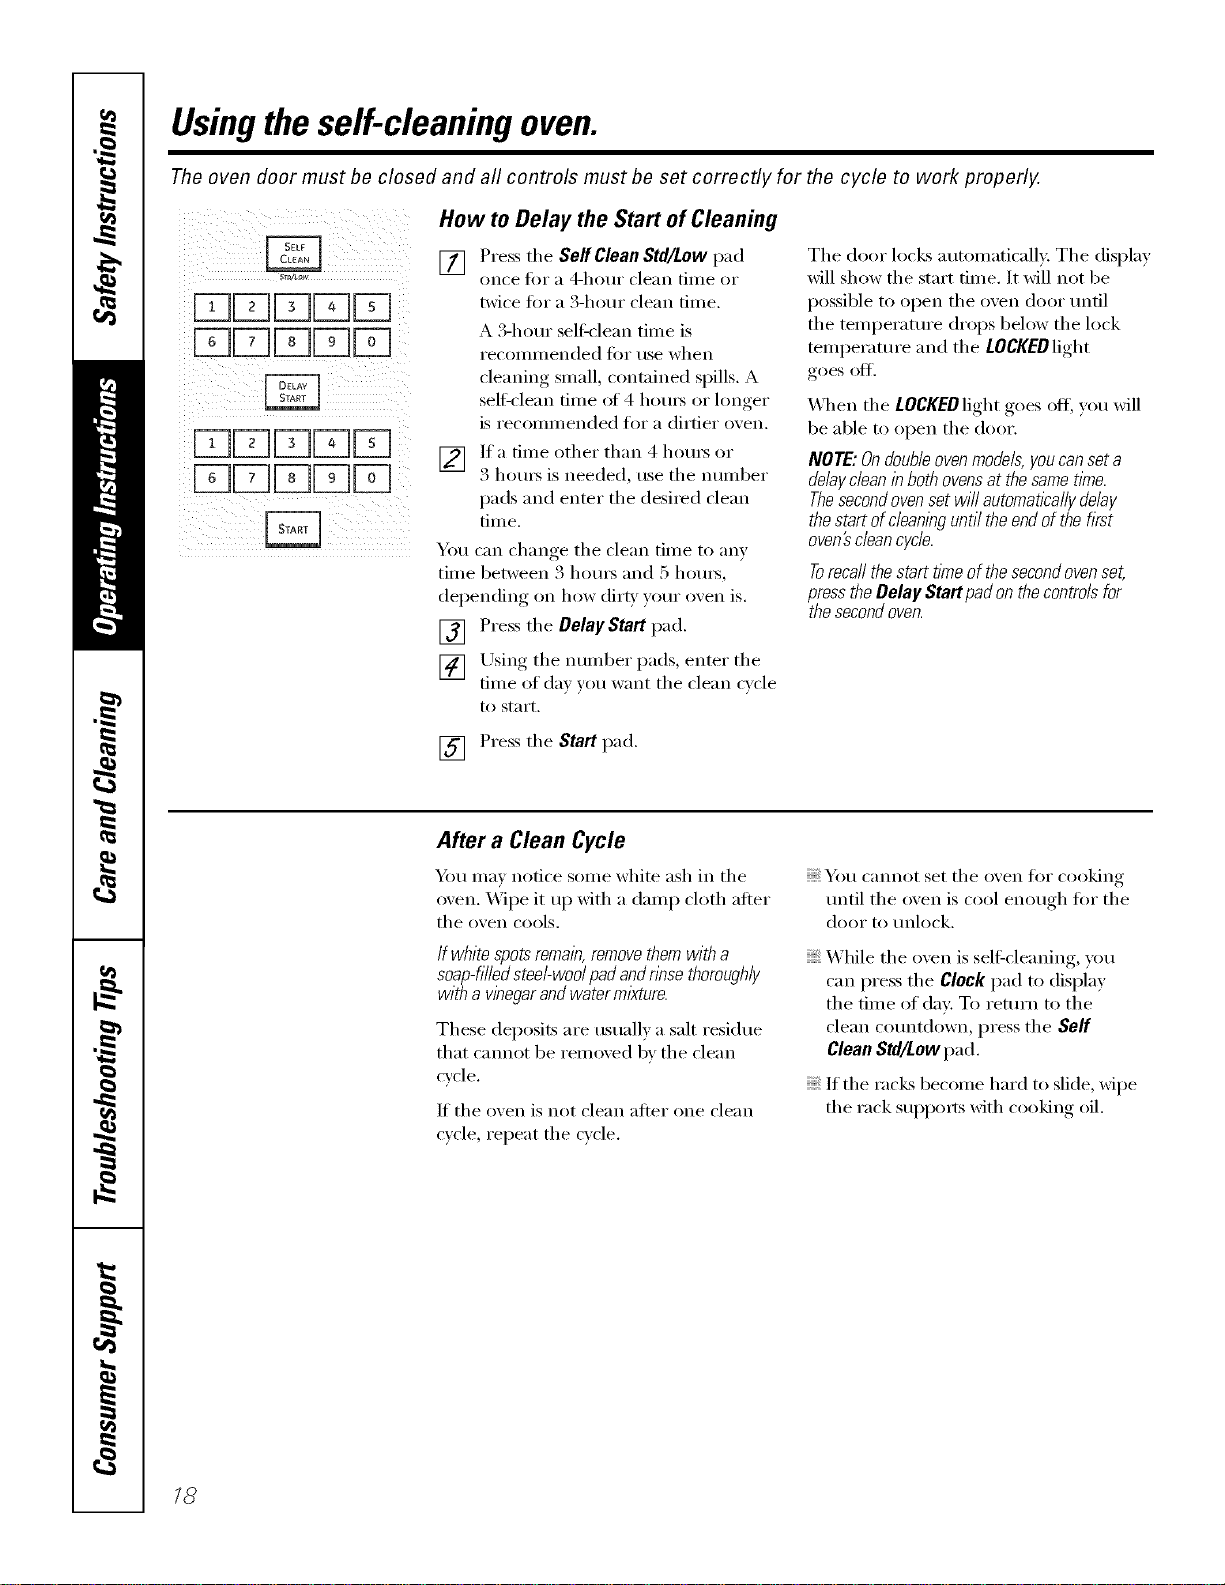
How to Delay the Start of Cleaning
[] Press the SeffClean Std/Low pad
once tot a 4-hour clean time or
twice fi)r a 3-hour clean time.
A 3-hour seltk'lean time is
I'eCoIIlIll ended tar rise when
cleaning small, contained spills. A
sel6clean time at 4 hom_ or longer
is recommended tot a dirtier oven.
[_] Ifa tilne other than 4 houls or
3 houI_ is needed, use tile nunlber
pads and enter the desired clean
time.
You can change tile clean time to any
tiine between 3 houi_ and 5 houi_,
depending on how dir D, yore" oven is.
[] Press tile Delay Start pad.
[] Using tile nunlber pads, enter tile
time of (lax you want tile clean cycle
to start.
Tile door locks automatically. Tile display
will show the start time. It will not be
possible to open tile oven door/mtil
the temperature drops below the lock
temperatm'e and tile LOCKEDlight
goes off.
X41/entile LOCKEDlightgoes oil you will
be able to open tile door.
NOTE:Ondoubleovenmodels,youcanseta
delaydeaninbothovensatthesametlkne.
Thesecondovensetwi//automaticallydelay
thestartofc/eanlbguntiltheendofthefirst
oven_cleancycle.
Torecall thestart flYneof the secondoven set,
pressthe Delay Start pad on the controls for
the secondoven.
[] Press tile Start pad.
After a Clean Cycle
Ym may notice some white ash in tile
oven. Wipe it up with a damp cloth alter
tile ()veil cools.
If white,spots remain,removethem with a
soap-filledsteel-wool pad and nbsethoroughly
with a vinegarandwater mlkture.
These deposits are usually a salt residue
that cmmot be removed by tile clean
cycle.
If tile oven is not clean atter one clean
cycle, repeat tile cycle.
You cannot set tile oven fiw cooking
tmtil the oxen is cool enough tot the
door to t/nlock.
While tile oven is sel6cleaning, you
can press tile Clock pad to display
tile time of day: To return to tile
clean countdown, press tile Self
Clean Std/Low pad.
If tile racks become hard to slide, wipe
tile rack SUl)pm*s with cooking oil.

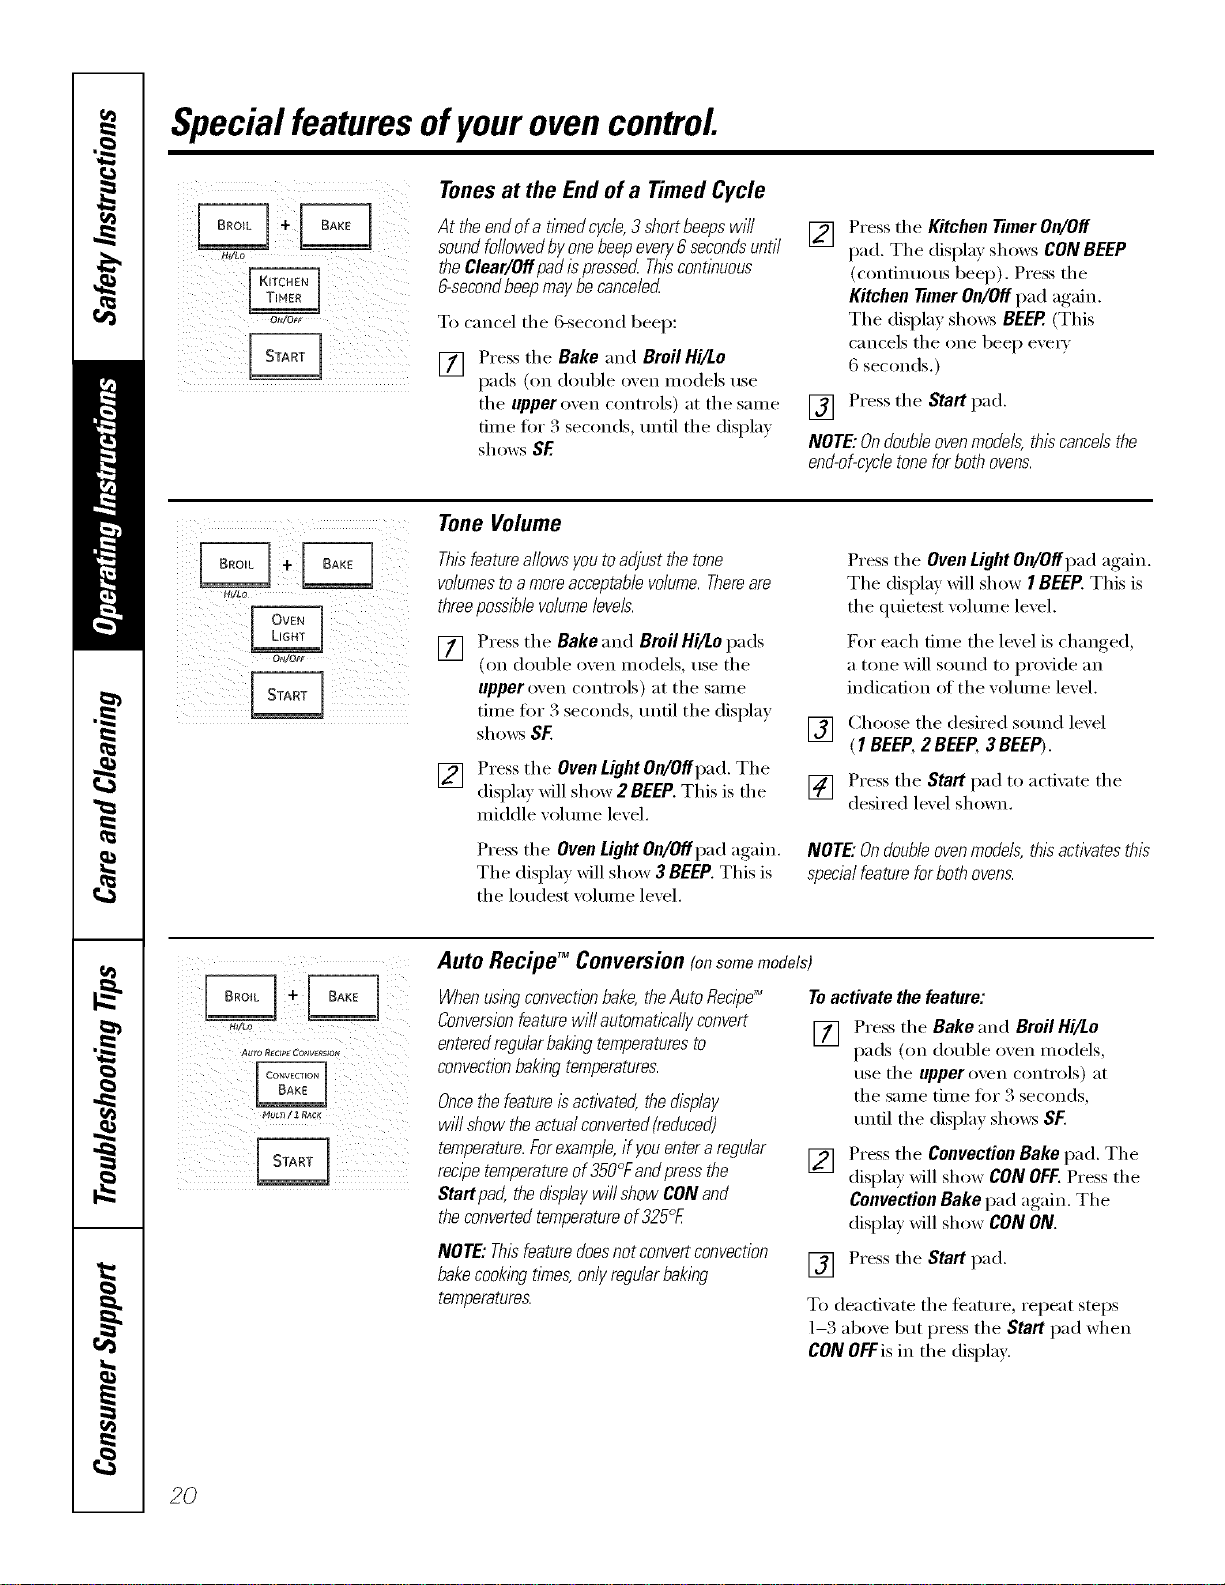
Special featuresofyourovencontrol ge.com
Yournew touch pad control has additional features that you may choose to use. The following are the features
and how you may activate them.
The special feature modes can only be activated while the display is showing the time of day. They remain in
the control's memory until the steps are repeated.
When the display shows your choice, press the Start pad. The special features will remain inmemory after
a power failure, except for the Sabbath feature, which will have to be reset.
12-Hour Shutoff
oven on, thecontrol wi// automatically turn off the
HIILo ovenafter 12hours dunbgbaklhgfunctions or
after 3hours duringa broil function.
If w)u wish to mrn OFFthis teature, fi)llow
the steps below.
[] Press the Bake and Broil Hi/Lo
pads (on double oxen models, use
the upper oven controls) at the same
time tbr 3 seconds, tmfil the display
sho_s SE
[] Press the Delay Start pad tmtil
no shOrt (no shutoff) appea_ in
the displa).
[] Press the Start pad to activate the no
shutoff and lea_e the control set in
this special featm'es mode.
NOTE:Ondoubleovenmodels, th# activates th#
special featurefor both ovens.
H_o
12-Hour, 24-Hour or Clock Blackout
Yourcontrolissettousea 12-hourdock.
If you would prefer to hme a24-hem"
militn_x' time clock or black out the clock
display fi)llow the steps below.
[] Press the Bake and Broil Hi/Lo
pads (on double oven models, use
the upper oven controls) at the same
time fi_r 3 seconds, tmfil the display
sho_:s SE
[] Press the Clock pad once. The
display will show 12hr. If this is
the choice _ou want, press the
Start pad.
Press the Clock pad again to change
to the 24-hour military time clock.
The display will show 24hr. ]f this
is the choice you _m_t, press the
Start pad.
Press the Clock pad again to black
out the clock display, The display
will show OFF.If this is the choice
you want, press the Start pad.
NOTE"If the dock isinthe b/ack-outmode,you
wi// not beable to usethe Delay Start function.
_hAo
bhAo
Fahrenheit or Celsius Temperature Selection
Yourovencontrol isset to usethe Fahrenheit
temperatureselections,but youmay changethis
touse the Celsiusselections.
[] Press the Bake and Broil Hi/Lo
pads (on double oven models, use
the upper o'.en controls) at the same
time fl)_ 3 seconds, tmtil the displa)
shows SE
[] Press the Broil Hi/Lo and Cooking
Time pads again at the same time.
The displa) will show C(Celsius).
[] Press the Start pad.
NOTE:Ondoubleovenmode/s,thenew settlbg
willbedisplayedforbothovens.
[] Press the Broil Hi/Lo and Cooking
Timepads at the same time. The
display will show F(l_2fl_renheit).
18
Special featuresofyourovencontrol.
O_/OFF
i )iii
Tonesat the Endof a TimedCycle
At theendofa tlYnedcycle,3shortbeepswill
soundfollowedbyonebeepevery6secondsuntil
theClear/OffpadispressedThiscontlbuous
6-secondbeepmaybecanceled
To cancel tile 6-second beep:
[] Press tile Bake and Broil Hi/Lo
pads (on double oven models use
tile upper o'`en controls) at tile same
time fin 3 seconds, tmti] tile displa)
shows SE
[] Press tile Kitchen timer On/Off
pad. Tile displa? shows CON BEEP
(continuous beep). Press tile
Kitchen timer On/Off pad again.
Tile display sho_:s BEEP.(This
cancels tile one beep evexT
6 seconds.)
[] Press tile Start pad.
NOTE:Ondouble ovenmodels,this cancelsthe
end-of-cycletonefor both ovens.
Tone Volume
Thisfeatureallows youto adjust the tone
volumesto a moreacceptable volume.Thereare
threepossible volumelevels.
[] Press tile Bake and Broil Hi/Lo pads
(on double o'`en models, use tile
upper oven controls) at tile same
time fin" 3 seconds, mlfil tile display
sho_:s SF.
[] Press tile Oven Light On/Offpad. Tile
displa) _fill show 2 BEEP.This is tile
middle '`olume le'` el.
Press tile Oven Light On/Off pad again.
Tile displa_ xfill show 3 BEEP. This is
tile loudest '`olume le'`el.
Press tile Oven Light On/Offpad again.
Tile display will show I BEEP. This is
tile quietest volume level.
For each time tile level is changed,
a tone will sound to provide an
indication of tile volmne level.
[_] Choose tile desired sound level
(I BEEP,2 BEEP,3 BEEP).
[] Press tile Start pad to acth _te tile
desired le'`el shown.
NOTE."Ondoubleovenmodels,thisactivatesthis
specialfeatureforbothovens.
AUTO RECtPeCONW_5_ON
il i i iiiiii i!
Auto RecipeTM Conversion (onsomemodels)
Whenuslbgconvectionbake,theAutoRecipe_
Conversionfeaturewillautomaticallyconvert
enteredregu/arbaklbgtemperaturesto
convectionbakingtemperatures.
Oncethefeatureisactivated,thedisplay
wi//showtheactualconverted(reduced)
temperature.Forexamp/e,if youenteraregular
recipetemperatureof350_Fandpressthe
Startpad,thedlsp/aywi//showCONand
theconvertedtemperatureof325_£
NOTE:Thisfeaturedoesnotconvertconvection
bakecookingtimes,on/yregu/arbaking
temperatures.
Toactivate the feature:
[] Press tile Bake and Broil Hi/Lo
pads (on double (),,ell Inodels,
use tile upper oven controls) at
tile same time tor 3 seconds,
tmtil tile display sho_:s Sf.
] Press tile Convection Bake pad. Tile
displa_ will show CON OFF.Press tile
Convection Bake pad again. Tile
display will show CON ON.
Press tile Start pad.
[]
To deactivate tile teatm'e, repeat steps
1-3 abo'`e but press tile Start pad when
CON OFFis in tile display.
2O
ge.com
HI/Ln
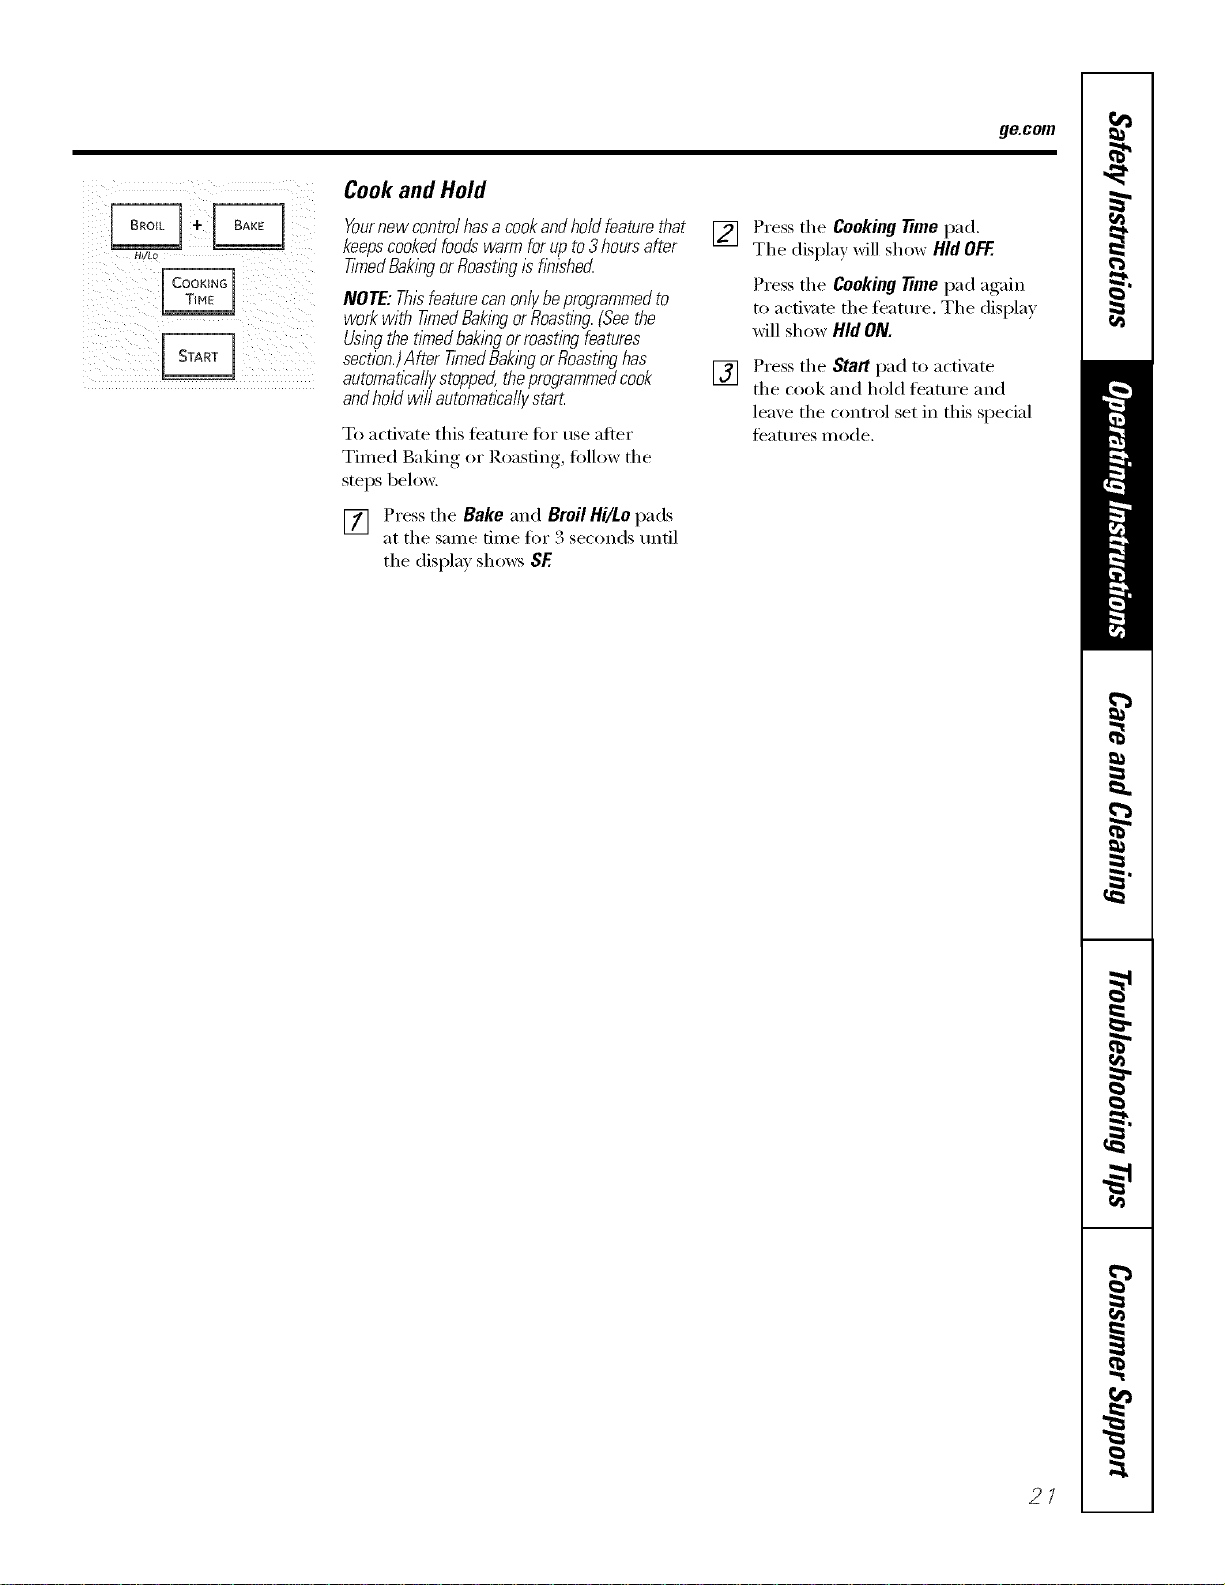
Cook and Hold
Yournewcontroihasa cookandhoidfeaturethat
keepscookedfoodswarmforupto3hoursafter
tinnedBakingorRoastbg12hhlsherL
NOTE: Thisfeaturecan on/]/beprogrammedto
work with timedBakbg or floastbg. {See the
Usingthe tknedbaking or roasting features
section.)After tiYnedBakingor Roastinghas
automaflcaiiystopped,theprogrammedcook
and hoid will automaflcaiiystart.
To activate this teature lot use atier
Timed Bakin,*_ or Roasting, follow the
steps below.
[] Press the Bake and Broil Hi/Lo pads
at the same time fox 3 seconds until
the display shows SE
[]
[]
Press the Cooking _me pad.
The display will show Hid OFF.
Press the Cooking 77mepad again
to acfix _te the teatm'e. The display
will show Hid ON.
Press the Start pad to actix _te
the cook and hold feature and
leaxe the control set in this special
teatm'es mode.
21

UsingtheSabbathFeature.
(Designedforuseon theJewish SabbathandHolidays.)(onsomemodels)
TheSabbathfeature canbe usedfor baking/roastingonlg It cannot be usedfor convection,broiling,self-cleaningor
DelayStart cooking.
NOTE."Theovenfightcomesonautomatically(onsomemodels)whenthedoor is openedand goesoff whenthedoor is closed.
Thebulbmaybe removed.Seethe OvenLightReplacementsection. Onmodelswith a lightswitch on the controlpanel,theoven
lightmay be turnedonand left on.
H,/LO
D[Z][Z]D[E]
[Z]DZ]D[E][Z]
When the display shows Dthe
oven is seth7 Sabbath. When the
display shows D c the oven is
bakhTg/roasting.
Hewto Set for Regular Baking/Roasting
Make sure the clockshows thecorrect time of day and
theoven is off
] Press and hold both th( Bake and Broil
Hi/Lo pads, at the same time, until die
display S]iOWS SE
NOTE:Iibake or broil appears in the
display, the Bake and Broil Hi/Lo pads
_r('_'('I_()t tou(hed at die same time.
Touch t]l(' Clear/Off pad and b('gfin again.
] "].q) die OelayStart pad until SAb bAtH
at)pears ill the display.
] Touch the Start pad and D will appear in
the display.
] Tou(h the Bake t)ad. No sigllal will
[>e+9_en.
] Using the numtler pads, enter the desired
ten/pel_mlre betwee]l 170°F and 5r,()°E
No sigl/al or t(tmpenmlre *,*,rill1X!gixen.
] Touch the Start pad.
[_ After a random (telaT_ period o[
approxinmtely 30 se(onds to 1 n/illute,
D c will apt)ear in the display indi(ating
that tile o*,vn is baking/masting. If D c
doesn't appear ill tile display, start
ag;_in at Step 4.
To a(!just the ()*,el/ teml)eratm'e, t()llCll tile
Bake pad, enter tile new temperature using
the number pads, and touch the Startpad.
NOTE:The Clear/Off and CookingTimepadsm:e
active (truing tile Sallbath/bamre.
When the display shows Dthe
oven is set fl7Sabbath. When the
display shows D c the oven is
bakhTg/roasting.
How to Set for Timed Baking/Roasting -Immediate Start and Automatic Stop
Make sure the clockshows thecorrect time of day and Tou(h the Bake pad. No signal *,*,'illbe
theoven is oK [] gixen.
[]
[]
[]
[]
[]
[]
Press and hold both the Bake and Broil
Hi/Lo pads, at the same time, m/d[ the
display shows SE
NOTE:[[ bake or broil appears ill tile
display, the Bake and Broil Hi/Lo pads
_r(']:(' not tou(hed at the same time.
Touch tile Clear/Offpad and begh/
ag_fin.
Tap the Belay Start pad until SAb bAtH
appears in the display.
"lbu(h the Start t)ad and 2 *,viiiappear in
the display.
"lbu(h the Cooking time pad.
To/l(h the I//llIll)er [)ads tO set tile
desire(t length ot cooking lime betwee]l
1 minute and 9 hour.', and 99 minutes.
The cooking time that yell elltered will
be displayed.
"Ibuch tile Start t)ad.
[]
[]
[]
I..lSill_ tlle I/till/her pads, ellter tlle
desired tenq)erature. No sigl/_fl or
ten/perature will 1)e g,rixell.
Tou(h the Staff pad.
After a randon/delay period of
at)proximatelT_ 30 se( on(Is to 1minute,
D C will al)l)ear ill tile display indicating
that tile oven is baking!roasting. If m C
doesn't appear in the di.splay, start
ag_dn at Step 7.
To a(!lust tile oxen temperature, touch tile
Bake 1lad, enter tile new temperature using
tile number pads and touch tile Startpad.
When cooking is tin[shed, the display \*,'ill
change fl:om D C to D and 0:_0 \\'ill apl)ear
indi(ating that the o*,en has turned OFFbtlt is
still set in Sabbath. P,emove the cooked/ood.
How to Exit the Sabbath Feature
]"lbud/the Clear/Offpad.
] If the overt is cooking, wait tbr a random
dela} perle(1 of approximately 30 seconds
to 1 minute, until onl) D is in the display.
] Press and hold both th( Bake and Broil
Hi/Lo pads, at the same time, m/til the
display shov, s SE
] "lht) the DelayStart pad until 12shdn
or no shdnappears in the displaT_ 12shdn
ill(ti(ates that the o'_ell *,viiiatltOl//ati(all_
turn off after 12 hours, no shdn indicates
that the ovell *,*,'illI/el a/ltOl//aticall+
ttlrll ofF.
] "lbu(h the Staff pad.
NOTE:If a power outage occun:ed while
the o*,vn v,v_sill Sabbath, tile o\en will
;-itltOlilatJc;-illv ttlrll ell ;_llld st:d\ ell evell
vvllell the power ret/lrl/s+ The ovel/COlltrol
llltlSt be reset,
Careand cleaning of the oven. gecem
Be sure electrical _ower is off and aft surfaces are cool before cleaning any part of the oven.
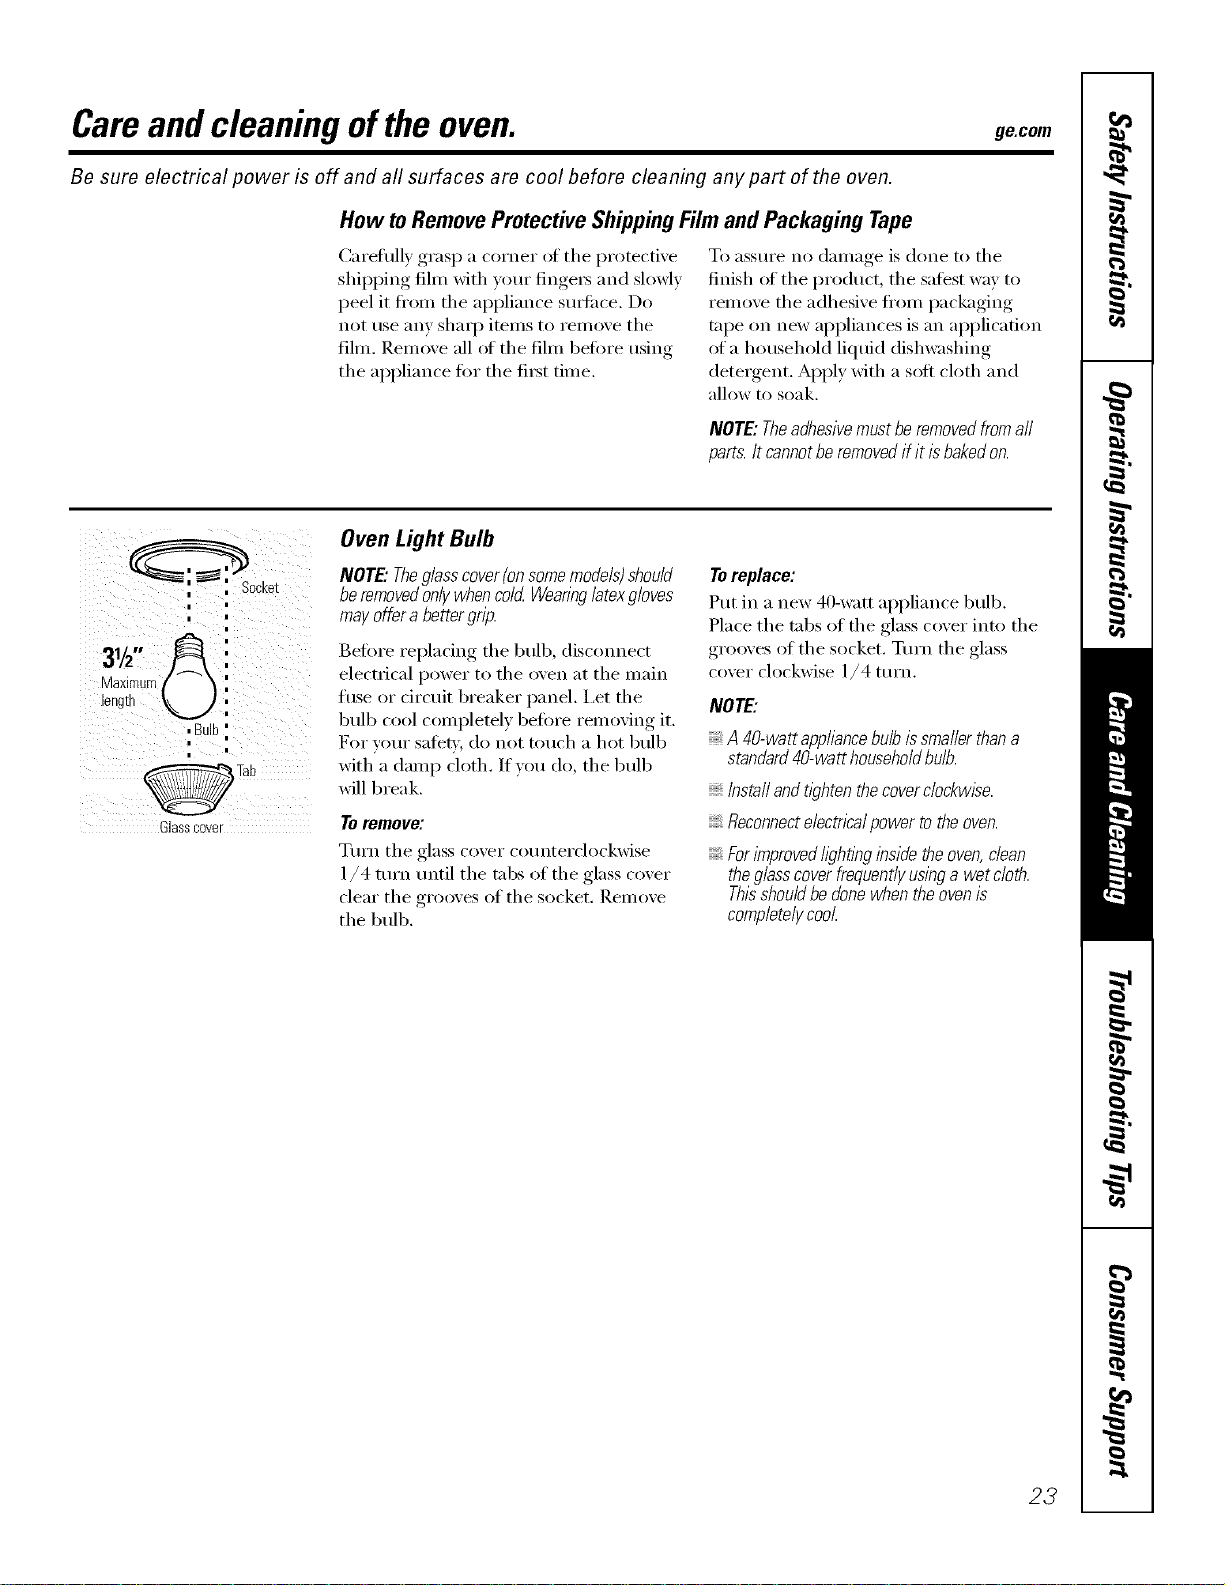
How toRemoveProtectiveShippingFilmand Packaging Tape
Carefllllv grasp a corner of tile protective
shil)ping film with your finge_ and slowly
peel it fl'om tile appliance s/mfi_ce. Do
not use any shaq) items to remove tile
fihn. Remove all of tile film before using
tile appliance fin" tile fi_t time.
To [lSStlYe no daiilage is done to tile
finish of the product, the satest way to
remove tile adhesive fl'om packaging
tape on new appliances is an application
of a household liquid dishwashing
detergent. Apply with a soft cloth and
allow to soak.
NOTE:Theadhesivemustberemovedfromaft
parts.It cannotberemovedif itisbakedon.
i
i
3½" &
Maximun
_engm ,Bulb
i
Glassc0vel
Oven Light Bulb
NOTE."Theglasscover(on somemodels)should
be removedonlywhen cold Wearinglatexgloves
may offer a better grip.
Before replacing tile bulb, disconnect
electrical power to tile oven at tile main
fuse or drcuit breaker panel. I,et tile
bulb cool complemly befin'e removing it.
For yore" satet,i, do not touch a hot bulb
with a damp cloth. If you do, the bulb
will break.
Toremove:
Tm'n tile glass cover co/mterclockwise
1/4 ttlYn until tile tabs of tile glass cover
clear tile grooves of tile socket. Remove
tile bulb.
Toreplace:
Put in a new 40-watt appliance bulb.
Place the tabs of the glass cover into the
grooves of the socket. Turn the glass
cover clockwise 1/4 turn.
NOTE:
A 40-wattapphance bulb issmaller thana
standard40-watt householdbulb.
Instafl andtl_?htenthe cover clockwise.
Reconnecte/ectnca/power to the oven.
ForlTnprovedhghflbginside the oven,dean
theglasscoverfrequently usinga wet c/oth.
Thisshouldbe donewhen the ovenis
completelycool
23
Careand cleaning oftheoven.
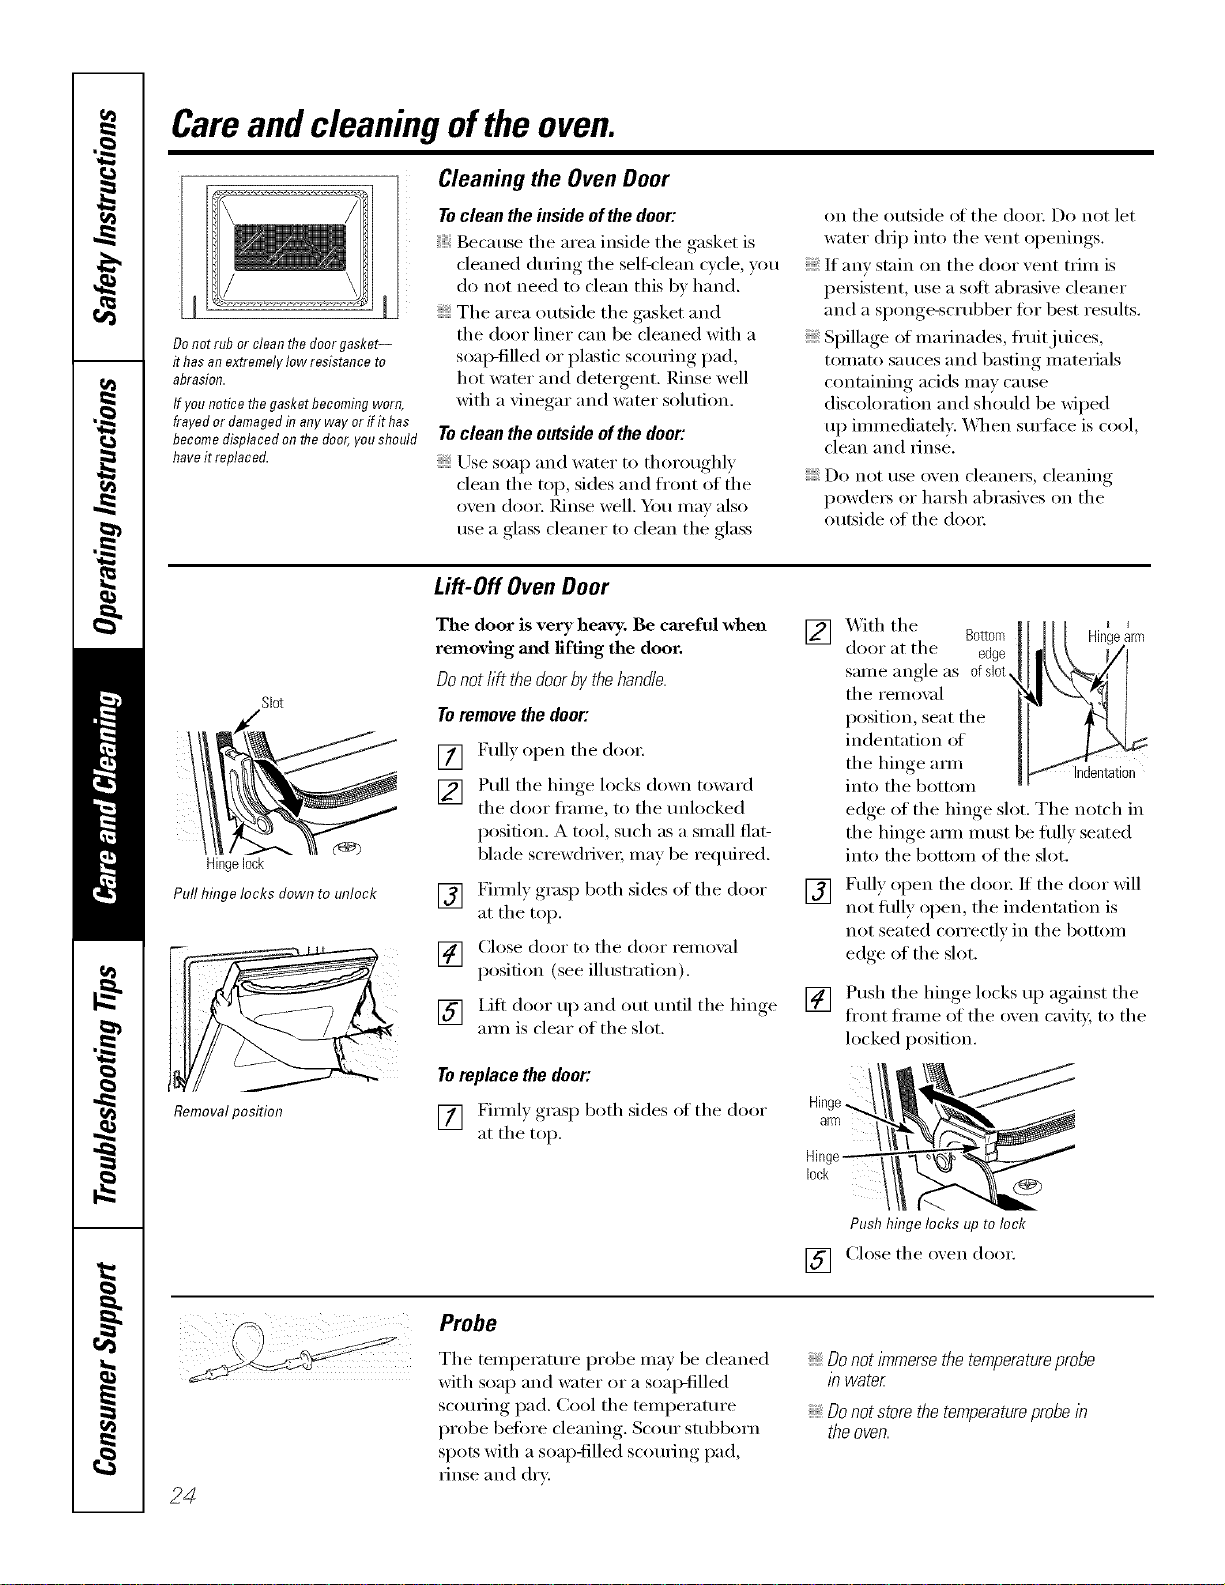
Donotrub or cleanthedoorgasket--
it hasan extremelylow resistanceto
abrasion.
ff younoticethe gasketbecomingworn,
frayedor damagedinany wayor if it has
becomedisplacedon thedoor,youshould
haveit replaced.
Cleaning the Oven Door
Toclean the inside ofthe door:
Because tile area inside tile gasket is
cleaned during tile self_'lean cycle, you
do not need to clean this bv hand.
The area outside the gasket and
tile door liner can be cleaned with a
soap-filled or plastic scom-ing pad,
hot wamr and dem_gent. Rinse well
with a vinegar and water solution.
Toclean the outside of the door:
Use soap and water to thoroughly
clean the top, sides and front of the
oven (lore: Rinse well. _)u may also
use a glass cleaner to clean tile glass
on tile outside ot tile (loot; Do not let
water drip into the vent openings.
If any stain on the door vent trim is
i)e_istent, use a soft abrasive cleaner
and a sponge-scrubber tot best results.
SI)illage el marinades, fl'uitj uices,
tomato sauces and basting materials
containing acids may cause
discoloration and should be wiped
u I) immediately. _]/en sm'ti_ce is cool,
clean and _inse.
Do not use oxen cleaner3, cleaning
i)ow(le_ or ha_h abrasixes on tile
outside of tile (loo_:
Slot
d_
Hingelock
Pull hinge locks down to unlock
Removalposition
Lift-Off Oven Door
The door is very heavy. Be careful when
removh_g m_d lifting the door.
Donot lift the door by the handle.
Toremove the door:
[] Full) open tile (loo_:
[] Pull tile hinge locks down toward
the door fl'ame, to the mdocked
posidon. A tool, such as a small fiat-
blade screw(hixe_; may be reqtfired.
[] Firefly grasp both sides of tile door
at tile top.
[] Close door to tile door remox d
position (see illustration).
[] l.ifl door up and out tmtil tile hinge
aml is clear el tile slot.
Toreplace the door:
[] Fimdy grasp both sides ol tile door
at tile top.
]Bottom _arm
X._ith tile
door at tile edge
sanle angle as ofslot,
tile remox_d
position, seat the
indentation of
tile hinge am/ Indentation
into tile bottom
edge of the hinge slot. The notch in
the hinge aml must be flfllv seated
into tile bottom of tile slot.
[] Fully open tile doo_: If tile door will
not flflly open, tile indentation is
not seated correctly in tile bottom
edge of the slot.
[] Push tile hinge locks up against tile
fl'ont fl'ame of tile oxen caviD; to tile
locked position.
Push hinge locks up to loci<
[] Close the oxen dora:
24
Probe
Tile temperatm'e probe ma) be cleaned
with soap and water or a soal)-filled
scorning pad. Cool tile temperature
probe before cleaning. Scorn" stubborn
spots with a soap-filled scouring pad,
rinse and dr*:
Donotimmersethetemperatureprobe
in water
Do not store the temperatureprobe in
the oven.

ge.com
Ovenrack Oven Racks
_M1 oven racks may be cleaned by hand
with an abrasive cleaner or steel wool.
_Mter cleaning, rinse the racks with clean
water and (h_' with a clean cloth.
Tile oven racks may remain in tile oven
(hwing self:cleaning cycle without being
damaged.
If tile racks become hard to slide, wipe
their side edges with a light coating ot
vegetable oil atter cleaning them by hand
or in the oven, This will hel I) maintain
tile ease of sliding tile rocks in and out
ot the oven.
Control Panel
It's a good idea to wipe tile control
panel after each use. Clean with mild
soap and water or vinegar and water,
rinse with clean water and polish (h_,'
with a soft cloth. X4]/en cleaning, the
control panel should be at room
temperature and not in direct s/mlight.
Do not/lse abrasive cleansei_, strong
liquid cleanse_, plastic scorning pads or
oven cleanet_ on the control panel--they
will damage the finish. A 50/50 solution
of vinegar and hot water works well.
Stainless Steel Surfaces (onsomemodels)
Donotusea steelwoolpa& itwill scratch
thesurface.
To clean tile stainless steel sm_hce,
use warn/sudsy water or a stainless steel
cleaner or polish. _Mwa):s wipe tile sm'fi_ce
in the direction of the grain. Follow the
cleaner instructions fi)r cleaning tile
stainless steel s/wlhce.
To inquire about imrchasing stainless
steel appliance cleaner or polish, or to
find the location of a dealer nearest you,
please call our toll-fl'ee number:
NationalPartsCenter
1.800.626.2002
ge.com
25
Before YouCall ForService...
Troubleshooting tips
Save time and money! Review the charts on the following
pages first and you may not need to carl for service.
Possible Causes What To Do
Controlsignals after You forgot to enter a bake *Press the Bake pad and desired temperature or tile
entering cooking time temperature or cleaning Self Clean Std/Low pad mad desired dean time.
or delay start time.
Fooddoes notbake Oven controls improperly set. *See tile Using the oven section.
or roastproperly Rack position is incorrect *See tile Using the oven section.
or the rack is not level.
Oven floor not in place. *Replace the oven floo_:
Oven thermostat needs *See the Adjust the oven thermostat--Do it yourself!
adjustment, section.
Fooddoes not Oven door is open. •(',lose the (_1oo_:This model is designed for closed door
broilproperly broiling oul): _Mwa):s broil with the door (losed.
Oven controls improperly set. *Make sure you press the Broil Hi/Lopad.
Improper rack position *See the Broiling Guide.
being used.
Food being cooked *For best results, use a p:m designed fi)r broiling.
in a hot pan. Make sure it is cool.
Cookware not suited *For best results, use a p:m (lesigued fin" broiling.
for broilhag.
The probe is plugged into the *Unplug and remove the probe from the oven.
outlet in the oven.
ha some areas the power *Preheat the broil element tor 10 Iniuutes.
(voltage) maybe low. * Broil for the longest period of time recoulu/euded in
the Broiling Guide.
Clock and timer A fuse ha your home may be *Replace the fl/se or reset the circuit breaker.
do not work blmm or the circuit breaker
tripped.
Oven controls improperly set. *See the Using the clock, timer and control lockout
section,
Oven light does Light bulb is loose or defective. *Tighten or replace the btdb.
not work Pad operating light is broken. • Call fin" service.
2C
ge.com
Possible Causes What To Do
Oven temperature too Oven thermostat * See tile Adjust the oven thermostat--Do it yourself!
hot or too cold needs adjustment, sectiou.
Oven will not work A fuse in your home may *Replace tile fl/se or reset tile circuit breaker:
be blown or the circuit
breaker tripped.
Oven controls improperly set. *See tile Using the oven section.
Oven will not self-clean The oven temperature * Allow tile oveu to cool and reset the coutrols.
is too high to set a
self-clema operation.
Oven controls hnproperly set. *See tile Using the self-cleaning oven sectJou.
The probe is plugged into •Reluove the probe from the oven.
the outlet in the oven.
"Crackling" or This is the sound of the •This is normal.
"popping "sound metal heating and cooling
during both the cooking and
cleaning functions.
Excessive smoking Excessive soil. *Press tire Clear/Off pad. Open the windows to rid
during clean cycle tire room of smoke. _\'ait until tire LOCKEDlight goes
off. Wipe up tire excess soil and reset the cleau cycle.
Oven door will Oven too hot. *Allow the oven to cool below h)ckiug, teml)erattu'e.
not open after a
clean cycle
Oven not clean after a Oven controls not properly set. *See tire Using the self-cleaning oven section.
clean cycle Oven was heavily soiled. *(,'lean tq) heavy spilh)vers beh)re starting tire clean
cycle. Hea\'ilv soiled oveus may ueed to sell:cleau
again or for a hmger period of time.
"LOCKED"flashes The self-clean cycle has *Close the oven door.
in the display been selected but the
door is not closed.
LOCKED light is on The oven door is locked * Press tire Clear/Offpad. Allow tire oven to cool.
when you want to cook because the temperature
inside the oven has not
dropped below the
locking temperature.
27
Before YouCallForService...
Troubleshooting tips
Possible Causes
"F-- and a number You have a function
or letter" flash error code.
in the display If the fm_ction code repeats. *Disconnect all power to the oxen for at least 30
seconds and then reconnect power. If the flmction
error code repeats, call for ser'Ace.
Displaygoes blank A fuse in your home may * Replace the fllse or reset the circuit breaker,
be blown or the circuit
breaker tripped.
The clock is in the * See the Special features ofvour ovencontrol section.
black-out mode.
Displayflashes Power failure. * Reset the clock.
Unable to get Oven control pads were *The Bake and Broil Hi/Lopads (on double oxen
displayto show "SF, not pressed properly, models, use the ui)i)er oxen (ontrols) must be
pressed at the same time and held for 3 seconds.
"PROBE" appears in This is reminding you to *Enter a probe temperatm'e.
the display enter a probe temperature
after plugging in the probe.
Power outage, Power outage or surge. *Reset the clock. If the oxen was in use, you must reset
clock flashes it by )ressing the Clear/Offpad, settim, the ch)ck
and resetting an} cooking flmction.
steamfrom the When using the convection • This is normal.
feature, it is normal to see
steam coming out of the
oven vent. As the number
of racks or mnom_t of
food being cooked increases,
the aanom_t of visible steam
wiU increase.
What ToDo
•Press the Clear/OfflYad. Mlow the oven to cool fi)r
one horn _.Put the oxen back into operation.
"Burning" or "oily," This is normal in anew oven *To speed the I)rocess, set a self-clean cycle for a
odor emitting from and will disappear in time. minim mn of 3 hours. See the Using the self-cleaning
the vent oven section.
Strongodor An odor from the insulation
around the inside of the
oven is normal for the first
few times the oven is used.
•This is temporar).
Fannoise A cooling fan or aconvection
fml (depending on the
function you are using)
may automatically turn on.
•This is normal. The cooling tim will turn on
to cool internal parts. It may rtm for u I) to l-I/2
horn's after the oven is turned off. The convection
thn will cycle on and off tmtil the fimction is over
or the door is opened,
28
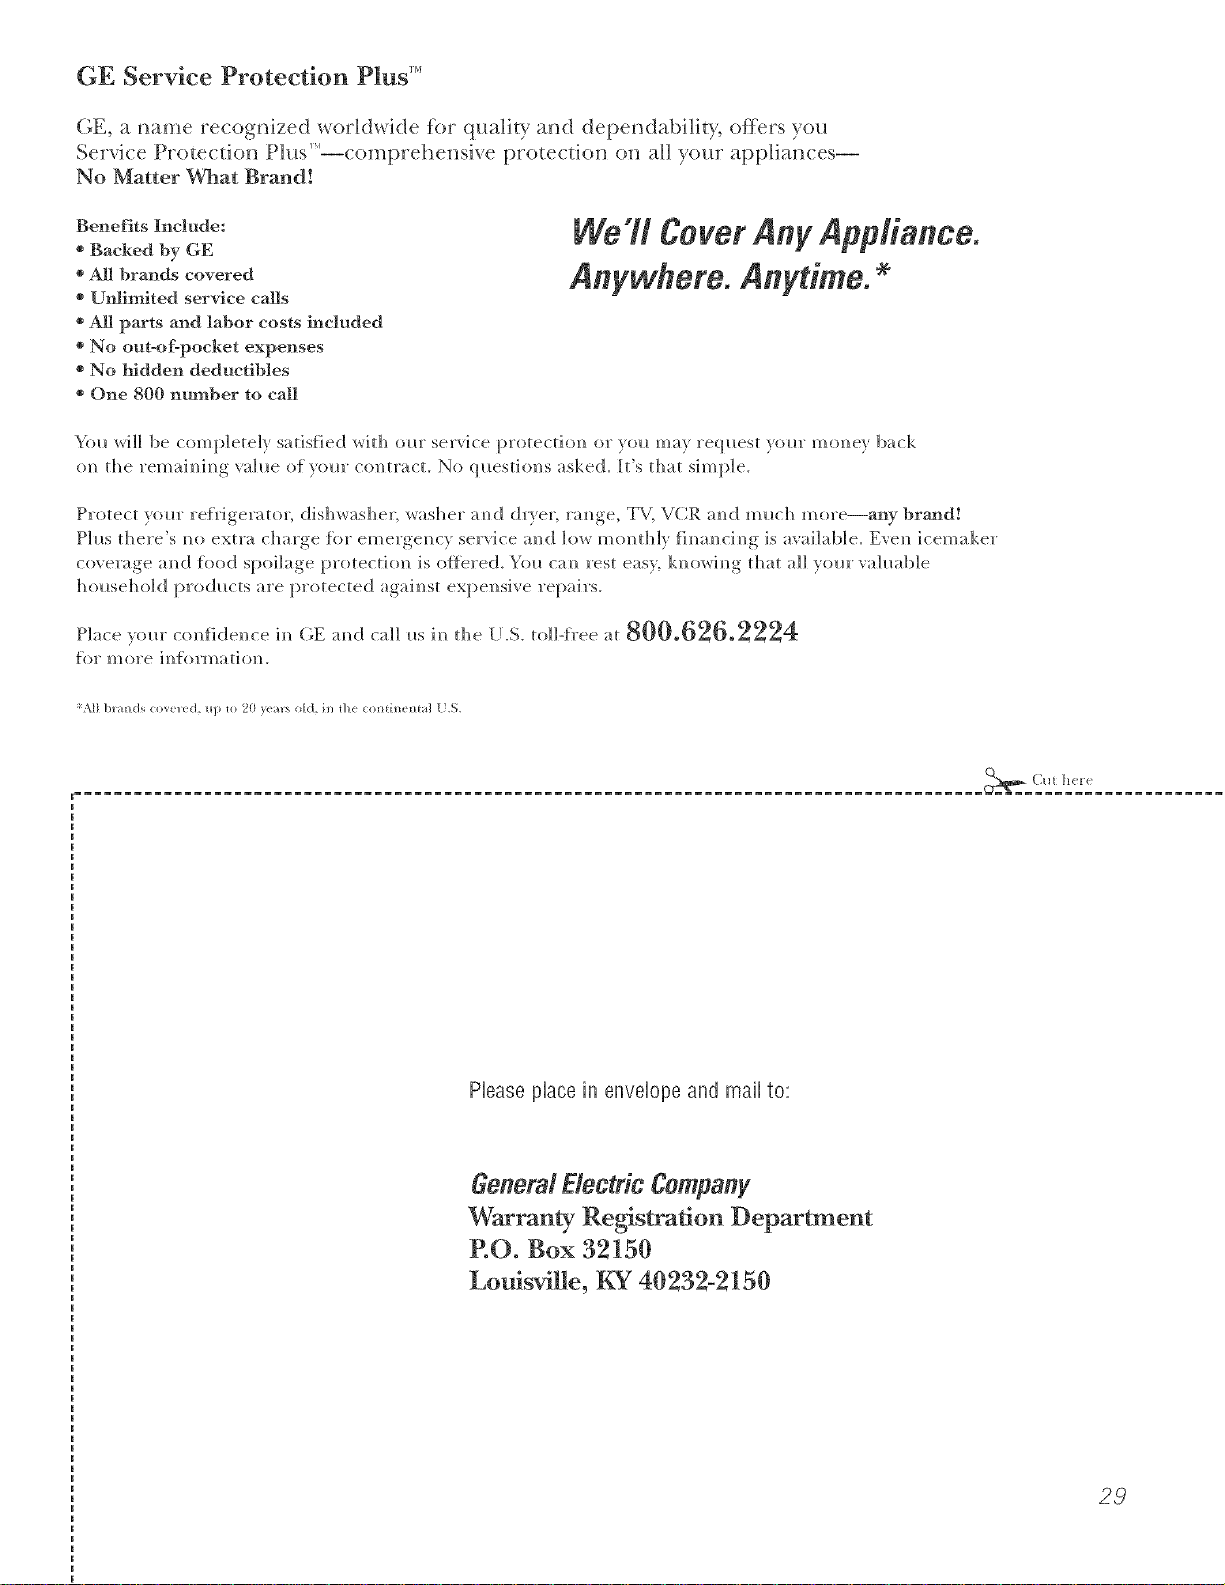
GE Service Protection Plus '_'
GE, a _mme recognized _;orldwkle fbr q_mlity a_d depeildabHity; offers )ou
) it .
Service Protectio_ t h_s --comprehe_s_xe protecti(m o_ aH }ore applim_ces--
No Matter What Brand[
Benefits Include:
o Backed by GE
o All brands covered
o Unlimited service calls
o All parts and labor costs h_cluded
oNo out-of-pocket expenses
o No }ridden deductibles
o One 800 nt_fl_er to call
We ?i Cover Any Appliance.
Anywhere° Anytime.
Y<m wi]] be complete]} satisfied with our service protectiol_ or }ou ma', request }ol_r mol_ev back
om_ the remaim_im_g vab0e of_om" co]_tract. No questiol_s asked. It's that simple.
Protect w)l_r refi'igera to_; dis]]wash e_; was]] era m_d (byes; ra m_ge, TVI VCR a m_d m i_ch m ore--any brand!
Plus there's m_<)extra charge {or emergel_cy service al_d ]o_ mol_tb]y fim_am_cim_g is available. Evel_ icemaker
coverage a_d tood spoilage protectio]] is o_tered_ _'i)_l ca_ rest eas). ki_owi_g that a]] v<mr w_blab]e
ho_seho]d producers are protected agai_st expel_sive repairs.
for more
*\[1 |l*al_ds (ox_.ll d, tip Io 90_ _< !1"_old, ill ib< ( >l_[l_/l l_[a] [J._.
Please place in envelope and mail to:
General Etectric Company
Warranty Registration Department
P.O. Box 3215(}
Louis,dUe, KY 40232-2150
Consumer Product Ownership Registration
Dear Customer:
Thank you for purchasing our product and thank you for placing your confidence in us.
VCeare proud to hme you as a customer'.
Follow these three steps to protect your new appliance investment:
Complete mid mail
your Consumer
Product Ownership
Registration today.
ttave the pvaov of
mind of knowing wc
call contact VOll ill
the tmlikelx cx_nt of a
saR>U, modification.
After mailing the
registration below,
store this document
in a sail. place. It
contains inlormation
you will need should
you require service.
Our serxice lat/llaber is
800.(;E.CARES
(800.4?,2.2737).
Read VOIIF ()wller's
Mamlal ca refllllT_
It will help you
opel-at{ VOIlF llew
appliance properl>
Model Number Serial Number
I I I
Important: If you did not get a registration card with your
product, detach and return the form below to
ensure that your product is registered, or register
online at ge.com. ,_,,_ Cul h<r<
Consumer Product Ownership Reg
Model Number Serial Number
Mn Ms. M_s. Miss
Fir_l ] ILasll
Name IIIIIIIII Name IIIIIIIIIIII
Sl r<!(!l [
Address I I I I I I I I I I I I I I I I I I I I I I I I
, I
I
I
Apt. # ]
Ciw ] I I
1)alePhlced
hi Use Ill
Month
IIIIIIIIE-mail Address::
IIIIIIII
Day] I ] ",_,ar_
Zip
[ [ ] State ] I [ Code
Phon_
Number] I I 1-1 I I
30
GE Consumer & Industrial
Appliances
General ElectdcCompany
Louisville,KY40225
ge,com
*Please provide your e-mail address to receive, via e-mail, discounts, special ollbp, and ()tiler important
communications from (;E Appliances (GI_\).
Check here if you do not want to receive communications fl-om GEA's carcfillly selected partners.
FAII.URI_ TO COMPI.ETE AND RETI 7RN TIIIS CARD DOES NOT DIMINISII Y()[ 7R
W.\l_t \N'IY RIG trFS.
For more information about G1LVsprivacy and daIa usage polic> go to ge.com and click on
"Pri_a_y Policy" or call 81_).626.2224.
Notes.
I
w
m.
w
31
m
Notes.
,0
m
__
r_
m
m
32
GEBuilt-InElectric OvenWarranty.
All warranty service provided by our Factory Service Centers, or
an authorized Customer Care®technician. Toschedule service,
on-line, 24 hours a day, vis# us at ge.com, or call 800.GE.CARES
(800.432.2737).Please have serial number and model number
available when calling for service.
Staple your receipt here.
Proof of the original purchase
date is needed to obtain service
under the warran_
From the date of the
origina! purchase
GE Will Replace:
Any pattof the oven which fifils due to a (lefect in materials or w(n'kmanship.
During this limited one-year warranty, GE will also provide, free of charge, all labor
and in-home service to replace the (lefecti\'e part,
Service trips to your home to teach you how to
use the product.
Improper hlstallation, delivery or mah_tenm_ce.
Failure of the product if it is abused, misused,
or used for other thml the intended purpose
or used commercially.
Replacement of house fuses or resetting of circuit
breakers.
Dmnage to the product caused by accident, fire, floods
or acts of God.
h_cidentaJ or consequential dmnage caused by possible
defects with this applimlce.
Dmnage caused after delivery.
Product not accessible to provide required service.
EXCLUSIONOFIMPLIED WARRANTIES--Your sole and exclusive remedy isproduct repa# as provided in thisLimited
Warranty.Any implied warranties, iucluding the implied warranties ofmerchantability orfitness fora particular purpose,
are limited to one year or the shortestperiod allowed bylaw.
This warranty is extended to the original purchaser and any succeeding owner for products purchased for
home use within the USA. If the product is located in an area where service by a GEAuthorized Servicer is not
available, you may be responsible for a trip charge or you may be required to bring the product to an Authorized GE
Service location for service. In Alaska, the warranty excludes the cost of shipping or service calls to your home.
Some states do not allow the exclusion or limitation of incidental or consequential damages. This warranty
gives you specific legal rights, and you may also have other rights which vary from state to state. Toknow
what your legal rights are, consult your local or state consumer affairs office or your state's Attorney General
Warrantor."General Electric Company.Louisville,KY 40225
32
ConsumerSupport.
"I gEAppliancesWebsite ge.com
Haxe a question or need assistance with )our appliance? Tr) tile GE Appliances _._ebsite 24 hom_ a day,
an) day of tile }ear! For greater convenience and taster service, you can now download Owner s Manuals,
order parts or exert schedule serxice on-line.
ScheduleService
Expert GE repair seix'ice is only one step awa) fl'om your dooi: Get on-line and schedule your serxice at
your comenience 24 hom_ am' day of tile year! Or call 800.GE.CARES (800.432.2737) {huin{* n{mnal
business hom_.
de.com
RealLifeDesignStudio ge.com
GE supports tile Uni\'eisal Design concept--products, services, and enviromnents that can be used by
people of all ages, sizes and capabilities. We recognize tile need to design for a wide range of physical and
inental abilities and iml)ailments. For details of GE's Univei_al Design apl)lications, including kitchen
design ideas tor people with disabilities, check out our X&'ebsite today. For the healing impaired, please call
800.TDD.GEAC (800.833.4322).
ExtendedWarranties ge.com
Purchase a (;E extended warrant_ and learn about special discounts that are a_ailable while xour, warrant_
is still ill effect. You C_lllpurchase it on-line amfinm or call 800.626.2224 during mmnal business hom_.
GE Consulner Home Serxices will still be there alter )our warrant}, expires.
PartsandAccessories de.com
Individuals qualified to sei','ice their own appliances can have parts or accessoiJes sent directly to their
holnes (VISA, Master(:ard, and Discover cards are accepted). Order on-line today, 24 houi_ every day or by
I)hone at 800.626.2002 duIing noi_nal business houi_.
Instructions contained in this manual cover procedures to be performed by any user. Other servicing generally
should be referred to qualified service personnel Cautionmust be exercised, since improper servicing may cause
unsafe operation.
ContactUs ge.com
If you are not safistied with tile service w)u receive fl'om GE, contact us on our X'Vebsite with all tile details
including your i)hone ntlll/beI; oI" wIJte to: General Managei; C/lStOll/eI" Relations
GE Appliances, Appliance Park
I,ouisville, KY 40225
l RegisterYourApplbnce
Register your new applimlce on-line---at your convenience! TiInel) product registration will allow for
' enhanced colnlnunication and i)rolnl)t service under tile terms of)our warranty, should tile need aiJse.
You nlav also Inail ill tile prel)rinted registration card included ill tile l)ackin°_ inatelJal.
ge.com
Printed in flTe United States