Loading ...
Loading ...
Loading ...

6
Before First Use:
Read all instructions and safety information carefully before first use. Please retain this information
for future reference.
1. Remove the parts from the packaging.
2. Place the oven on a flat, dry surface.
3. Remove any promotional labels or stickers.
4. Plug in and heat the oven empty for around 10 minutes at 230°C with the upper and lower
heating elements on.
5. Dispose of the packaging in a responsible manner.
6. Your appliance is now ready for normal use.
Note: There may be some smoke and a slight burning smell emitted during first use. This is normal
and just a product of any leftover manufacturing residue. This is not a malfunction and will stop after
the first few uses.
Using Your Appliance:
1. Insert the wire rack or baking tray into the oven, onto the required shelf.
2. Plug the oven in and preheat as required by your recipe.
3. Set the temperature dial and the oven function dial. The front indicator light will show when
the heating elements are on.
4. Using oven gloves, place the food to be cooked into the oven.
5. Set the timer by turning it clockwise.
6. Once the time is up, the timer will ring, reminding you to remove your food from the oven.
Note: Some food may require turning halfway through cooking time. Always follow the instructions
on the food packaging.
Note: You can only use 2 of the functions at any one time, ie: 2 x Hotplate, 1 X Hotplate & Oven &
1 x Hotplate and 1 x Rotisserie.
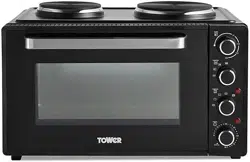
Using the hotplates:
1. Place a pot or pan onto the desired hotplate.
2. Turn on the hotplate dial, select your required temperature, and then set the required time.
3. When the timer has finished, the hotplates will shut off automatically.
Using the rotisserie:
1. Slide the spit in to the centre of the chicken, beef or any meats, slide the rotisserie forks on to
the spit (forks inwards) securing the forks with the thumb screws so that the meat is tight on
the spit.
2. Set the temperature dial and the oven function dial.
3. Insert the pointed end of the spit into the drive socket, inside the oven. Rest the square end of
the spit on to the spit support, on the opposite inner wall of the oven.
4. Set the timer dial to the desired cooking time.
5. When complete, the timer bell will ring and the timer will turn off.
6. Remove the spit by placing the hooks of the rotisserie handle under the grooves on either side
of the spit.
7. Lift the left side of the spit up and out first, and then pull the spit out of the drive socket and
carefully remove from the oven.
8. Take the food off the spit and place it on a cutting board or platter.
Note: When cooking poultry, it may be necessary to secure both the legs and wings to the body with
butchers twine to make the roast as compact as possible for smooth movement of the rotisserie
spit.
Loading ...
Loading ...
Loading ...
