Loading ...

FITTING THE SINK
If you choose to mount the tap onto the sink prior to fitting, take
extra care as it will change the weight and balance of the sink.
Position and align the sink correctly in the cutout and lower it onto
the benchtop. From underneath, tighten the clips with a screwdriver
using a suitable tightening sequence (tighten from the centre of the
sink to the outer edges) until the sink is secure and no gaps are
visible. Take extra care if using power tools as over-tightening can
damage clips.
ADDITIONAL SEALANT
Apply additional sealant (neutral-cure) around the join where the
counter/benchtop and the stainless steel sink meet. Check that the
sealant product is mildew resistant and is suitable for use on the
benchtop material.
REMOVE EXCESS SEALANT
Excess sealant must be removed promptly with a suitable clean-up
solvent recommended for use on both the counter/benchtop and
stainless steel to ensure damage does not occur.
PLUMBING & TAPWARE
IMPORTANT - Connections to plumbing should always be done by a
licensed plumber. Fit supplied basket wastes to sink bowls. Install
tapware according to manufacturer’s instructions.
FOLLOW THESE STEPS TO INSTALL AN OLIVERI TOPMOUNT SINK
IF COUNTER / BENCHTOP IS SUPPLIED WITH CUT-OUT, SKIP STEPS MARKED WITH*
TF08g - Topmount Installation and Care Instructions
© Oliveri Solutions
CHECK SPACE & LEVEL
Use a level to check the counter/benchtop – if not level, have rectified.
Ensure there is adequate space for tapware (including a splashback if
specified). Check space for installation (underneath) and operation
(above). Particular care must be taken when a thick splash back is
used (it may interfere with tapware location and operation). Ensure
the cabinet will not foul the sink mounting flange or basins.
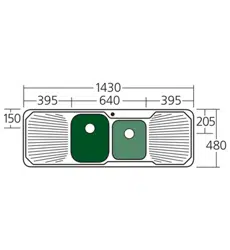
TEMPLATE *
Cut-out templates/dimensions for your Oliveri sink are available
online at oliveri.com.au Use the product model number to find the
template. Some sink templates apply to both left-hand and
right-hand models. Ensure template is the correct way around for
your model.
MARK CUT OUT *
Carefully mark out the template (or follow drawing instructions).
Once the hole is marked out, use the template to conduct a final
check before cutting. IMPORTANT: If you have traced the sink
itself to mark your cut out, the hole must be cut 10mm inside
the marked line.
CUT & FINISH HOLE *
Re-check the position and cut-out shape you have traced before
cutting. Ensure there are no obstacles below that might interfere with
cutting. Drill pilot holes to accept an appropriate cutting tool for the
counter/benchtop material (wear suitable personal protection
equipment).
TRIAL FIT THE SINK
Check that all clips are folded in so they will adequately clear the
cut-out. Carefully position the sink into the cut-out to make sure it
fits correctly. If the fit is not correct, remove the sink and proceed
with remedial work. Perform another trial fit after corrections have
been made.
CHECK FOAM SEAL
Make sure the foam seal is intact and fits all the way around the sink
with no gaps visible. This will ensure a water tight seal when the sink
is properly tightened down to the counter/benchtop.
Some models may require sealant only and do not include a foam seal.
DO NOT INSTALL USING EPOXY ADHESIVES
Should a genuine warranty claim arise for a sink installed using this method, Oliveri will cover the
replacement cost of the sink only and not the cost of sink removal or reinstallation. If you have
any doubts, confirm the correct mounting method for your material by consulting the
counter/benchtop supplier.
It is essential that the installation is waterproof and carried out in accordance
with these instructions. Oliveri Solutions will not be held responsible for any
damage caused by leakage or faulty installation.