CONNECT
MOUNT
CONNECT WEDGEMOUNT
1
72385 CONNECT WEDGEMOUNT - BLACK

CONNECT
MOUNT
CONNECT WEDGEMOUNT
2
IPORT CONNECT WEDGE MOUNT Install
Manual
Thank you for purchasing the all new IPORT
CONNECT Platform. We hope you enjoy this
revolutionary new system and if at any time you
need more assistance please contact IPORT Tech
Support via Online chat or through our help desk.
- IPORT Team
CONNECT
MOUNT
CONNECT WEDGEMOUNT
3
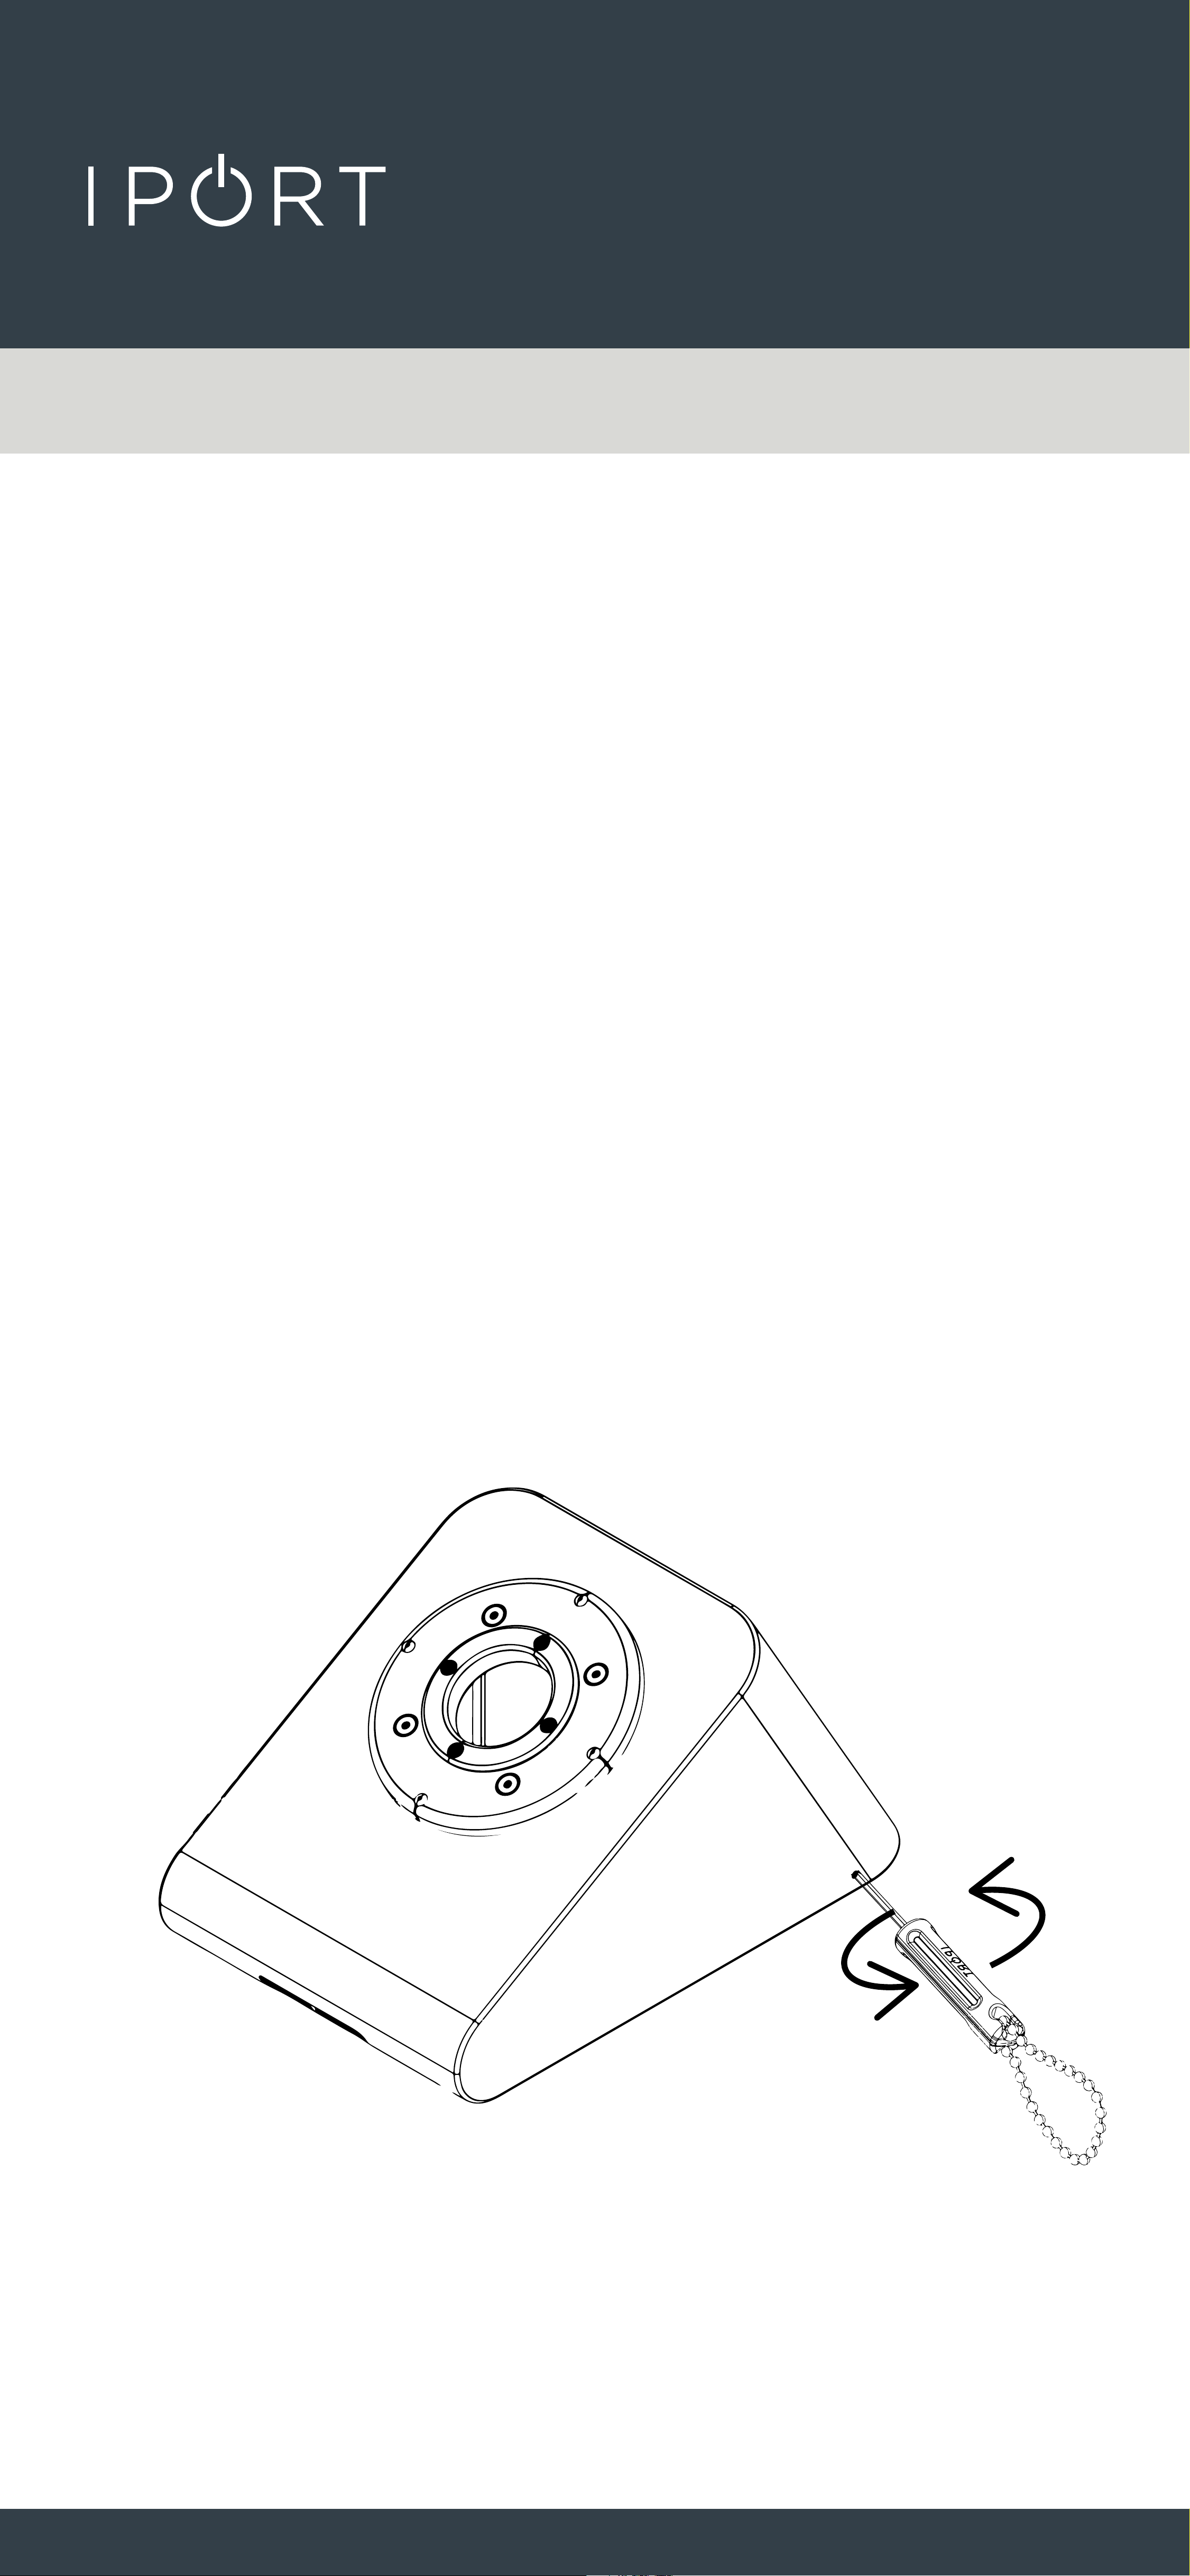
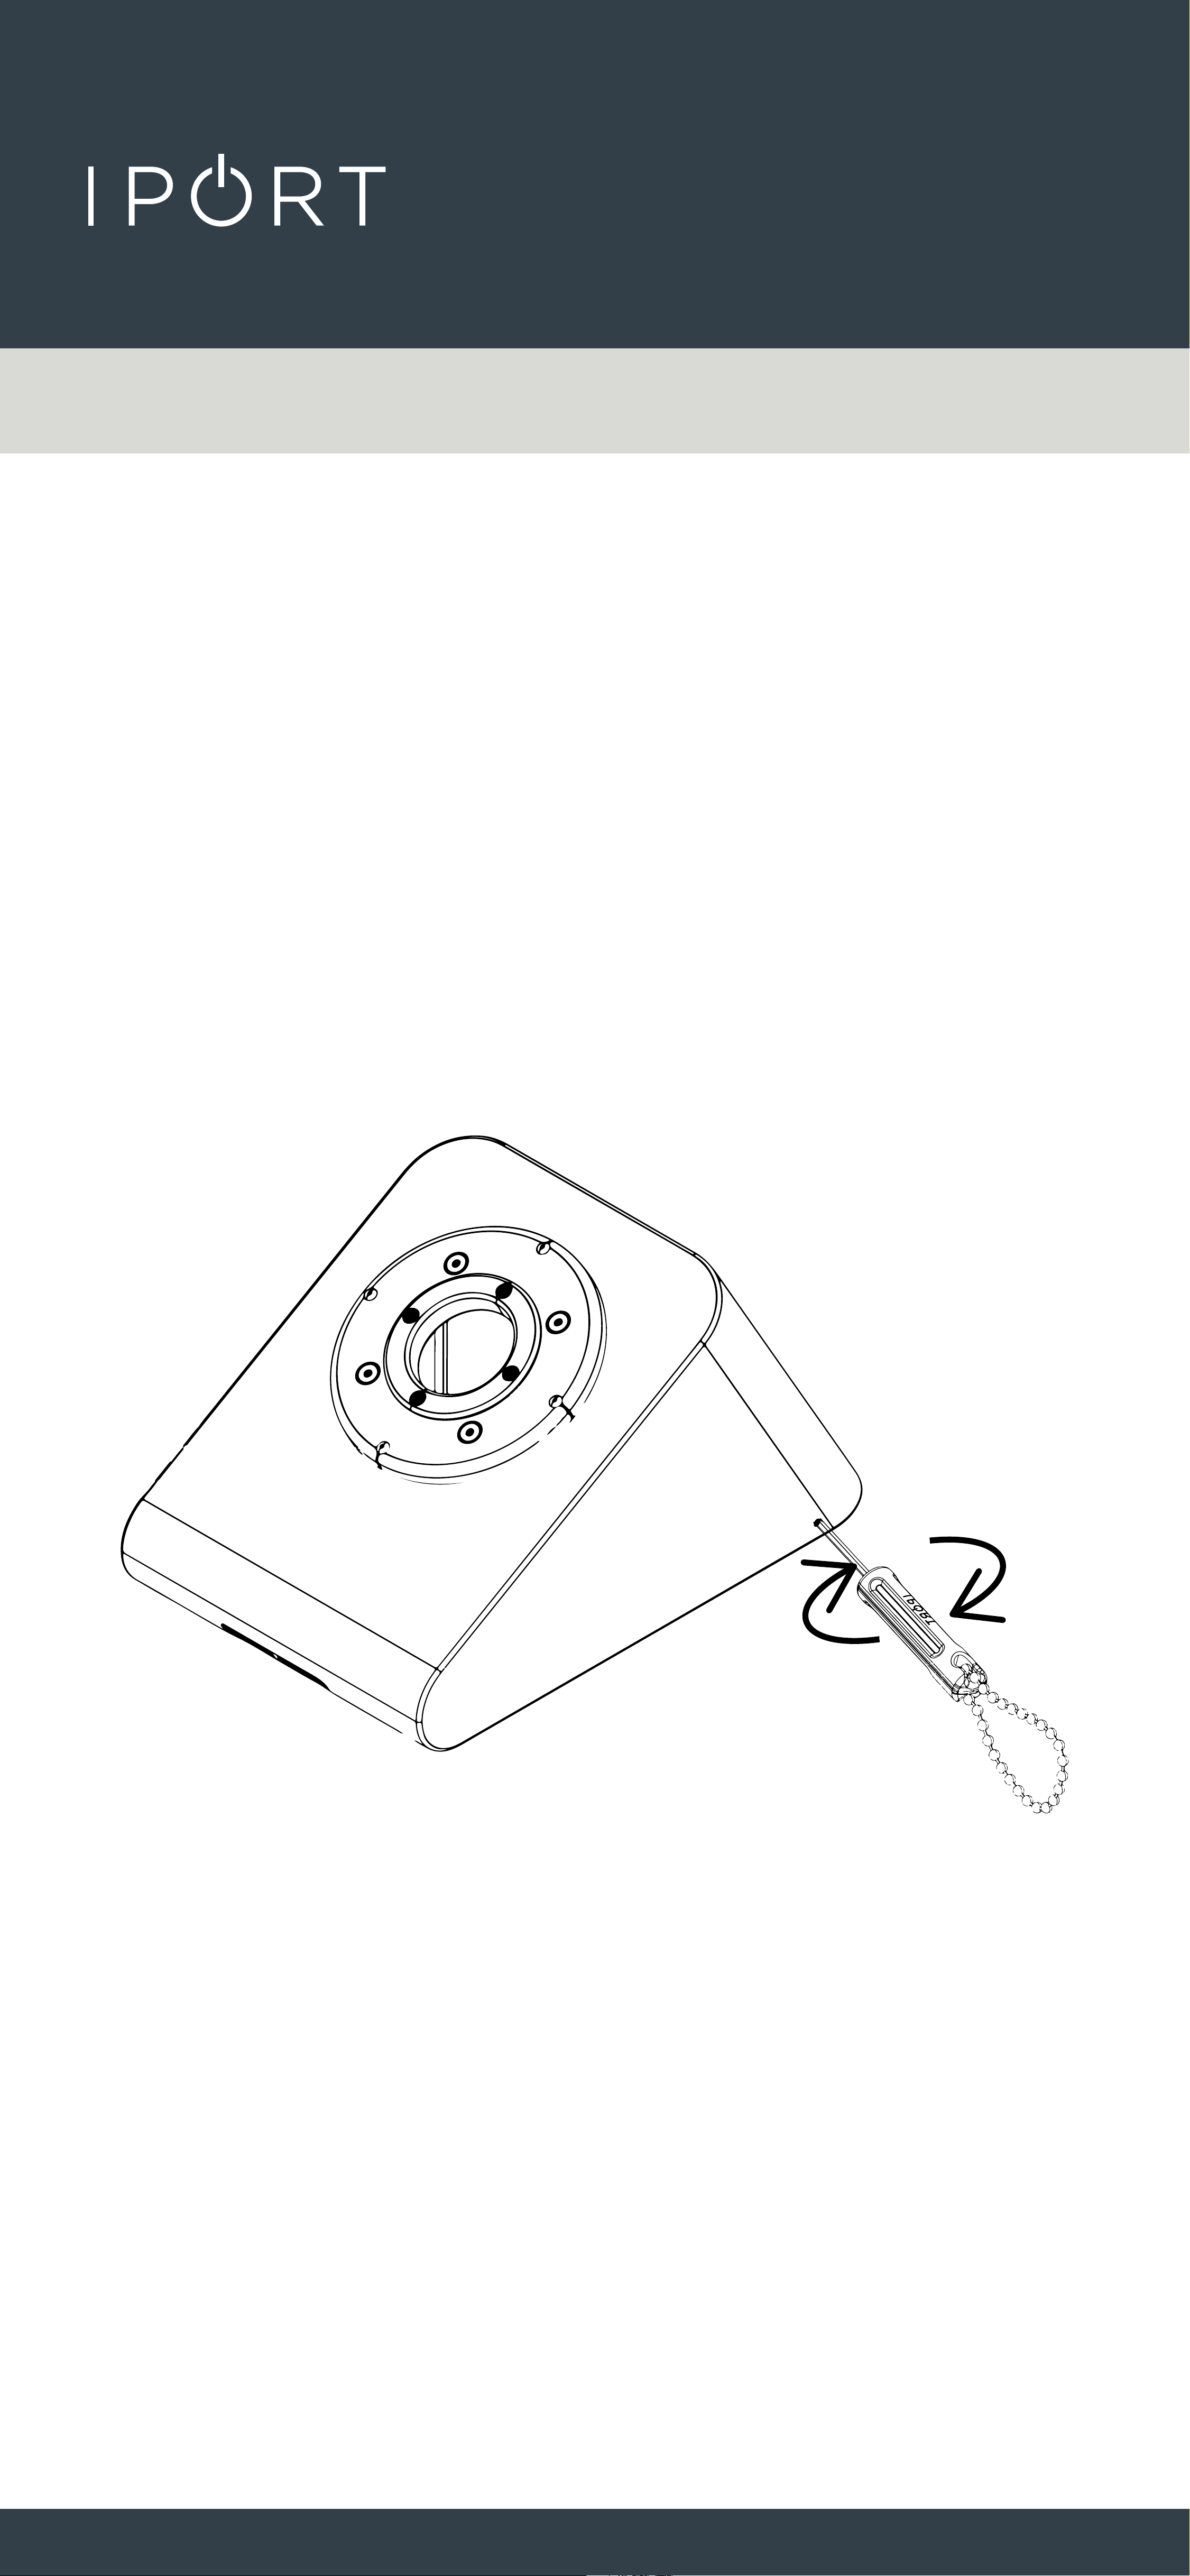
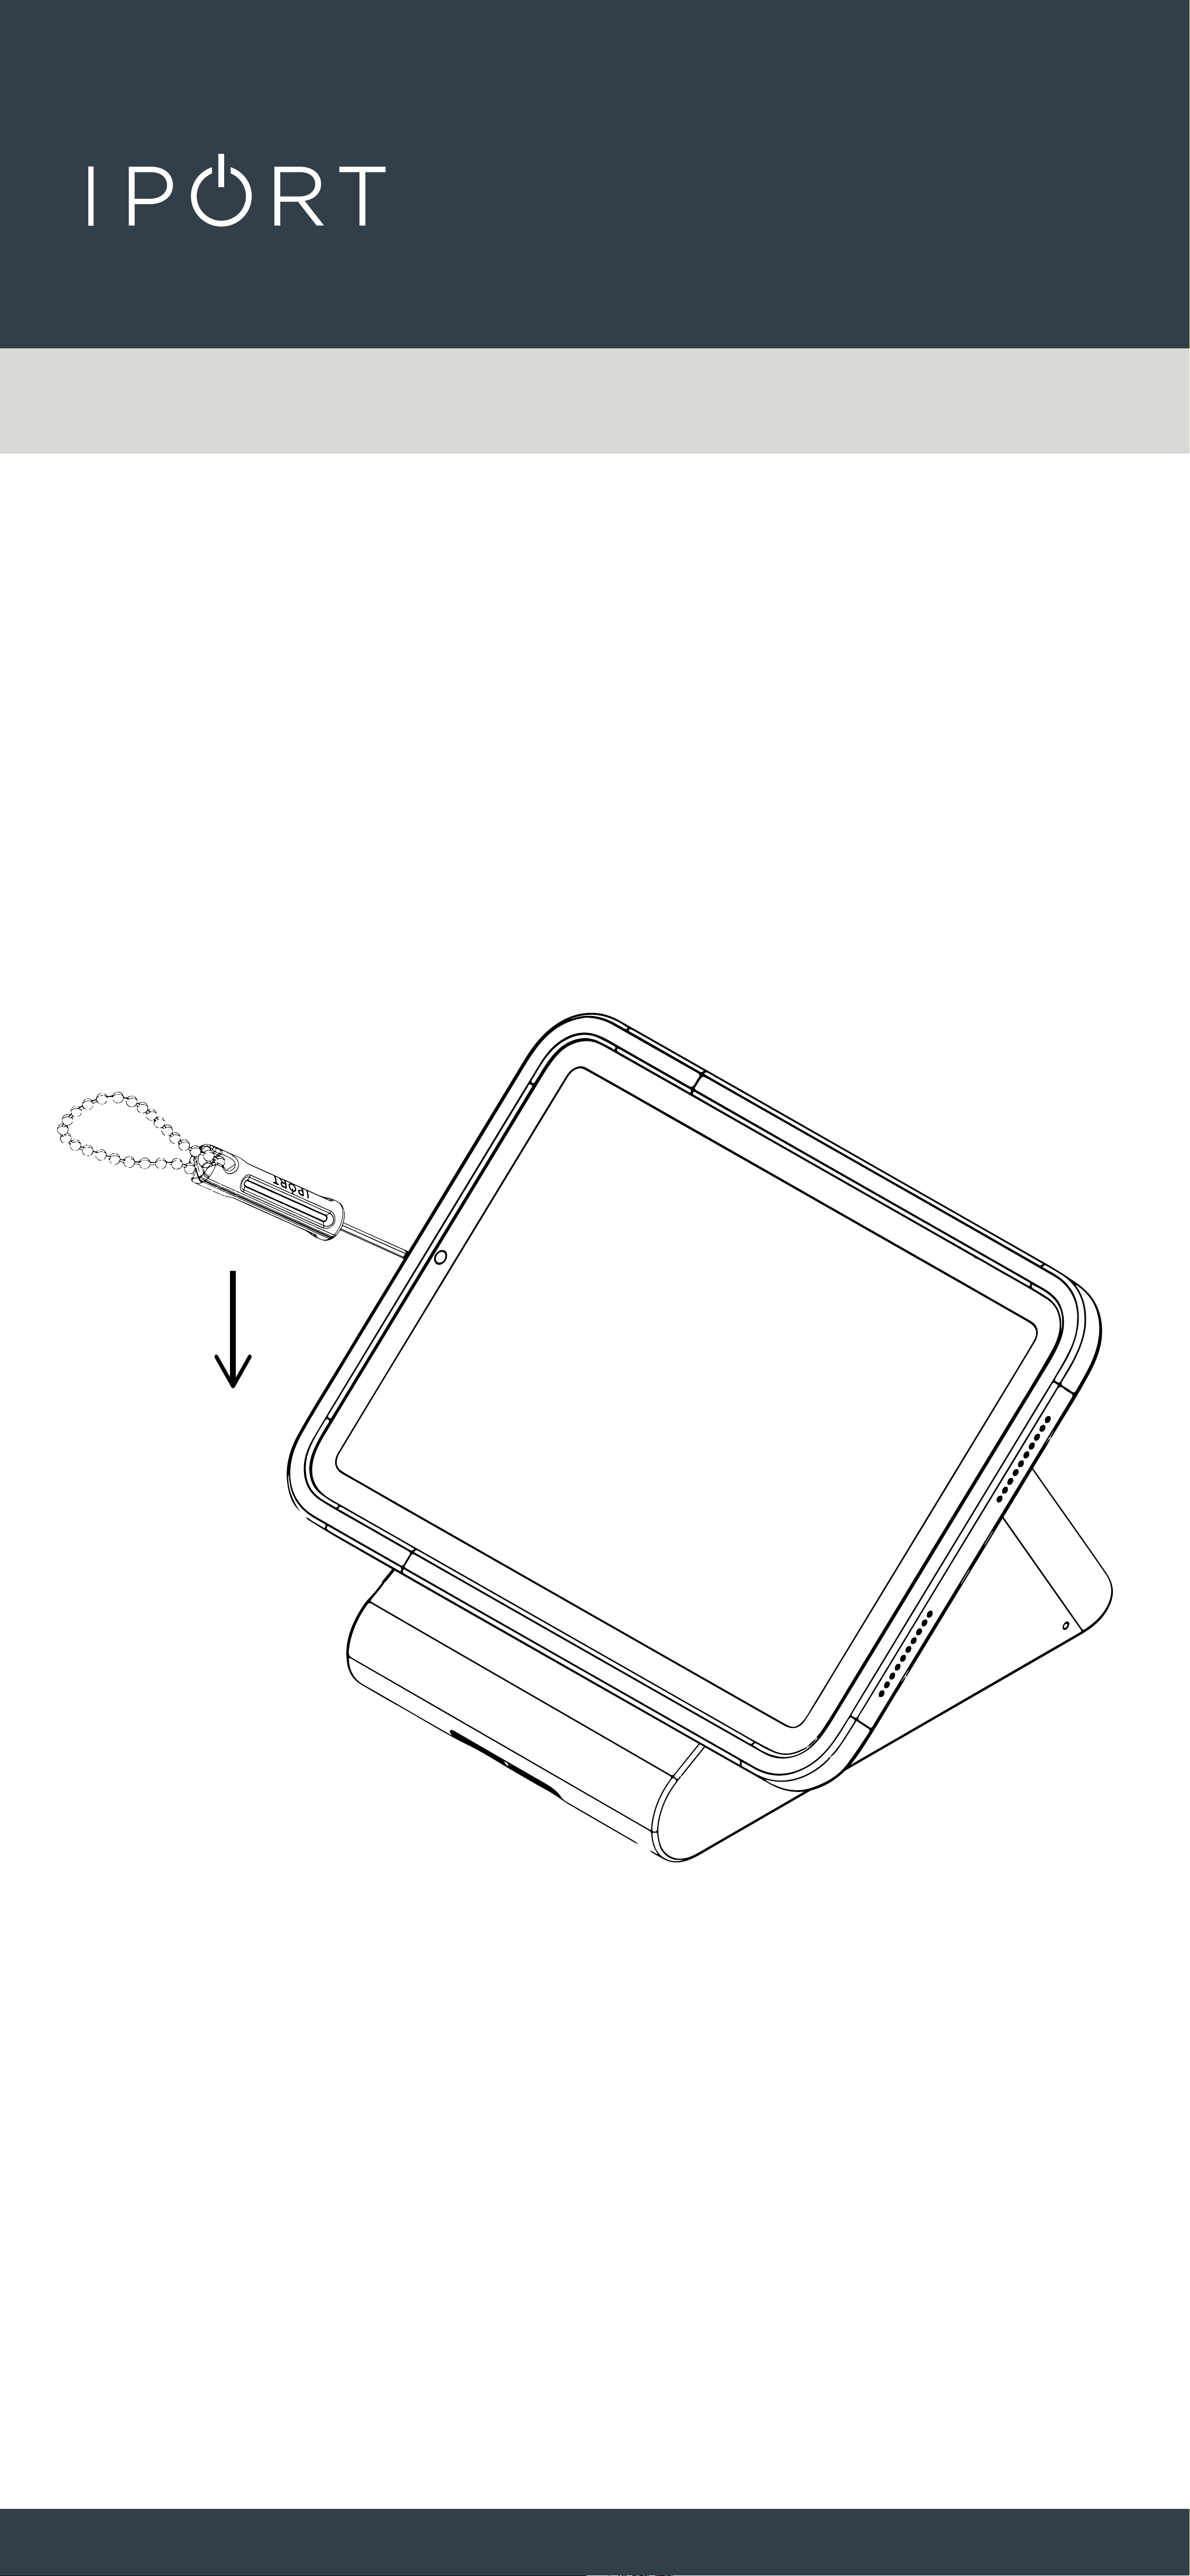
1. Use the Provided IPORT Security tool
to unlock the Wedge Mount from the
Security foot. Insert the tool into the
small holes found on the left and right
of the WegeMount. Turn the tool
counterclockwise until the tool stops
spinning.
IPORT CONNECT WEDGEMOUNT Install
PoE+ Data
CONNECT
MOUNT
CONNECT WEDGEMOUNT
4
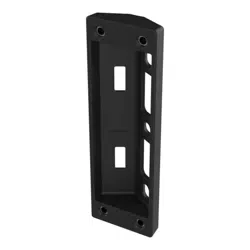
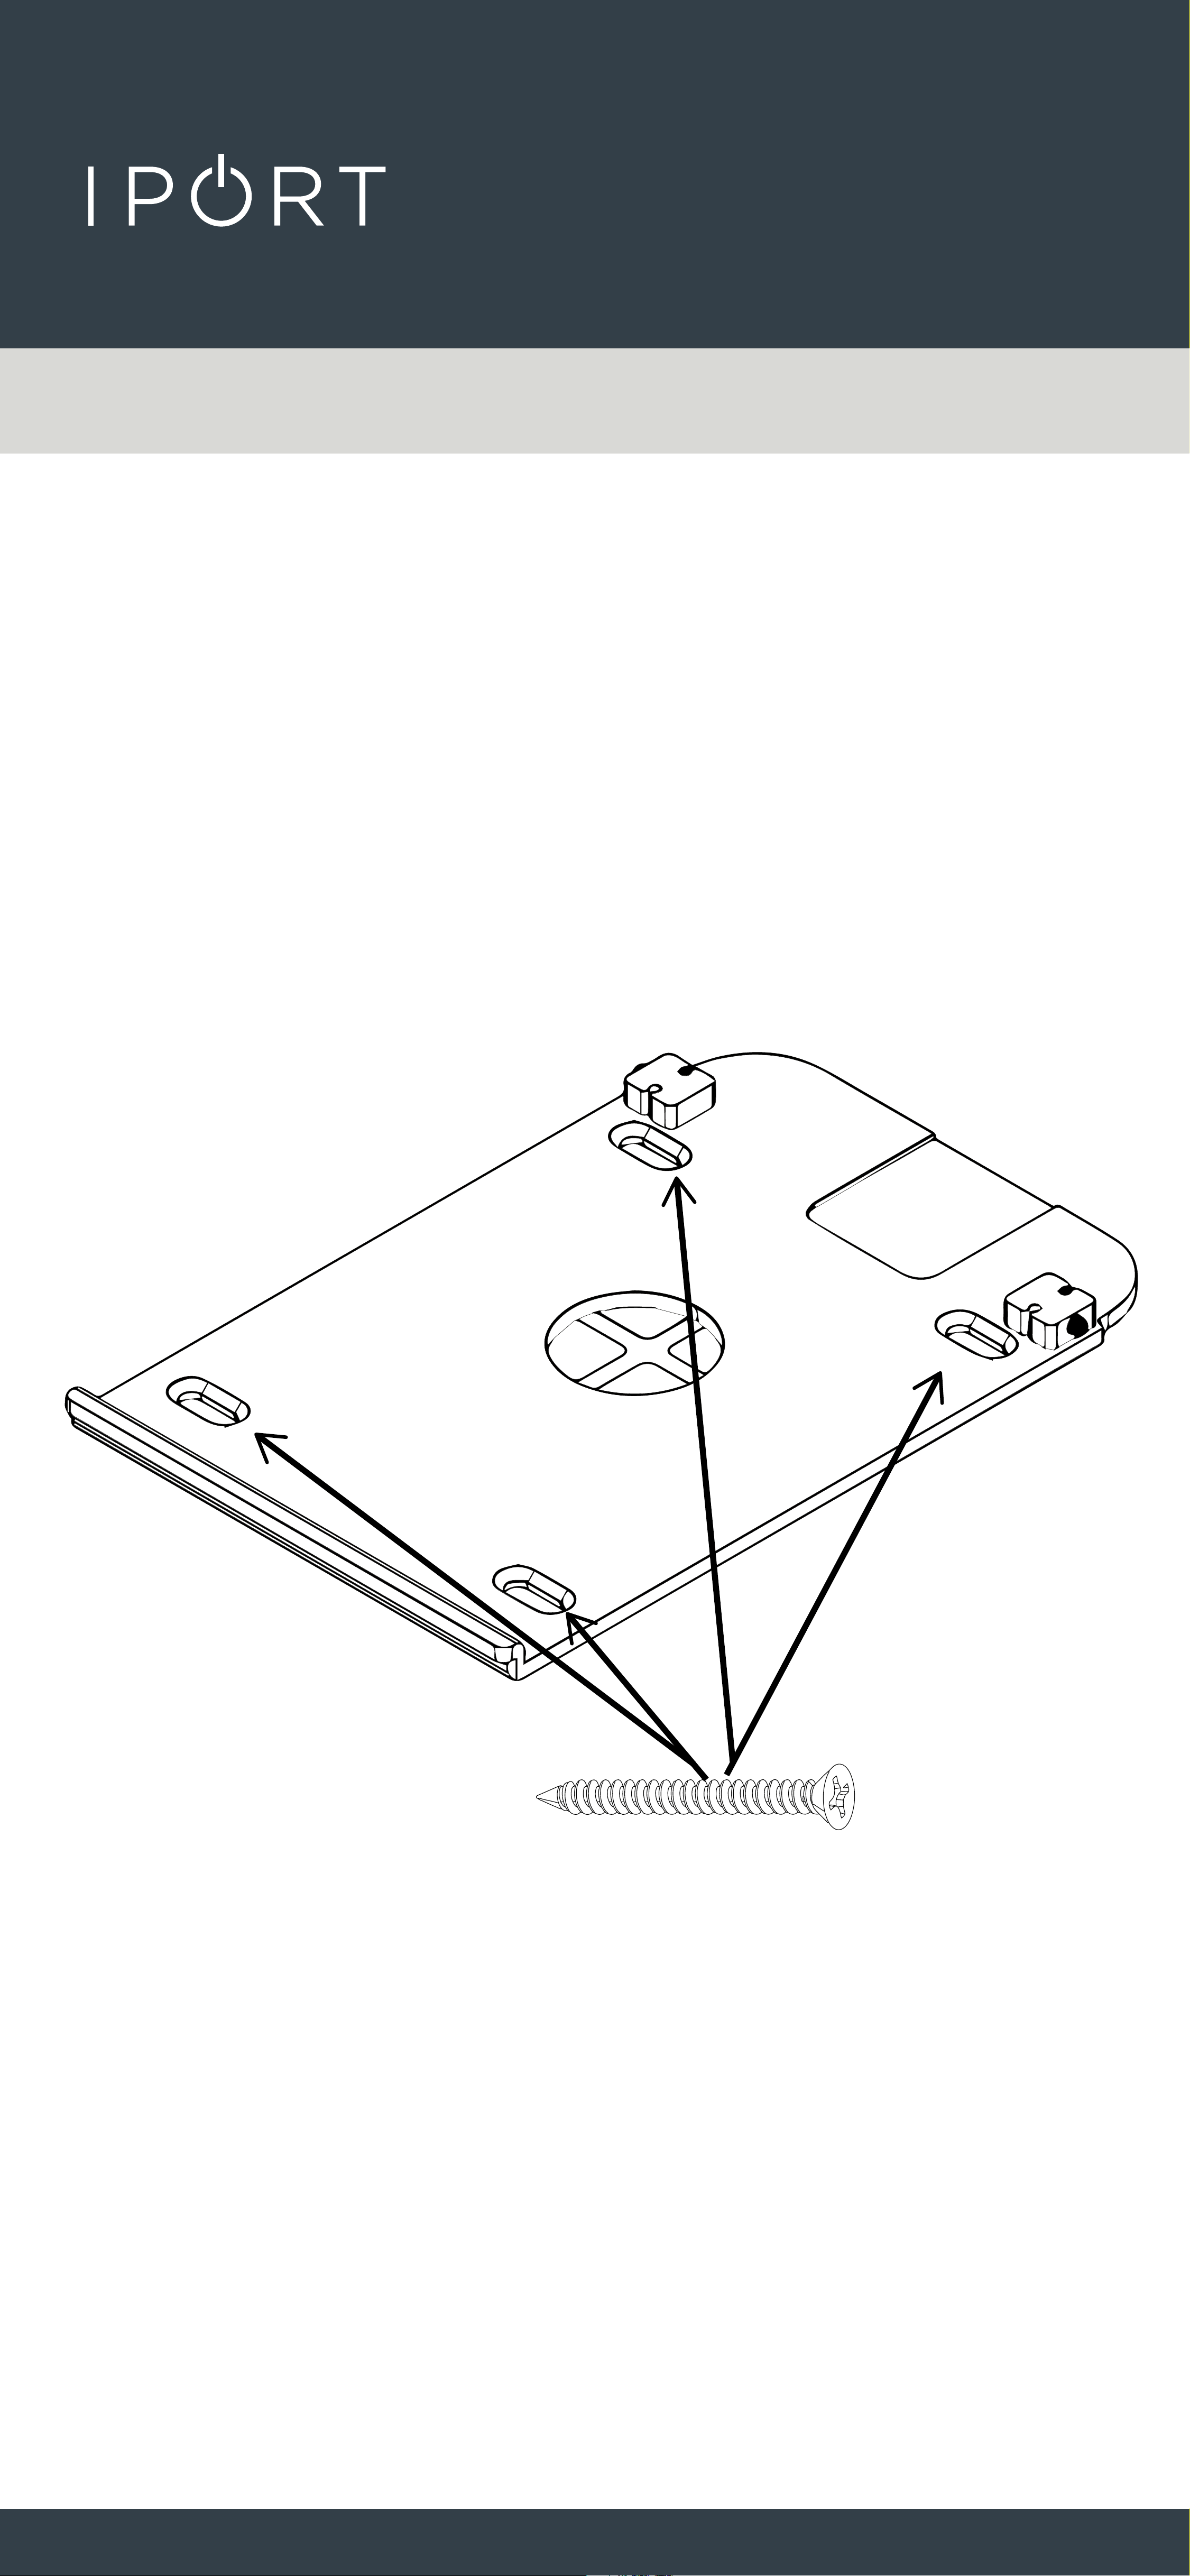
2. Place the Security foot in the
desired location, drill pilot holes and
use the 4 provided screws to secure
the security foot to a solid surface.
x4
CONNECT
MOUNT
CONNECT WEDGEMOUNT
5
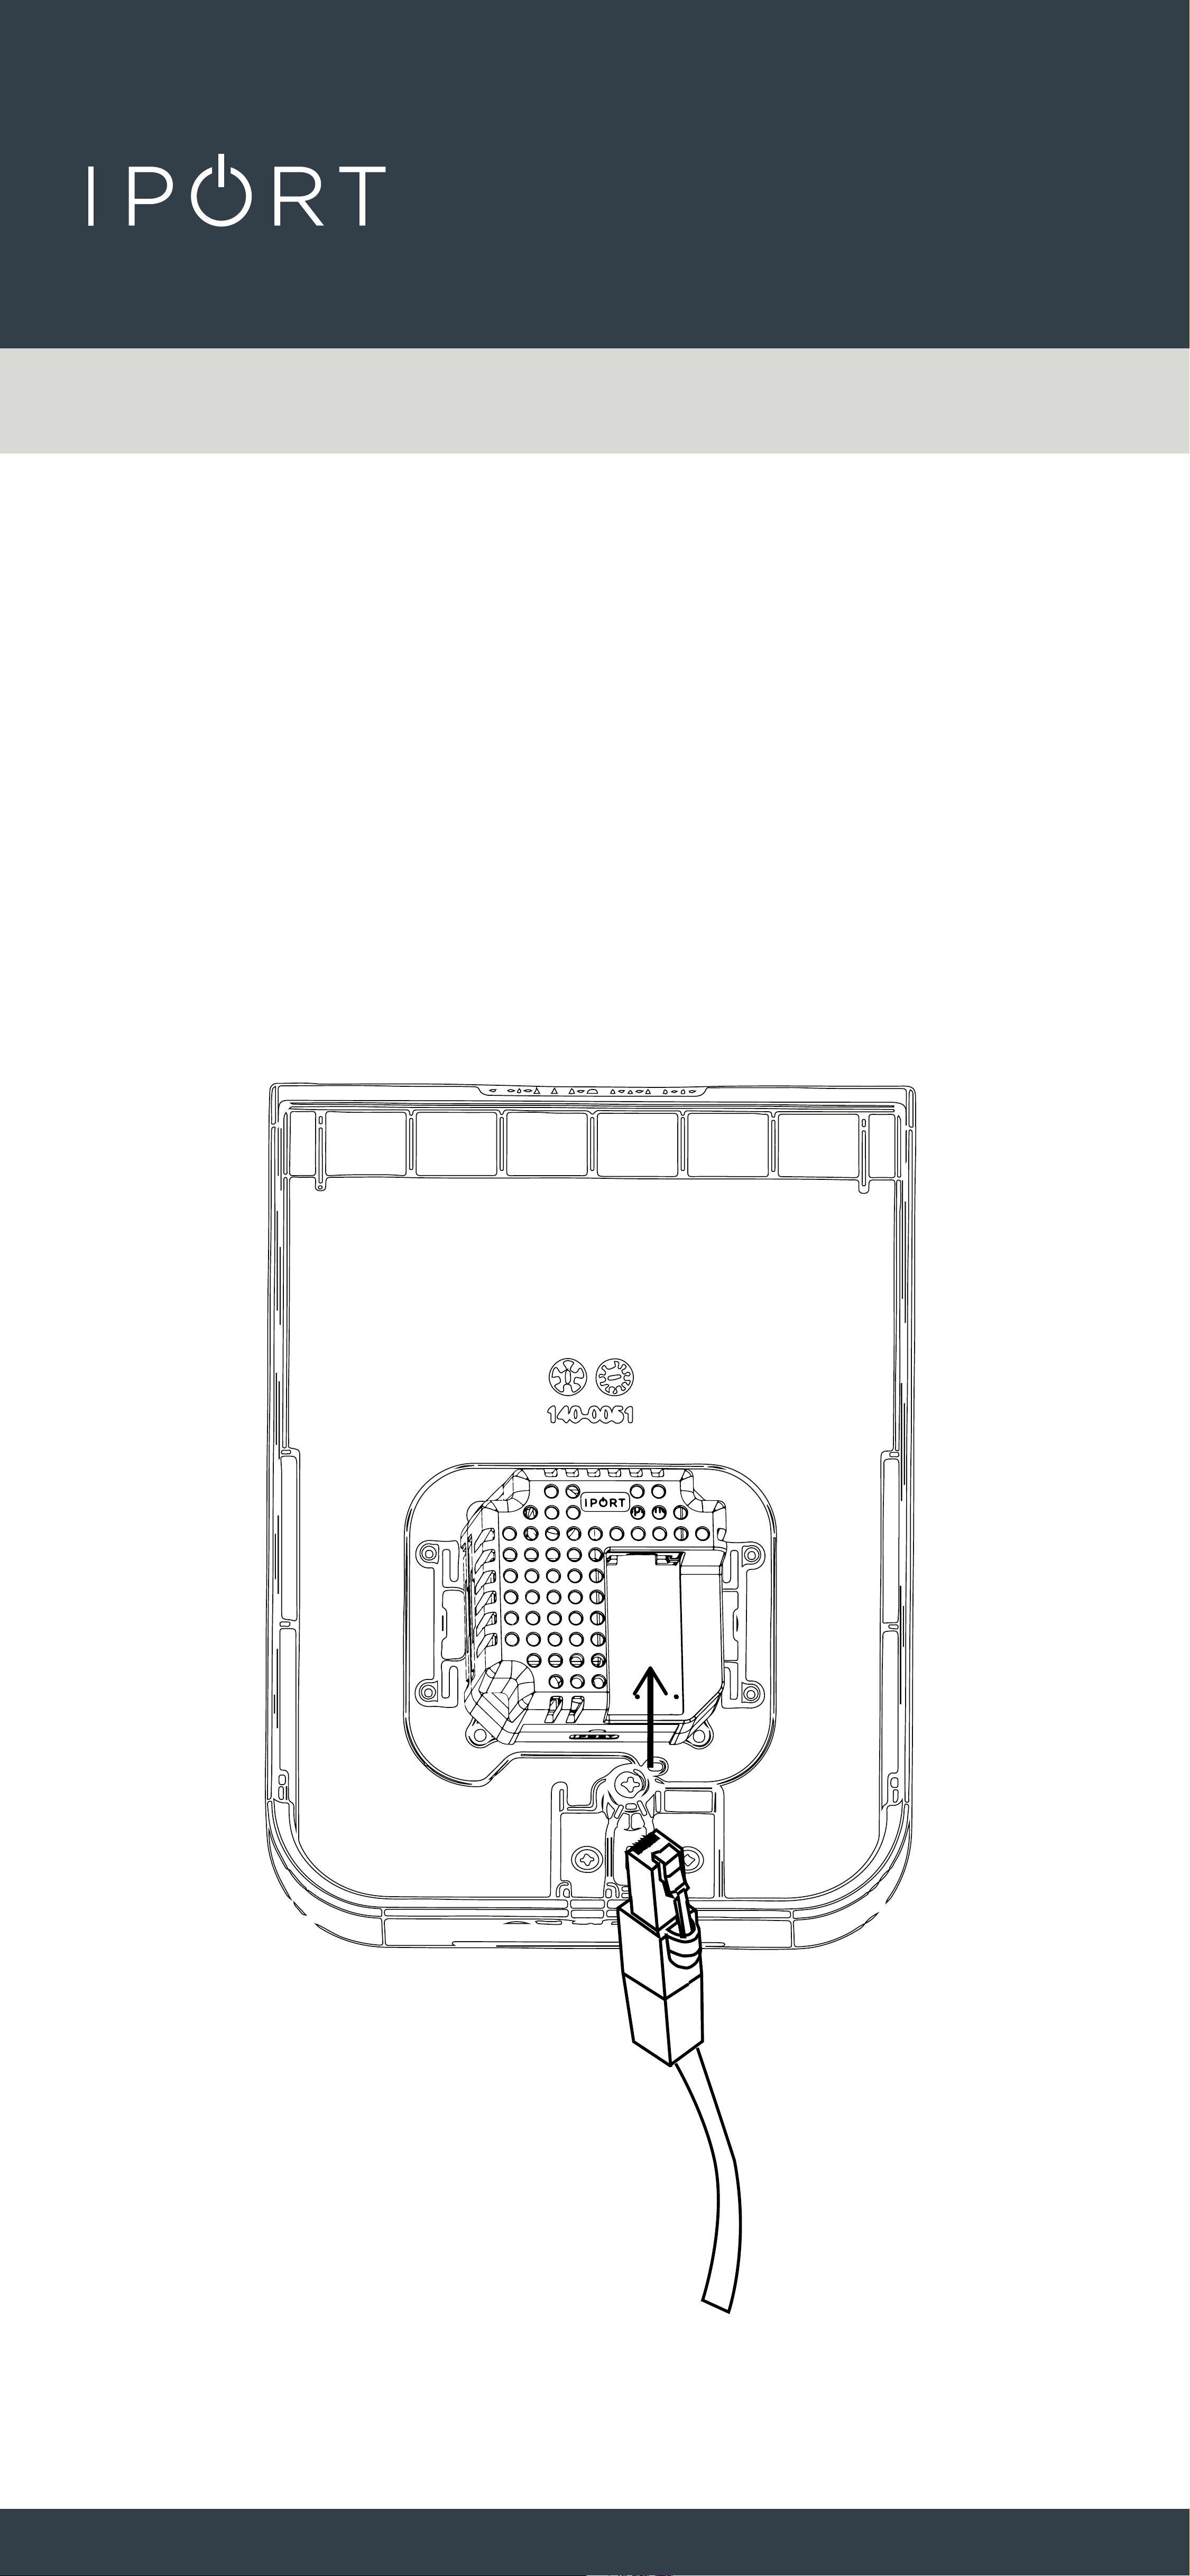
3. Flip the Wedge Mount over and
insert the CAT6 cable into the RJ45
of the PoE+ Adapter inside the
CONNECT Wedge Mount.
CONNECT
MOUNT
CONNECT WEDGEMOUNT
6
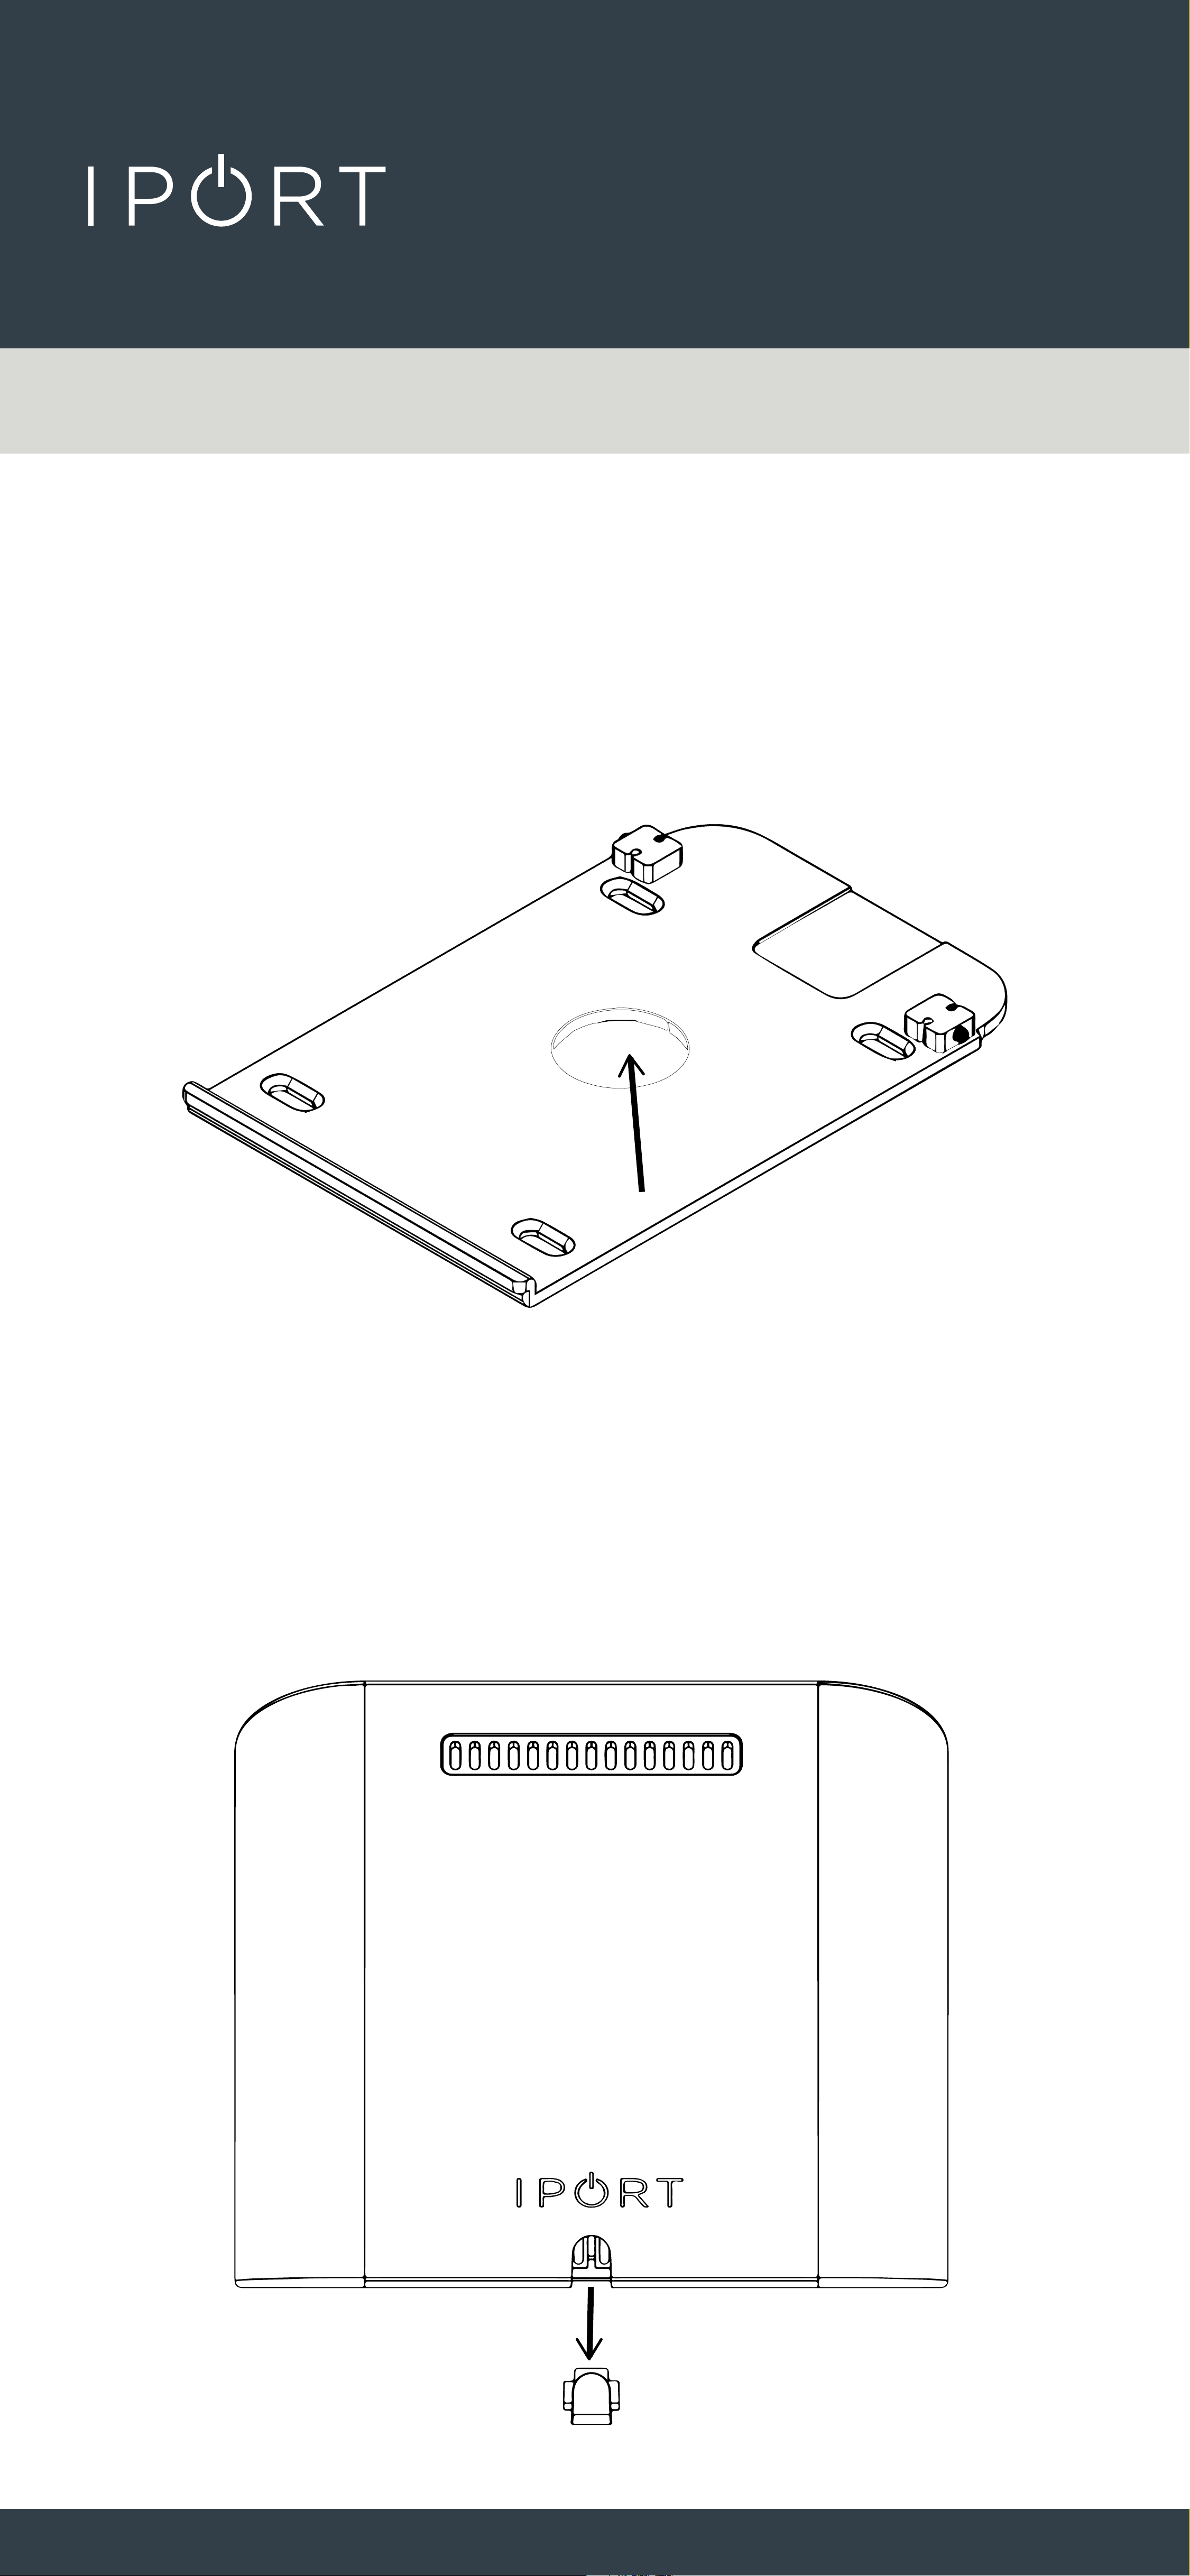
4. Option A, Run the cat6 cable
through the center of the security
foot for a clean cable free install.
4. Option B, Run the cable out the back
of the WedgeMount making sure to
remove the cable channel cover.
CONNECT
MOUNT
CONNECT WEDGEMOUNT
7
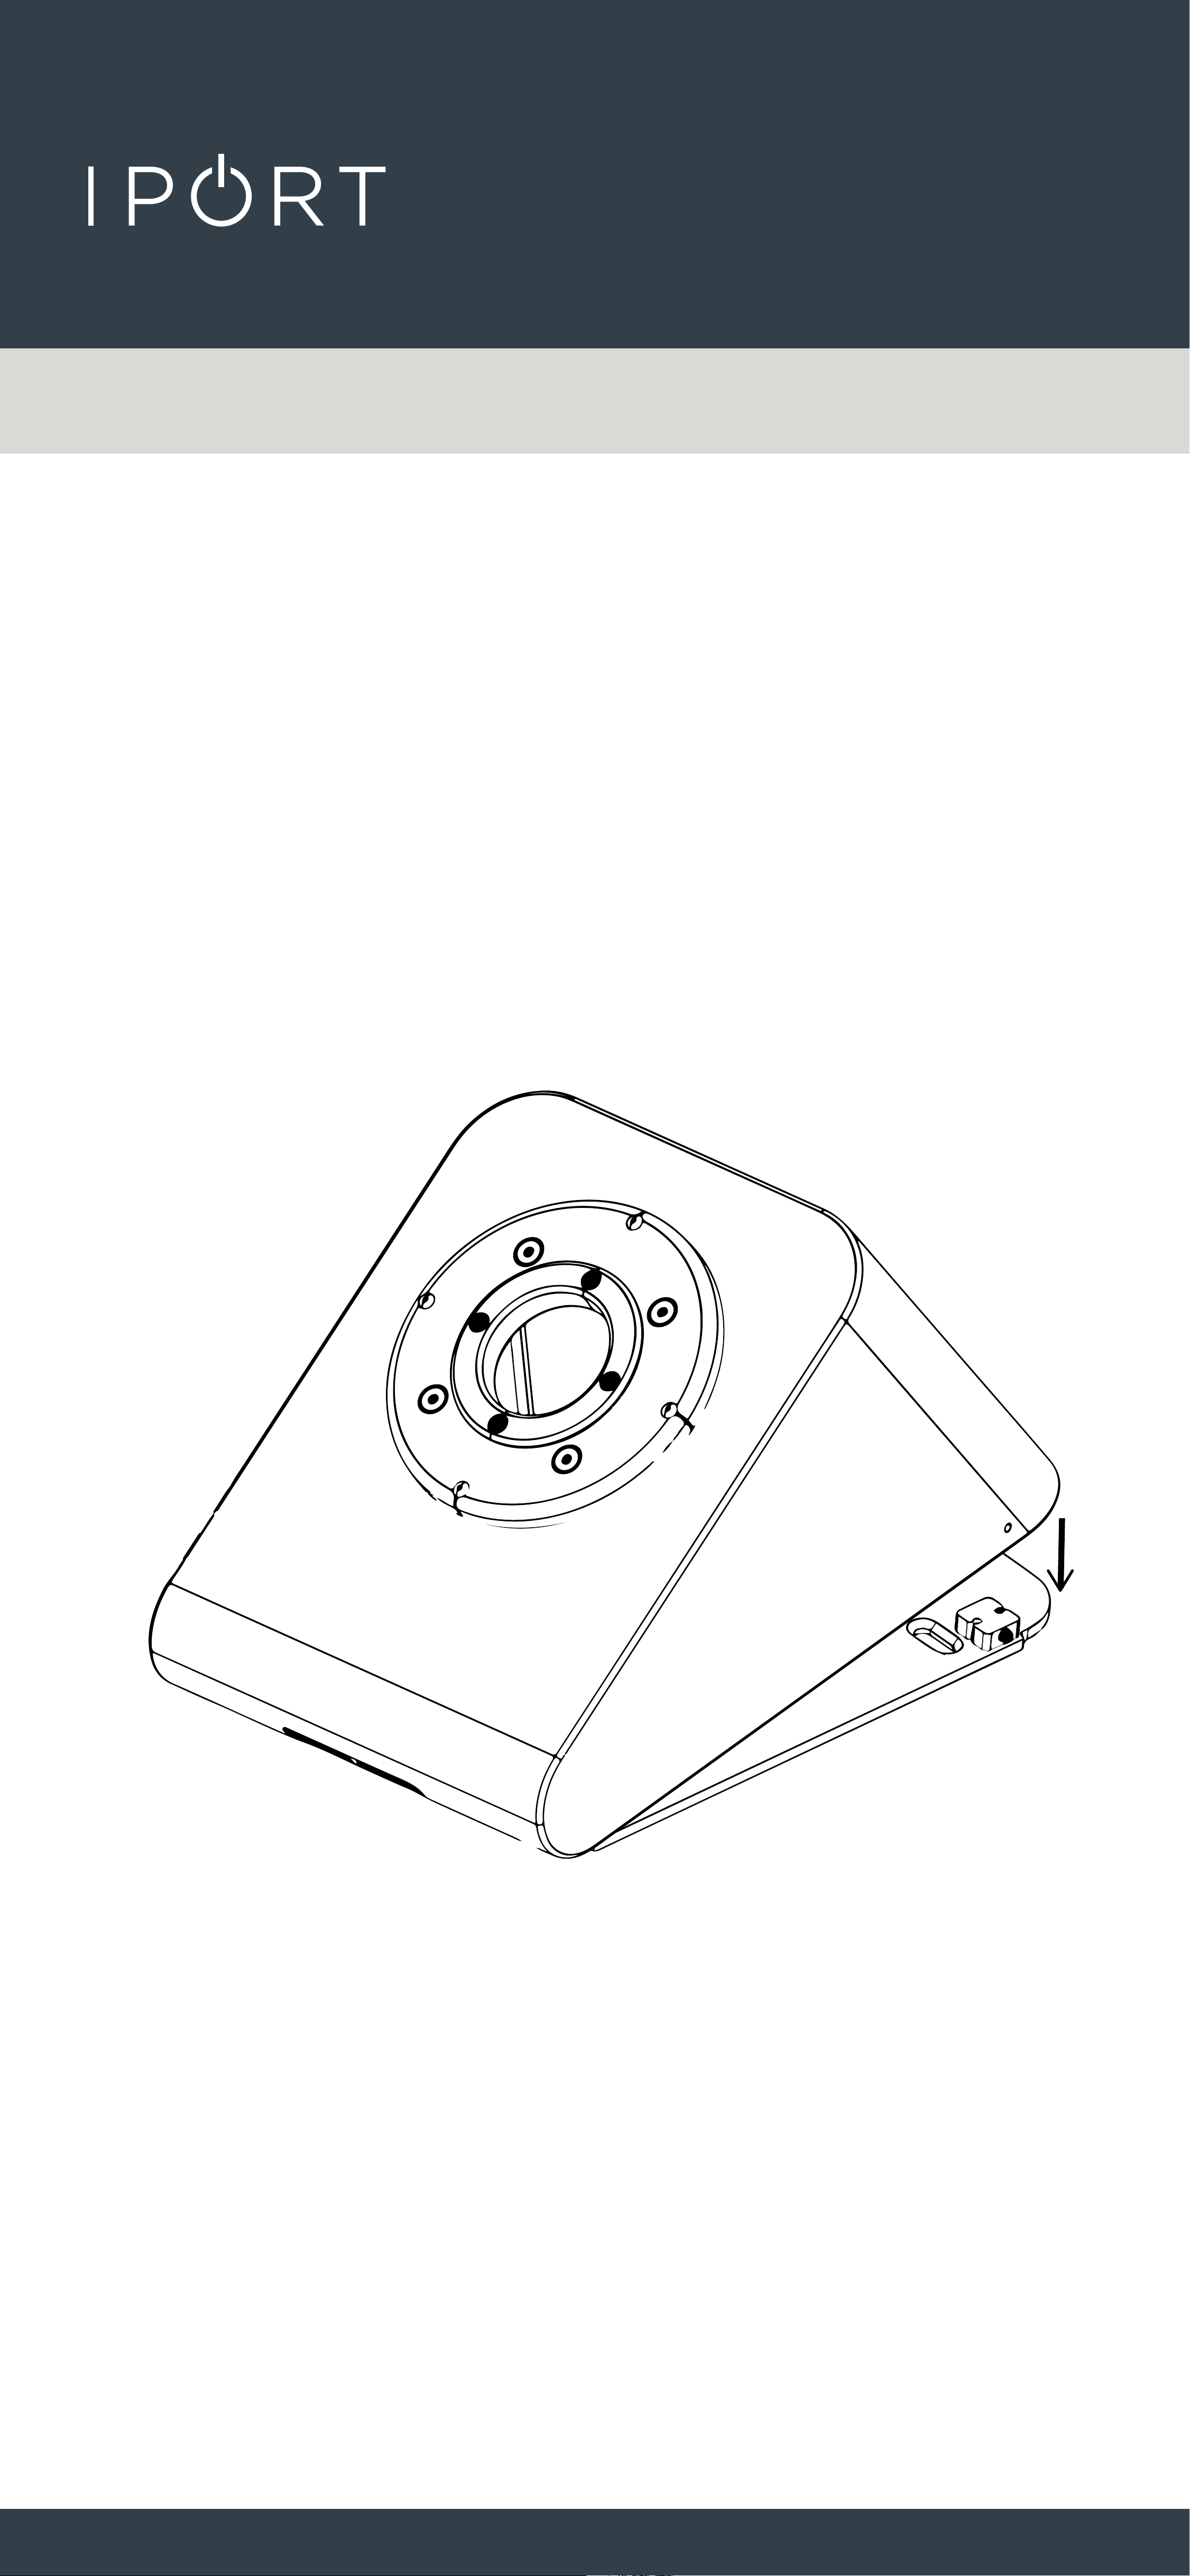
5. Reinstall the WedgeMount onto the
security foot making sure to hook
the front of the security foot to the
WedgeMount and set firmly down.
CONNECT
MOUNT
CONNECT WEDGEMOUNT
8
6. Use the provided IPORT Security
Tool to lock the WedgeMount to the
security foot. Turn the tool clockwise
until it stops on both sides of the
Wedge Mount.
CONNECT
MOUNT
CONNECT WEDGEMOUNT
9
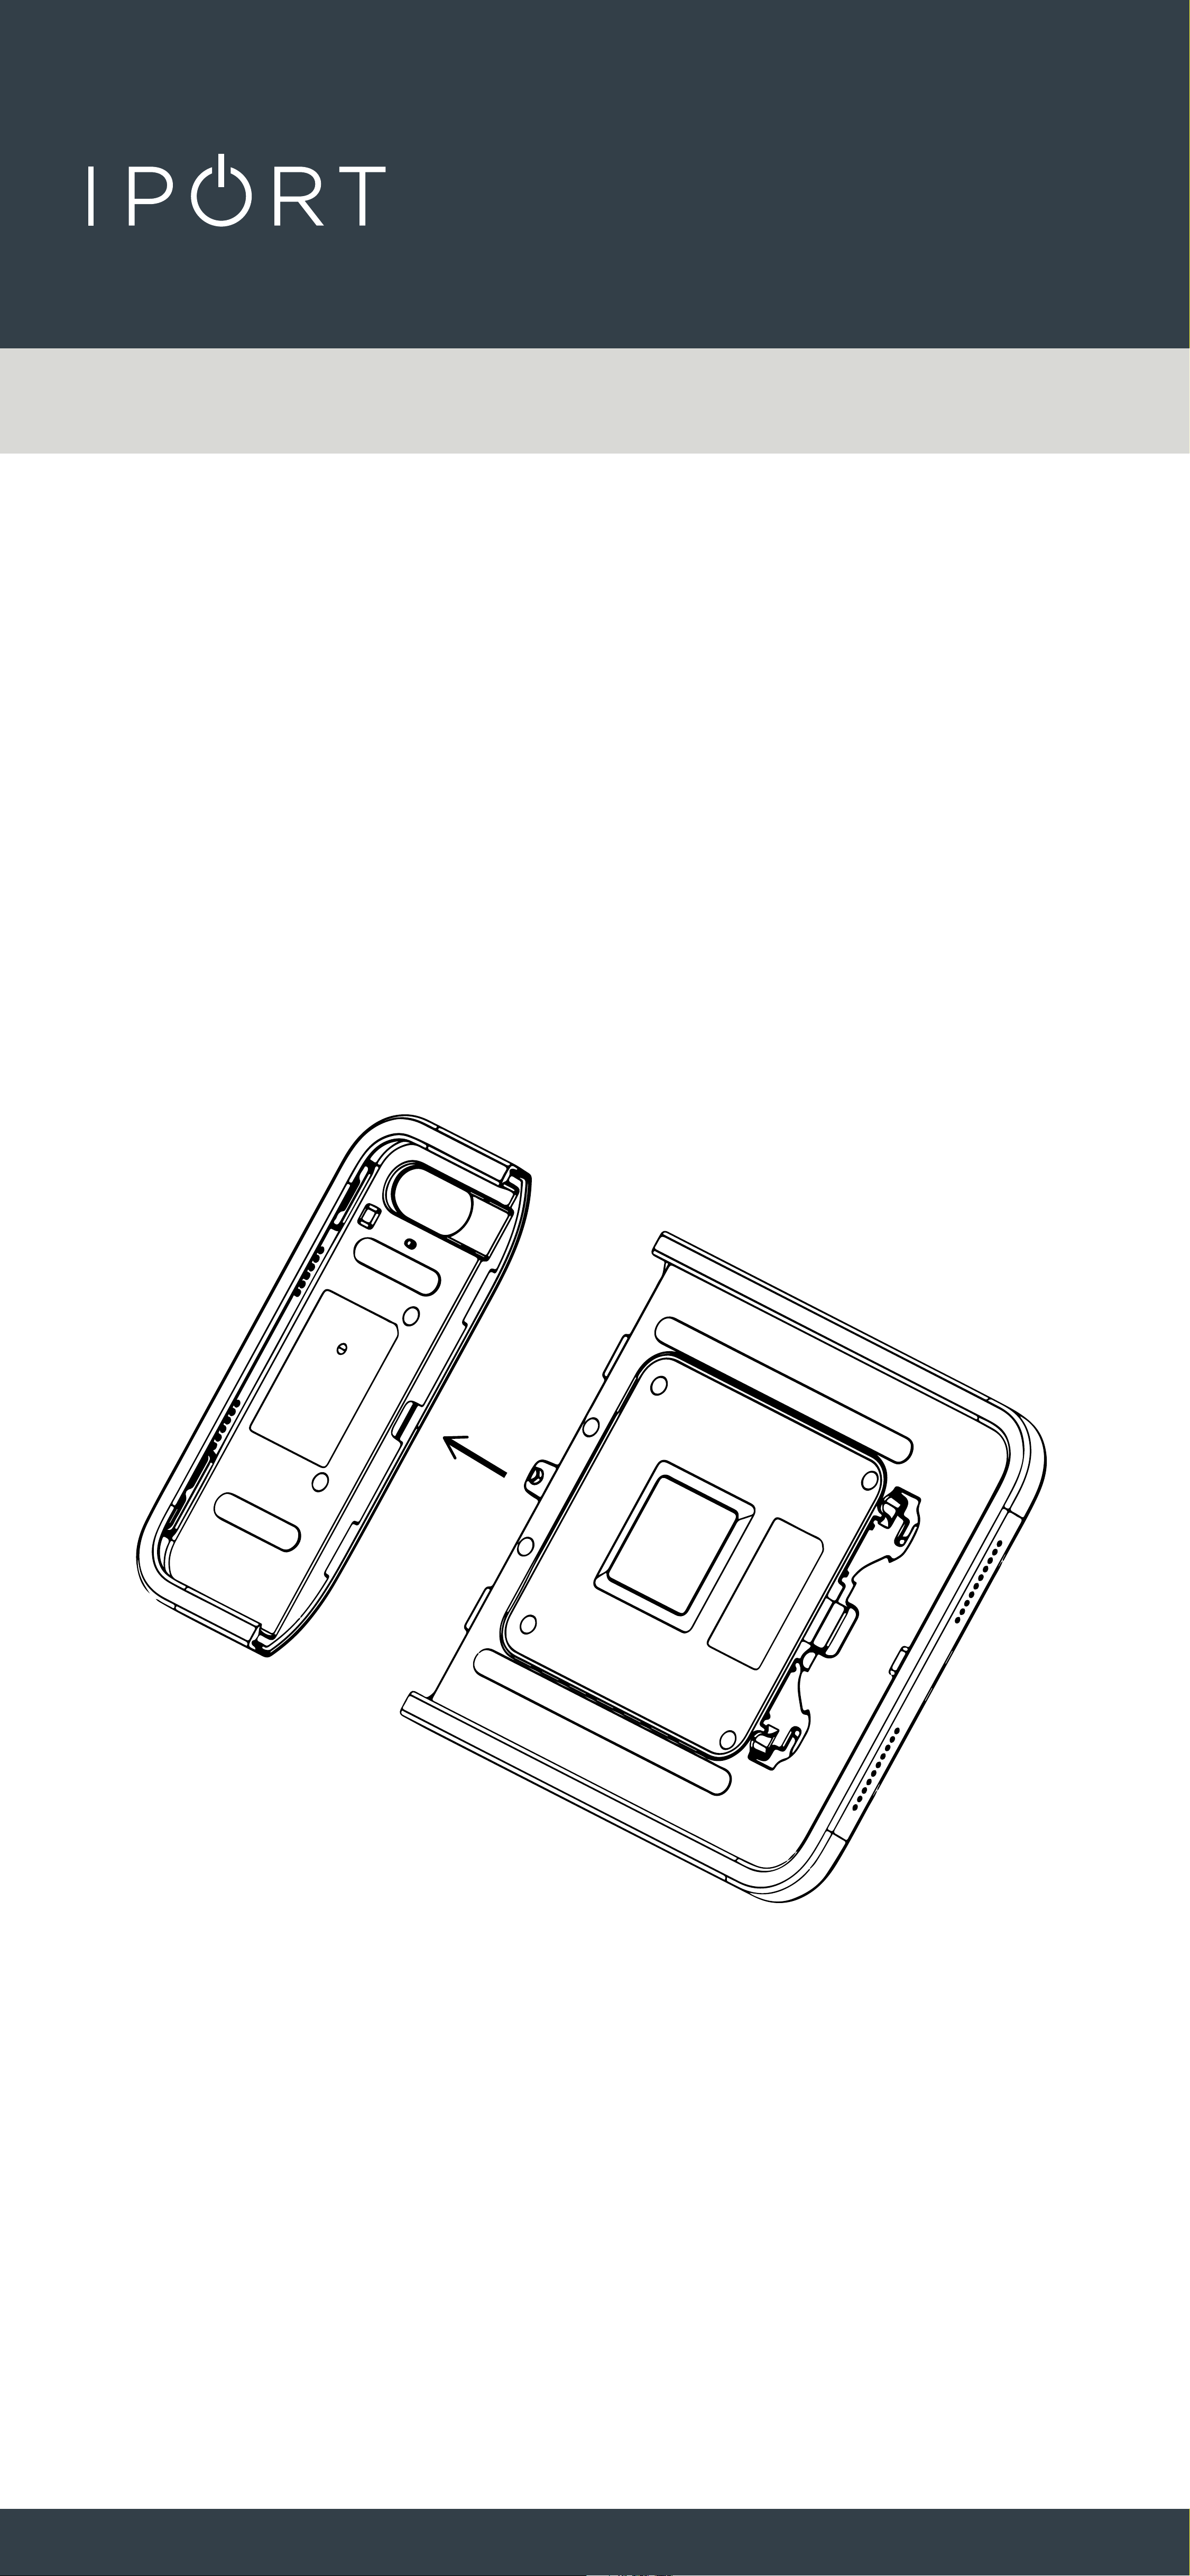
7. Remove the Case Top from the
IPORT CONNECT PRO Case by
pressing up and separating the two
halves of the case.
CONNECT
MOUNT
CONNECT WEDGEMOUNT
10
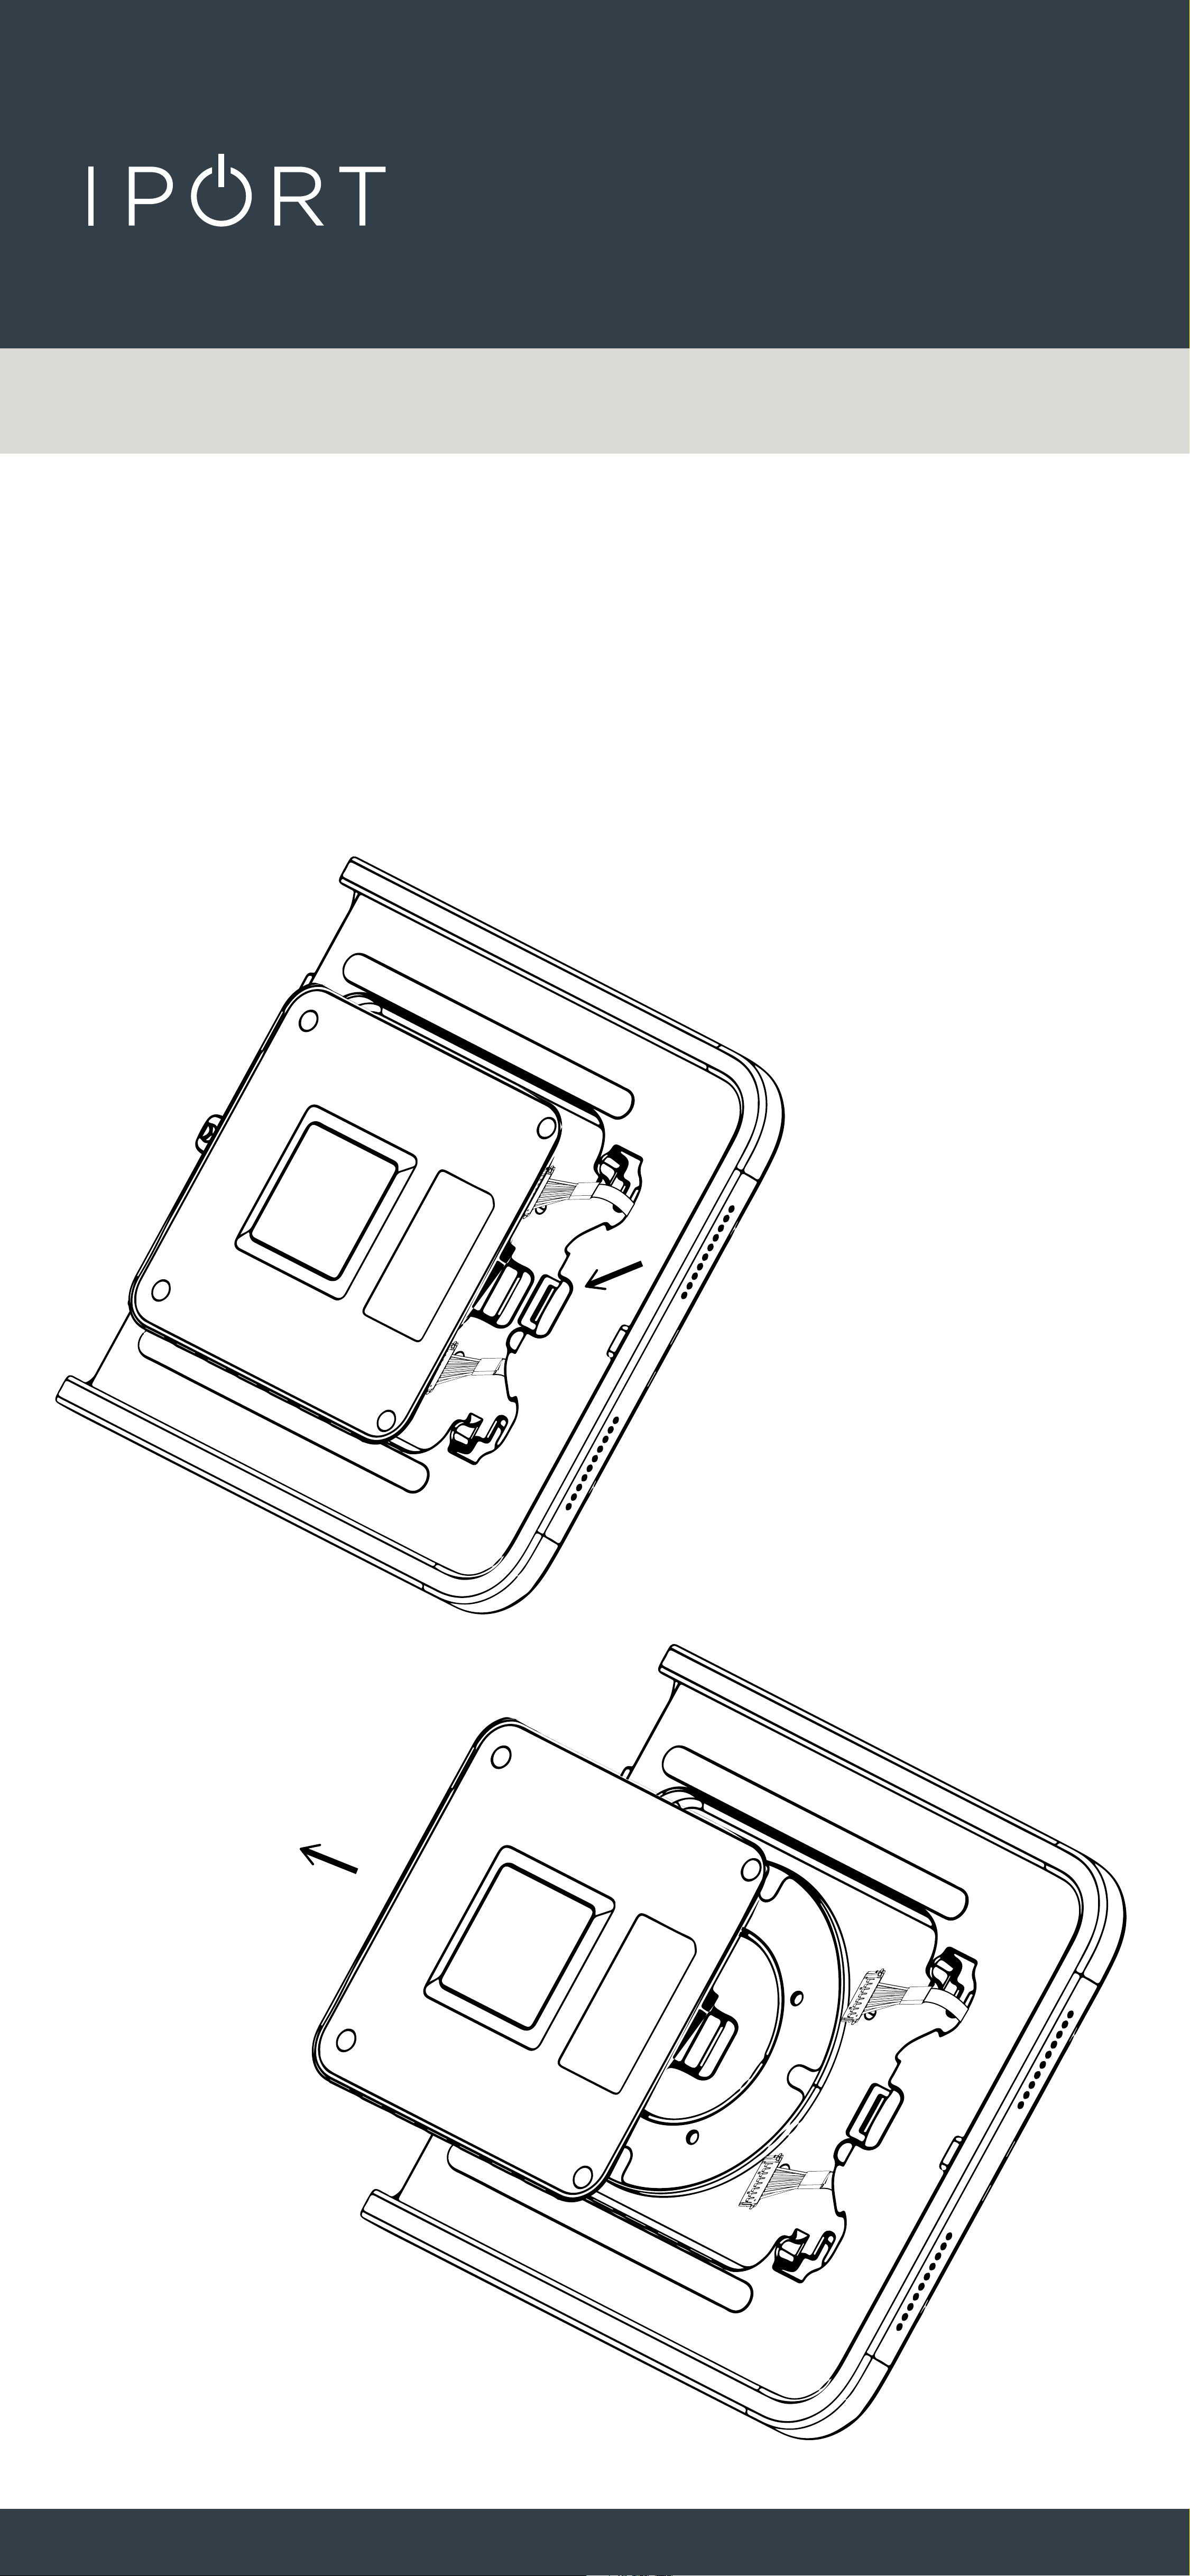
8. Remove the electronics board from
the IPORT CONNECT PRO Case by
pressing up the release tab toward
the top of the case. Make sure to
disconnect the two attached cables.
CONNECT
MOUNT
CONNECT WEDGEMOUNT
11
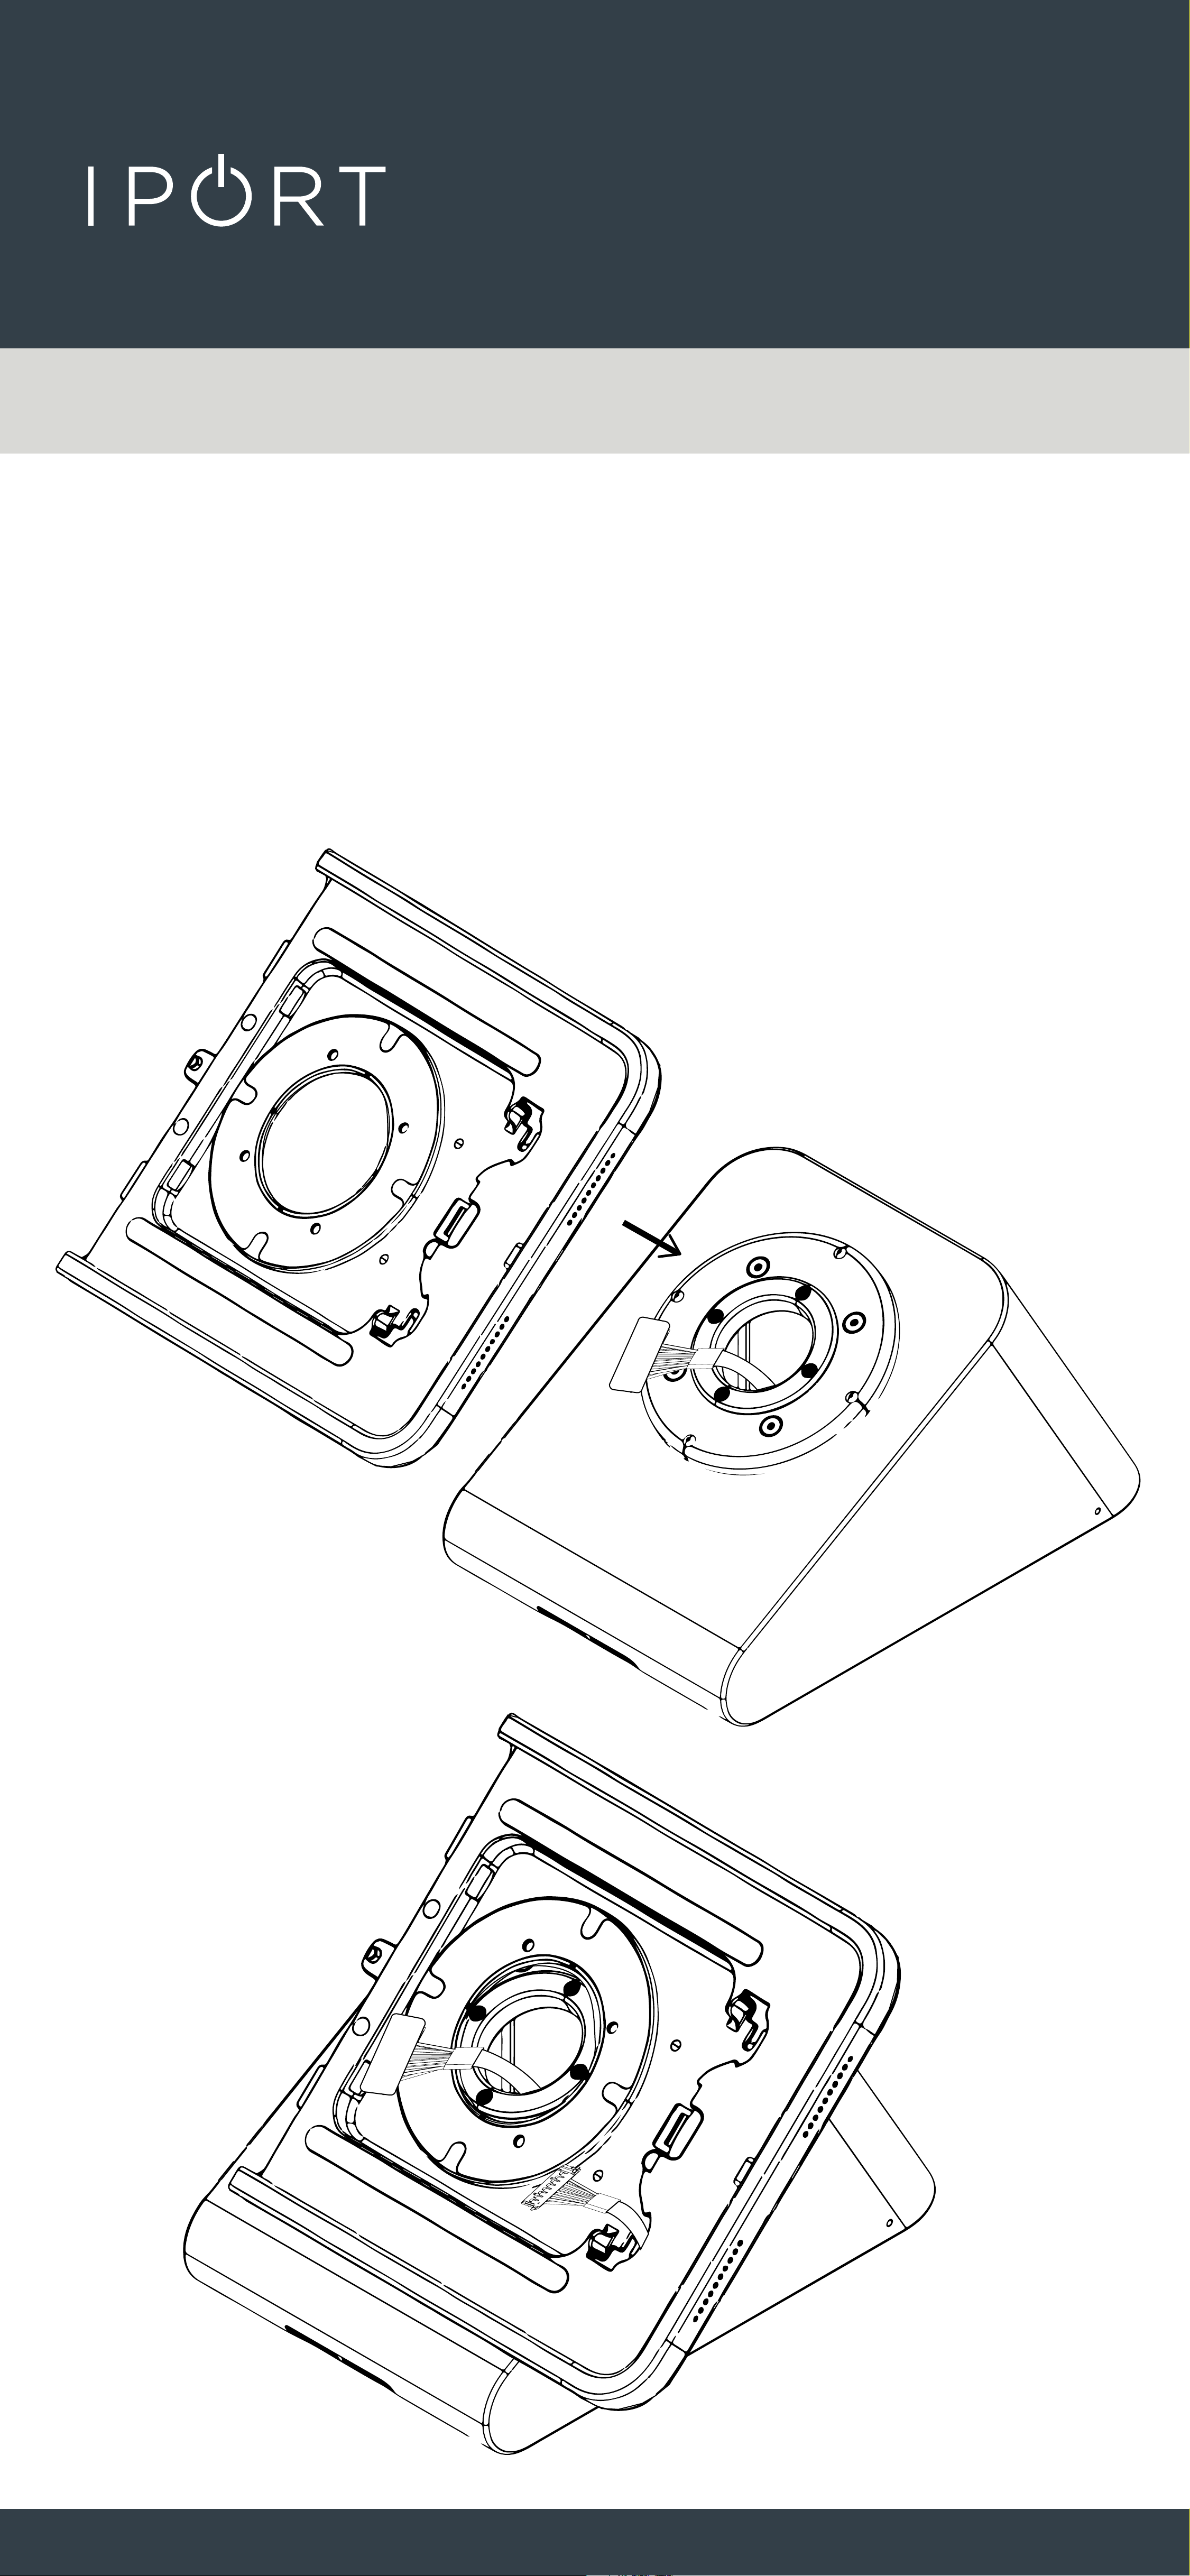
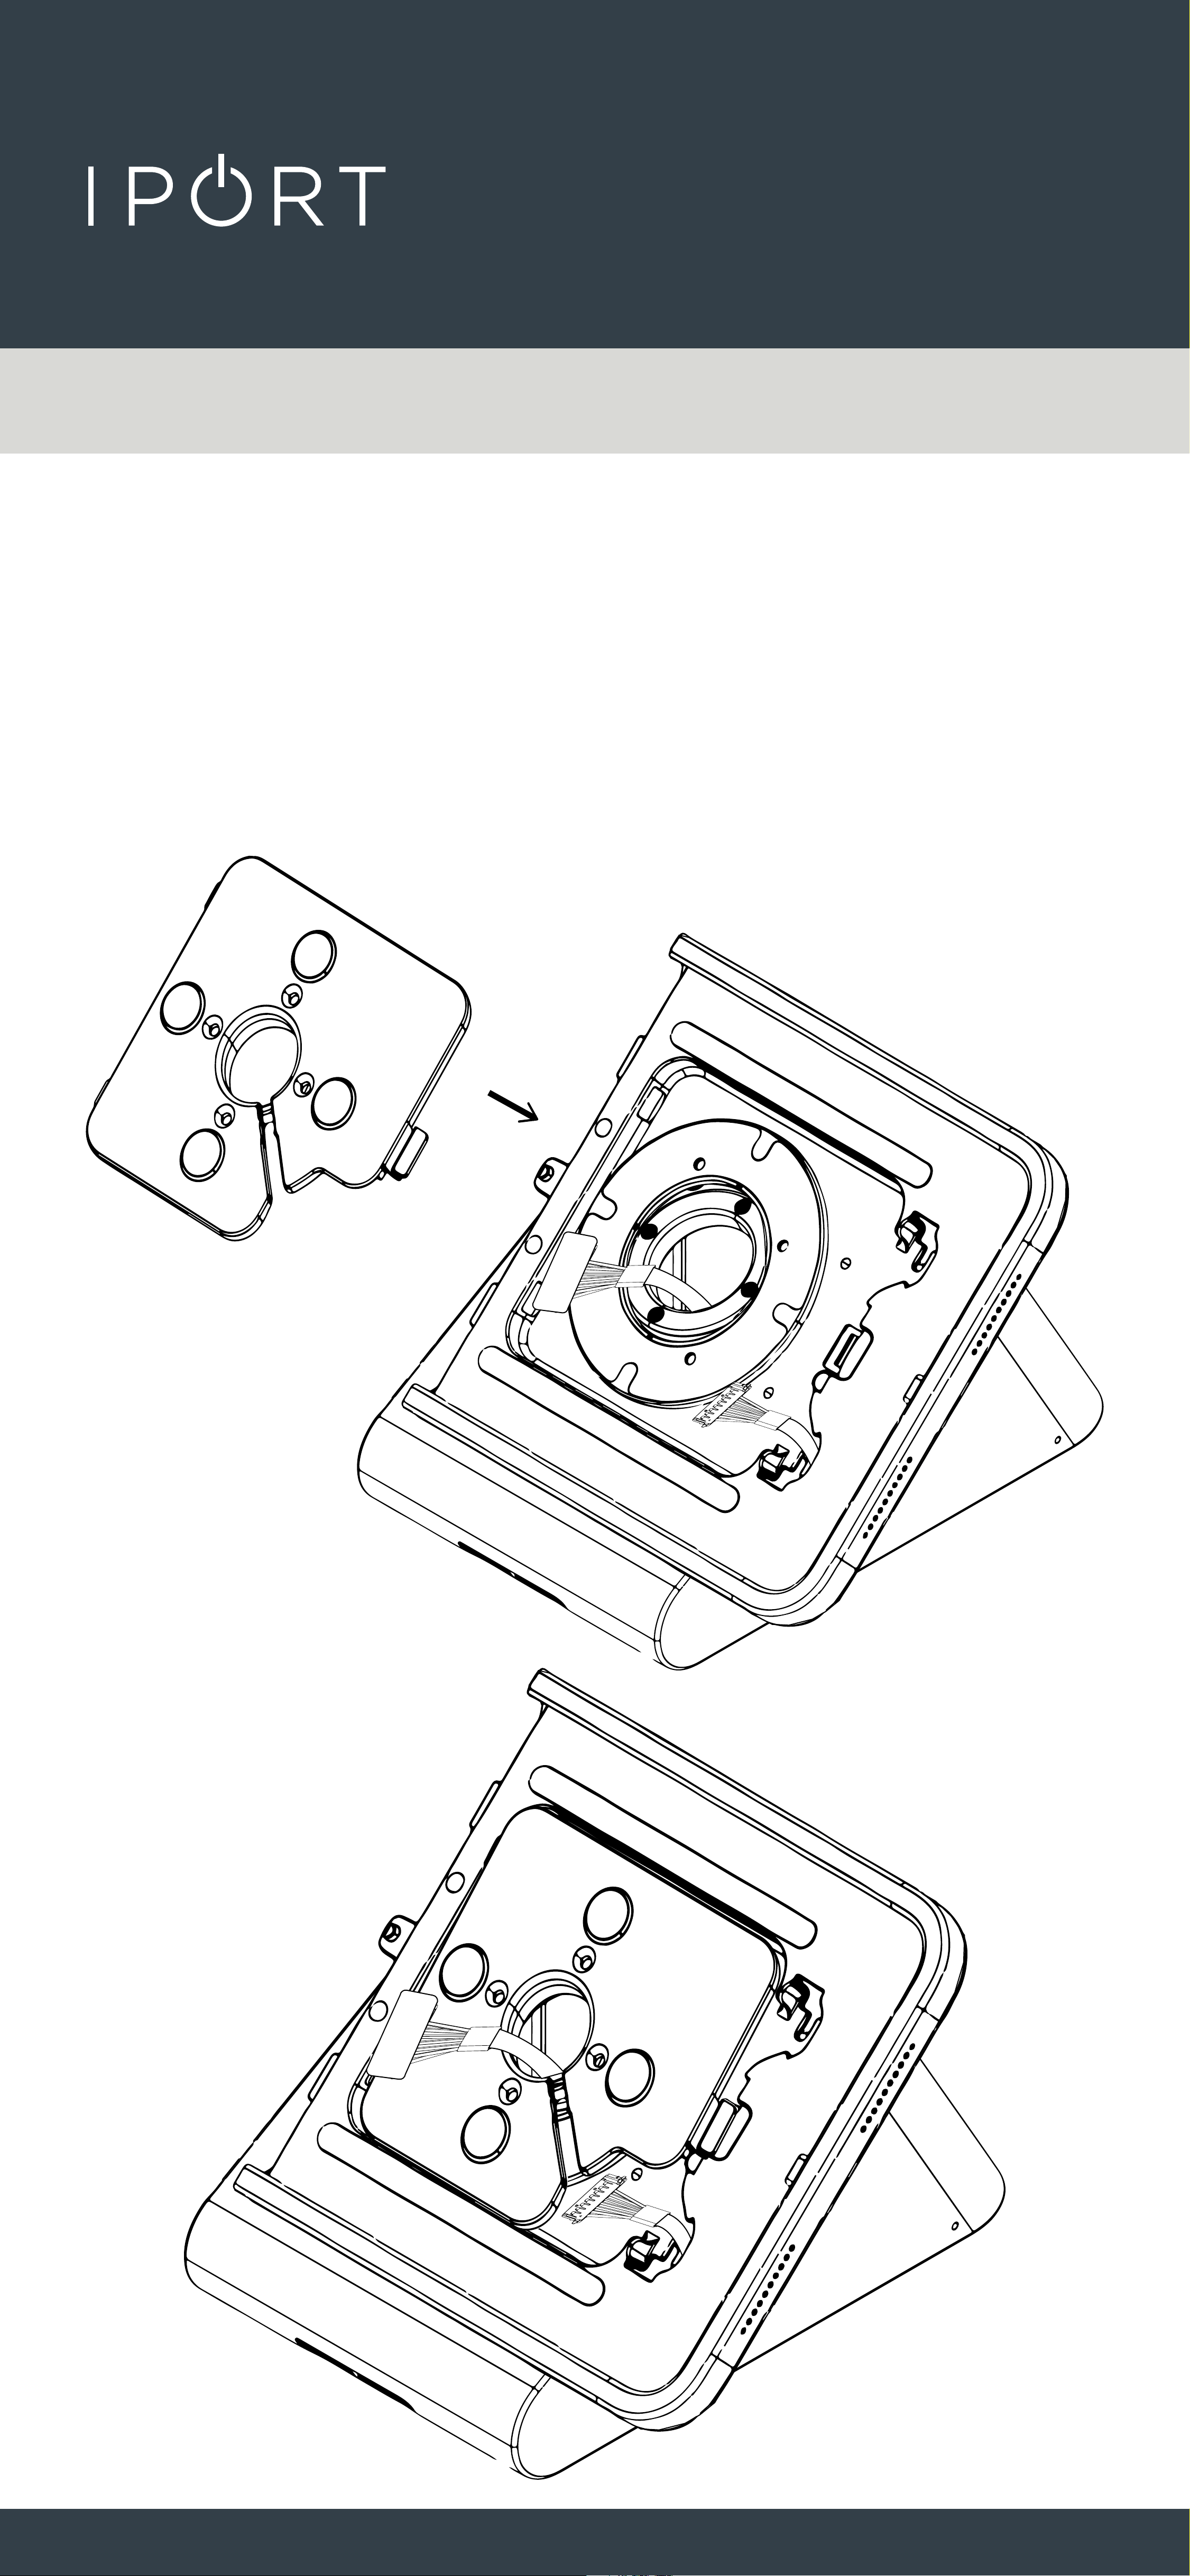
9. Place the Case onto the
WedgeMount, making sure to run
the Molex cable through the center of
the Case before placing on the
WedgeMount.
CONNECT
MOUNT
CONNECT WEDGEMOUNT
12
10. Insert the Mounting Plate into the
Case and feed the Molex cable
though the center hole. Make sure
the Mounting plate clips into place.
CONNECT
MOUNT
CONNECT WEDGEMOUNT
13
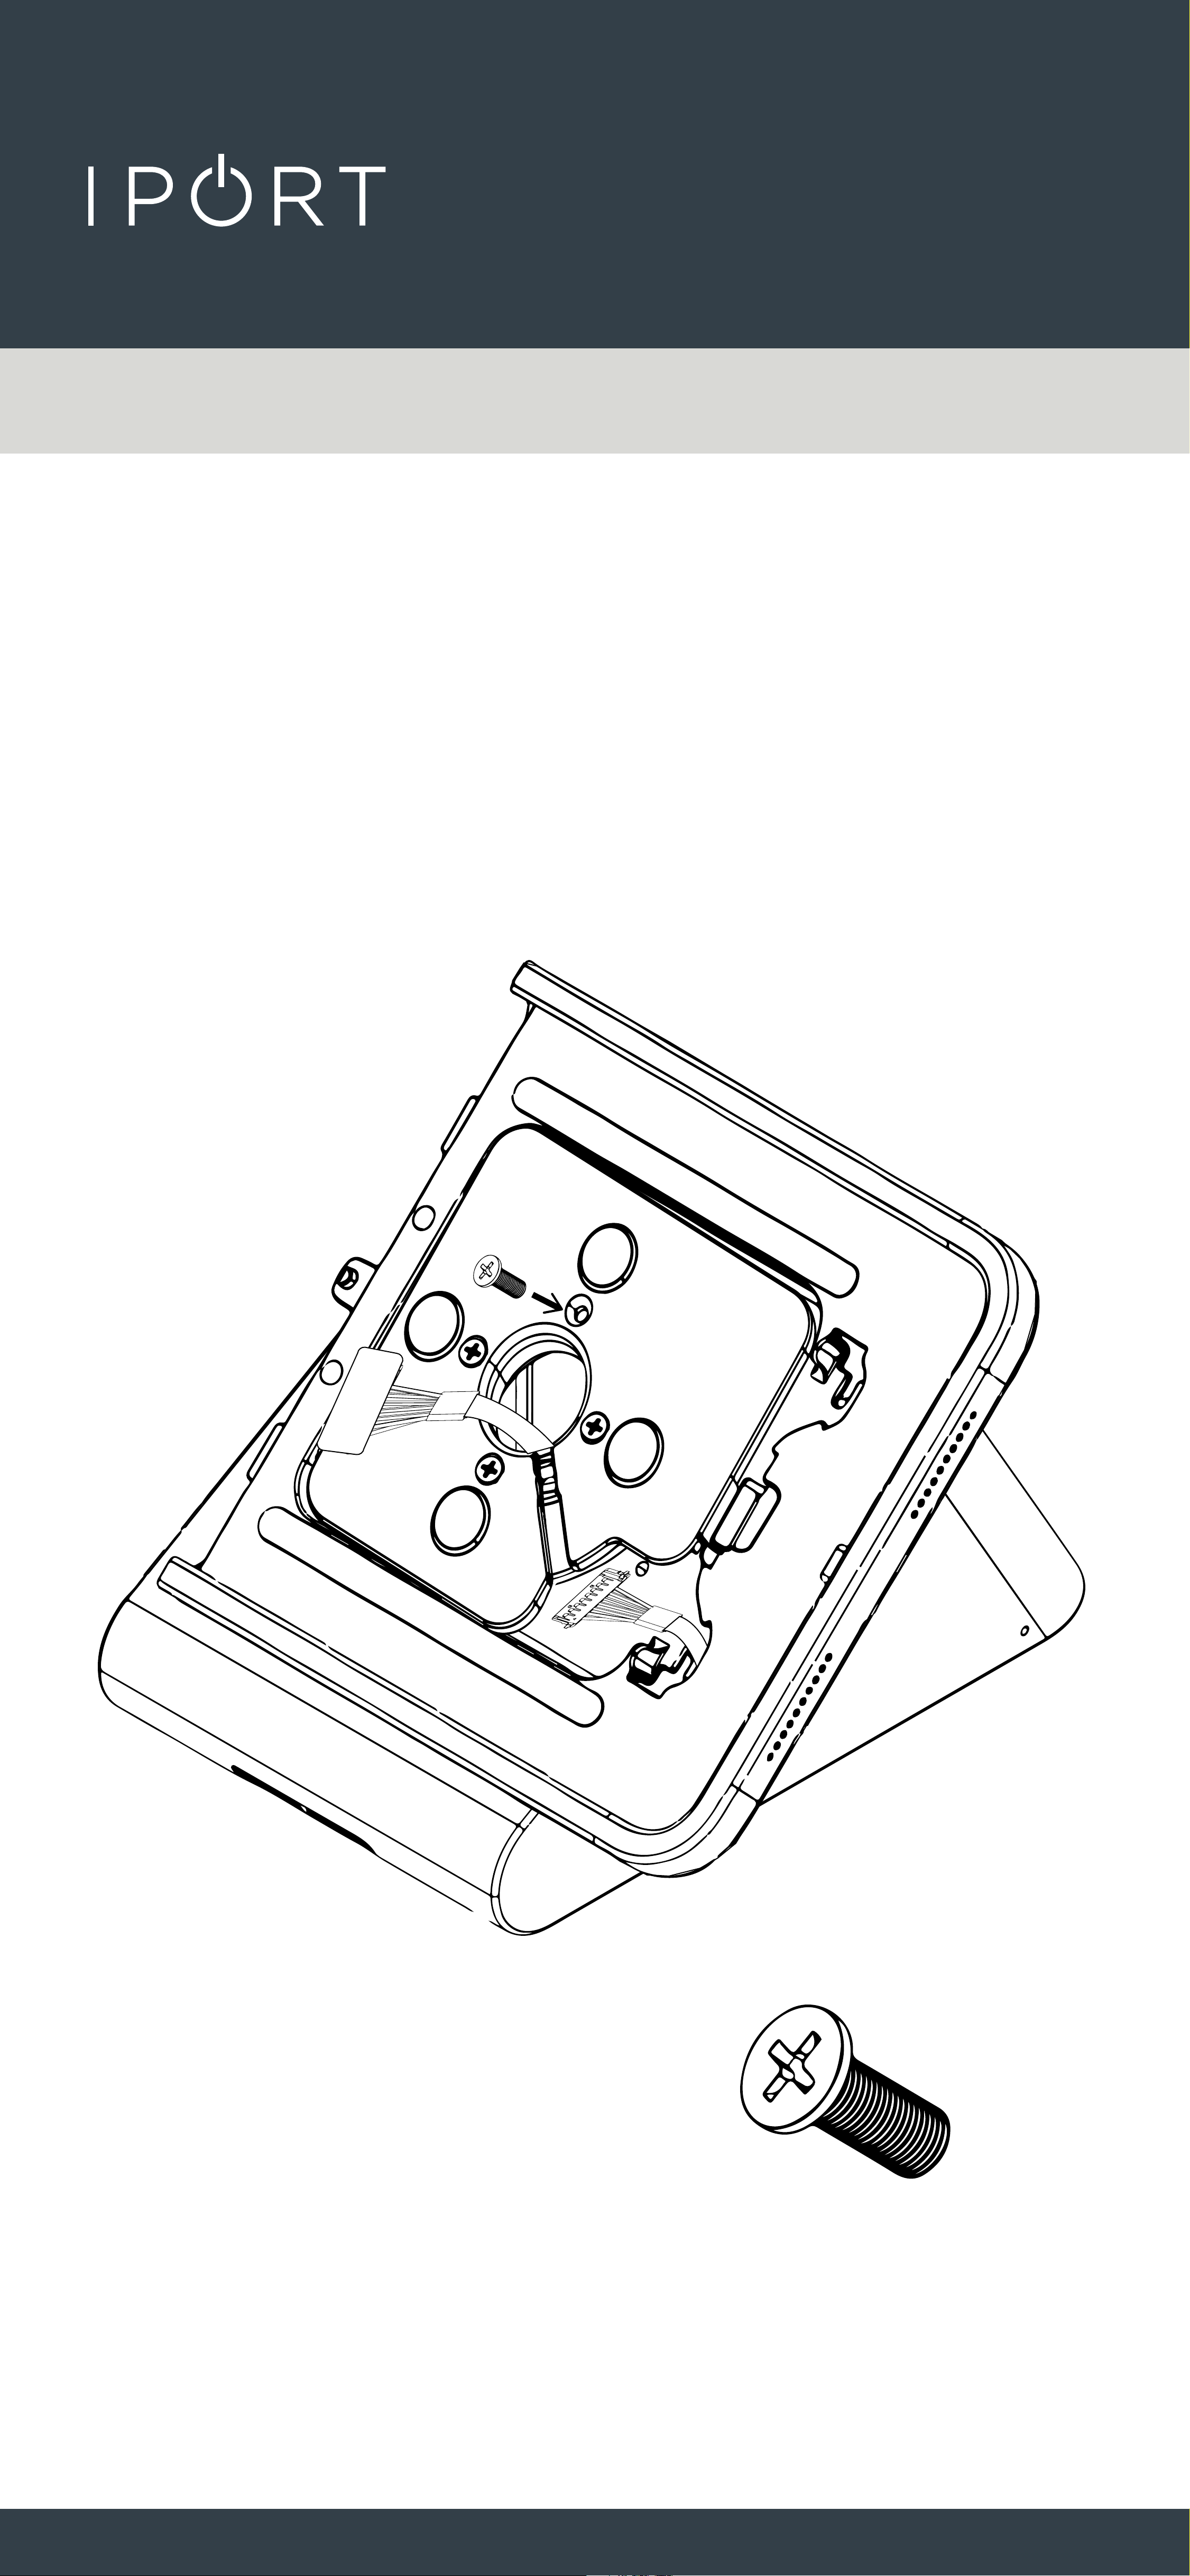
11. Use the 4 provided machine screws
and secure the Mounting Plate and
Case to the WedgeMount.
x4
CONNECT
MOUNT
CONNECT WEDGEMOUNT
14
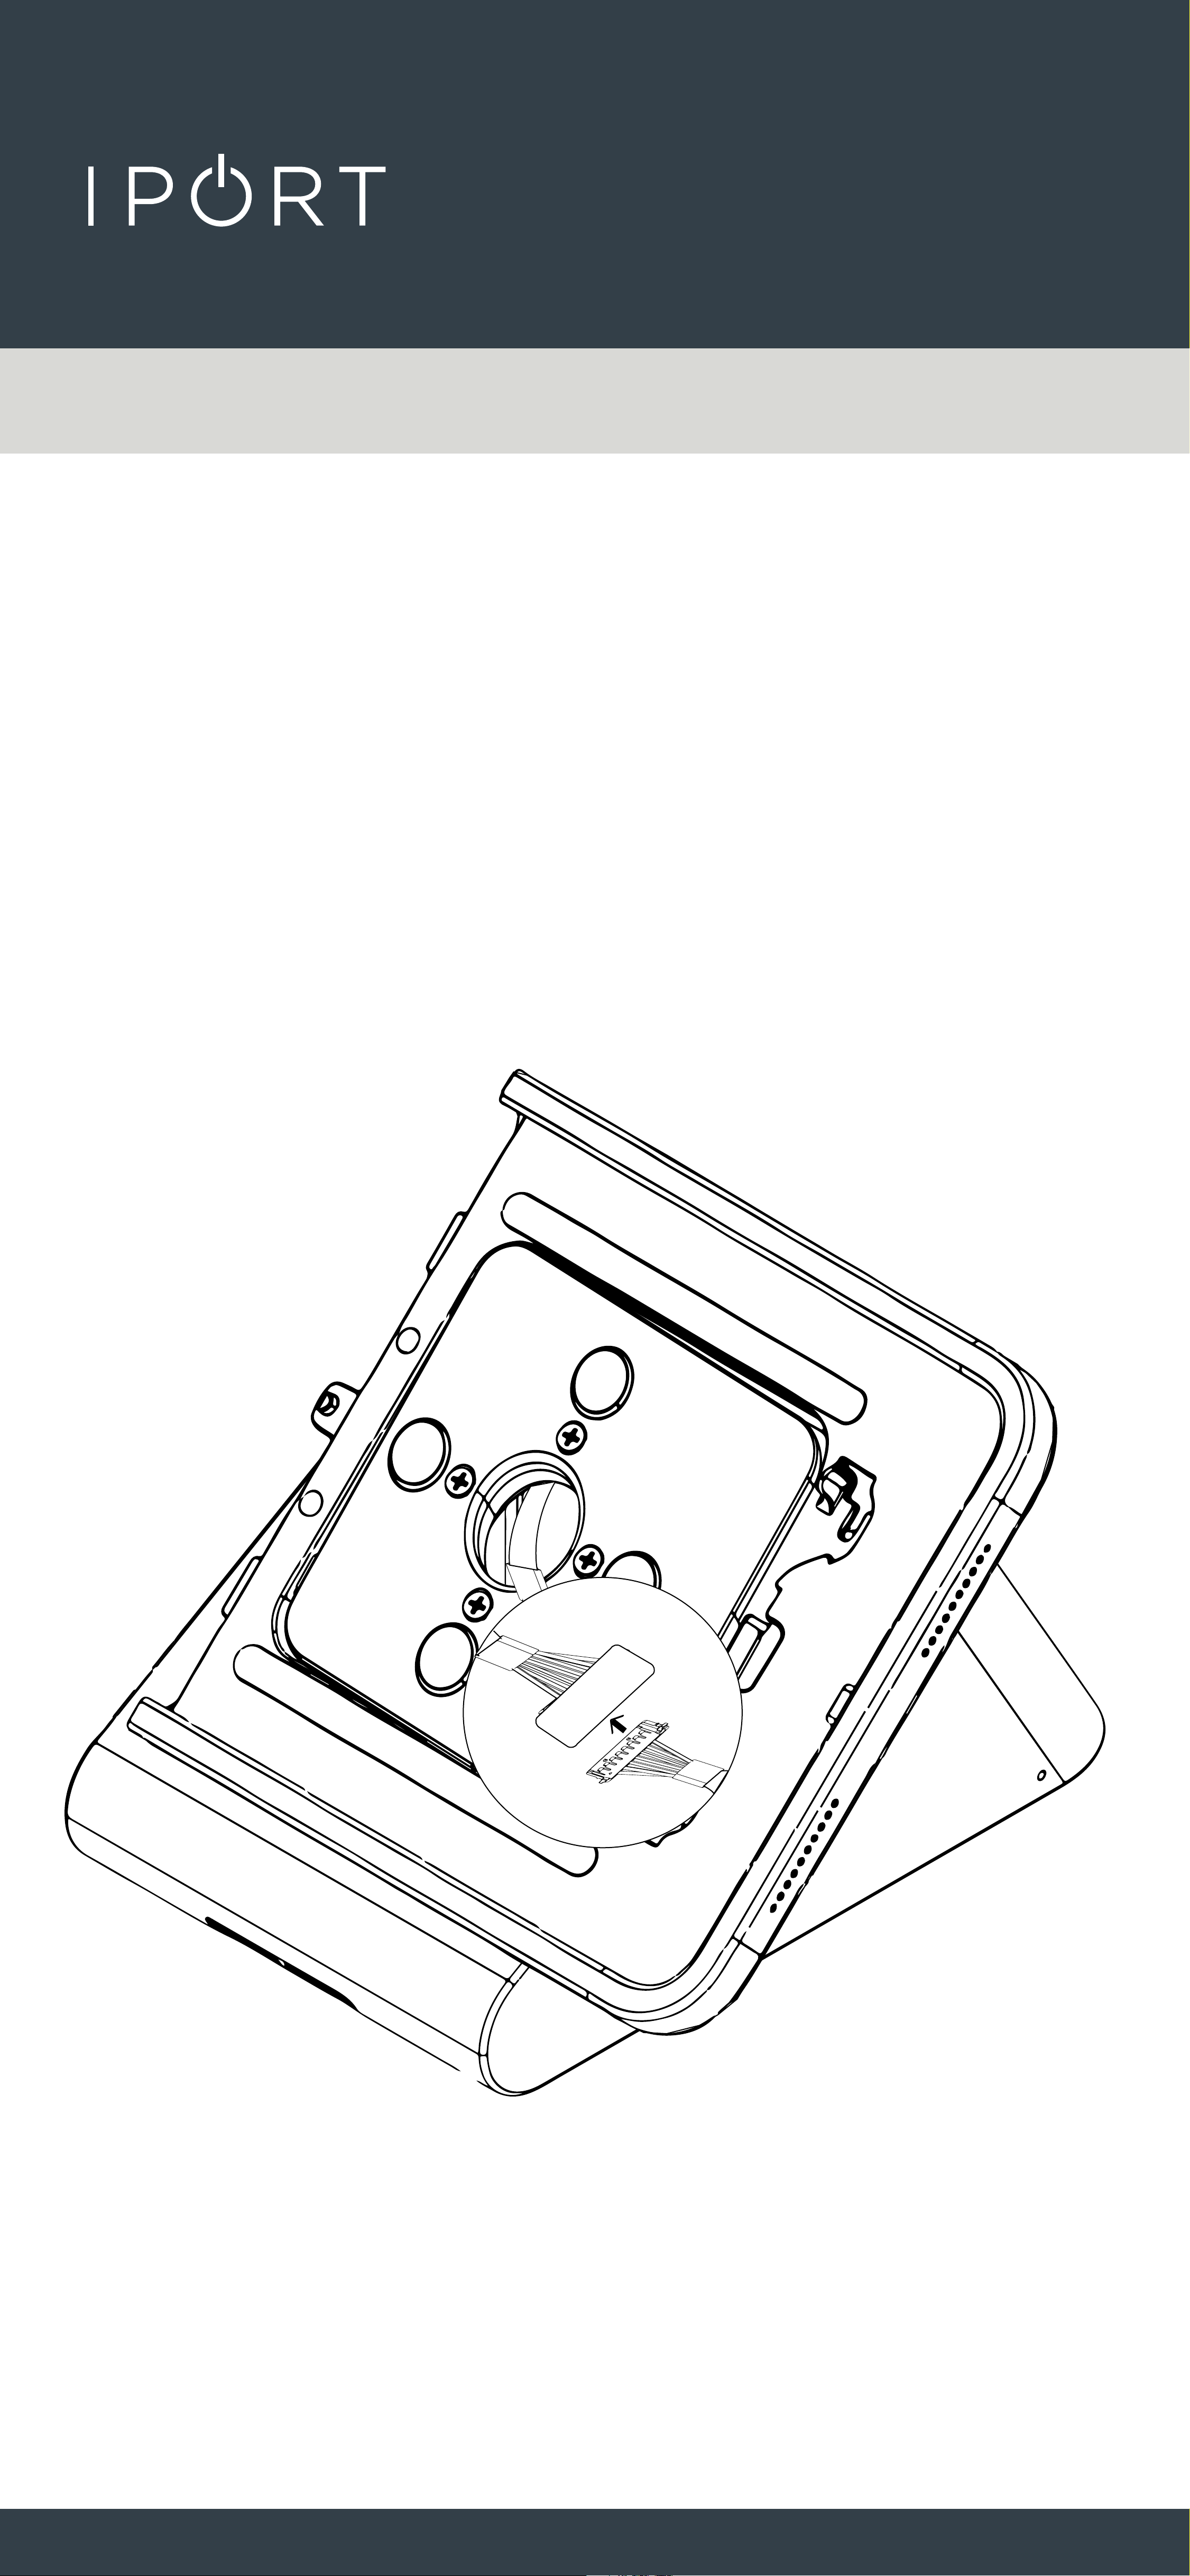
12. Connect the two Molex cables
together and place in the channel of
the mounting bracket.
CONNECT
MOUNT
CONNECT WEDGEMOUNT
15
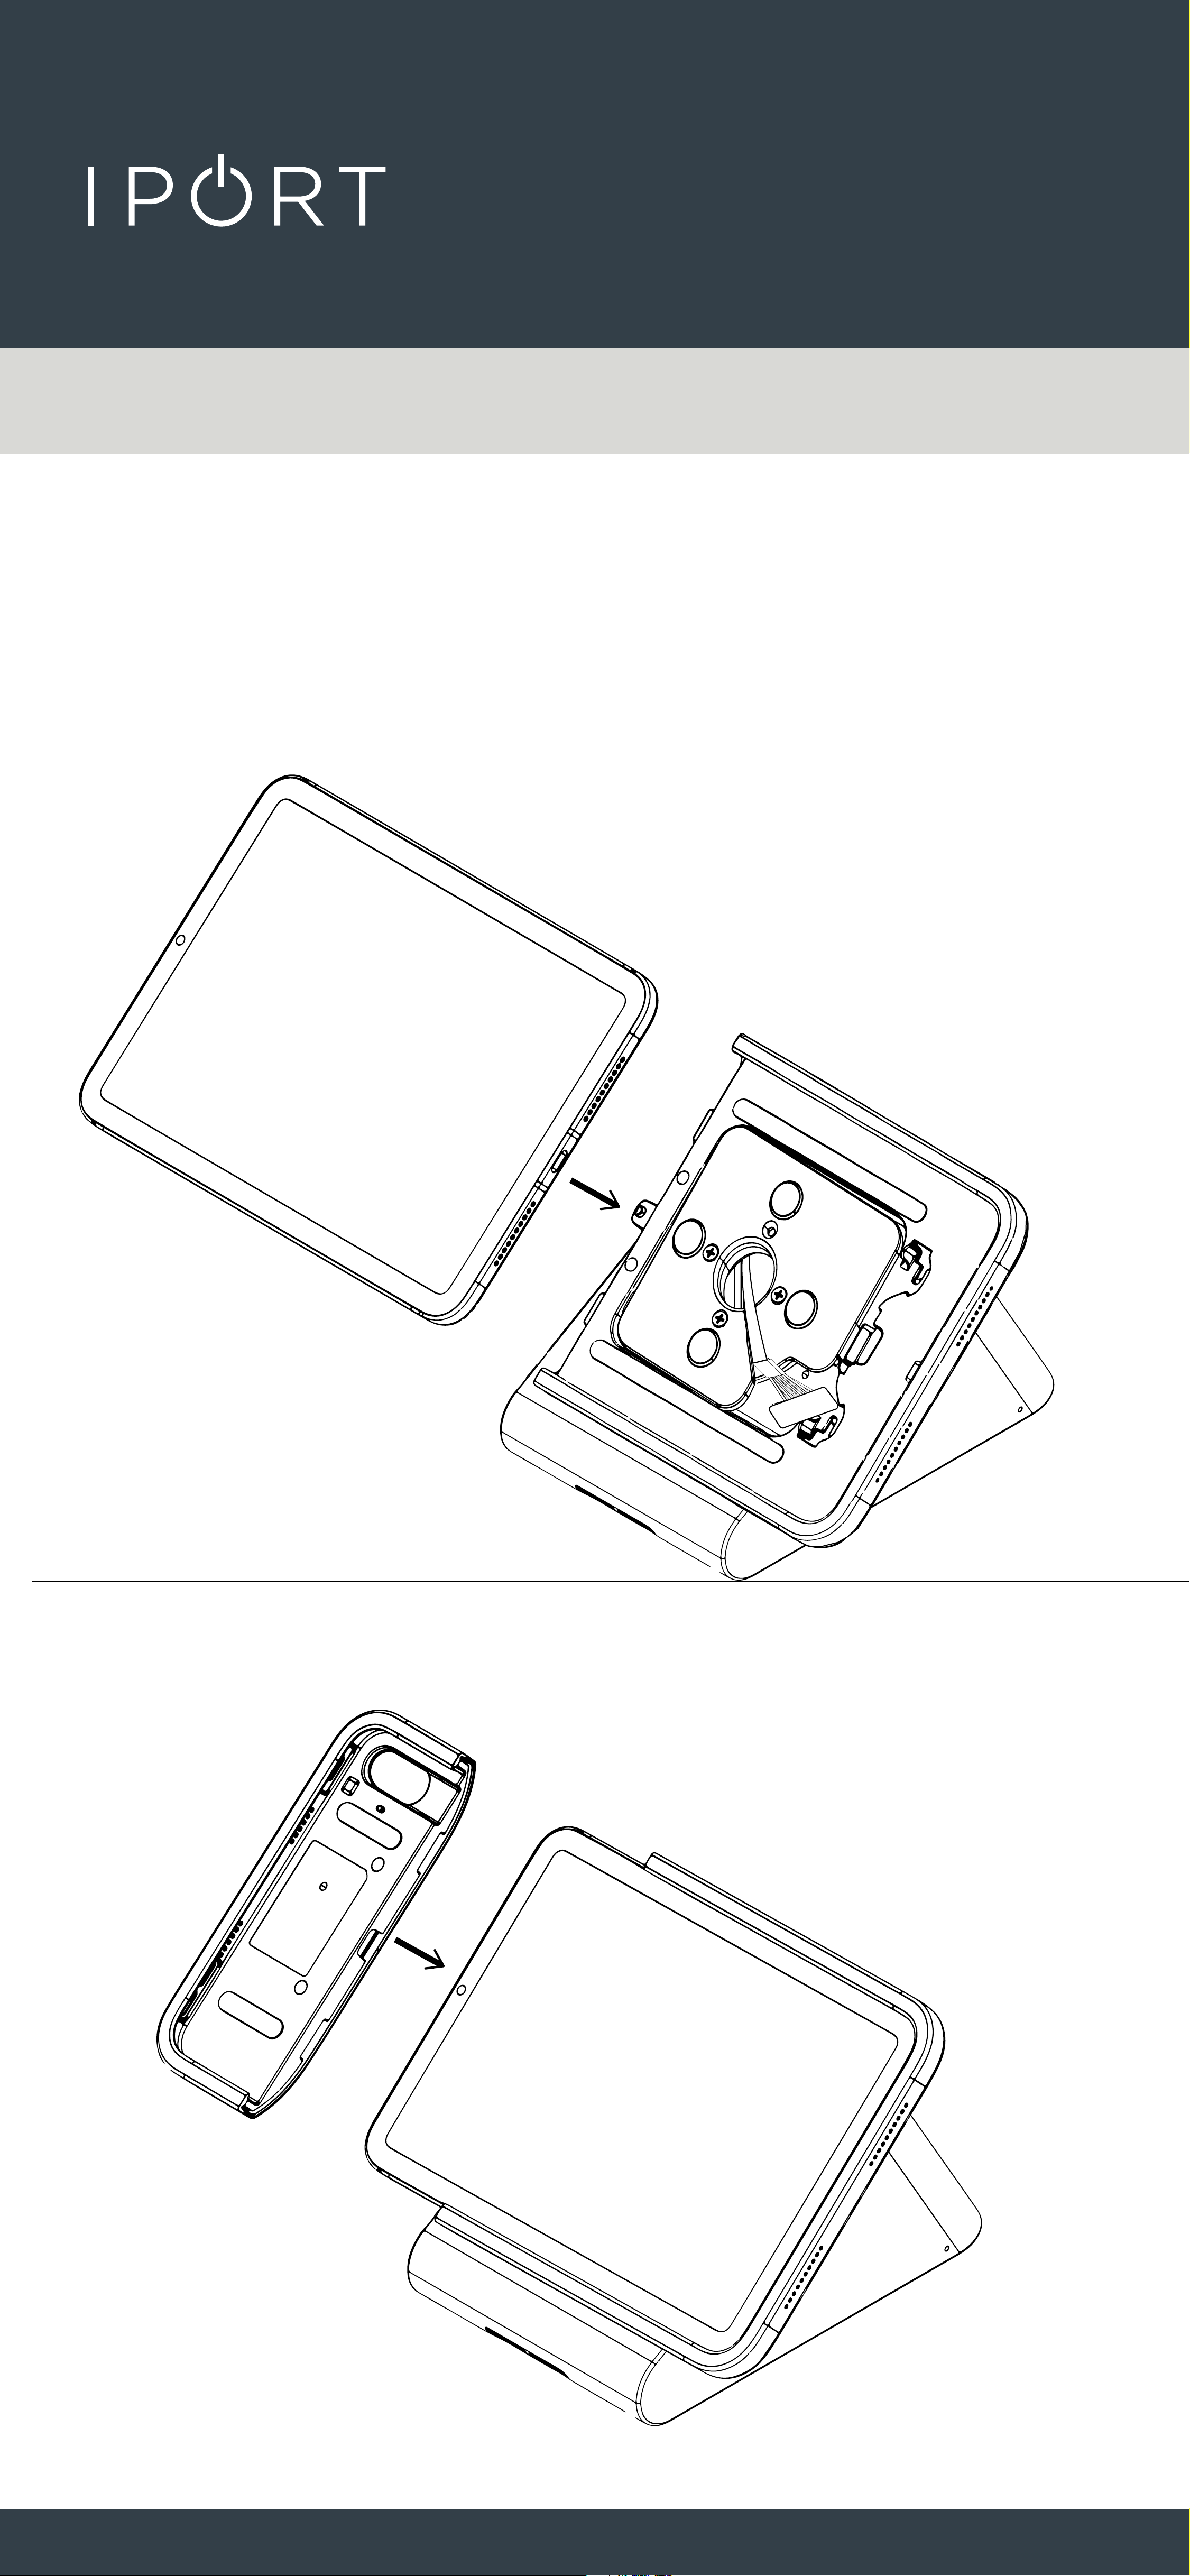
13. Install the iPad into the Case and
attach the Case Top.
CONNECT
MOUNT
CONNECT WEDGEMOUNT
16
14. Use the provided IPORT Security
tool to lock the Case top onto the
Case securing the iPad.
COMPLETE