Loading ...
Loading ...
Loading ...
www.BISSELL.ca
5
WARNING
Do not plug in your vacuum until you are familiar with all instructions and operating
procedures.
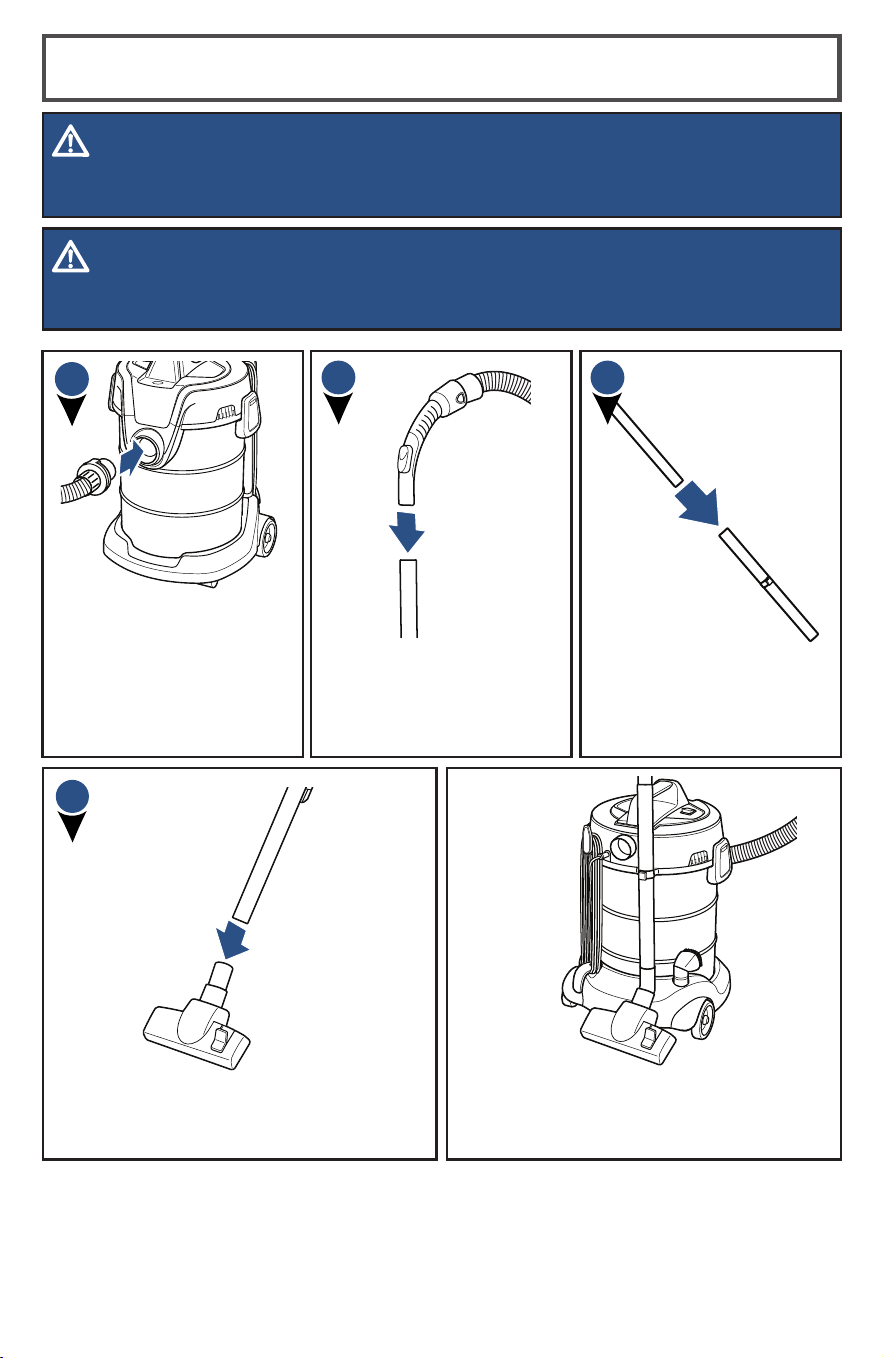
Connect Hose Handle
to the end of the
Extention Wand and
twist slightly to tighten.
Unlock the clips on the Top
Cover to remove the Hose.
Locate the Hose Connector
on end of hose and line up
the tab with the arrow on
the Suction Inlet. Insert the
hose and turn clockwise to
secure.
Connect the Multi-Surface Floor Tool to
end of the Extension Wand and twist
slightly to tighten.
Assembly (Dry Cleaning)
Once assembled, you can store your
vacuum by inserting the Parking Hook
(located on the Extension Wand) into the
storage slot on the rear of the vacuum.
2
4
WARNING
Plastic fi lm can be dangerous. To avoid danger of su ocation, keep away from children.
Connect Extensions
Wands together with
the Parking Hook on the
lower half.
3
1
www.BISSELL.ca
5
AVERTISSEMENT
Ne branchez pas votre aspirateur avant de vous être familiarisé avec toutes les
instructions et toutes les procédures d’utilisation.
Branchez le manche du
tuyau à l’extrémité du
tube-rallonge et tournez-
le légèrement pour serrer.
Désengagez les fermoirs du
couvercle supérieur pour
retirer le tuyau. Trouvez
l’embout à l’extrémité du
tuyau et alignez la languette
avec la flèche sur l’entrée
d’aspiration. Insérez le tuyau
et tournez-le dans le sens
horaire pour le fixer en place.
Branchez l’accessoire de plancher multi-
surface au tube-rallonge et tournez-le
légèrement pour le serrer.
Assemblage (nettoyage sec)
Une fois qu’il est assemblé, vous pouvez ranger
l’appareil en insérant le crochet de rangement
(situé sur le tube-rallonge) dans la fente de
rangement à l’arrière de l’aspirateur.
2
4
AVERTISSEMENT
La pellicule de plastique peut être dangereuse. Pour éviter les risques d’étou ement,
tenir hors de portée des enfants.
Branchez les tubes-
rallonges ensemble avec le
crochet de rangement sur la
moitié inférieure.
3
1
Loading ...
Loading ...
Loading ...