Loading ...
Loading ...
Loading ...
E-87
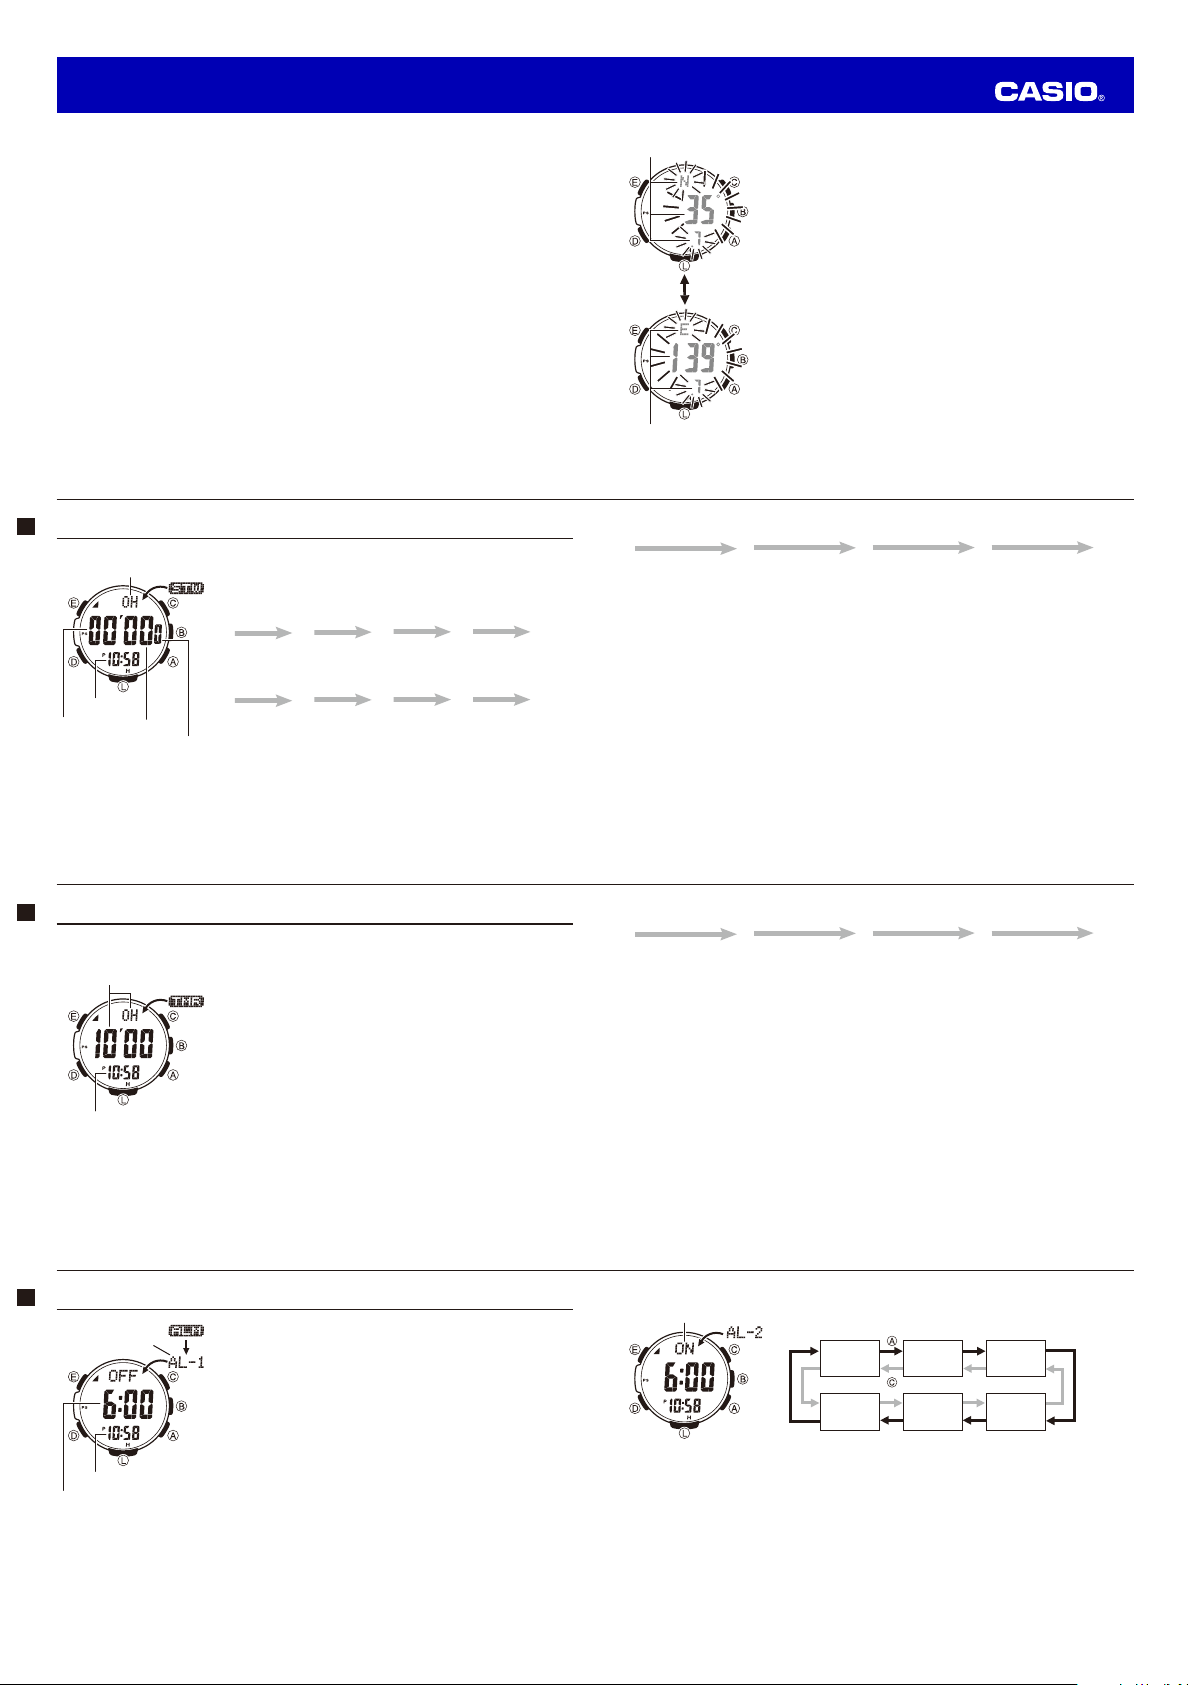
To set an alarm time
1. In the Alarm Mode, use
A
and
C
to scroll through the alarm screens
until the one whose time you want to set is displayed.
AL-1 AL-2 AL-3
SIG* SNZ
AL-4
* There is no time setting for the hourly time signal.
2. Hold down
E
until SET Hold appears on the display and then the current settings start to fl ash.
• This is the setting screen.
3. Press
D
to move the fl ashing between the hour and minute settings.
4. While a setting is fl
ashing, use
A
(+) and
C
(–) to change it.
• When setting the alarm time using the 12-hour format, take care to set the time correctly as a.m. (no
ind
icator) or p.m. (P indicator).
5. Press
E
to exit the setting screen.
• Setting an alarm time causes that alarm to turn on automatically.
Alarm ON/OFF indicator
E-86
Using the Alarm
You can set fi ve independent daily alarms. When an alarm is turned on,
an alarm will sound for about 10 seconds each day when the time in the
Timekeeping Mode reaches the preset alarm time. This is true even if the
watch is not in the Timekeeping Mode. One of the daily alarms is a
snooze alarm. The snooze alarm will sound every fi ve minutes up to
seven times or until it is turned off.
You can also turn on an Hourly Time Signal, which will cause the watch
to beep twice every hour on the hour.
To enter the Alarm Mode
Use
D
to select the Alarm Mode (
ALM
) as shown on page E-24.
• About one second after
ALM
appears on the display, the display will
change to show an alarm name (
AL-1
to
AL-4
, or
SNZ
) or the
SIG
indicator. The alarm name indicates an alarm screen.
SIG
is shown
when the Hourly Time Signal screen is on the display.
• When you enter the Alarm Mode, the data you were viewing when you
last exited the mode appears fi rst.
Alarm name
(AL- or SIG)
Alarm time
(Hour : Minutes)
Current time
E-85
To perform a countdown timer operation
A
A
A A
C
Start Stop (Restart) (Stop) Reset
• Before starting a countdown timer operation, check to make sure that a countdown operation is not in
progress (indicated by the seconds counting down). If it is, press
A
to stop it and then
C
to reset to
the countdown start time.
• An alarm sounds for ten seconds when the end of the countdown is reached. This alarm will sound in
all modes. The countdown time is reset to its starting value automatically when the alarm sounds.
To stop the alarm
Press any button.
E-84
Using the Countdown Timer
The countdown timer can be confi gured to start at a preset time, and sound an alarm when the end of the
countdown is reached.
To enter the Countdown Timer Mode
Use
D
to select the Countdown Timer Mode (
TMR
) as shown on page E-24.
• About one second after
TMR
appears on the display, the display will
change to show the countdown time hours.
To specify the countdown start time
1. Enter the Countdown Timer Mode.
• If a countdown is in progress (indicated by the seconds counting
dow
n), press
A
to stop it and then press
C
to reset to the current
countdown start time.
• If a countdown is paused, press
C
to rese
t to the current
countdown start time.
2. Hold down
E
for at least two seconds.
• SET
Hold will fl ash on the display and then the current start time
setting will start to fl ash. Keep
E
depressed until the start time
setting starts to fl ash.
3. Press
D
to move the fl ashing between the hour and minute settings.
4. Use
A
(+) and
C
(–) to change the fl ashing item.
• To set the starting value of the countdown time to 24 hours, set 0H 00
’00.
5. Press
E
to exit the setting screen.
Countdown time
(Hour, minutes, seconds)
Current time
E-83
To measure two fi nishes
A
C
A C
C
Start Split
First runner fi nishes.
(
SPLIT
appears in
the upper part of the
display.)
Display time of fi rst
runner
Stop
Second runner
fi nishes.
Split release
Display time of
second runner
Reset
Note
• The Stopwatch Mode can indicate elapsed time up to 999 hours, 59 minutes, 59.9 seconds.
• Once started, stopwatch timing continues until you press
A
to stop it, even if you exit the Stopwatch
Mode to another mode and even if timing reaches the stopwatch limit defi ned above. A paused timing
operation will remain paused until you press
A
to restart it or
C
to reset.
• Exiting the Stopwatch Mode while a split time is frozen on the display clears the split time and returns
to elapsed time measurement.
• While
SPLIT
is shown in the upper display, it alternates with the hour digits of the split time at
one-second intervals.
E-82
Using the Stopwatch
The stopwatch measures elapsed time, split times, and two fi nishes.
To enter the Stopwatch Mode
Use
D
to select the Stopwatch Mode (
STW
) as shown on page E-24.
To perform an elapsed time operation
A
A
A A
C
Start Stop (Restart) (Stop) Reset
To pause at a split time
A
C
C A
C
Start Split
(
SPLIT
appears
in the upper part
of the display.)
Split release Stop Reset
Current time
Hours
Seconds
Minutes
1/10 second
E-81
3. Press
E
to display the longitude/latitude setting screen, with the
latitude setting fl ashing.
4. Use
D
to move the fl ashing between the latitude and the longitude
setting.
5. Use
A
(+) and
C
(–) to change the fl ashing setting.
• You can configure the longitude and latitude setting within
f
oll
owing ranges.
Latitude Range: 65.0°S (South 65.0 degrees) to 0°N to 65.0°N
(North 65.0 degrees)
Longitude Range: 179.9°W (West 179.9 degrees) to 0°E to 180.0°E
(East 180.0 degrees)
• Latitude and longitude values are rounded off to the nearest
degr
ee.
6. Press
E
to return to the Timekeeping Mode.
7. In the Timekeeping Mode, press
D
.
•
Display the location whose sunrise and sunset times you want to
vie
w.
Latitude
Longitude
Press D.
E-80
To look up the sunrise and sunset times for a specifi c location
Important!
• You do not need to perform this procedure to look up the sunrise and sunset times in your currently
sel
ected Home City.
• If you select a different city code to look up the sunrise and sunset times there, return to the city
cod
e of your Home City (your current location) when you are fi nished. Otherwise, the time shown
in the Timekeeping Mode will not be correct.
• For information about the Home City setting, see “Confi guring Home City Settings” (page E-28).
1. In the Timekeeping Mode, hold down
E
for at least two seconds. First,
SET Hold
will fl ash on the
display, and
CITY
will be displayed in the upper display. After that, the currently selected city code and
city name will scroll across the upper display. Keep
E
depressed until the scrolling starts.
2. Use
A
(East) and
C
(West) to select the city code whose sunrise and sunset times you want to view.
•
For details about city codes, see the “City Code Table” at the back of this manual.
• If this display shows the information you need, you can exit this procedure at this point by pressing
E
twi
ce. If you want to specify a latitude and longitude for a more exact reading, advance to step 3,
below.
Operation Guide 3490
Loading ...
Loading ...
Loading ...