Loading ...
Loading ...
Loading ...
6
ENGLISH (Original instructions)
Features
This appliance includes some or all of the following features.
1. ON/Off switch
2. Lock off button
3. Trigger switch
4. Steam nozzle
5. Water tank
6. Filler cap
Accessories
This appliance includes some of the following accessories
others are available to purchase from the Black & Decker
website.
The performance of your appliance depends on the accessory
used. Black & Decker accessories are engineered to high
quality standards and designed to enhance the performance
of your appliance. By using these accessories you will get the
very best from your appliance.
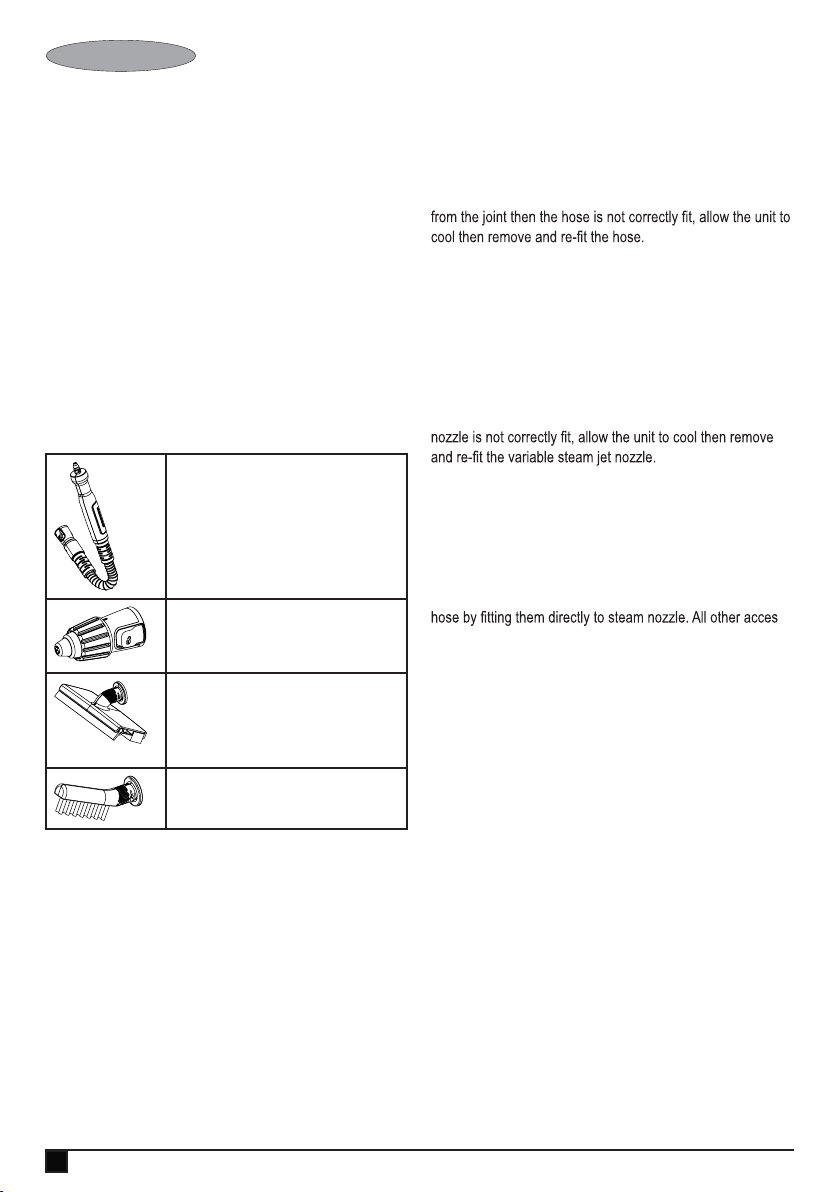
Flexible hose and handle
For convienient use of all accessories.
Variable stem jet nozzle
For higher pressure steam bursts, twist to change
the spray pattern of the steam burst.
Large Squeegee
For cleaning galss doors and windows.
Warning! Do not use the window squeegee on cold
glass. It may cause the glass to break.
Detail tile cleaner
For cleaning grouted areas between tiles.
Assembly
Warning! Before attempting any of the following operations,
make sure that the appliance is switched off and unplugged
and that the appliance is cold and does not contain any water.
Attaching the hose and accessories (Fig. A & B)
Warning! Inspect the seal (7) on the steam nozzle (4) and
hose (8) before each use. If the seal is missing or damaged
then please contact your nearest authorised repair agent. Do
not use the appliance.
Attaching the hose (Fig. A)
Press in the clips (9) on either side of the hose (8).
Press the hose (8) onto the steam nozzle (4) and release
the clips (9).
Important! Ensure that the hose (8) is securely fastened
before using the hand held steeam cleaner. If steam escapes
Attaching the variable steam jet nozzle (Fig. B)
Press in the clips (11) on either side of the variable steam
jet nozzle (12).
Press the variable steam jet nozzle onto the steam nozzle
(4) or the hose (8) and release the clips (11).
Important! Ensure that the variable steam jet nozzle (12) is
securely fastened before using the hand held steeam cleaner.
If steam escapes from the joint then the variable steam jet
Attaching other accessories (Fig. A)
Align the lugs on the hose (8) with the recesses on the
accessory.
Press the accessory (10) onto the hose (8) and twist anti-
clockwise untill the accessory clicks into place.
Note! The variable steam jet nozzle may be used without the
-
sories must be connected to the hose for use.
Removing the hose and accessories(Fig. A & B)
Warning! The Steam nozzle, variable steam jet nozzle, hose
and accessories become hot during use. Allow the unit and all
accessories to cool before removing any accessories.
Removing an accessory (Fig. A)
Twist the accessory (10) clockwise then pull away from
the hose (8).
Removinging the hose (Fig. A)
Press in the clips (9) on either side of the hose (8) and pull
away from the steam nozzle (4).
Removing the variable steam jet nozzle (Fig. B)
Press in the clips (11) on either side of the vaiable steam
jet nozzle (12) and pull away from the steam nozzle (4).
Filling the water tank (Fig. C)
This Steam cleaner incorporates an anti-calc system to help
prolong the life of the system.
Note: Fill the water tank with clean tap water.
Note: In areas of very hard water, the use of de-ionised water
is recommended.
Loading ...
Loading ...