Loading ...
Loading ...
Loading ...
15
hours light up.
• Use buttons (C3) or (C4) to set the numbers of hours
after which the appliance should start to operate.
• The appliance will start to operate in the same operating
mode that was previously set.
Start up can be programmed at any time within the 24 hours
that follow. A few seconds after the timer is set, the setting is
acquired. The timer indicator stays lit and the display returns to
standby.
To cancel the timer program, press the timer key (C7) twice. The
timer indicator (C10) will go o.
OPERATION USING THE REMOTE CONTROL
• Aim the remote control at the receiver (A12) on the air
conditioner. The maximum distance between the remote
control and the appliance is 7 metres (with no obstacles
between the remote and the receiver) (Fig. 8).
• The remote control should be handled with extreme care,
without dropping it or exposing it to direct sunlight and
keeping it away from heat sources.
7m
OPERATING FROM THE REMOTE CONTROL
INSERTING OR REPLACING THE BATTERIES
• Remove the cover on the rear of the remote control;
• Insert or replace the batteries with two new LR03 “AAA”
1.5V batteries, inserting them correctly (see the directions
inside the battery compartment) (Fig. 8);
• Replace the cover.
• In the remote control’s display there is a battery charge
indicator, when it ashes it is necessary to replace the bat-
teries.
( ).
Please note: If the remote control unit is replaced or discarded,
the batteries must be removed and disposed of in accordance
with current legislation as they are harmful to the environment.
Do not mix old and new batteries.
Do not mix alkaline, standard (carbon-zinc) or rechargeable
(nickel-cadmium) batteries. Do not dispose of batteries in re.
Batteries may explode or leak. If the remote control is not be
used for a certain length of time, remove the batteries.
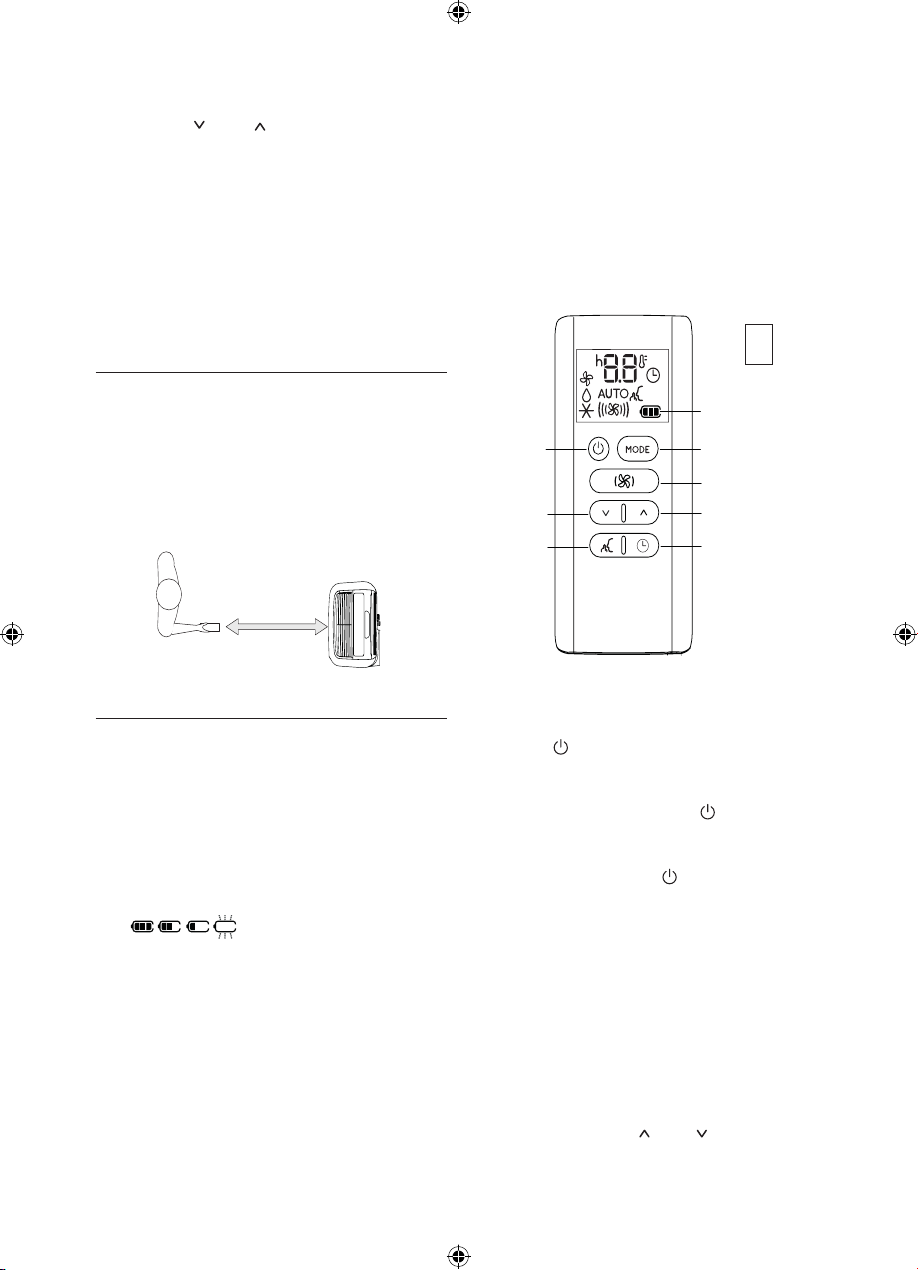
DESCRIPTION OF THE REMOTE CONTROL
D1. ON/STAND-BY button
D2. MODE button
D3. Fan speed selection button
D4. Increase button
D5. Decrease button
D6. Silent button (on some models only)
D7. Timer button
D8. Battery charge status indicator
D1
D8
D5
D2
D4
D6
D7
D3
TURNING THE APPLIANCE ON/OFF
• Plug into the outlet.
• Press the
C1C2
C4
C13
C12
C9
C7
C5
C6
C3
C14
C10
C15
C11
C8
ON/STAND-BY button (D1). When turned on,
the air conditioner starts operating in the same mode as
when it was turned o.
• To switch the appliance o, press the
C1C2
C4
C13
C12
C9
C7
C5
C6
C3
C14
C10
C15
C11
C8
ON/STAND-BY but-
ton (D1) again.
Please note: Never switch the appliance o by removing the plug.
Always switch it o by pressing the
C1C2
C4
C13
C12
C9
C7
C5
C6
C3
C14
C10
C15
C11
C8
ON/STAND-BY button (D1)
and waiting few minutes before removing the plug. Only in this
way the appliance will perform the standard checkings.
Please note:Functions of the remote control (D) correspond to
those of the control panel (C).
MODES SELECTION
To select the desired operating mode, press repeatedly the MODE
key (D2) until the desired function is selected.
SELECTING THE TEMPERATURES
In air conditioning mode press (D4) or button (D5) to select
the desired temperature.
D
Loading ...
Loading ...
Loading ...