Loading ...
Loading ...
Loading ...
Section 3 - MAINTENANCE
WARNING
DO NOT attempt any adjustments, maintenance,
service or repairs with the engine running. Stop
engine. Stop blade. Engage parking brake. Remove
key. Remove spark plug wire from spark plug and
secure away from plug. Engine and components are
HOT. Avoid serious burns, allow all parts to cool
before working on machine. Fuel Filler Cap and Vent
must be closed securely to prevent fuel spillage.
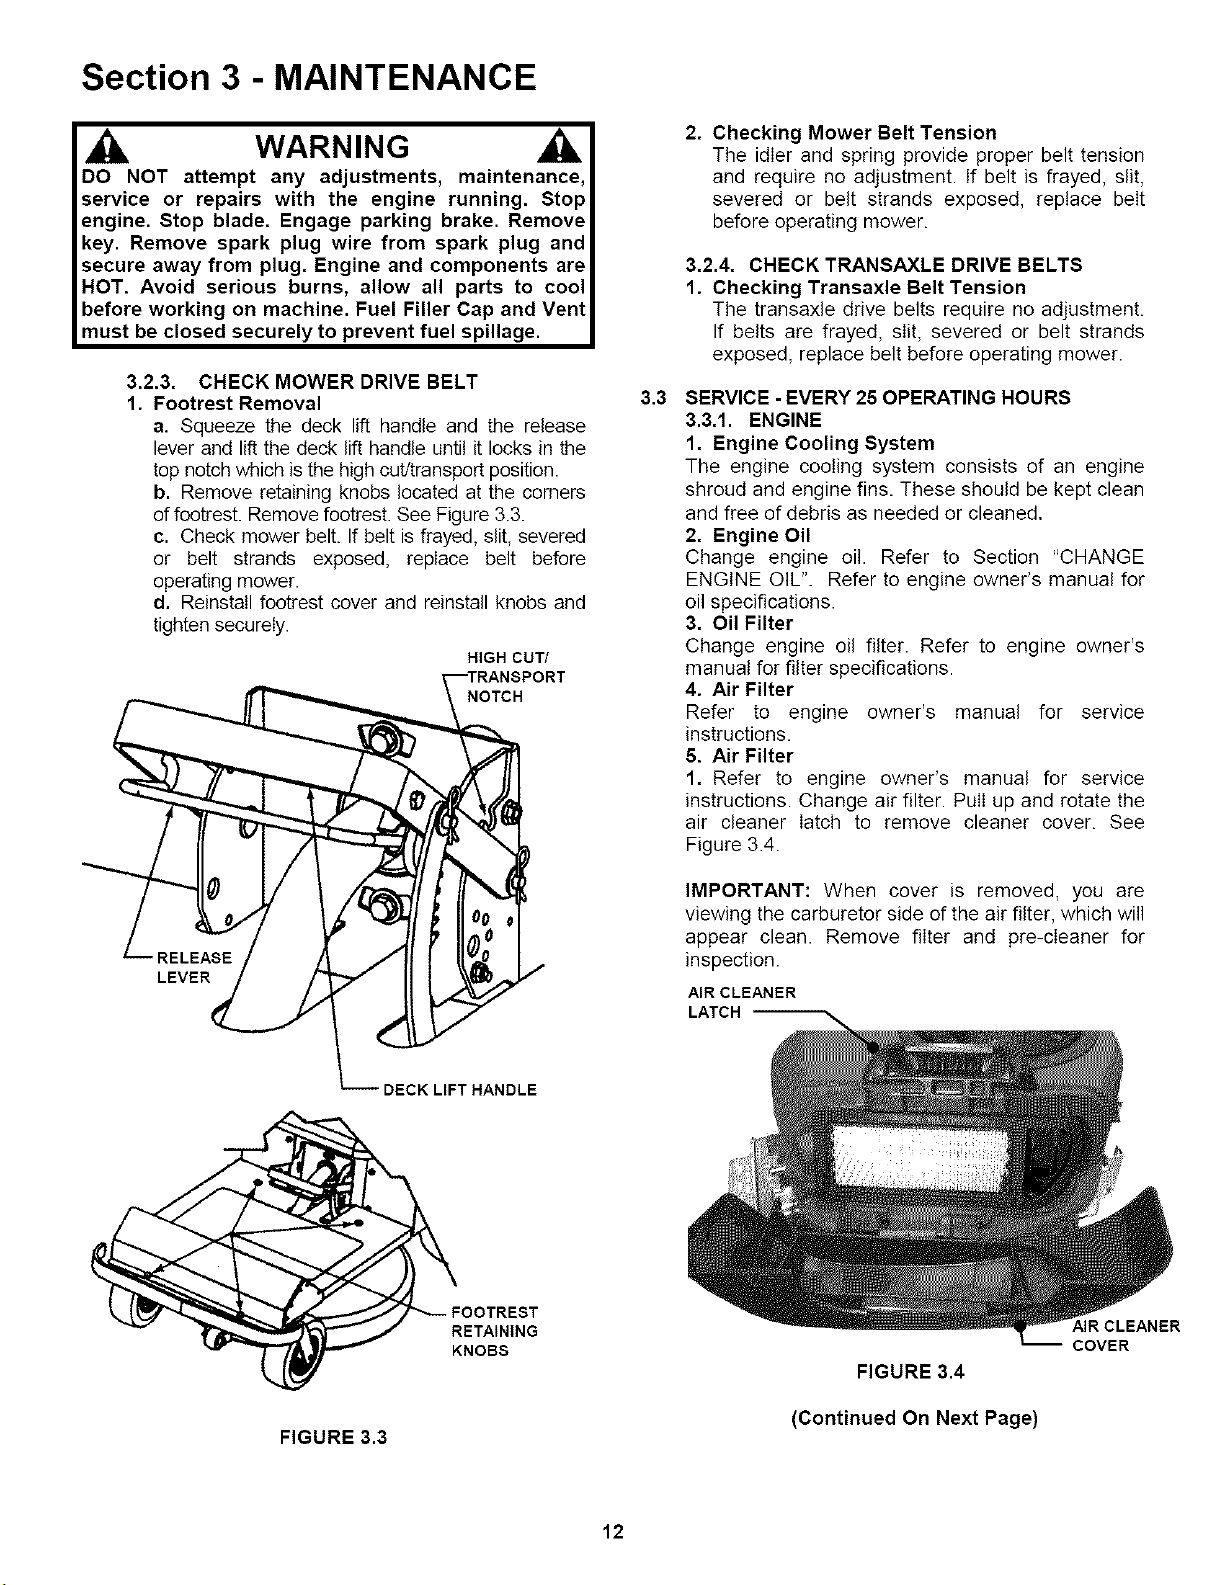
3.2.3. CHECK MOWER DRIVE BELT
1. Footrest Removal
a. Squeeze the deck lift handle and the release
lever and lift the deck lift handle until it locks in the
top notch which is the high cut/transport position.
13.Remove retaining knobs located at the corners
of footrest. Remove footrest. See Figure 3.3.
c. Check mower belt. If belt is frayed, slit, severed
or belt strands exposed, replace belt before
operating mower.
d. Reinstall footrest cover and reinstall knobs and
tighten securely.
HIGH CUT/
NOTCH
RELEASE
LEVER
DECK LIFT HANDLE
RETAINING
KNOBS
FIGURE 3.3
3.3
2. Checking Mower Belt Tension
The idler and spring provide proper belt tension
and require no adjustment. If belt is frayed, slit,
severed or belt strands exposed, replace belt
before operating mower.
3.2.4. CHECK TRANSAXLE DRIVE BELTS
1. Checking Transaxle Belt Tension
The transaxle drive belts require no adjustment.
If belts are frayed, slit, severed or belt strands
exposed, replace belt before operating mower.
SERVICE - EVERY 25 OPERATING HOURS
3.3.1. ENGINE
1. Engine Cooling System
The engine cooling system consists of an engine
shroud and engine fins. These should be kept clean
and free of debris as needed or cleaned.
2. Engine Oil
Change engine oil. Refer to Section "CHANGE
ENGINE OIL". Refer to engine owner's manual for
oil specifications.
3, Oil Filter
Change engine oil filter. Refer to engine owner's
manual for filter specifications.
4. Air Filter
Refer to engine owner's manual for service
instructions.
5. Air Filter
1. Refer to engine owner's manual for service
instructions. Change air filter. Pull up and rotate the
air cleaner latch to remove cleaner cover. See
Figure 3.4.
IMPORTANT: When cover is removed, you are
viewing the carburetor side of the air filter, which will
appear clean. Remove filter and pre-cIeaner for
inspection.
AIR CLEANER
LATCH
FIGURE 3.4
(Continued On Next Page)
AIR CLEANER
COVER
12
Loading ...
Loading ...
Loading ...