Loading ...
Loading ...
Loading ...
28
Overview of Pressure Control Features
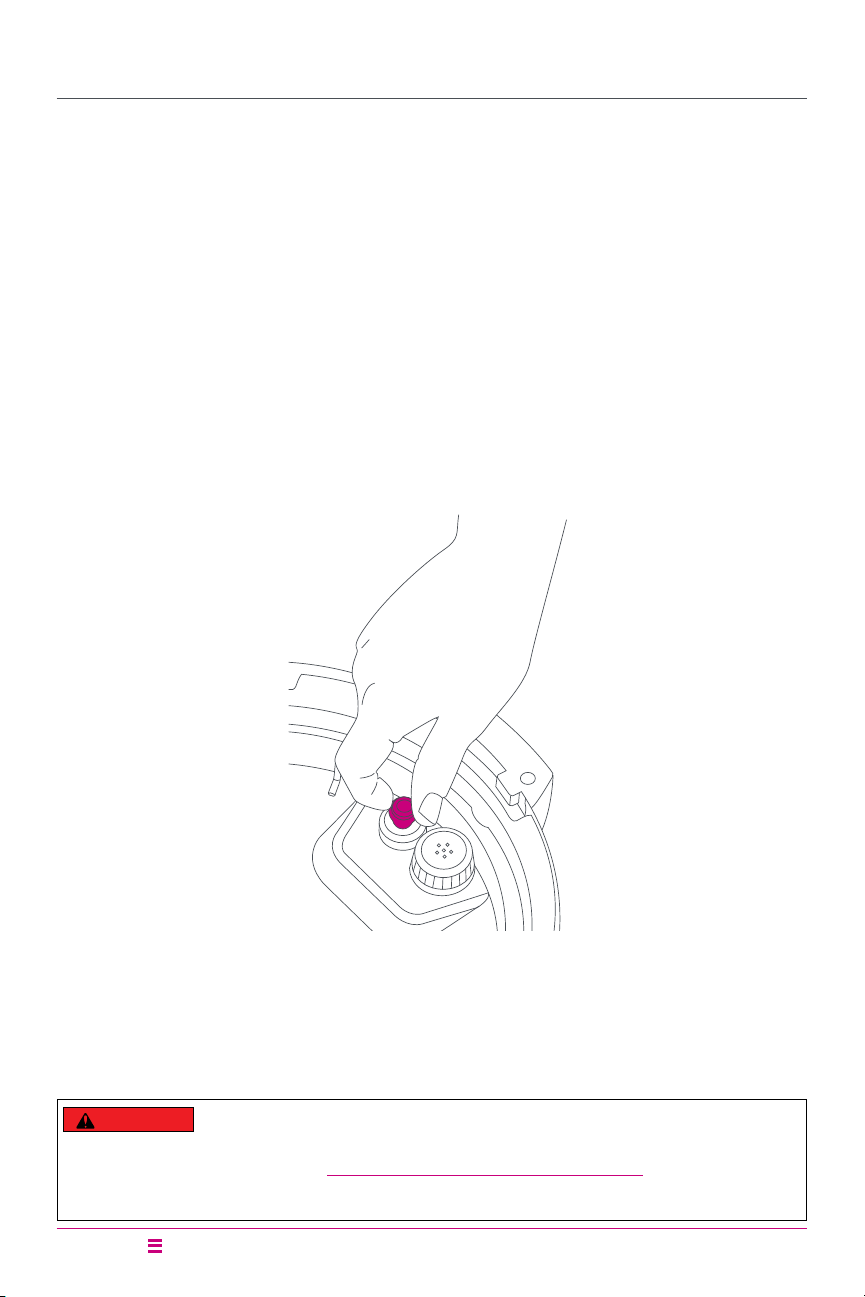
Remove the Float Valve from the Lid
Place one nger on the at top of the oat valve, then turn the lid over. Detach
the silicone cap from the bottom side of the oat valve.
Remove the oat valve from the top of the lid. Do not discard the oat valve or
silicone cap.
Install the Float Valve
Drop the narrow end of the oat valve into the oat valve hole on the top of the
lid. Place one nger on the at top of the oat valve, then turn the lid over. Firmly
attach the silicone cap to the bottom of the oat valve.
Do not attempt to operate the pressure cooker without the oat valve and/or
silicone cap properly installed in the pressure cooking lid.
Illustrations are for reference only and may differ from the actual product.
DANGER
While the oat valve is up, contents of cooker are under extreme pressure.
Do not attempt to remove the lid. All pressure must be released, and oat valve must
be down. Refer to Depressurizing the Cooker (Venting Methods) for information on
releasing pressure. Failure to follow these instructions may result in property damage
and/or personal injury.
Loading ...
Loading ...
Loading ...