
Loading ...
Loading ...
Loading ...
1;+766-+< <0- 84=/ .:75 <0- 87?-:
;7=:+- *-.7:- 5)316/ )6A ),2=;<5-6<;
7: +0)6/16/ )++-;;7:1-; Such preventive safety
measures reduce the risk of starting the tool accidentally.
$14-4),-6;<)44)<176
$7 :-,=+- <0- :1;3 7. 162=:A ,7 67< =;-
<14- *4),- 4):/-: 7: ;5)44-: <0)6 J
,1)5<-: ,7 67< =;- <14- *4),- ?1<0 ;8--, :)<16/ 4-;;
<0)6" 64A=;-;577<0-,/-<14-*4),-.:--7.
78-616/;)6,/:77>-;
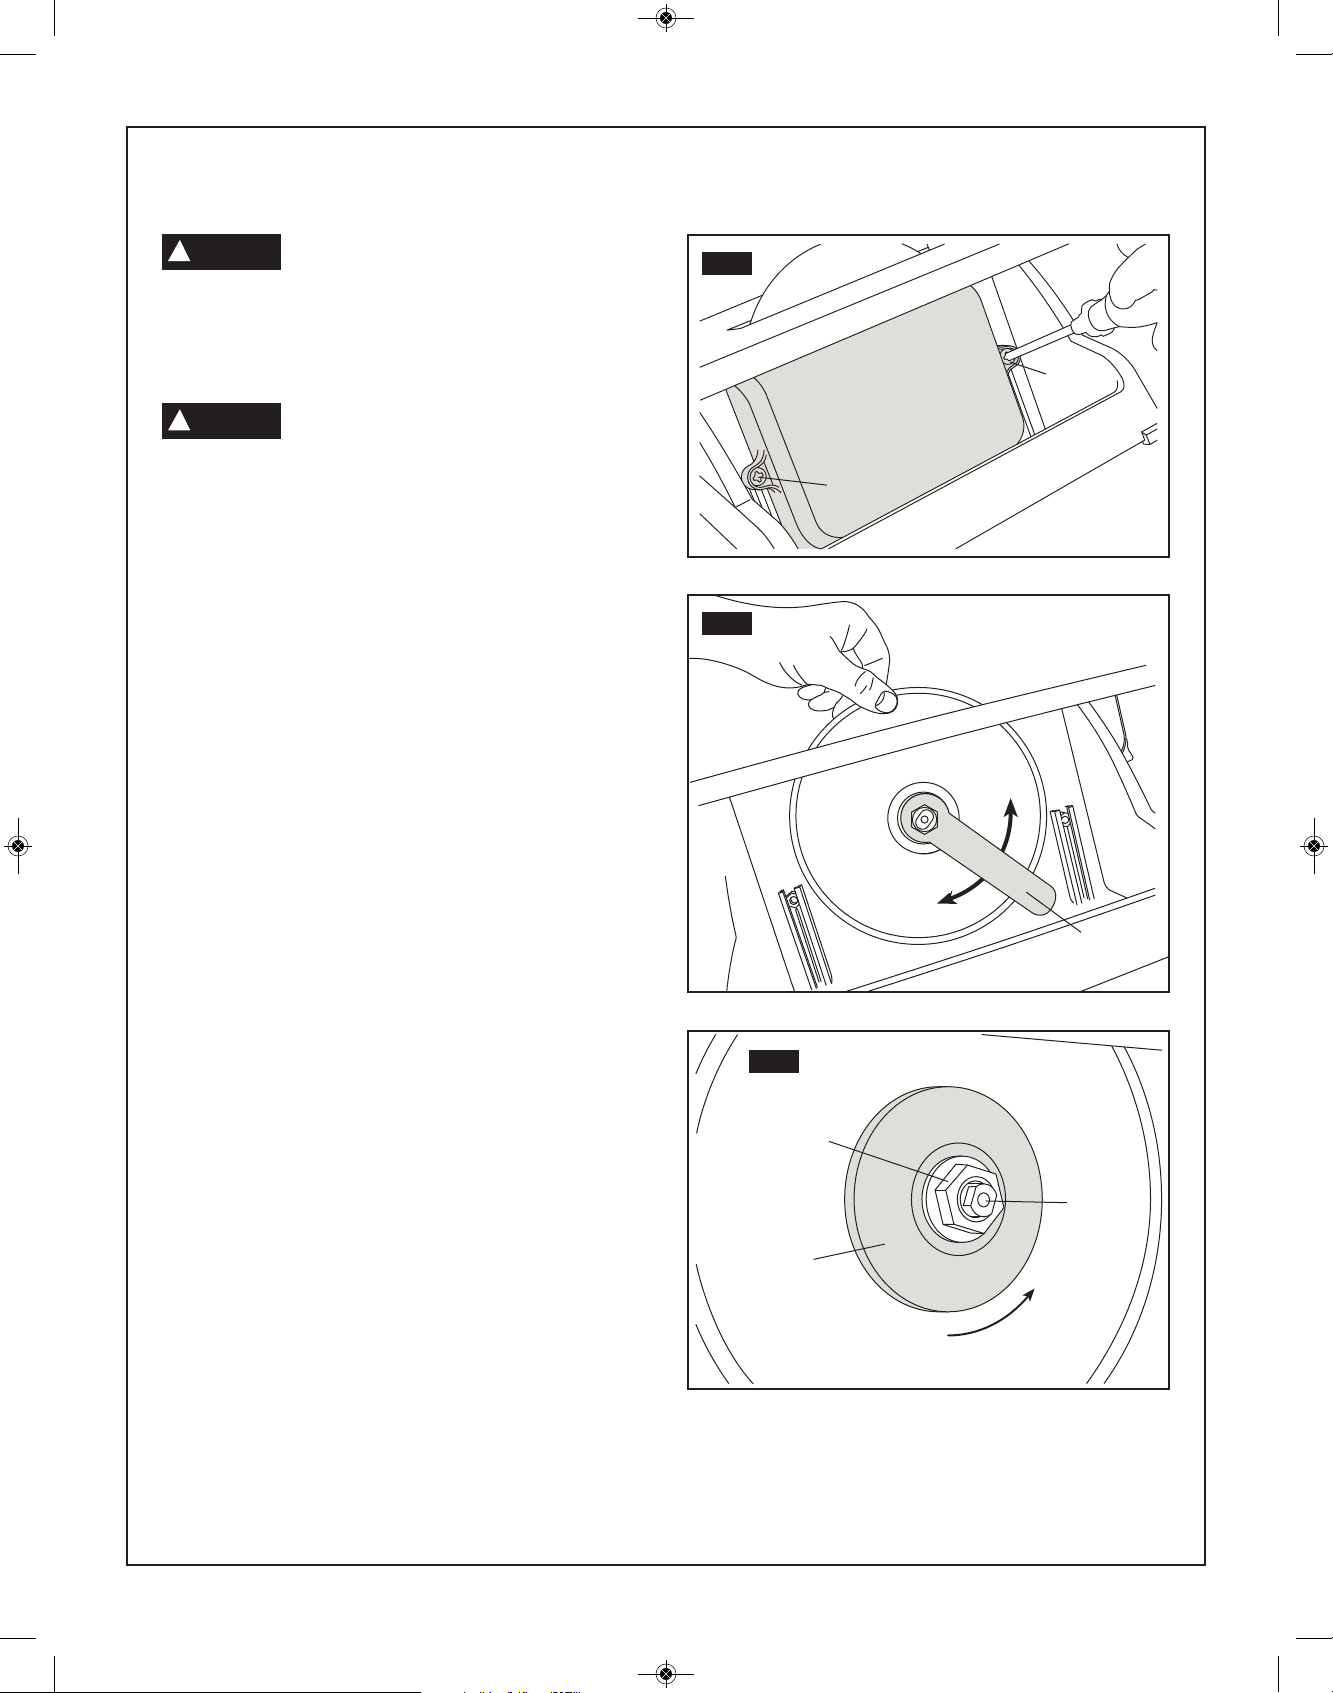
1. Remove the lower guard by using a number 2 screwdriver
(not provided) to loosen the two securing screws (Fig. 1).
2. Hold the tile saw blade firmly by hand, then loosen the nut
with nut wrench in a counterclockwise direction (Fig. 2).
3. Remove outer flange and the tile blade.
4. Ensure that the shaft and the flanges are clean.
5. Ensure that the directional arrow marked on the new tile
blade is counterclockwise with the shaft. (Fig. 3). Ensure
the outer flange is aligned with the shaft.
6. Install the new tile blade by reversing the steps required
to remove the tile blade. DO NOT OVERTIGHTEN.
7. Ensure the tile blade is secure before using.
WARNING
!
WARNING
!
FIG. 1
FIG. 2
FIG. 3
;;-5*4A)6,,2=;<5-6<;
7?-:
=):,
#+:-?
#+:-?
"-57>-
6;<)44
=<-:
4)6/-
$14-
4),-
=<
#0).<
$14-4),-1:-+<176
':-6+0
SM 2610028638 12-14_3540 12/23/14 9:01 AM Page 11
Loading ...
Loading ...
Loading ...