
Loading ...
Loading ...
Loading ...
15
• Remove the package containing the accessories.
• Remove the protective plastic lm from the panels. If the appliance is exposed to the
sun or to heat, remove the lm after the appliance cools.
• Check that the refrigerant lines do not rub or touch lines or other surfaces, and that the
fan blade (if applicable) turns freely.
• Check that the compressor is snug on all mounting pads.
• The icemaker can be installed on a dispenser unit or ice storage bin. The ice storage
bins listed below are recommended.
Model Number Bin Width Recommended Hoshizaki Ice Storage Bin
KM-901M_J/3
KM-1100M_J
KM-1340M_J/3
KM-1601MRJ/3
30" or Wider B-500 Series
For further options, contact your local Hoshizaki distributor.
• NOTICE! Remote models must be connected to an appropriate remote condenser
unit. The remote condenser units listed below are recommended. Connection to a
different remote condenser unit will void the warranty unless Hoshizaki approves
a different remote condenser unit for your specic application. For further
details, contact your local Hoshizaki distributor.
Model Number Recommended Hoshizaki Remote Condenser Unit
KM-910MRJ/3
KM-1100MRJ
KM-1340MRJ/3
URC-14F
KM-1601MRJ/3 URC-22F
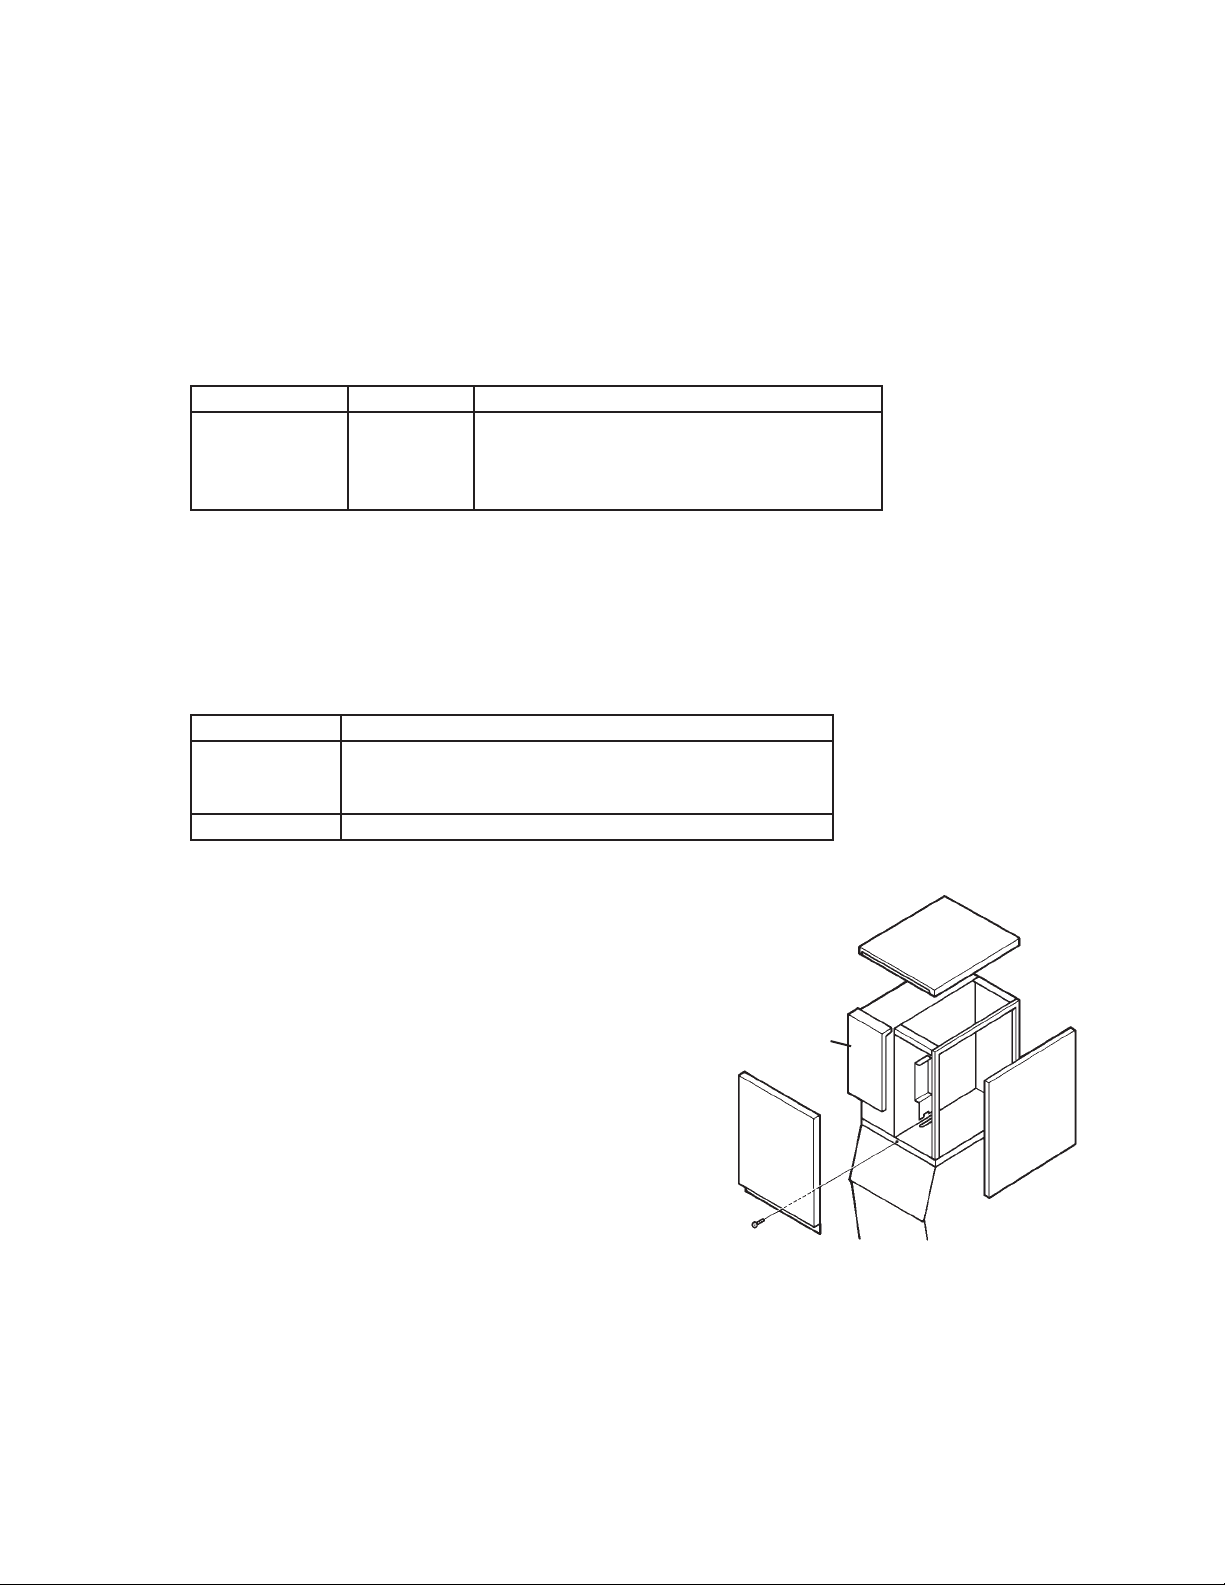
C. How to Remove Panels
See Fig. 1
• Front Panel: Remove the screw. Lift up and
pull towards you.
• Top Panel: Lift up at front slightly, push
rearward and lift off.
• Right Side Panel: Remove the screw. Slide
forward slightly and lift off.
• Insulation Panel: Lift up slightly, and pull
towards you.
Fig. 1
Top Panel
Right
Side
Panel
Front
Panel
Insulation Panel
Loading ...
Loading ...
Loading ...