FST2060
OXFORD
INSTALLATION GUIDE
OXFORD
INSTALLATION GUIDE
©2013 Fresca ™ All rights reserved. This material may not be reproduced, displayed, modified or distributed without the express prior written permission of the copyright holder.
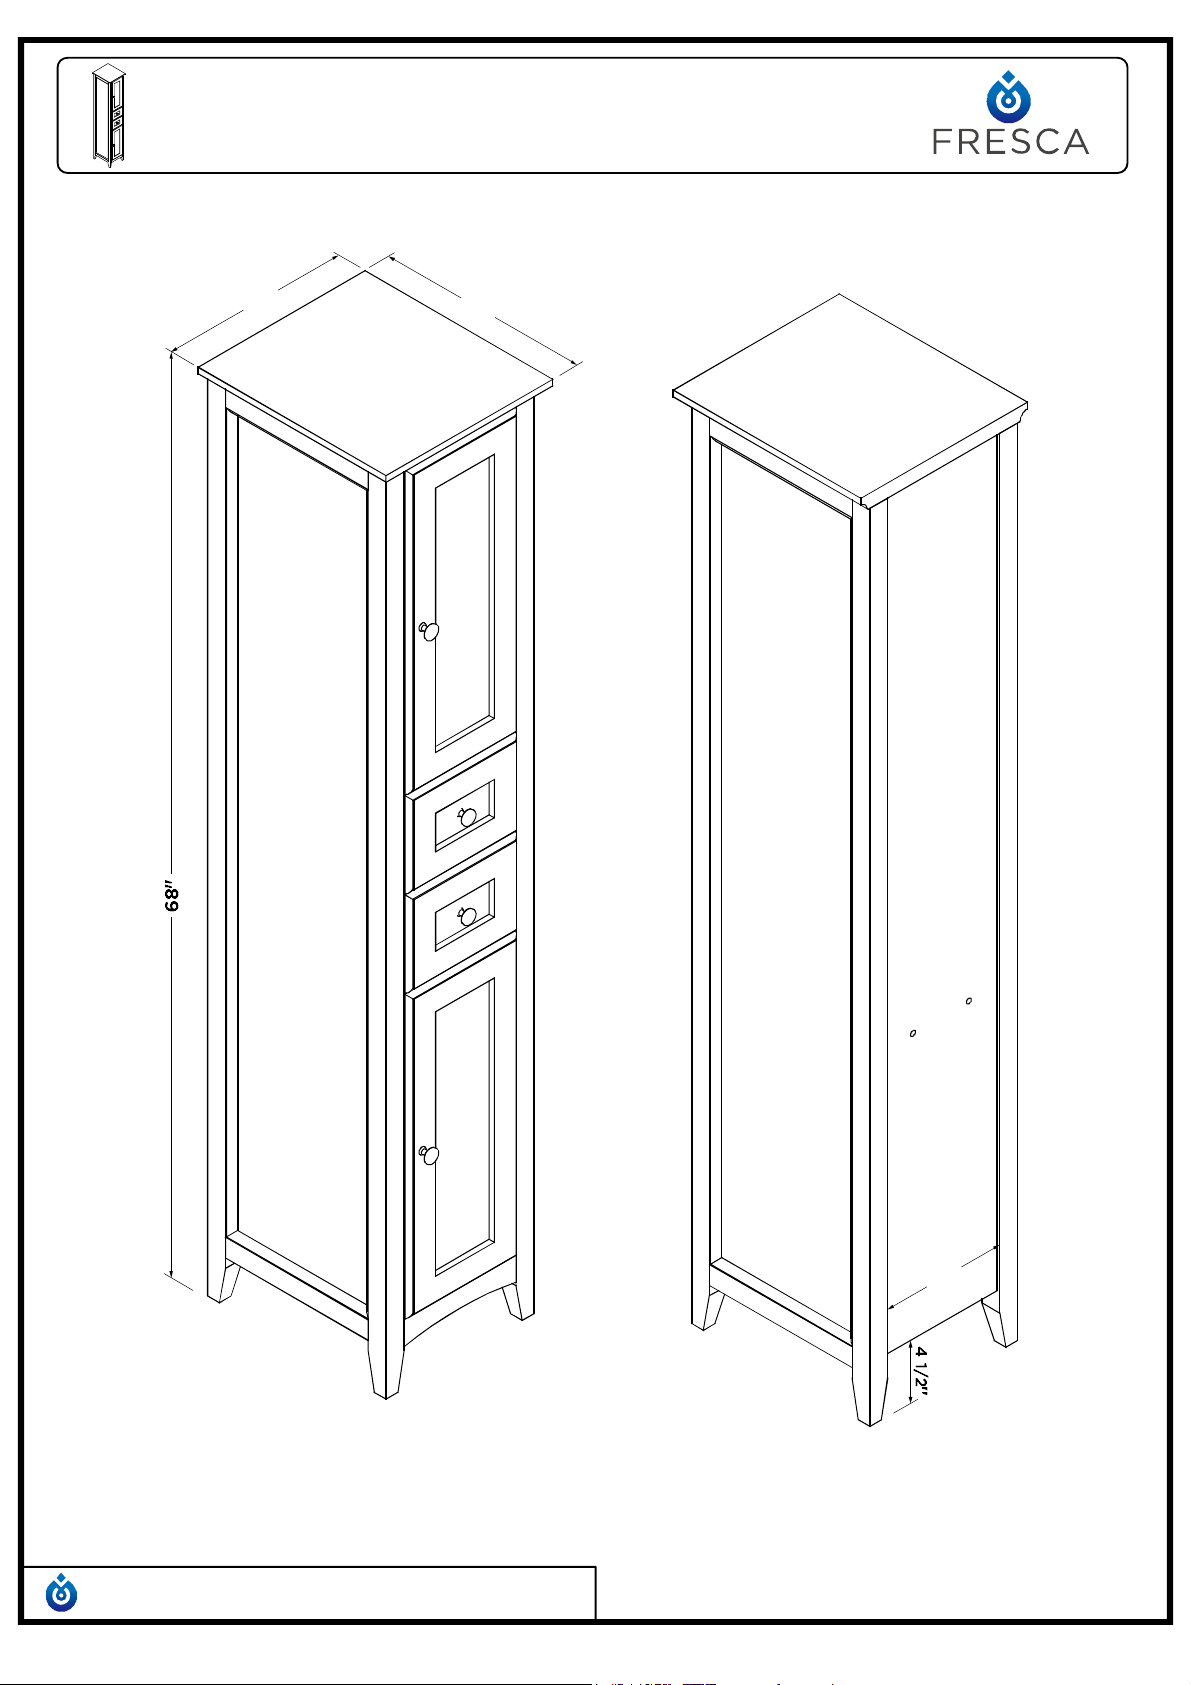
PAGE 1
Note:
All dimensions and specifications are approximate and subject to change without notice.
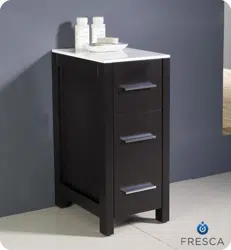
14"
15 3/4"
10 3/4"
#2
1/8" Drill bit
TOOLS FOR ASSEMBLY
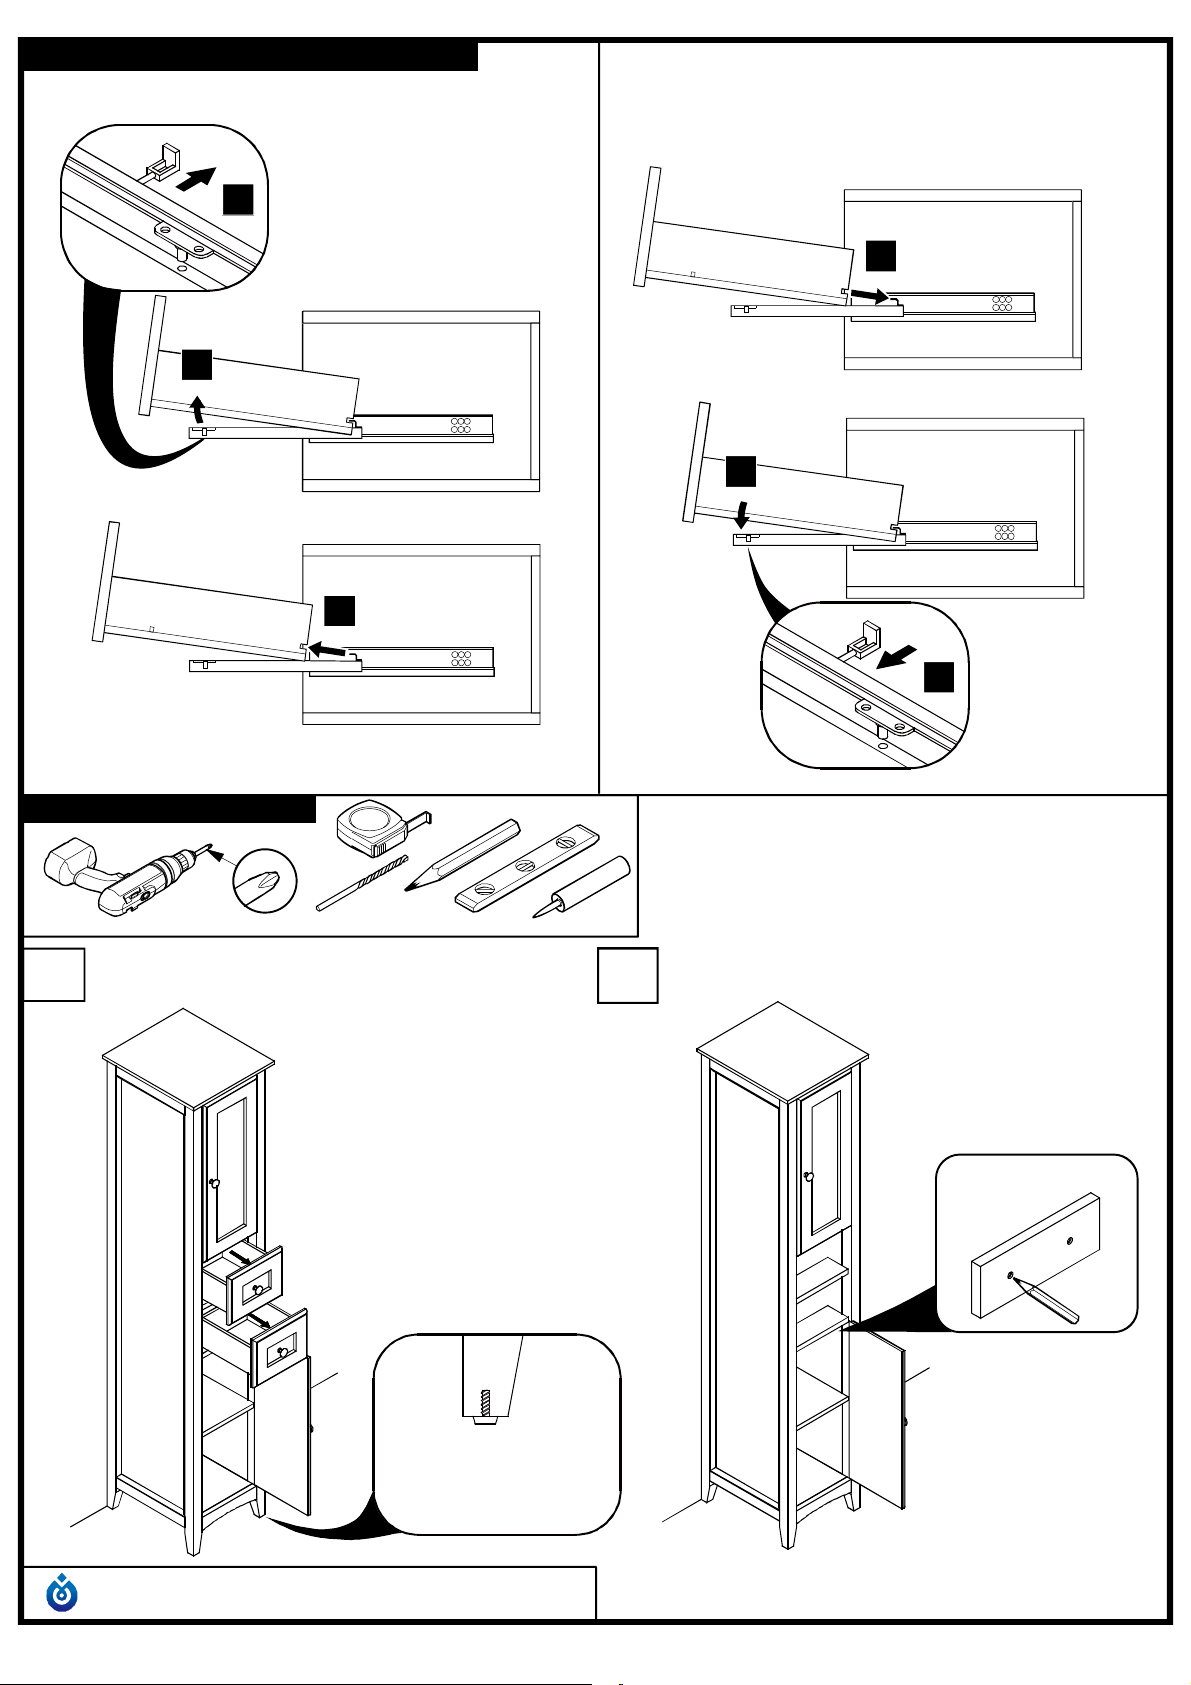
DRAWER REMOVAL & INSTALLATION
REMOVAL INSTALLATION
2
3
1
2
Level the cabinet and then open the drawers
and door as illustrated shown
1
2
Mark the installing position
OXFORD
INSTALLATION GUIDE
©2013 Fresca ™ All rights reserved. This material may not be reproduced, displayed, modified or distributed without the express prior written permission of the copyright holder.
PAGE 2
1
3
OPTIONAL STEP
INTERIOR VIEW
Adjust the adjustable level to
ensure the cabinet stable
Drill the installation holes accordingly
3
©2013 Fresca ™ All rights reserved. This material may not be reproduced, displayed, modified or distributed without the express prior written permission of the copyright holder.
PAGE 3
Insert the expansible plastic plugs
5
Install cabinet
6
Reinstall the drawer and close the door
Consult an expert for the proper
screws/bolts to use when attaching
to various wall constructions.
Screws provided do not attach to all
wall construction types.
4
IMPORTANT:
OXFORD
INSTALLATION GUIDE
INTERIOR VIEW