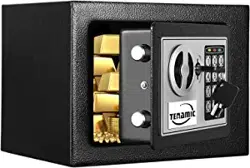

DIGITAL KEYPAD SAFE BOX
TE Series
Instruction Manual
The professional of family safety.

Thank you for choosing our products!
You’ve taken an important step in organizing and
protecting your most valued possessions.
Every series of our safes is professionally made and
designed to provide safety.
Please take time to read and familiarize yourself with the
proper operating procedures of your new safe presented
on the following pages.
Again, thank you for choosing our products!

PRODUCT

WARNINGS
To prevent damage to your TENAMIC unit or injury to yourself or to others, read the following safety
precautions before using this unit.
● DO NOT PLACE OR STORE THE EMERGENCY KEYS INSIDE THE SAFE AT ANT TIME.
● DO NOT expose to extreme heat or cold. Battery power may be affected.
● If the battery fails, you will be unable to open the safe.
● Always check to make sure door has latched when closing.
DISCLAIMERS
● Neither seller or manufacturer shall be liable for unauthorized access, any injury, loss or damage to personal
property direct or consequential, arising out of the use of, or the inability to use the TENAMIC Safe.
● The user shall determine the suitability of the TENAMIC Safe before the intended use and user assumes all
risk and liability whatsoever in connection therewith, TENAMIC Safe are not intended to protect against
environmental hazards including fire and water.
● Be sure and follow all local and state firearm laws.
CAUTION: PLEASE KEEP PRODUCT OUT OF CHILDREN.
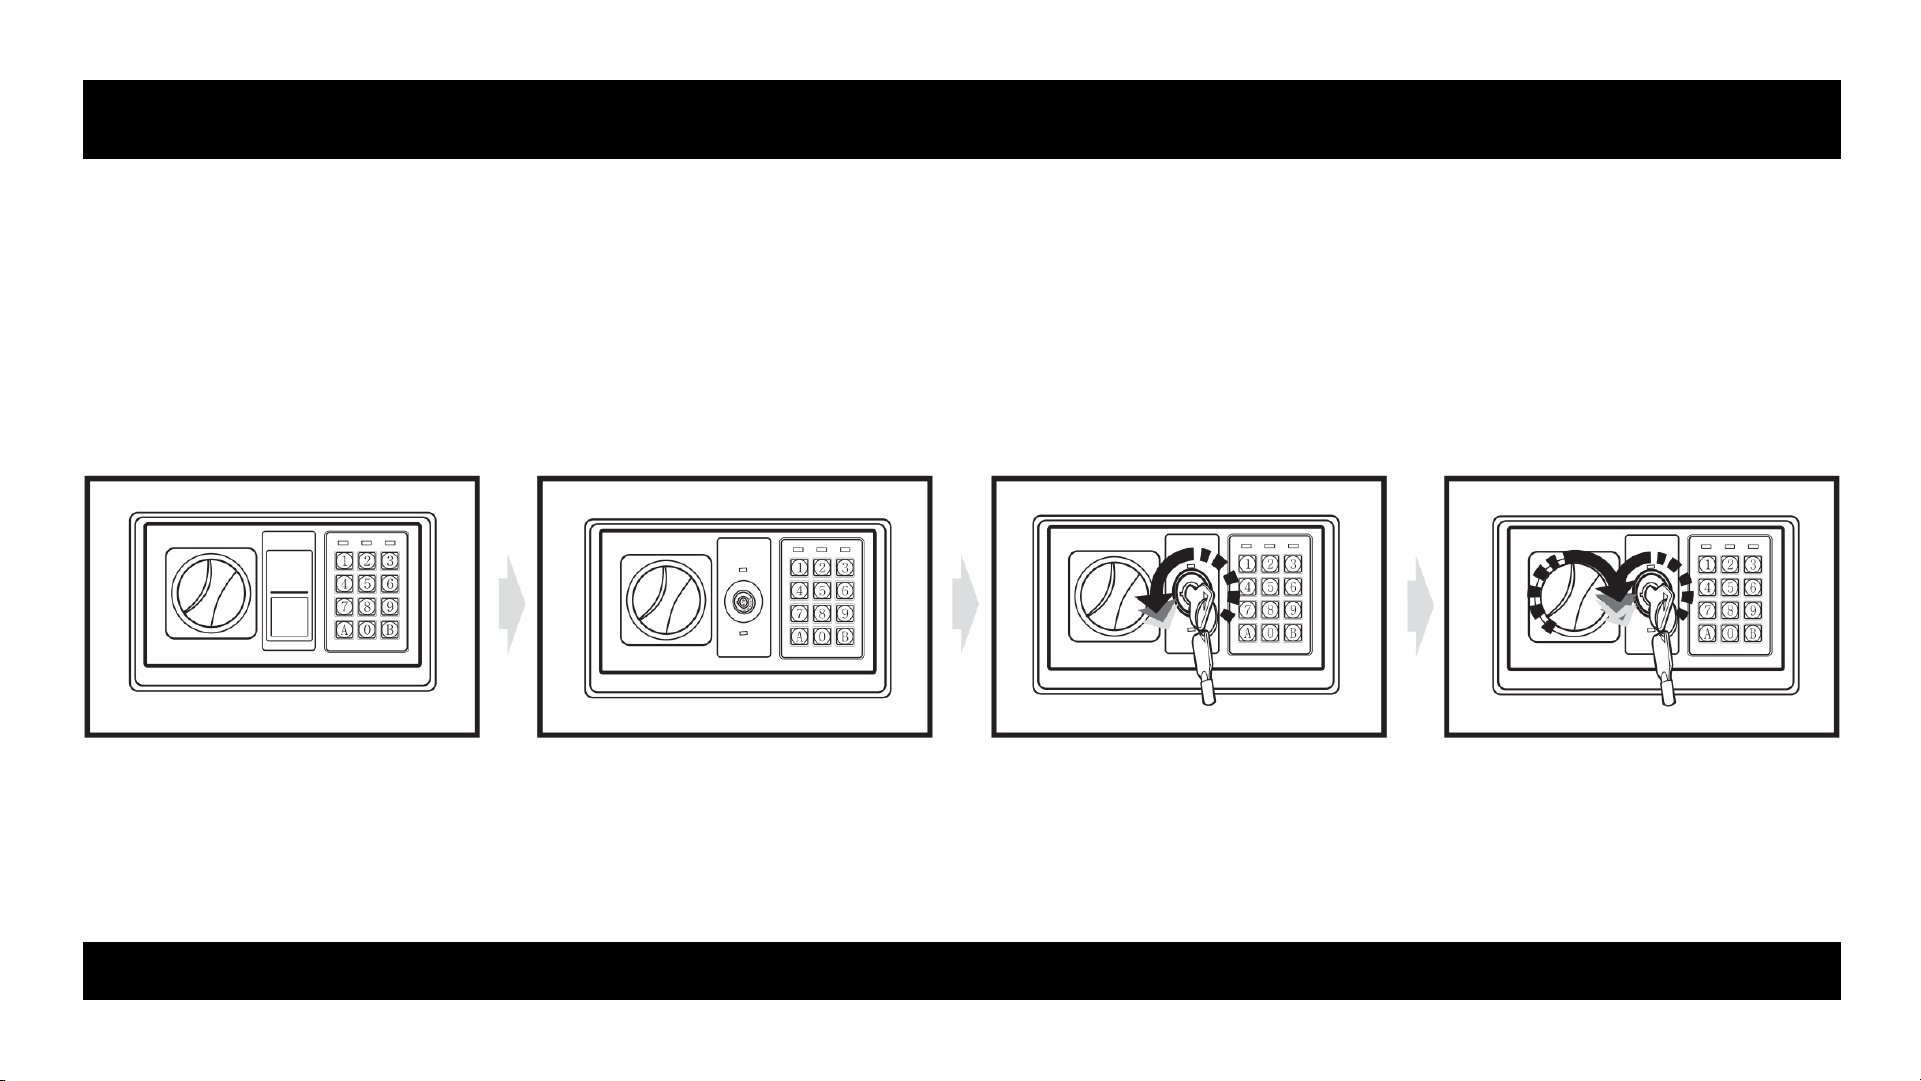
OPENING YOUR SAFE FOR THE FIRST TIME
● When first opening, user should open the safe with the emergency key.
● Remove the key hole cover, then insert the emergency key, and turn it count clockwise.
● Turn the knob clockwise to open the door.
CAUTION: Finish operation, pull out the emergency key and keep it in a safe place.

INSERTING THE BATTERIES
● Open the door.
● Insert 4 * AA batteries into the battery compartment.
● Under normal condition, if both of the red and the green lights are on at the same time, it means the voltage
is low and you should insert new batteries.
CAUTION: Replace 4 fresh batteries by lining them up in a manner as indicated by the “+” and “-” signs. When
outage for longer than thirty minutes, you should reset the user’s code.
SETTING THE USER CODE
● With the door open, press the reset button one, start setting code when the yellow lights goes on.
● Input new code (3-8 digits), and press the “*” or “#” button to confirm with 2 beeps, which indicates the
acceptance and storage of the new code.
● If the yellow light flashes with 3 buzzer beeps, which means the code changing is not effective, and you need
to try again.
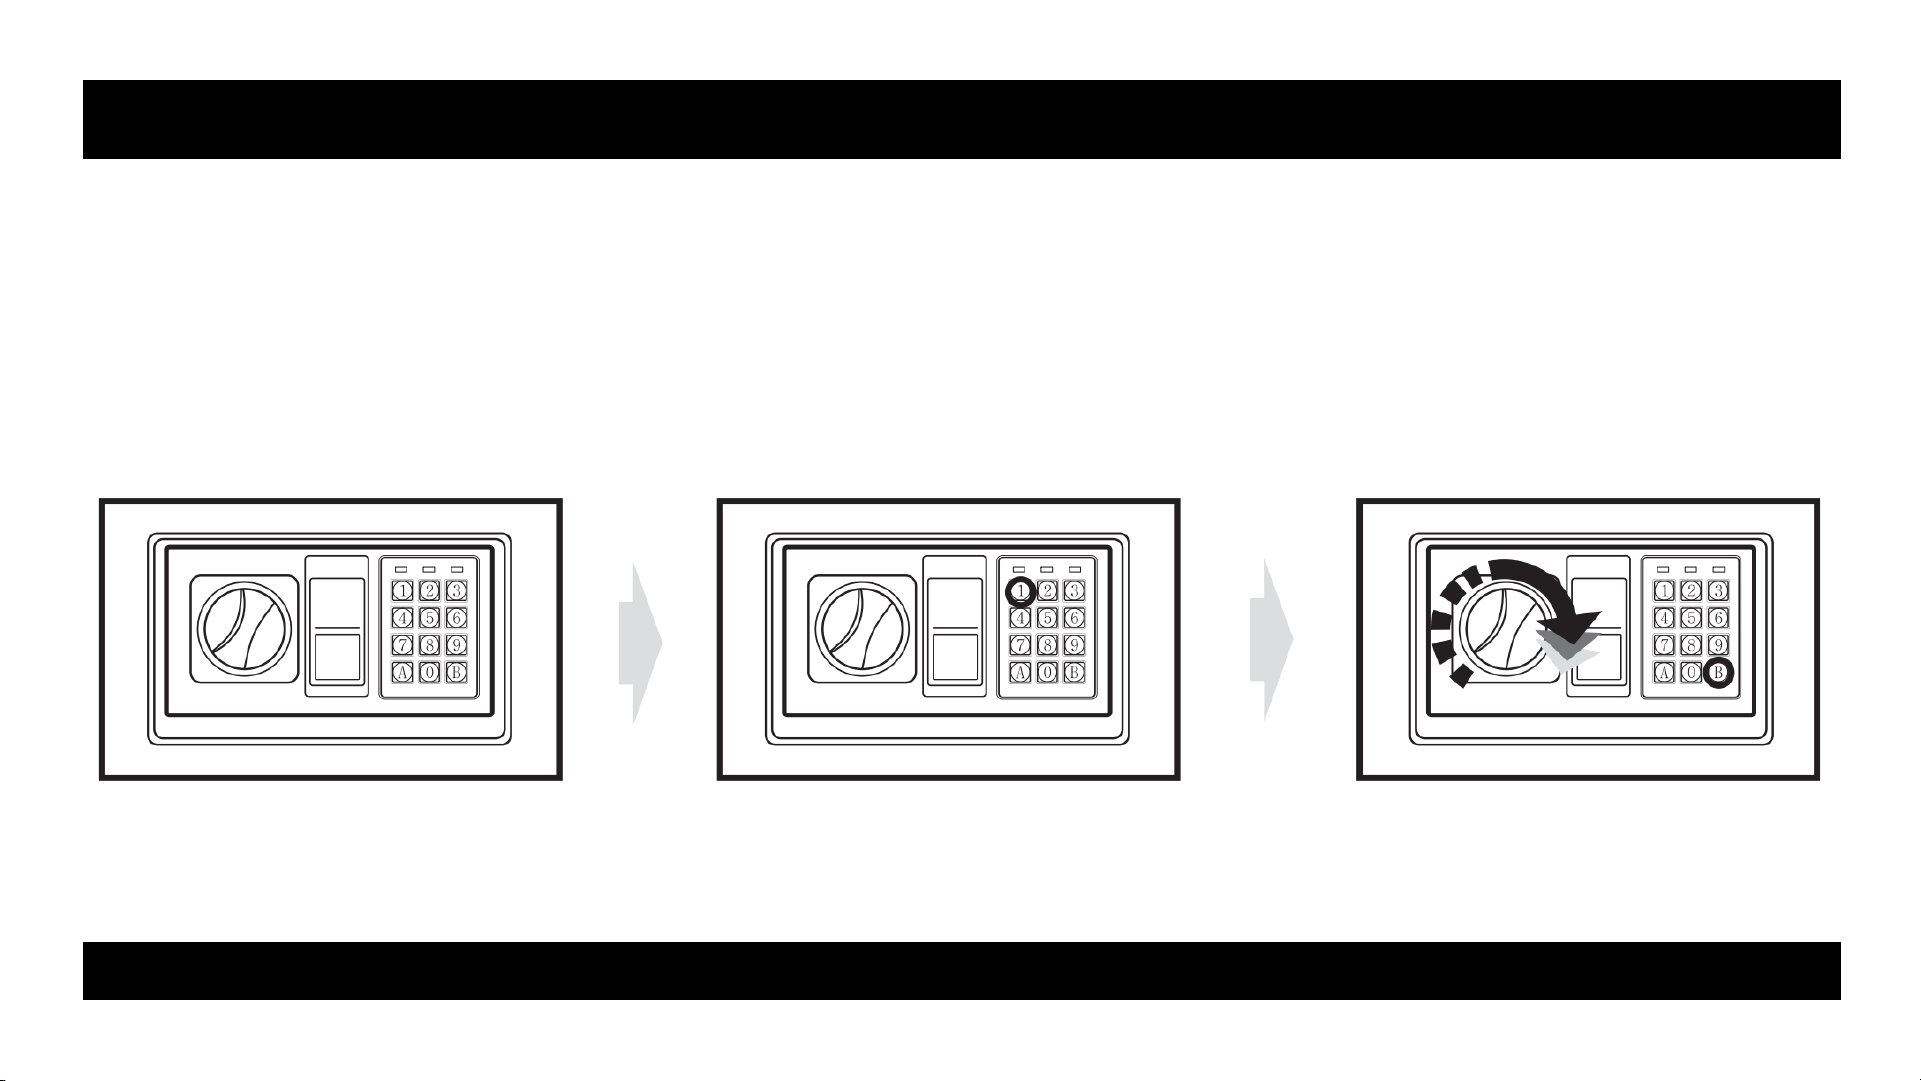
OPENING DOOR
● Input the code you set (3 to 8 digits), each pressing result one buzzer beep and yellow light flashes.
● Press “*” or “#” button, the green light will be on.
● Rotate the knob clockwise and pull outwards within 5 seconds, the door is opened.
CAUTION: The user preset code “159”. Please input the user code again if the yellow light flashes with three
buzzer beeps.

CLOSING DOOR
●Turn the knob counter clockwise to close the door.
AUTOMATIC LOCK and ALARM SYSTEM
● 3 continuously wrong entries will activate the warning beep for 20 seconds.
CAUTION: The keypad would be disabled during the beeping. You can only stop the beeps by opening the safe
with emergency key and power-cut by removing the battery.
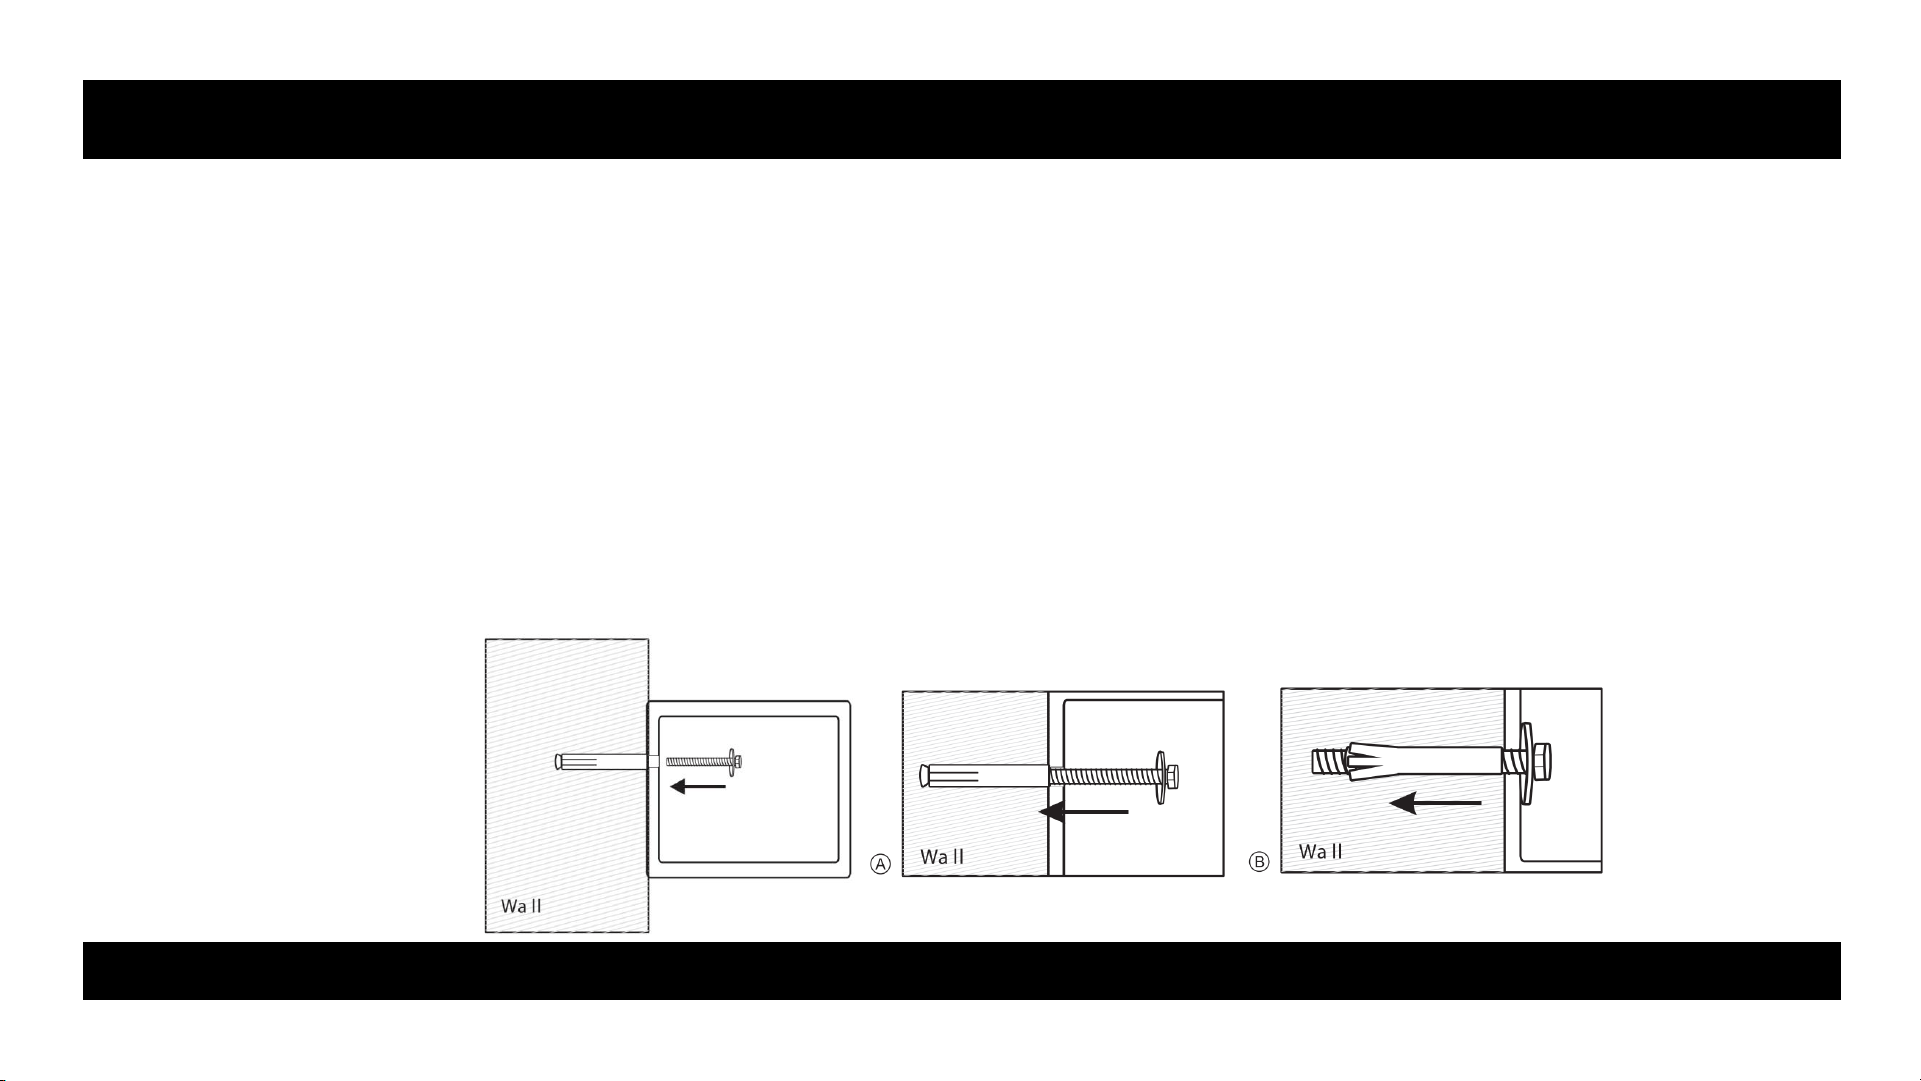
MOUNTING METHOD
TIP: Make sure you have enough clearance for the lid to open properly before mounting the safe and fix the
safe in the place which is not easy to move.
● Drill holes for expansion bolts (or clamping screws) in the right place.
● Turn the expansion bolts counterclockwise to separate.
● Use the expansion bolts (or clamping screws) to secure the case to the wall.
● Make sure the case is mounted in place as required and then tighten all screws.
CAUTION:
● Use the expansion bolt when there is a concrete wall surface. Use the clamping screw when there is a
wooden wall surface.
● Do not let the safe door face the floor when you mounting the safe with the vertical direction to avoid your
property from damage.

CUSTOMER SUPPORT
Dear customer,
Thank you for trusting us.
If you have any questions about the product, please feel free to contact our customer service mailbox:
. We will try our best to solve every after-sales problem for you.
If you are satisfied with our products, please don’t forget to share the details with your friends and other
customers, and tell us your feelings.
We sincerely thank you for your support and understanding.
Best wishes!

WARRANTY (Terms and Conditions)
TENAMIC is committed to building high quality products and will make every effort to ensure our products are
free from any defects. We guarantee your safe will be free od defects in materials or workmanship for a period
of one year from the date of purchase. This warranty does not cover abuse, misuse, use in any manner for which
is not designed, neglect, modification, damage in advertently caused by the owner; accidents, and/or tampering.
If you safe is determined to be defective and we are responsible for the cause we will have it repaired at our
expense, or we will send a new replacement at no cost to you. You will be required to return your existing unit
as well as all included accessories to TENAMIC prior to replacement of the defective unit along with your order
of purchase.
If it is determined your safe needs to be returned our returned our customer support team will provide you with
a return detail.
Please have the following information available when contacting us:
● Purchaser’s name and mailing address, email address, and phone number
● Online order number
● Detailed description of problem
NEITHER SELLER NOR MANUFACTURER SHALL BE LIABLE FOR ANY INJURY, LOSS OR DAMAGE, DIRECT OR
CONSEQUENTIAL, ARISING OUT OF THE USE OF, OR THE INABILITY TO USE THE TENAMIC SAFE.

Customer Service Contact: