Loading ...
Loading ...
Loading ...
49-60792-2 29
3
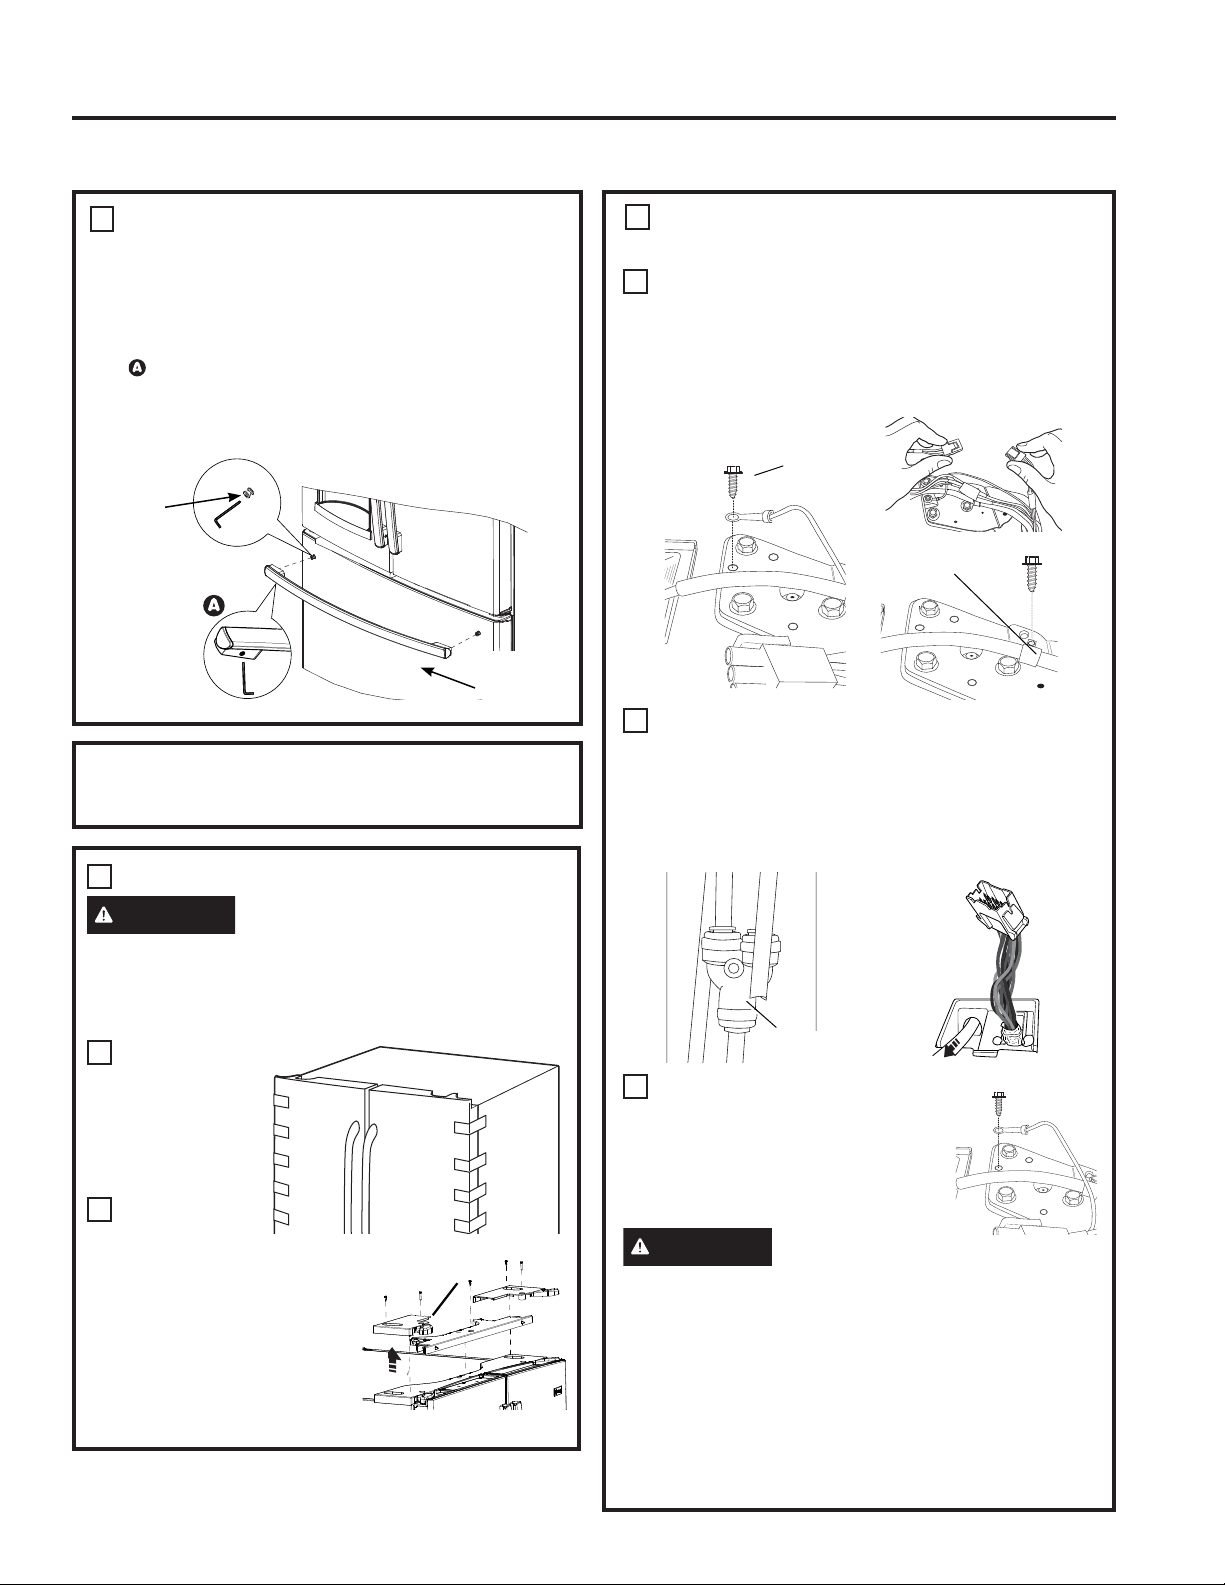
REMOVE THE REFRIGERATOR
DOORS (cont)
C
'LVFRQQHFWHOHFWULFDOFRQQHFWRUVFRPLQJIURPHDFK
door located under the hinge covers.
5HPRYHWKH´KH[KHDGVFUHZWRGLVFRQQHFWWKH
ground wire from the hinge.
5HPRYHWKH´KH[KHDGVFUHZWRUHPRYHWKH
strain relief from the water line.
'
'LVFRQQHFWWKHZDWHUOLQHIURPWKHEDFNRIWKHXQLW
by pressing down on the dark grey collar while
pulling up on the water line.Pull water line through
case conduit from the top to free the line for door
removal. The water line is more than 4’ long and
PD\QHHGWREHWDSHGWR'RRUIRUDFFHVVLELOLW\
when reinstalling.
E
8VLQJD´VRFNHWUDWFKHWGULYHU
remove the screws securing the
top hinge to the cabinet, then lift
the hinge straight up to free the
hinge pin from the location in the
top of the door.
CAUTION
Lifting Hazard
Single person lift could cause injury. Use
assistance when handling, moving or lifting the
doors.
NOTE: when removing door, to prevent damage to
door and electronics, carefully place the door in a
proper location.
NOTE: The lower door hinge pin and hinge are keyed
and must be matched correctly for the door to self
close properly. Please follow the directions carefully.
REMOVE THE FREEZER DOOR
HANDLE
+DQGOH'HVLJQYDULHVEDVHGRQPRGHOVKRZHYHU
,QVWDOODWLRQLVVDPH
Stainless steel and plastic handles:
/RRVHQWKHVHWVFUHZVZLWKWKH´$OOHQ
wrench and remove the handle.
NOTE: ,IWKHKDQGOHPRXQWLQJIDVWHQHUVQHHGWR
EHWLJKWHQHGRUUHPRYHGXVHD´ Allen wrench.
2
Reinstall the handles using the same procedure as
removing.
Mounting
)DVWHQHUV
Leave film
on until after
installation
INSTALLATION INSTRUCTIONS
Installation Instructions
INSTALLING THE REFRIGERATOR (Cont.)
REMOVE REFRIGERATOR DOORS
WARNING
)ROORZDOOVWHSVIRUUHPRYLQJ
DQGUHLQVWDOOLQJWKHGRRU)DLOXUHWRIROORZWKHVH
instructions, leaving off parts, or overtightening screws,
can lead to the door falling off and result in injury and
property damage.
A
Securely tape the
door shut with
masking tape or
have a second
person support
the door.
B
Start with
left-hand door
first: Remove the hinge
cover on top of the left
refrigerator door by
removing all hex screws
DQGSXOOLQJLWXS'RWKH
same for the right-hand
door and the middle cover.
3
Hinge
Cover
Ground
screw
Strain
Relief
Y or Straight
Connector
Loading ...
Loading ...
Loading ...