Loading ...
Loading ...
Loading ...

10
4. The plug on end of power cord must be
replaced with a UL/CSA listed plug rated for 230
volt operation.
6.3 Extension cords
The use of extension cords is discouraged; try to
position machines near the power source. If an
extension cord is necessary, make sure it is in good
condition. When using an extension cord, be sure to
use one heavy enough to carry the current your
product will draw. An undersized cord will cause a
drop in line voltage resulting in loss of power and
overheating.
Table 2 shows correct size to use depending on
cord length and nameplate ampere rating. If in
doubt, use the next heavier gauge. The smaller the
gauge number, the heavier the cord.
Ampere
Rating
Volts
Total length of
cord in feet
More
Than
Not
More
Than
120
240
25
50
50
100
100
200
150
300
AWG
00 06 18 16 16 14
06 10 18 16 14 12
10 12 16 16 14 12
12 16 14 12
Not
Recommended
Table 2: Extension cord recommendations
7.0 Adjustments
Always disconnect band saw
from power source before making adjustments,
unless indicated otherwise.
7.1 Handle adjustment
The plastic handles for swivel (A, Figure 7-1) and
blade guide arm positioning are adjustable to
prevent obstruction of other parts. Pull out on handle
and rotate it on pin, then release it, allowing it to
resettle on pin.
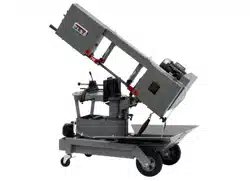
7.2 Bow swivel
1. Disconnect band saw from power source.
2. Loosen handle (A, Figure 7-1) and rotate bow
to desired angle on scale (B).
3. Confirm accuracy of angle by cutting a test
piece or using an angle measuring device
against blade and fixed vise jaw. If scale needs
adjustment, adjust pointer.
4. Verify accuracy of 45-degree left and right stop
screws (C). Adjust if needed.
5. Tighten handle (A) before operating saw.
Figure 7-1
7.3 Blade speed adjustment
1. Disconnect band saw from power source.
2. Place bow in horizontal position.
3. Open pulley box and turn handle (D, Figure 7-
2) counterclockwise to release tension on drive
belt.
4. Move belt to desired pulley combination. Refer
to chart inside pulley box (reproduced in Figure
7-3).
5. Turn handle (D) clockwise to tension belt.
Finger pressure on belt midway between
pulleys should cause approximately 1/2-inch
deflection. Do not overtighten belt.
6. Close pulley box before operating.
General rule for band saw blade speed: The harder
the material being cut, the slower the blade speed.
Refer to a machinist’s handbook for recommended
speeds for specific materials.
Figure 7-2: blade speed adjustment
Loading ...
Loading ...
Loading ...