Loading ...
Loading ...
Loading ...
10
INSTALLATION AND CONNECTION
After installation, wait for 24 hours without
moving the appliance before using it for the fi rst time.
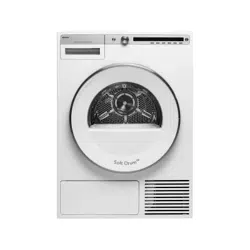
If the dryer has to be laid down on one of the sides
during transport or servicing, place it with its left
side, viewing from the appliance front, downwards.
90°
90°
90°
90°
DRYER PLACEMENT
The dryer can be either free standing or installed on
top of a washing machine.
The dryer emits heat. Therefore, do not place it in
a very small room, as the drying process may be
longer due to limited amount of ambient air.
Do not place the dryer in a room where
temperature can drop below 0 °C, as the machine
may not operate correctly at such low temperatures,
or freeze, which in turn can result in damage to the
machine.
For optimum dryer operation, install it in a room with
adequate ventilation and a temperature between
10 °C and 25 °C.
Do not place the dryer behind lockable or sliding
door, or door with a hinge on the opposite side of the
dryer door hinge. Install the dryer in such way that
the door can always be freely opened.
Never block the air vents.
Do not place the dryer on a carpet with long
fi bres as this may impede air circulation.
If the appliance is installed on a plinth or a
similar structure, then the appliance must be fi xed to
it, to avoid the risk of falling.
ASKO original accessories are available for this
purpose, complete with fi xing instructions.
Free-standing appliance
The dryer may be placed adjacent to a washing
machine.
If the friction between the dryer feet and the fl oor is
not suffi cient, the dryer may move during operation.
To prevent sliding, use a non-slide mat or install the
supplied vacuum feet onto both front feet.
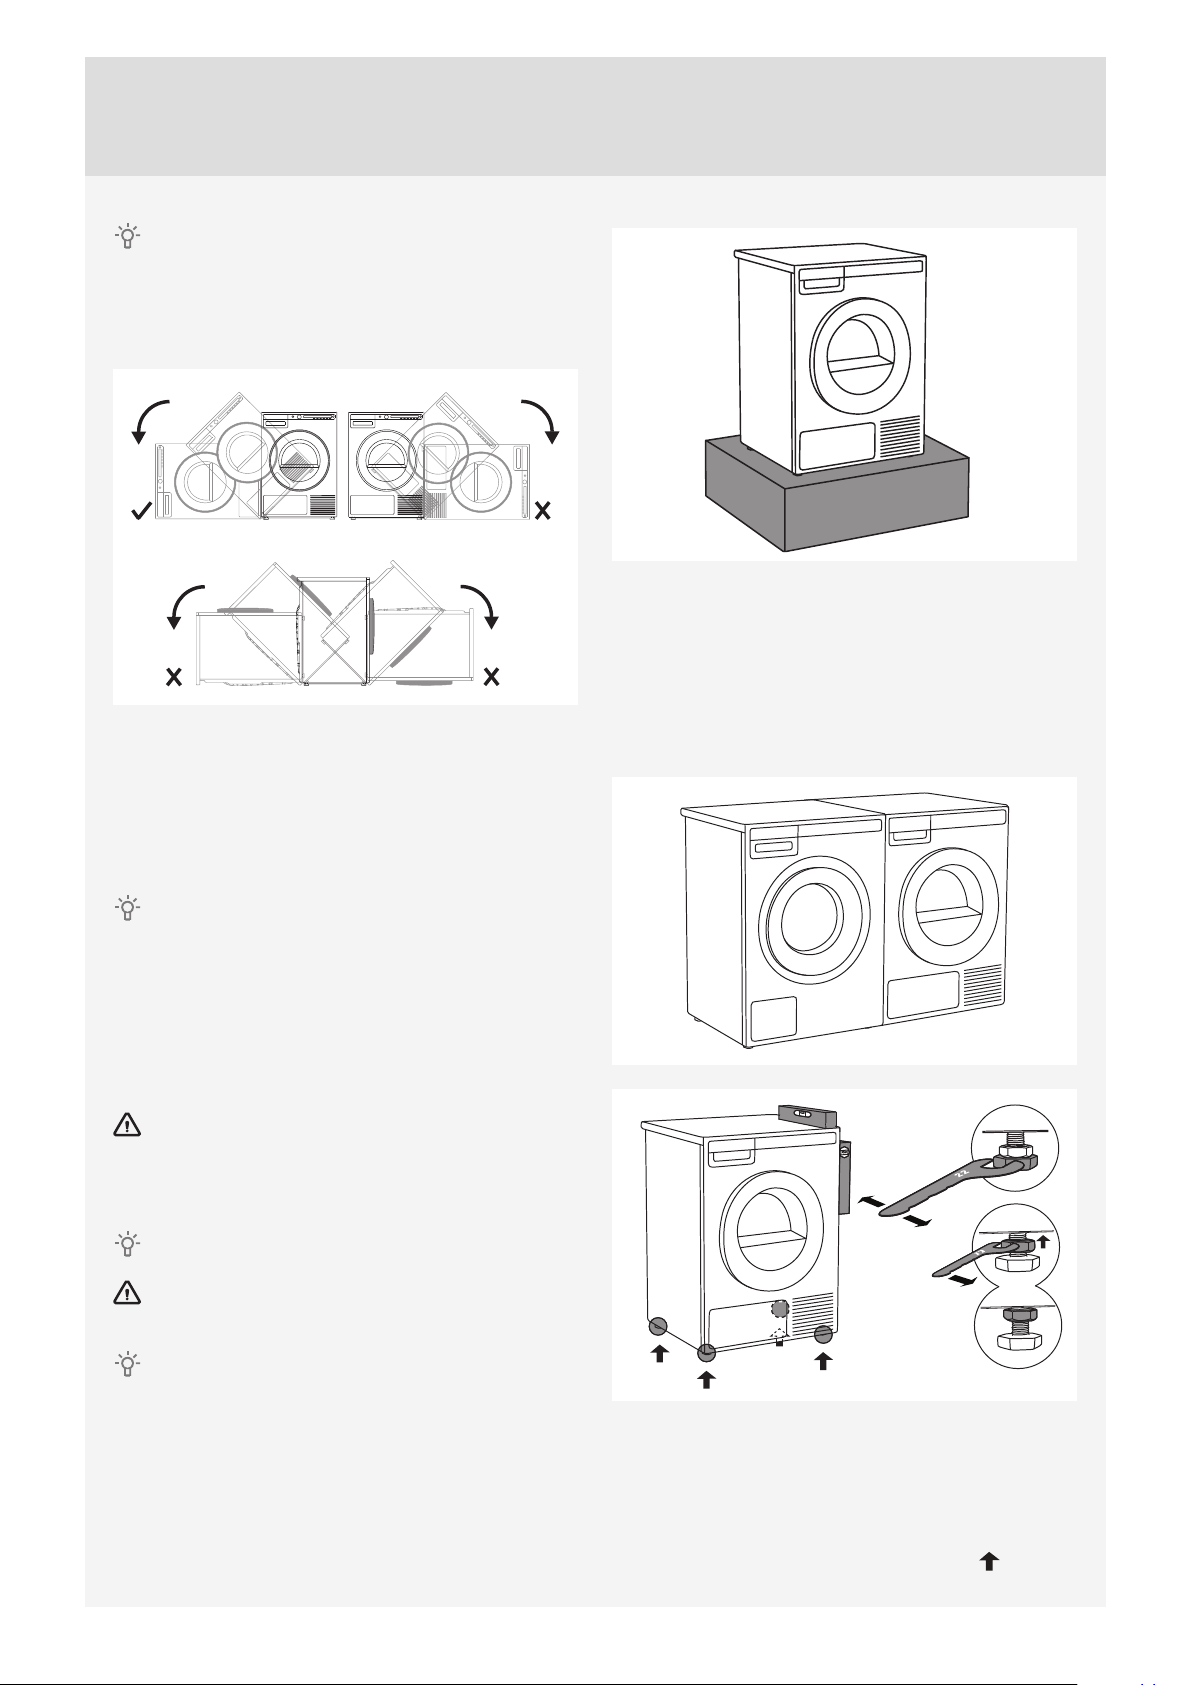
Place the dryer so that it is stable. Use a spirit
level to level the dryer in longitudinal and traverse
direction by rotating the adjustable feet using a No.
22 spanner (max. 15 mm). Then, fi rmly tighten the
jam nuts (counter nuts) by rotating them towards the
appliance bottom using a No. 17 spanner
.
Loading ...
Loading ...
Loading ...