
Owner's
Manual
Advantium®
120V Speedcook Oven
For Models:
ZSC1201
ZSC1202
Write the model and serial numbers here:
Model #
Serial #
Findthese numbers on a label inside
the oven.
49-4059!
HFL382!!606
11-08 JR
monogram.cam
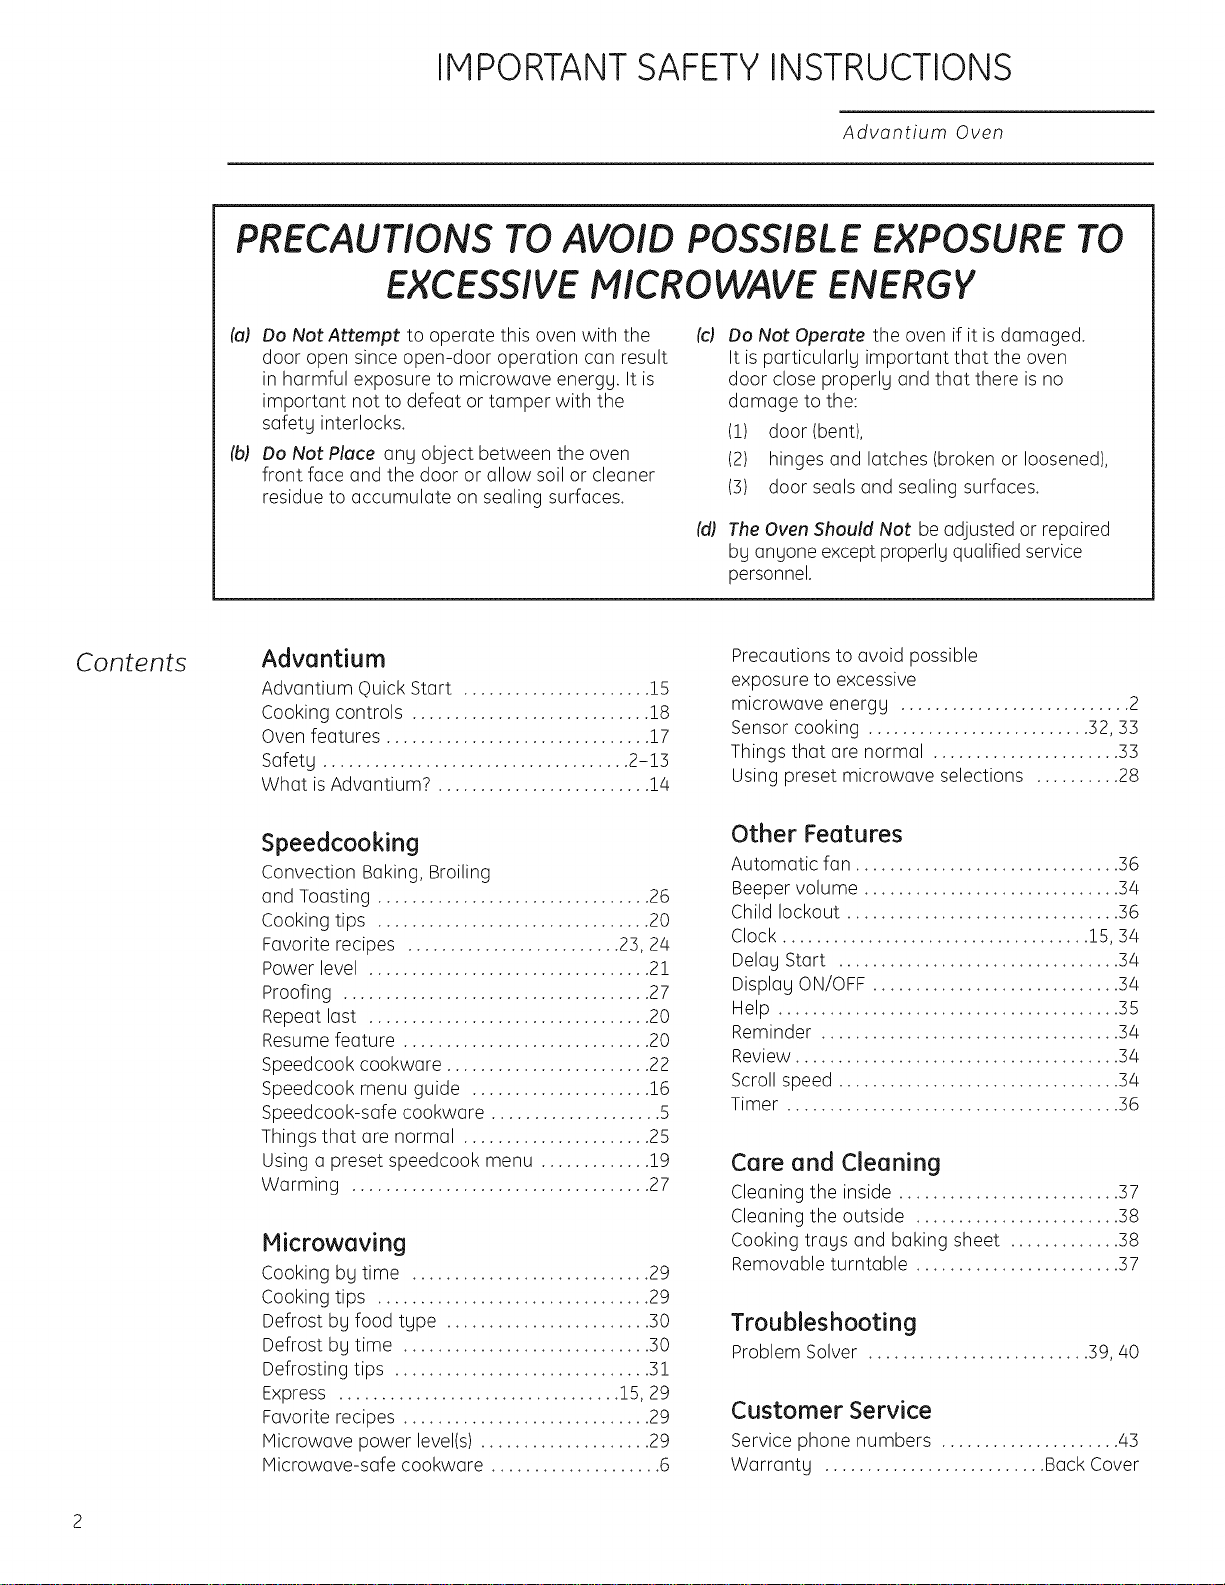
IMPORTANT SAFETY INSTRUCTIONS
Advantium Oven
PRECAUTIONS TO AVOID POSSIBLE EXPOSURE TO
EXCESSIVE MICROWAVE ENERGY
_a) Do NotAttempt to operate this oven with the _c)
door open since open-door operation can result
in harmful exposure to microwave energg. It is
important not to defeat or tamper with the
safetg interlocks.
Do Not Place ang object between the oven
front face and the door or allow soil or cleaner
residue to accumulate on sealing surfaces.
Do Not Operate the oven if it is damaged.
It is particularlg important that the oven
door close properlg and that there is no
damage to the:
(1) door (bent),
(2) hinges and latches (broken or loosened),
(3) door seals and sealing surfaces.
_dJThe Oven Should Not be adjusted or repaired
bg angone except properlg qualified service
personnel.
Contents
Advantium
Advantium Quick Start ...................... !5
Cooking controls ............................ 18
Oven features ............................... 17
Safetg .................................... 2-15
What is Advantium? ......................... 14
Speedcooking
Convection Baking, Broiling
and Toasting ................................ 26
Cooking tips ................................ 20
Favorite recipes ......................... 25, 2/4
Power level ................................. 21
Proofing .................................... 27
Repeat last ................................. 20
Resume feature ............................. 20
Speedcook cookware ........................ 22
Speedcook menu guide ..................... 16
Speedcook-safe cookware .................... 5
Things that are normal ...................... 25
Using a preset speedcook menu ............. 19
Warming ................................... 27
Microwaving
Cooking by time ............................ 29
Cooking tips ................................ 29
Defrost bg food tgpe ........................ 30
Defrost bg time ............................. 50
Defrosting tips .............................. 51
Express ................................. 15, 29
Favorite recipes ............................. 29
Microwave power level(s) .................... 29
Microwave-safe cookware .................... ro
Precautions to avoid possible
exposure to excessive
microwave energg ........................... 2
Sensor cooking .......................... 52, 55
Things that are normal ...................... 33
Using preset microwave selections .......... 28
Other Features
Automatic fan ............................... 36
Beeper volume .............................. 34
Child lockout ................................ 36
Clock .................................... 15,34
Delag Start ................................. 54
Displag ON/OFF ............................. 54
Help ........................................ 55
Reminder ................................... 54
Review...................................... 54
Scroll speed ................................. 3/4
Timer ....................................... 56
Care and Cleaning
Cleaning the inside .......................... 37
Cleaning the outside ........................ 38
Cooking trags and baking sheet ............. 38
Removable turntable ........................ 37
Troubleshooting
Problem Solver .......................... 39, 40
Customer Service
Service phone numbers ..................... 43
Warrantg .......................... Back Cover
IMPORTANT SAFETY INSTRUCTIONS
Advantium Oven
.4,WARNING!
To reduce the risk of burns, electric shock, fire, injury to persons,
or exposure to excessive microwave energy:
SAFETY PRECAUTIONS
[]
Read all instructions before using
this appliance. When using electrical
appliances, basic safetg precautions
should be followed, including the
following:
[] Read and follow the specific precautions
in the PRECAUTIONS TOAVOID POSSIBLE
EXPOSURE TOEXCESSIVEMICROWAVE
ENERGY section on page 2.
[] Be sure gour appliance is properlg installed
and grounded bg a qualified technician in
accordance with the provided installation
instructions.
[] Install or locate this appliance onlg
in accordance with the provided installation
instructions.
[] Some products such as whole eggs and
sealed containers-for example, closed
jars-are able to explode and should not be
heated in this oven. Such use of the oven
could result in injurg.
[] Do not mount this appliance over
a sink.
[]
[]
Do not store angthing directlg on top
of the microwave oven surface when
the microwave oven is in operation.
This oven is not approved or tested for
marine use.
[] This oven is UL listed for standard wall
installation.
[]
[]
[]
Do not operate this appliance if it has
been damaged or dropped.
As with ang appliance, close supervision
is necessarg when used bg children.
Use this appliance onlg for its intended
use as described in this manual.
[]
[]
[]
Do not use corrosive chemicals or vapors
in this appliance.
This oven is specificallg designed to heat,
drg or cook food, and is not intended for
laboratorg or industrial use.
This appliance must onlg be serviced
bg qualified service personnel. Contact
nearest authorized service facilitg for
examination, repair or adjustment.
[] Do not cover or block ang openings on
the appliance.
[] Do not store this appliance outdoors.
Do not use this product near water-
for example, in a wet basement, near a
swimming pool, near a sink or in similar
locations.
[] It is important to keep the area clean where
the door seals against the microwave. Use
onlg mild, non-abrasive detergents applied
with a clean sponge or soft cloth. Rinse well.
[] To reduce the risk of fire in the oven cavitg:
- Do not overcook food. Carefullg attend
appliance when paper, plastic or other
combustible materials are placed inside
the oven while microwave cooking.
- Remove wire twist-ties and metal handles
from paper or plastic containers before
placing them in the oven.
- Do not use the oven for storage purposes.
Do not leave paper products, cooking utensils
or food in the oven when not in use.
- If materials inside the oven ignite, keep the
oven door closed, turn the oven off and shut
off power at the fuse or circuit breaker
panel. If the door is opened, the fire mag
spread.
- Do not use the Sensor Features twice
in succession on the same food portion.
If food is undercooked after the first
countdown, use COOK BYTIME for
additional cooking time.
[] If installing the Advantium 120V Oven below
36", you must use the plastic bottom trim
due to burn risk to children. The plastic trim
acts as insulation and will help prevent
burns to children from hot surfaces.
[] If installing the Advantium 120V Oven
below 36", do not remove the door's plastic
bottom trim due to burn risk to children.
The plastic trim acts as insulation and will
help prevent burns to children from hot
surfaces.
SAVE THESE INSTRUCTIONS
5
IMPORTANT SAFETY INSTRUCTIONS
Advantium Oven
WARNING!
SAFETY PRECAUTIONS
[]
[]
Do not operate the oven without
the turntable in place. The turntable
must be unrestricted so it can turn.
During and after use, do not touch,
or let clothing or other flammable
materials contact any interior area
of the oven; allow sufficient time
for cooling first.
[] Keep the oven free from grease buildup.
[]
[]
Cook meat and poultry thoroughly-
meat to at least an INTERNAL
temperature of 160°F, and poultry to
at least an INTERNAL temperature of
180°F. Cooking to these temperatures
usually protects against foodborne
illness.
Potentially hot surfaces include the
oven door, floor, walls, oven rack and
turntable.
ARCING
Arcing can occur during both speedcooking and microwave cooking. If you see arcing,
press the CLEAR/OFF pad and correct the problem.
Arcing is the microwave term for sparks
in the oven. Arcing is caused by:
[] Metal or foil touching the side of
the oven.
[] Foil not molded to food (upturned edges
act like antennas).
[] Use foil only as recommended in
this manual.
[]
[]
[]
Metal cookware used during either
speedcook or microwave cooking (except
for the puns provided with
the oven).
Metal, such as twist-ties, poultry pins,
or gold-rimmed dishes, in the oven.
Recycled paper towels containing small
metal pieces being used in the oven.
FOODS
[]
[]
[]
[]
[]
When microwaving, place all foods and
containers on the clear glass tray.
Do not pop popcorn in your oven unless in
a special microwave popcorn accessory or
unless you use popcorn labeled for use in
microwave ovens.
Do not boil eggs in this oven. Pressure will
build up inside egg yolk and will cause it to
burst, possibly resulting
in injury.
Do not operate the oven without food
inside. This may cause damage to the
oven. It increases the heat around the
magnetron and can shorten the life of the
oven.
Foods with unbroken outer "skin"
such as potatoes, hot dogs, sausages,
tomatoes, apples, chicken livers and other
giblets, and egg yolks should be pierced to
allow steam to escape during cooking.
[] SUPERHEATEDWATER
Liquids, such as water, coffee or tea, are
able to be overheated beyond the boiling
point without appearing to be boiling. Visible
bubbling or baiting when the container is
removed from the microwave oven is not
always present. THISCOULD RESULTIN
VERYHOTLIQUIDS SUDDENLYBOILING
OVERWHEN THE CONTAINERISDISTURBED
ORA SPOONOROTHERUTENSILIS
INSERTEDINTO THELIQUID.
To reduce the risk of injury to persons:
- Do not overheat the liquid.
- Stir the liquid both before and halfway
through heating it.
- Do not use straight-sided containers with
narrow necks.
After heating, allow the container to stand
in the microwave oven for a short time
before removing the container.
Use extreme care when inserting a spoon
or other utensil into the container.
4 SAVE THESE INSTRUCTIONS
IMPORTANT SAFETY INSTRUCTIONS
Advantium Oven
.4,WARNING!
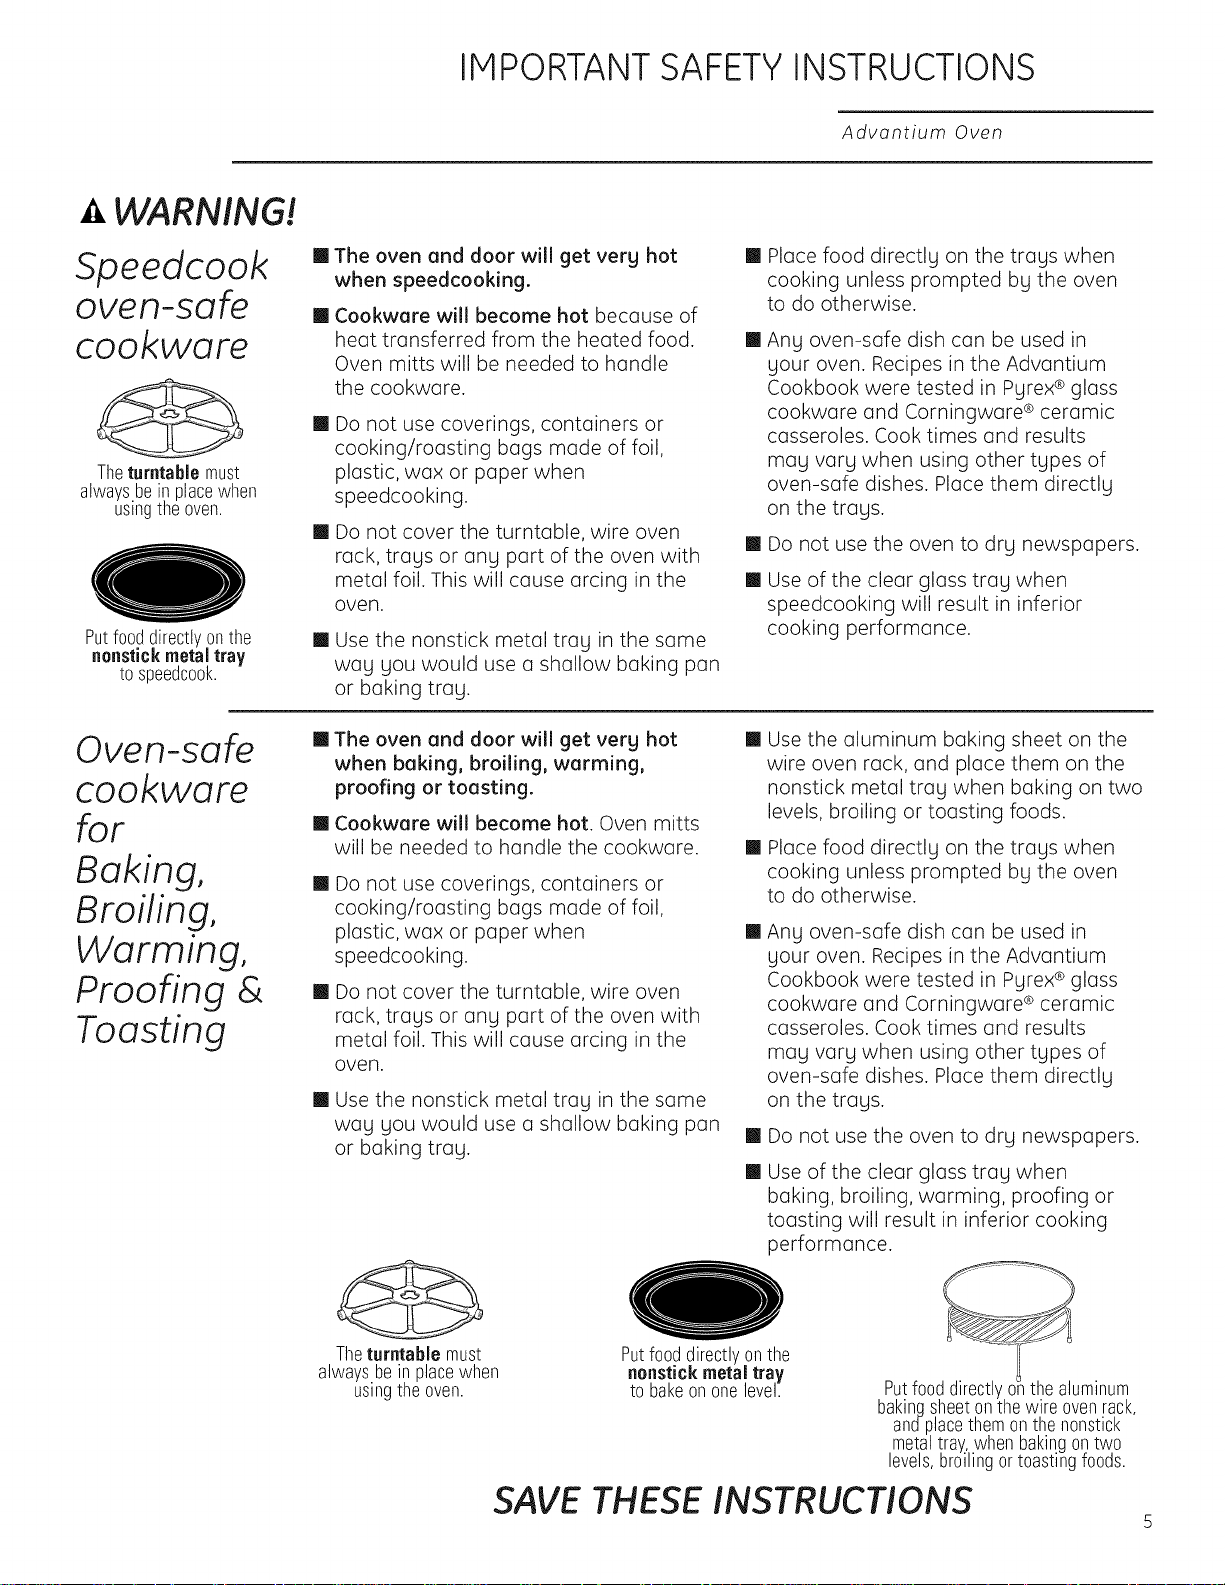
Speedcook
oven-safe
cookware
Theturntable must
alwaysbeinplacewhen
usingtheoven.
Putfood directly on the
nonstick metal tray
to speedcook.
Oven-safe
cookware
for
Baking,
Broiling,
Warming,
Proofing &
Toasting
[] The oven end door will get very hot []
when speedcooking.
[] Cookwere will become hot because of
heat transferred from the heated food. []
Oven mitts will be needed to handle
the cookware.
[]
[]
[]
Do not use coverings, containers or
cooking/roasting bags made of foil,
plastic, wax or paper when
speedcooking.
Do not cover the turntable, wire oven
rack, trays or any part of the oven with
metal foil. This will cause arcing in the
oven.
Use the nonstick metal tray in the same
way you would use a shallow baking pan
or baking tray.
[]
[]
Place food directly on the trays when
cooking unless prompted by the oven
to do otherwise.
Any oven-safe dish can be used in
your oven. Recipes in the Advantium
Cookbook were tested in Pyrex ® glass
cookware and Corningware ®ceramic
casseroles. Cook times and results
may vary when using other types of
oven-safe dishes. Place them directly
on the trays.
Do not use the oven to dry newspapers.
Use of the clear glass tray when
speedcooking will result in inferior
cooking performance.
[]
[]
[]
[]
[]
The oven and door will get very hot
when baking, broiling, warming,
proofing or toasting.
Cookwere will become hot. Oven mitts
will be needed to handle the cookware.
Do not use coverings, containers or
cooking/roasting bags made of foil,
plastic, wax or paper when
speedcooking.
Do not cover the turntable, wire oven
rack, trays or any part of the oven with
metal foil. This will cause arcing in the
oven.
Use the nonstick metal tray in the same
way you would use a shallow baking pan
or baking tray.
[]
Theturntable must
always.bein placewhen
usmgtheoven.
[]
[]
[]
[]
Putfooddirectlyonthe
aenstick metal tray
to bakeononelevel.
Use the aluminum baking sheet on the
wire oven rack, and place them on the
nonstick metal tray when baking on two
levels, broiling or toasting foods.
Place food directly on the trays when
cooking unless prompted by the oven
to do otherwise.
Any oven-safe dish can be used in
your oven. Recipes in the Advantium
Cookbook were tested in Pyrex ® glass
cookware and Corningware ®ceramic
casseroles. Cook times and results
may vary when using other types of
oven-safe dishes. Place them directly
on the trays.
Do not use the oven to dry newspapers.
Use of the clear glass tray when
baking, broiling, warming, proofing or
toasting will result in inferior cooking
performance.
ba!!_;! _iie;; !'_i_iie ei_i_i'ii_ k
metaltray,whenbakingontwo
levels,broilingortoastingfoods.
SAVE THESE INSTRUCTIONS
5

IMPORTANT SAFETY INSTRUCTIONS
Advantium Oven
WARNING!
Microwave-
safe
cookware
Theturntable must
alwaysbeill placewhen
usingtile oven.
0
Theclear glasstray
shouldalwaysbe in place
whenmicrewaving.
Make sure to use suitable cookware during microwave cooking. Most glass casseroles,
cooking dishes, measuring cups, custard cups, pottery or china dinnerware which does not
have metallic trim or glaze with a metallic sheen can be used. Some cookware is labeled
"suitable for microwaving."
[]
[]
[]
[]
Place food or microwavable container
directly on the clear glass tray to cook
your food.
Use of the nonstick metal tray during
microwave cooking will result in inferior
cooking performance.
If you are not sure if a
dish is microwave-safe,
use this test: Place in the
oven both the dish you
are testing and a glass How to test fora
measuring cup filled micr0wave-safedish.
with 1 cup of water-set the measuring
cup either in or next to the dish.
Microwave 30-45 seconds at high.
If the dish heats, it should not be
used for microwaving.
If the dish remains cool and only the
water in the cup heats, then the dish
is microwave-safe.
Cookware may become hot because
of heat transferred from the heated food.
Oven mitts may be needed to handle
the cookware.
[] Do not use recycled paper products.
Recycled paper towels, napkins and
waxed paper can contain metal flecks
which may cause arcing or ignite.
Paper products containing nylon or
nylon filaments should be avoided,
as they may also ignite.
[] Use foil only as directed in this manual.
When using foil in the oven, keep the foil
at least 1" away from the sides of the
oven.
[]
[]
Do not use the oven to dry newspapers.
If you use a meat thermometer while
cooking, make sure it is safe for use
in microwave ovens.
[] Paper towels, waxed paper and plastic
wrap can be used to cover dishes in
order to retain moisture and prevent
spattering. Be sure to vent plastic wrap
so steam can escape.
[] Not all plastic wrap is suitable for use
in microwave ovens. Check the package
for proper use.
[] "Bailable" cooking pouches and tightly
closed plastic bags should be slit, pierced
or vented as directed by package. If they
are not, plastic could burst during or
immediately after cooking, possibly
resulting in injury. Also, plastic storage
containers should be at least partially
uncovered because they form a tight
seal. When cooking with containers
tightly covered with plastic wrap, remove
covering carefully and direct steam
away from hands and face.
[] Plastic cookware-Plastic cookware
designed for microwave cooking is very
useful, but should be used carefully. Even
microwave-safe plastic may not be as
tolerant of overcooking conditions as
are glass or ceramic materials and
may soften or char if subjected to
short periods of overcooking. In longer
exposures to overcooking, the food
and cookware could ignite.
Follow these guidelines:
1. Use microwave-safe plastics only
and use them in strict compliance
with the cookware manufacturer's
recommendations.
2. Do not microwave empty containers.
3. Do not permit children to use plastic
cookware without complete supervision.
[]
Some styrofoam trays (like those that
meat is packaged on) have a thin strip
of metal embedded in the bottom. When
microwaved, the metal can burn the floor
of the oven or ignite a paper towel.
SAVE THESE INSTRUCTIONS
6
IMPORTANT SAFETY INSTRUCTIONS
Advantium Oven
.4,WARNING!
SAFETY PRECAUTIONS
[]
[]
Don't defrost frozen beverages in
narrow-necked bottles (especially
carbonated beverages). Even if the
container is open, pressure can build up.
This can cause the container to burst,
possibly resulting in injury.
Foods cooked in liquids (such as
pasta) may tend to boil more rapidly
than foods containing less moisture.
Should this occur, refer to the Care
and Cleaning of the oven section for
instructions on how to clean the
inside of the oven.
[] Hot foods and steam can cause
burns. Be careful when opening any
containers of hot food, including popcorn
bags, cooking pouches and boxes. To
prevent possible injury, direct steam
away from hands and face.
[]
[]
Do not overcook potatoes. They could
dehydrate and catch fire, causing
damage to your oven.
Avoid heating baby food in glassjars,
even with the lid off. Hake sure all infant
food is thoroughly cooked. Stir food to
distribute the heat evenly. Be careful to
prevent scalding when warming formula.
The container may feel cooler than the
formula really is. Always test the formula
before feeding the baby.
[] Do not attempt to deep fry in the oven.
Notice--
Pacemakers
[] Host pacemakers are shielded from
interference from electronic products,
including microwaves. However, patients
with pacemakers may wish to consult their
physicians if they have concerns.
SAVE THESE INSTRUCTIONS
MESURESDESI_CURITI_IMPORTANTES
Four Advantium
(a)
(b)
J J
PRECAUTIONS POUR EVITERUNE EVENTUELLE
EXPOSITION EXCESSIVE AUX MICRO-ONDES
N'essayez pus de faire fonctionner le four 6
micro-ondes Iorsque la porte est ouverte,
puisque cela pourrait entraTner une
exposition nocive aux micro-ondes. II est
important de ne jamais essayer de forcer
ou modifier le syst@me de verrouillage de
s6curit6.
Ne placez pas d'objets entre la porte et la
surface avant du four. Ne laissez pas de
salet6 ou de r6sidus de produits nettogants
s'accumuler sur les surfaces d'6tanch_it6.
(d Ne faites pas fonctionner le four s'il est
endommag6. II est tr_s important que la
porte ferme bien et que les pi_ces suivantes
ne soient pas endommag_es :
(1) La porte (tordue),
(2) Les charni_res et Ioquets (cass6s ou
desserr6s),
(3) Lesjoints et surfaces d'6tanch_it6.
(d) Seu! un technicien qualifi_ doit r6parer
ou r6gler votre four 6 micro-ondes.
CONSERVEZ CES DIRECTIVES
MESURESDESI CURITI IMPORTANTES
Four Advantium
MISE EN
GARDE!
MESURES
Pour r duire le risque de brOlures, de choc lectrique, d'incendie,
de blessures autrui ou d'exposition excessive aux micro-ondes •
DE SdLCURITdL
III Veuillez life les mesures de s_curifi_
avant d'utiliser le four. Lors de l'utilisation
d'appareils _lectriflues, il faut observer
des mesures de s_curit_ _l_mentaires,
et en particulier :
Ill Veuillez lire et observer les <<Precautions pour
@viterune @ventuelleexposition excessive aux
micro-andes >>_ la page 8.
II Assurez-vous que I'appareil soit install@et mis (_
la terre correctement par un technicien qualifi_
conform_ment aux directives d'installation
fournies.
II
II
m
II
II
II
II
II
II
Installez et placez cet appareil seulement selon
les directives d'installation fournies.
Certains aliments comme les oeufs dans leur
coquille et les r@cipientsscell@s-par exemple,
des pots en verre ferm@s-peuvent @claters'ils
sont chauff@sdans le four _ micro-andes et
risquent de vous blesser.
N'installez pas cet appareil au-dessus d'un @vier.
Ne mettez rien directement sur la surface
de votre four 5 micro-andes pendant qu'il
fonctionne.
Cefour (_micro-andes n'a pas @t@approuv@
ou mis _ I'essai pour @treutilis@en mer.
Cefour est homologu_ ULpour une installation
murale standard.
N'utilisez pas cet appareil s'il a _t_ endommag_
ou s'il est tomb_.
Comme avec tout appareil, il est important de
surveiller @troitement Iorsque le four est utilis@
par des enfants.
N'utilisez cet appareil que pour I'usage auquel
il est destin@,tel que d@critdans le pr@sent
manuel.
II N'utilisez pas de substances chimiques
ou corrosives dans cet appareil.
II Cefour (_micro-andes a @t@conqu
sp@cifiquement pour chauffer, s@cherou
cuire des aliments et non pour @treutilis@
en laboratoire ou _ des fins industrielles.
II Seul un technicien qualifi@doit r@parercet
appareil. Communiquez avec le bureau de
service ap@s-vente le plus pr@ssi votre
appareil doit _tre v@rifi@,r@par@ou r@gl@.
II Necouvrez pas ou ne bloquez pas les
ouvertures de I'appareil.
II Ne rangez pas cet appareil (_I'ext@ieur. N'utilisez
pasce four (_proximit@de I'eau, par exemple,
dans un sous-sol mouill@,pr@sd'une piscine d'un
@vierou dans des emplacements semblables.
II IIest important que la surface de contact entre
la porte et le four (_micro-andes soit toujours
bien propre. Utilisez un d_tergent doux, non-
abrasif sur une @pongepropre ou un linge
souple. Rincez bien.
II Pour r@duireles risques d'incendie _ I'int@rieur
du four
- Nefaites pas trap cuire les aliments. Surveillez
la cuisson de pr@squand vous utilisez du papier,
du plastique ou d'autres mati@resinflammables
dans votre four pendant la cuisson.
- Enlevezles attaches m@talliqueset les poign@es
en m@taldes contenants de papier ou de
plastique avant de les mettre dans le four.
- Ne rangez rien dans le four. Ne laissez pas de
produits en papier, ustensiles de cuisson ou
aliments dans lefour Iorsqu'il n'est pas utilis@.
- Si un feu @clatedans votre four, laissez la porte
ferm@e,@teignezle four et d@branchez le cordon
d'alimentation ou coupez le courant en enlevant
le fusible ou en d@clenchant le disjoncteur. Si
vous ouvrez la porte, lesflammes risquent de
se propager.
- N'utilisez pas lesfonctions de capteur deux fois
de suite sur la m@mesection de nourriture. Si la
nourriture n'est pas assez cuite ap@s le premier
passage, utilisez COOKBYTIME(TEMPSDE
CUISSON) pour ajouter du temps de cuisson.
II Nefaites pas fonctionner lefour sans plateau
tournant. Le plateau doit pouvoir tourner sans
restriction.
II
Durant et apr@sI'usage, ne touchez pas ou ne
laissez pas de v@tementsou autres mat@iaux
inflammables entrer en contact avec I'int@rieur
du four. Pr@voyezsuffisamment de temps pour
le refroidissement.
Ii Si vous installez le four Advantium 120V sous
36po (91 cm),vous devez utiliser la garniture
infe'rieure en plastique @tantdonn@le risque
de br01ure couru par les enfants. Lagarniture
en plastique agit en tant qu'isolation et
contribuera _ prot@gerles enfants contre
le risque de br01ureau contact des surfaces
chaudes.
Ii Si vous installez le four Advantium 120V sous
36po (91 cm), n'enlevez pas la garniture
infe'rieure en plastique de la porte @tantdonn@
le risque de br01urecouru par les enfants.
La garniture en plastique agit en tant
qu'isolation et contribuera 5 prot@gerles
enfants contre le risque de br01ureau
contact des surfaces chaudes.
CONSERVEZ CES DIRECTIVES
MESURESDESI CURITI IMPORTANTES
Four Advantium
MISE EN
MESURES
ARC
D'ETINCELLES
ALIMENTS
GARDE!
DE S4LCURIT4L
[] Gardez le four libre de toute accumulation
de graisse.
[] Faites bien cuire la viande et la volaille-la
viande doit avoir une temp6mture INTERNE
de 160° F(71° C),et la volaille une
temp6rature INTERNEd'au mains 180° F
(8:3° C).Une pr6paration 6 ces niveaux de
temp6rature protege normalement des
maladies alimentaires.
[] Les surfaces chaudes peuvent inclure
la porte du four, le plancher, les parois,
le plateau de cuisson et le plateau
tournant.
Un arc peut apparaTtredurant la cuisson rap)de et la cuisson _ micro-andes. Si vous voyez
un arc, appuyez sur la touche annulation/arr@t (CLEAR/OFF)et corrigez le probl@me.
La formation d'un arc est la logan qu'ont
les micro-andes de produire des 6tincelles
dans le four. Ceci est imputable aux causes
suivantes :
[] Un article de m6tal ou du papier
d'aluminium est en contact avec les
parois du four.
[] Le papier d'aluminium n'6pouse pas bien
la forme de I'aliment (les bards relev6s
agissent comme des antennes).
[] Utilisez de papier d'aluminium saul
comme il est d_crit dans le pr6sent
manuel.
[] Les ustensiles de cuisson de m6tal
utilis6s durant la cuisson rap)de ou la
cuisson a micro-andes (sauf les
casseroles fournies avec le four).
[] Des articles en m6tal, comme des
attaches, les broches utilis6es pour la
volaille ou les garnitures dor6es des
assiettes se trouvent dans le four.
[]
Des essuie-tout en papier recgcl6
contenant de petites particules de m6tal
sont emplog6s dans le four.
[]
[]
[]
[]
[]
Pour la cuisson a micro-andes, placez tous
les aliments et contenants sur le plateau de
verre transparent.
Ne pr6parez pas de mais 6clat6 dans
votre four a micro-andes, a mains
d'utiliser un grille-mais sp6cialement
conqu a cette fin ou du mais 6clat6 pour
la cuisson aux micro-andes.
II n'est pas recommand_ de faire bouillir
des oeufs dans le four. La press)on qui se
cr6e dans le jaune fera 6clater I'oeuf et
pourrait causer des blessures.
Le fait de laisser fonctionner le four
micro-andes sans placer d'aliment
I'int6rieur peut endommager le four. Cela
augmente la temp6ratureautour du
magn6tron et peut affecter la dur6e de
vie de votre four.
Percez la <<peau >>qui recouvre certains
aliments, comme les pommes de terre,
les saucisses fum6es, les saucissons, les
tomates, les pommes, le foie de poulet et
autres abats, lesjaunes d'oeuf, pour
permettre a la vapeur de s'6chapper
pendant la cuisson.
[] EAU SURCHAUFFEE
w
w
Les liquides, tels que I'eau, le col@ou le th@
peuvent @tresurchauff@s au-del_ du point
d'_bullition sons avoir I'air de bouillir. Une
_bullition ou formation de bulles n'est pas
toujours visible Iorsque ler_cipient est sort)
du four a micro-andes. CECIPEUT
ENTRA[NERDESDE-BORDEMENTSSOUDAINS
DELIOUIDESBROLANTSLORSOUELE
RE-CIPIENTESTDEPLACEOU SIUNE CUILLER
OU TOUTAUTREUSTENSILEESTINTRODUlT
DANS LE LIOUIDE.
Pour r6duire le risque de blessures pour
autrui :
Ne surchauffez pas le liquide.
M61angez le liquide avant son
r6chauffement et au milieu de celubci.
N'utilisez pas de r6cipient a bards
verticaux et _]col 6trait.
- Apr_s avoir r6chauff6, laissez un peu
le r6cipient dans le four a micro-andes
avant de sortir le r6cipient.
- Fakes preuve de grande prudence Iors
de I'introduction d'une cuiller ou de tout
autre ustensile dans le r_cipient.
CONSERVEZ CES DIRECTIVES

MESURESDESECURITEIMPORTANTES
Four Advantium
MISE EN
Ustensiles
de cuisson
sans danger
p,,our,le four
a CUlSSOn
ropide
Leplateauteurnant
d0_tt0uj0urs etre en
place10rsquev0us
utilisezlefour.
Placezlesaliments
directementsurle
plateaude metal
anti-adhesif pourune
cuiss0nrapide.
Ustensiles
de cuisson
convenont
au four
pour
culslner,
griller,
rdchauffer
et rStir.
GARDE!
[]
[]
Le four et la porte deviennent tr_s
chauds pendant la cuisson rapide.
Les ustensiles de cuisson deviennent
chauds 6 cause du transfert de chaleur
des aliments. II faut porter des gants
thermor6sistants pour manipuler les
ustensiles de cuisson.
[] N'utilisez pas de couvercles, de contenants
ou de sacs de cuisson/r6tisserie fabriques
d'aluminium, de papier cir6 ou de papier
pour la cuisson rapide.
[] Ne couvrez pas le plateau tournant,
le plateau de cuisson m6tallique, les
plateaux ou toute partie du four de
papier m6tallique. Ceci provoquera
la formation d'un arc dans le four.
[]
Utilisez le plateau de m6tal anti-adh6sif
de la m_me mani_re qu'un plat peu
profond ou qu'un moule.
[] Placez la nourriture directement sur les
plateaux pendant la cuisson 6 moins
d'indication contraire du four.
[] Vous pouvez utiliser tout plat convenant
au four dans votre four 6 micro-ondes.
Les recettes du livre de cuisine
Advantium ont 6t6 test6es dans des plats
de verre Pgrex ®et des casseroles de
c6ramique Corningware ®. Les temps de
cuisson et les r6sultats peuvent varier en
utilisant d'autres types de plats pouvant
aller au four. Placez-les directement sur
les plateaux.
[] N'utilisez pas le four pour faire s6cher
les journaux.
[] Utiliser le plateau de verre transparent
pour la cuisson rapide produira une
performance de cuisson inf6rieure.
[]
Le four et la porte deviennent tr_s
chauds pendant que vous cuisinez, grillez,
r_chauffez ou rStissez les aliments.
[] Les ustensiles de cuisson deviennent
chauds. II faut porter des gants
thermor6sistants pour manipuler les plats.
[] N'utilisez pas de couvercles, de contenants
ou de sacs de cuisson/r6tisserie fabriques
d'aluminium, de papier cir6 ou de papier
pour la cuisson rapide.
[] Ne couvrez pas le plateau tournant,
le plateau de cuisson m6tallique, les
plateaux ou route partie du four de
papier m6tallique. Ceci provoquera la
formation d'un arc dans le four.
[] Utilisez un plateau de m6tal anti-adh@sif
de la m_me mani_re qu'un plat peu
profond ou qu'un moule.
[] Utilisez la plaque de cuisson d'aluminium
sur le plateau de cuisson m6tallique et
placez-les sur le plateau
[]
m6tallique anti-adh_sif en cuisinant 6
deux niveaux ' griller ou r6tir.
Placez la nourriture directement sur les
plateaux pendant la cuisson 6 moins
d'indication contraire du four.
[] Vous pouvez utiliser tout plat convenant
au four dans votre four 6 micro-ondes.
Les recettes du livre de cuisine Advantium
ont 6t6 test6es dans des plats de verre
Pgrex®et des casseroles de c6ramique
Corningware ®.Les temps de cuisson et
les r6sultats peuvent varier en utilisant
d'autres tgpes de plats pouvant aller au
four. Placez-les directement sur les
plateaux.
[] N'utilisez pas le four pour faire s6cher
les journaux.
[] Utiliser le plateau de verre transparent
pour cuisiner, griller, r6chauffer ou r6tir
produira une performance de cuisson
inf6rieure.
Leplateau teumant
d0_tt0uj0ursetreen
place10rsquev0us
utilisezlefour.
Placezlesaliments
directementsurle
plateau demetal
anti-adhesif pour
preparerlesaliments
unniveau.
Mettezlesalimentsdirectementsur
la plaquedecuiss0nd'aluminiumsur
leplateaudecuiss0nmetalliqueet
placez-lessurleplateaumetallique
anti-adh_sifen cuisinant
deuxniveaux• griller0u r0tir.
CONSERVEZ CES DIRECTIVES 11

MESURESDESI CURITI IMPORTANTES
Four Advantium
MISE EN
Ustensile
de cuisson
convenant
au four a
micro-ondes
Leplateautournant
d0_tt0uj0urs@treen
place10rsquev0us
utilisezlefour.
O
Leplateaudeverre
transparent devrait
t0uj0urs6treen place
pourla cuiss0n8
micro-ondes.
12
GARDE!
Assurez-vous d'utiliser des ustensiles de cuisson appropri4s pour la cuisson 8 micro-ondes.
La plupart des casseroles de verre, des plats de cuisson, des tasses 8 mesurer, des ramequins, de
vaisselle de la poterie ou de la porcelaine sans bordure ou glaqure de mdtal 8 patine mdtallique
peuvent 8tre utilisds. Certains ustensiles de cuisson portent la mention <<convient au four 8
micro-ondes >>.
[] Placez les aliments ou les contenants
pour la cuisson 6 micro-ondes
directement sur le plateau de verre
transparent pour les faire cuire.
[] Utiliser le plateau de m6tal anti-adh6sif
pour la cuisson 6 micro-ondes produira
une performance de cuisson inf@ieure.
[] Si vous n'@tespas certain qu'un plat puisse
aller au micro-ondes, utilisez ce test : placez
dans le four le plat 6 tester et une tasse 6
mesurer de verre remplie d'une tasse d'eau.
Placez cette derni_re dans ou pros du plat.
Faites fonctionner le four de 30 6 45
secondes 6 temp6rature 61ev6e.Si le plat se
r6chauffe, il ne doit pas _tre utilis6 pour la
cuisson 6 micro-ondes.
[]
[]
S'il reste frais et si seulement I'eau se
r6chauffe, alors il convient pour le four.
Les ustensiles de cuisson deviennent
chauds en raison du transfert de chaleur
des aliments. IIfaut porter des gants
thermor6sistants pour manipuler les plats.
N'utilisez pas de produits de papier
recgcl6. Les essuie-tout en papier
recgcl6, les serviettes et le papier cir6
peuvent contenir de petites particules de
m6tal qui pourraient provoquer un arc
ou s'enfiammer. Vous devez 6viter les
produits de papier contenant du nglon
ou des filaments de nglon car ils peuvent
aussi s'enflammer.
[] Utilisez le papier aluminium seulement
selon les indications de ce guide. Les
plateaux t616s peuvent 6tre pr6par6s au
micro-ondes si les plateaux d'aluminium
sont de moins de 3/4 po (1,9 cm) de
hauteur et si vous retirez la pellicule
couverture et remettez le plateau dans la
boTte.Lorsque vous utilisez du papier
aluminium dans le four, gardez-le 6 au
moins 1 po (2,54 cm) des parois du four.
[] N'utilisez pas le four pour faire s6cher les
journaux.
[] Si vous utilisez un thermom6tre 6 viande
pour la cuisson, assurez-vous qu'il
convienne aux fours 6 micro-ondes.
[] Certains plateaux de stgromousse (comme
ceux pour I'emballage de la viande) ont une
mince bande de m6tal incorpor6e dans la
partie inf6rieure. Au cours de la cuisson au
micro-ondes, le m6tal peut br01erlebas du
four ou enflammer un essuie-tout.
[] Lesessuie-tout, le papier cire et la pellicule
de plastique peuvent servir 6 couvrir les
plats pour conserver I'humidite et eviter les
6claboussures. Assurez-vous d'avoir des
ouvertures dans la pellicule pour laisser la
vapeur s'6chapper.
[] Toutes les pellicules de plastique ne
conviennent pas aux fours 6 micro-
ondes. V@ifiez I'emballage.
[] Les sachets de cuisson et les sacs de
plastique bien ferm6s doivent _tre fendus,
perc6s ou a6r6s selon les indications sur
I'emballage. Sinon, le plastique pourrait
6clater durant ou imm6diatement apr_s
la cuisson pouvant ainsi mener 6 des
blessures. De m_me, les contenants de
plastique devraient _tre partiellement
d6couverts parce qu'ils forment une
fermeture 6tanche. Lorsque vous cuisinez
avec des contenants bien recouverts d'une
pellicule de plastique, retirez avec soin la
pellicule et dirigez la vapeur loin des mains
et du visage.
[] Ustensiles de cuisson de plastique-Les
ustensiles de cuisson de plastique conqus
pour la cuisson 6 micro-ondes sont tr_s
utiles, mais doivent _tre utilis6s avec soin.
PlUme le plastique convenant pour ce tgpe
de cuisson pourrait ne pas supporter la
<<sur cuisson >>comme les mat@iaux de
verre et de c@amique et alors le plastique
pourrait amollir ou se carboniser s'il est
soumis 6 de courtes p@iodes de sur
cuisson. Pour les expositions plus Iongues,
les aliments et les ustensiles de cuisson
pourraient s'enflammer.
Suivez ces directives :
,
Utilisez seulement des plastiques pour
les fours 6 micro-ondes et utilisezdes
en vous conformant aux directives du
fabricant.
2. Ne mettez pas de contenants vides dans
le four 6 micro-ondes.
3. Ne laissez pas les enfants utiliser des
ustensiles de cuisson de plastique sans
une @roite surveillance.
CONSERVEZ CES DIRECTIVES

MESURESDESI CURITI IMPORTANTES
Four Advantium
tl, MISE EN GARDE!
PIESURES DE SdLCURITdL
[]
[]
[]
Ne d6congelez pas de boissons
surgel6es dons des bouteilles au col
6trait (tout particuli@rement les boissons
gazeuses). M@mesi le contenant est
ouvert, il pourrait g ovoir une
accumulation de pression. Le contenant
pourroit olors 6clater, menant 6 des
blessures possibles.
Les aliments pr@ar6s dans des liquides
(comme les petes) ant tendance 6 bouillir
plus rapidement que les aliments
contenant mains d'humidit6. Si ceci se
produit, reportez-vous aux directives
concernant le nettogage de I'int@ieur
du four dans la section <<Entretien et
nettogage du four 6 micro-andes >>.
Les aliments chauds et la vapeur
peuvent provoquer des br01ures.
Attention en ouvrant des contenants
d'oliments chouds, g compris les sacs de
mois 6clot6, les sachets de cuisson et les
boTtes. Pour 6viter les blessures possibles,
dirigez la vapeur loin des mains et du
visage.
[]
[]
[]
Ne faites pas trap cuire les pommes de
terre. Elles pourraient se d@shgdroter et
s'enfiammer, provoquont des dommages
6 votre four.
Evitez de r6chauffer la nourriture de
b6b6 dans des contenants en verre,
m_me apr_s avoir retir6 le couvercle.
Assurez-vous que la nourriture de
b6b6 soit bien cuite. M61angez-la pour
r6partir la chaleur uniform6ment.
Attention 6 1'6chaudage en r6chauffant
la pr6paration des nourrissons. Le
contenant peut _tre plus frais au toucher
que la pr6paration elle-m_me. Testez
toujours la pr6paration avant de nourrir
le b@b@.
N'essagez pas de grande friture dans
le four.
Avis--
stimulateurs
cardiaques
La plupart des stimulateurs cardiaques
sont prot6g_s contre les interf@ences de
produits 61ectroniques, en particulier de
fours 6 micro-andes. N6anmoins, les
personnes agant un stimulateur cardiaque
peuvent consulter leur m6decin en cas
d'inqu_tude.
CONSERVEZ CES DIRECTIVES
13
What isAdvantium?
Advantium Oven
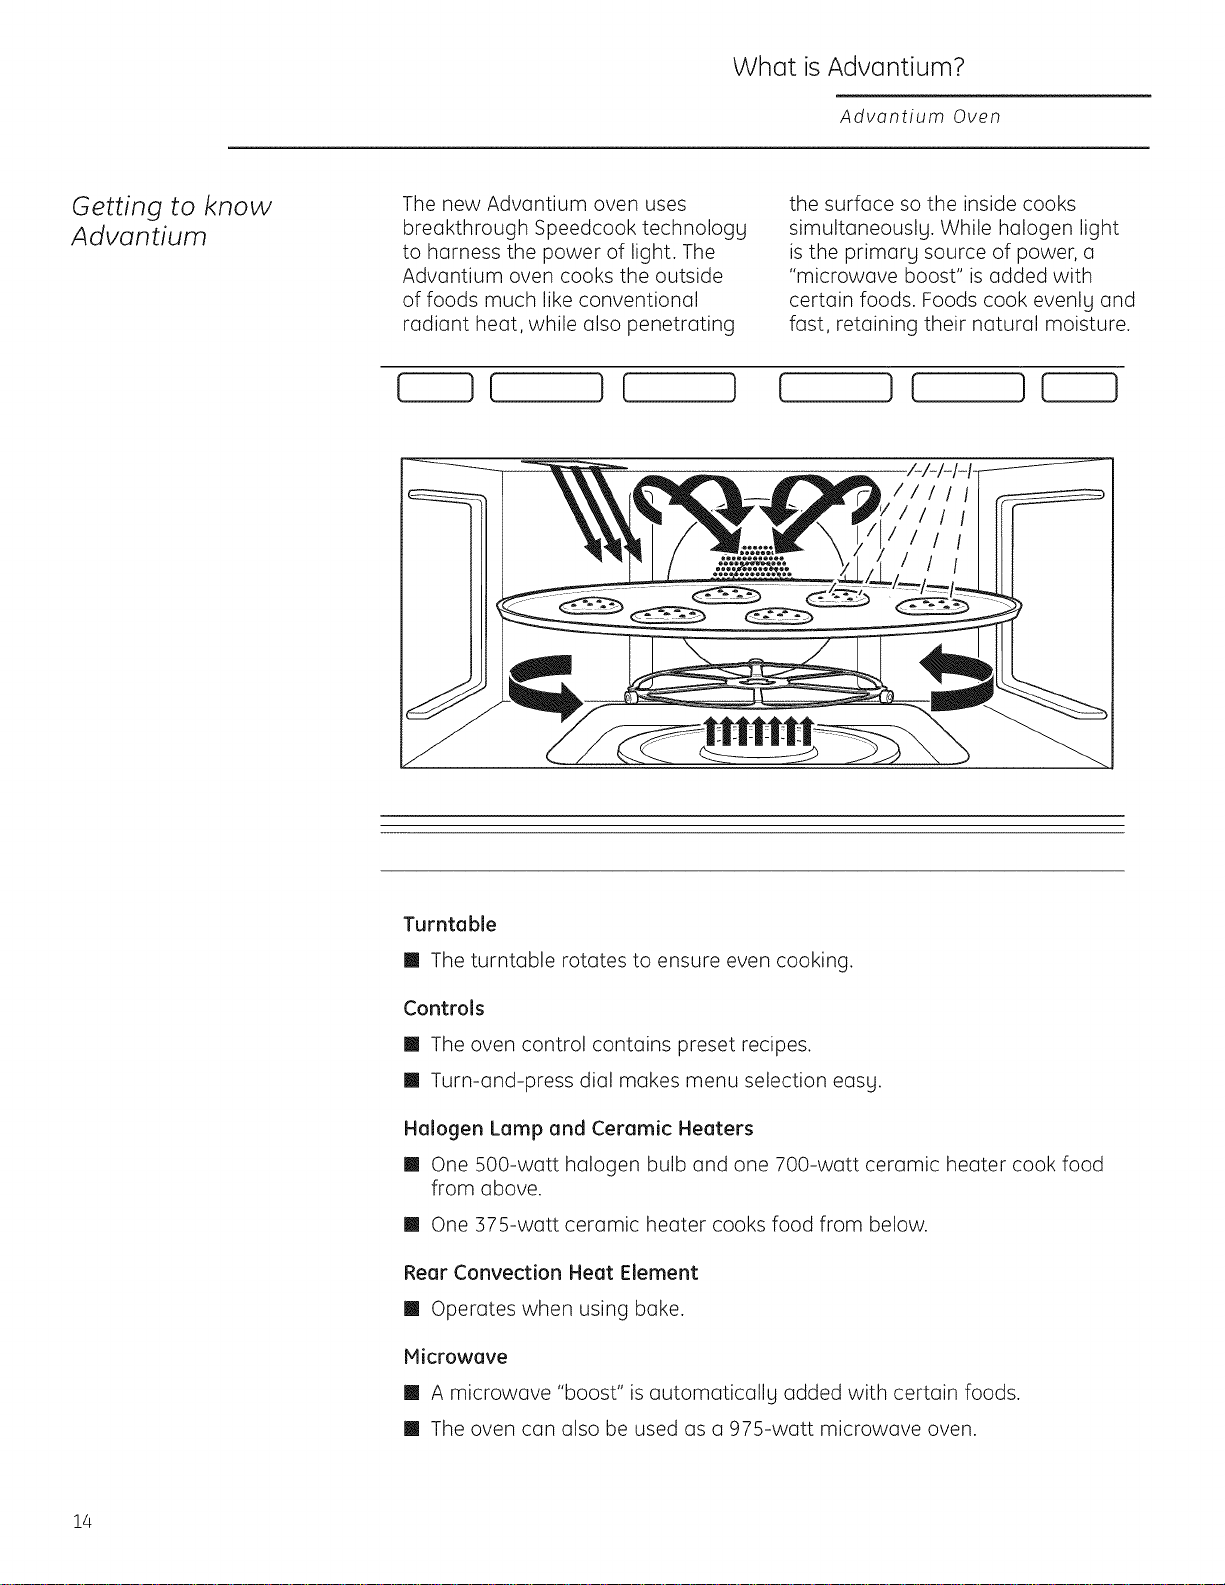
Getting to know
Advantium
The new Advantium oven uses
breakthrough Speedcook technology
to harness the power of light. The
Advantium oven cooks the outside
of foods much like conventional
radiant heat, while also penetrating
the surface so the inside cooks
simultaneously. While halogen light
is the primary source of power, a
"microwave boost" is added with
certain foods. Foods cook evenly and
fast, retaining their natural moisture.
/-1-H-I-
I!111
IIII
III
I
Turntable
[] The turntable rotates to ensure even cooking.
Controls
[] The oven control contains preset recipes.
[] Turn-and-press dial makes menu selection easg.
Halogen Lamp end Ceramic Heaters
[] One 500-watt halogen bulb and one 700-watt ceramic heater cook food
from above.
[] One 37g-watt ceramic heater cooks food from below.
Rear Convection Heat Element
[] Operates when using bake.
Microwave
[] A microwave "boost" is automatically added with certain foods.
[] The oven can also be used as a 975-watt microwave oven.
14
Advantium Quick Start
Advantium Oven
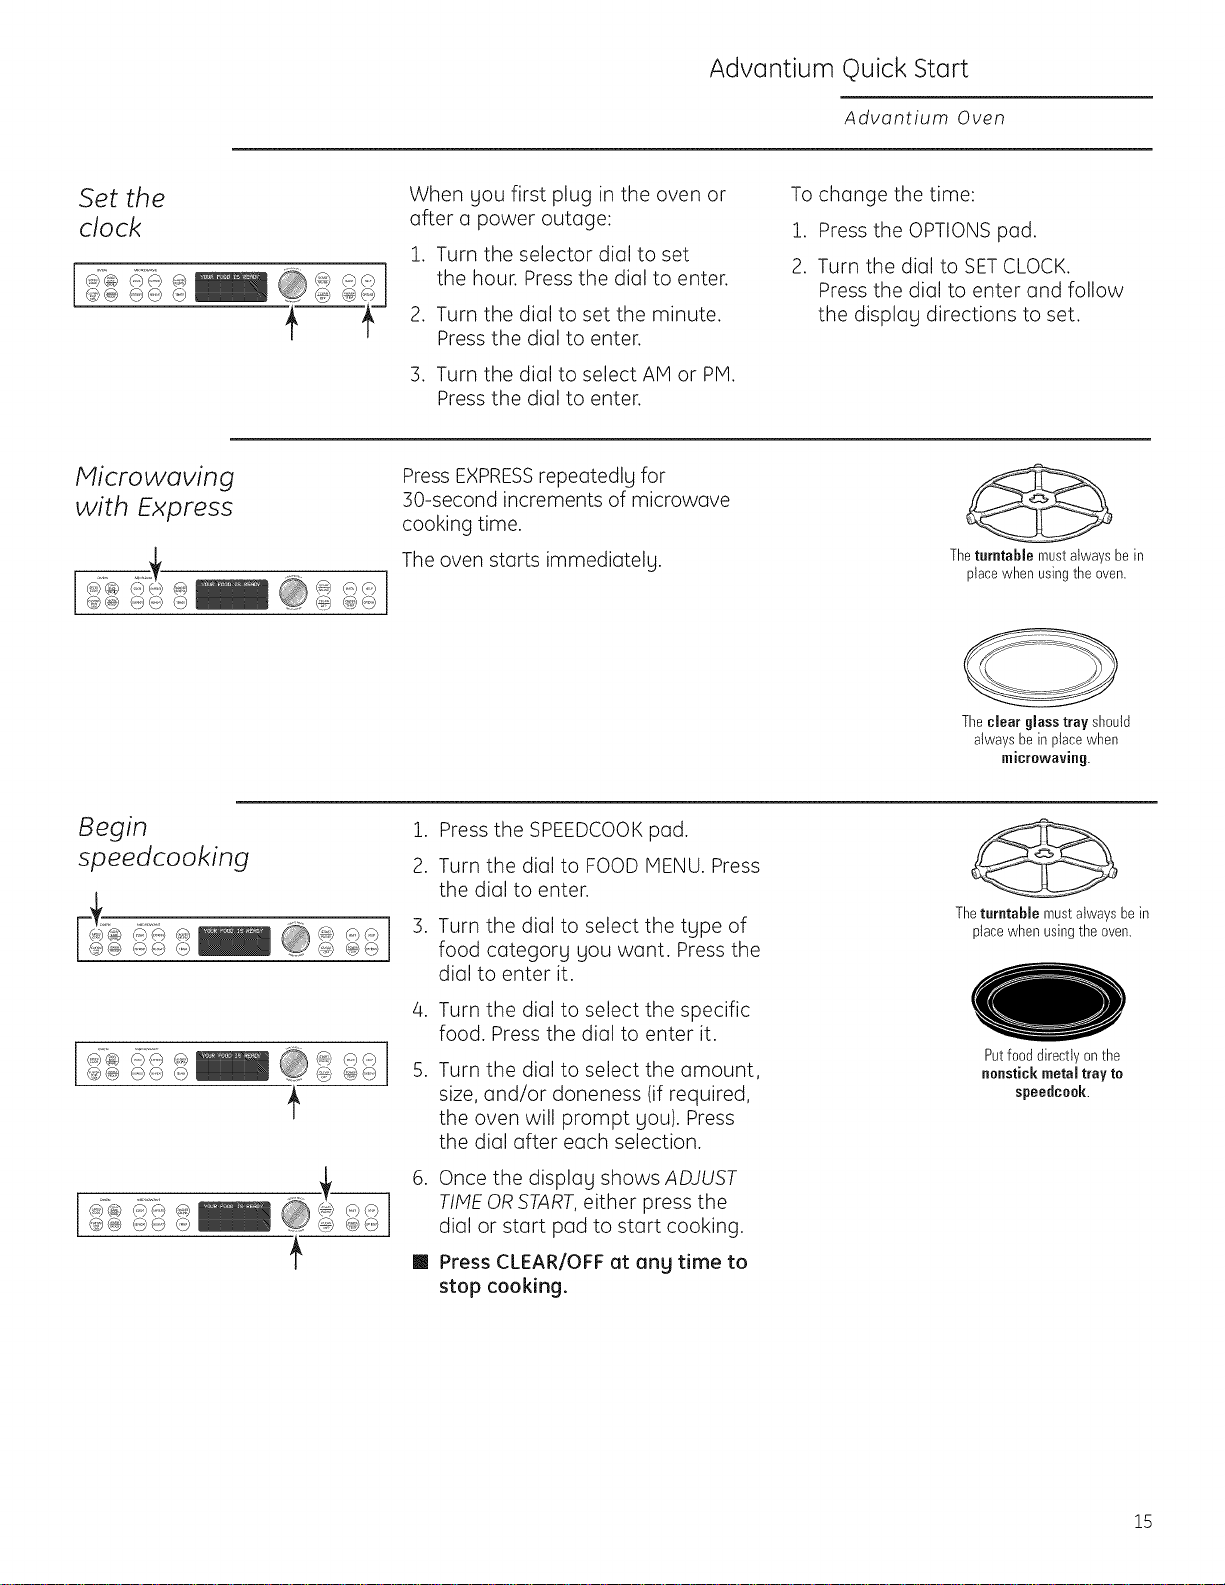
Set the
clock
@@ _;0 @ ........ @(:'}
When gou first plug in the oven or
after a power outage:
1. Turn the selector dial to set
the hour. Press the dial to enter.
2. Turn the dial to set the minute.
Press the dial to enter.
3. Turn the dial to select AM or PM.
Press the dial to enter.
To change the time:
1. Press the OPTIONS pad.
2. Turn the dial to SETCLOCK.
Press the dial to enter and follow
the displag directions to set.
tWicrowaving
with Express
Press EXPRESSrepeatedlg for
30-second increments of microwave
cooking time.
The oven starts immediatelg.
The turntable must always be in
place when using the even.
Theclear glasstray sh0uld
always beinplacewhen
microwaving.
Begin
speedcooking
..... @@
@@ @@ @ ......
1. Press the SPEEDCOOK pad.
2. Turn the dial to FOOD MENU. Press
the dial to enter.
.
.
.
@@ @@ @ .......
Turn the dial to select the tgpe of
food categorg gou want. Press the
dial to enter it.
Turn the dial to select the specific
food. Press the dial to enter it.
Turn the dial to select the amount,
size, and/or doneness (if required,
the oven will prompt you). Press
the dial after each selection.
Once the displag shows ADJUST
TIME ORSTART,either press the
dial or start pad to start cooking.
PressCLEAR/OFF at ang time to
stop cooking.
The turntable must always be in
place when using the oven.
Putfooddirectlyonthe
uaustick metal tray to
spee{lceek.
15
Speedcook Menu Guide
Advantium Oven
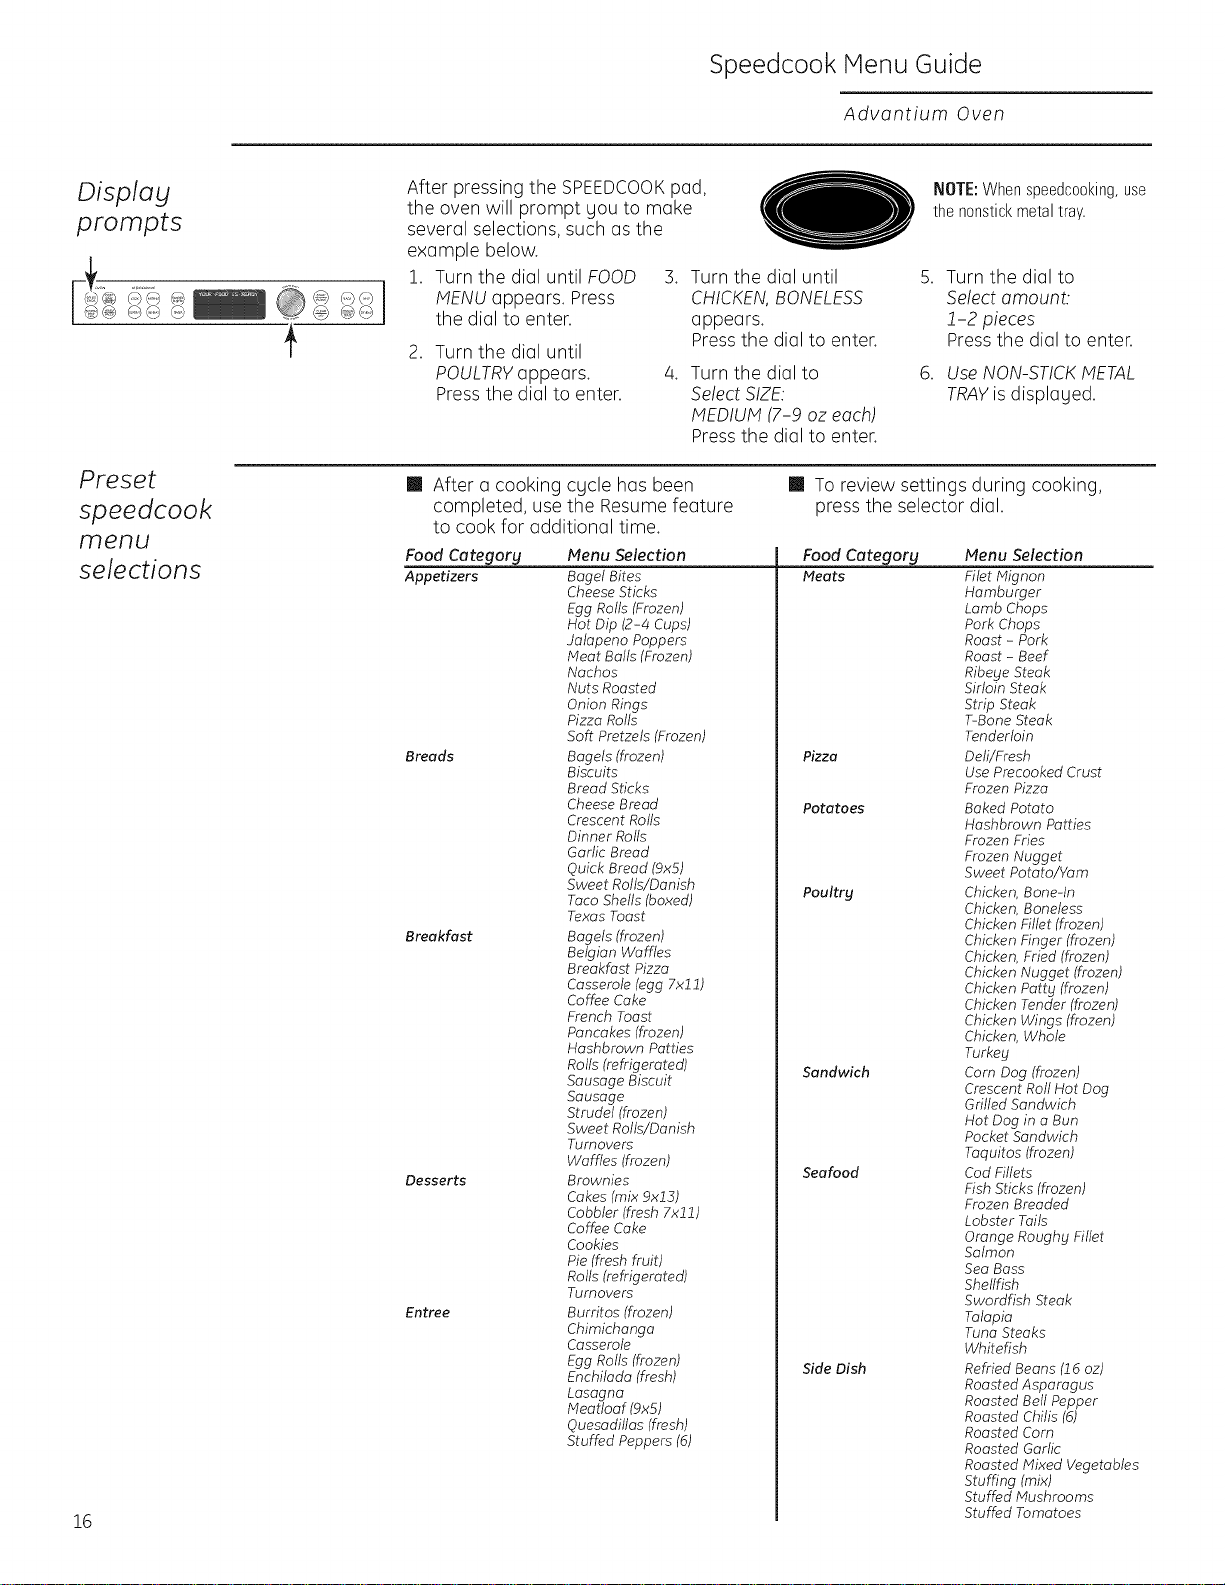
Display
prompts
,t
Preset
speedcook
menu
selections
16
After pressing the SPEEDCOOKpad,
the oven will prompt you to make
several selections, such as the
example below.
1. Turn the dial until FOOD
MENU appears. Press
the dial to enter.
2. Turn the dial until
POULTRYappears.
Pressthe dial to enter.
3. Turn the dial until
CHICKEN,BONELESS
appears.
Pressthe dial to enter.
/4. Turn the dial to
Select SIZE:
MEDIUM(7-9 oz each)
Pressthe dial to enter.
NOTE:Whenspeedcooking,use
the nonstickmetaltray.
5. Turn the dial to
Select amount:
!-2 pieces
Press the dial to enter.
6. Use NON-STICKMETAL
TRAYis displayed.
[] After a cooking cgcle has been
completed, use the Resume feature
to cook for additional time.
Food Category Menu Selection
Appetizers Bagel Bites
Cheese Sticks
Egg Rolls (Frozen)
Hot Dip (2-4 Cups)
Jalapeno Poppers
Meat Balls (Frozen)
Nachos
Nuts Roasted
Onion Rings
Pizza Rolls
Soft Pretzels (Frozen)
Breads Bagels (frozen)
Biscuits
Bread Sticks
Cheese Bread
Crescent Rolls
Dinner Rolls
Garlic Bread
Quick Bread (9x5)
Sweet Rolls/Danish
Taco Shells (boxed)
Texas Toast
Breakfast Bagels (frozen)
Belgian Waffles
Breakfast Pizza
Casserole (egg 7x11)
Coffee Cake
French Toast
Pancakes (frozen)
Hashbrown Patties
Rolls (refrigerated)
Sausage Biscuit
Sausage
Strudel (frozen)
Sweet Rolls/Danish
Turnovers
Waffles (frozen)
Desserts Browdies
Cakes (mix 9x13)
Cobbler (fresh 7x11)
Coffee Cake
Cookies
Pie (fresh fruit)
Rolls (refrigerated)
Turnovers
Entree Burritos (frozen)
Chimichanga
Casserole
Egg Rolls (frozen)
Enchilada (fresh)
Lasagna
Meatloaf (9x5)
Quesadillas (fresh)
Stuffed Peppers (B)
[] To review settings during cooking,
press the selector dial.
Food Category Menu Selection
Heats Filet Mignon
Hamburger
Lamb Chops
Pork Chops
Roast - Pork
Roast - Beef
Ribege Steak
Sirloin Steak
Strip Steak
T-Bone Steak
Tenderloin
Pizza Deft/Fresh
Use Precooked Crust
Frozen Pizza
Potatoes Baked Potato
Hashbrown Patties
Frozen Fries
Frozen Nugget
Sweet Potato/Yam
Paultry Chicken, Bone-In
Chicken, Boneless
Chicken Fillet (frozen)
Chicken Finger (frozen)
Chicken, Fried (frozen)
Chicken Nugget (frozen)
Chicken Patty (frozen)
Chicken Tender (frozen)
Chicken Wings (frozen)
Chicken, Whole
Turkey
Sandwich Cam Dog (frozen)
Crescent Roll Hot Dog
Grilled Sandwich
Hot Dog in a Bun
Pocket Sandwich
Taquitos (frozen)
Seafood Cod Fillets
Fish Sticks (frozen)
Frozen Breaded
Lobster Tails
Orange Roughs Fillet
Salmon
Sea Bass
Shellfish
Swordfish Steak
Talapia
Tuna Steaks
Whitefish
Side Dish Raffled Beans (16 oz)
Roasted Asparagus
Roasted Bell Pepper
Roasted Chilis (6)
Roasted Cam
Roasted Garlic
Roasted Mixed Vegetables
Stuffing (mix)
Stuffed Mushrooms
Stuffed Tomatoes
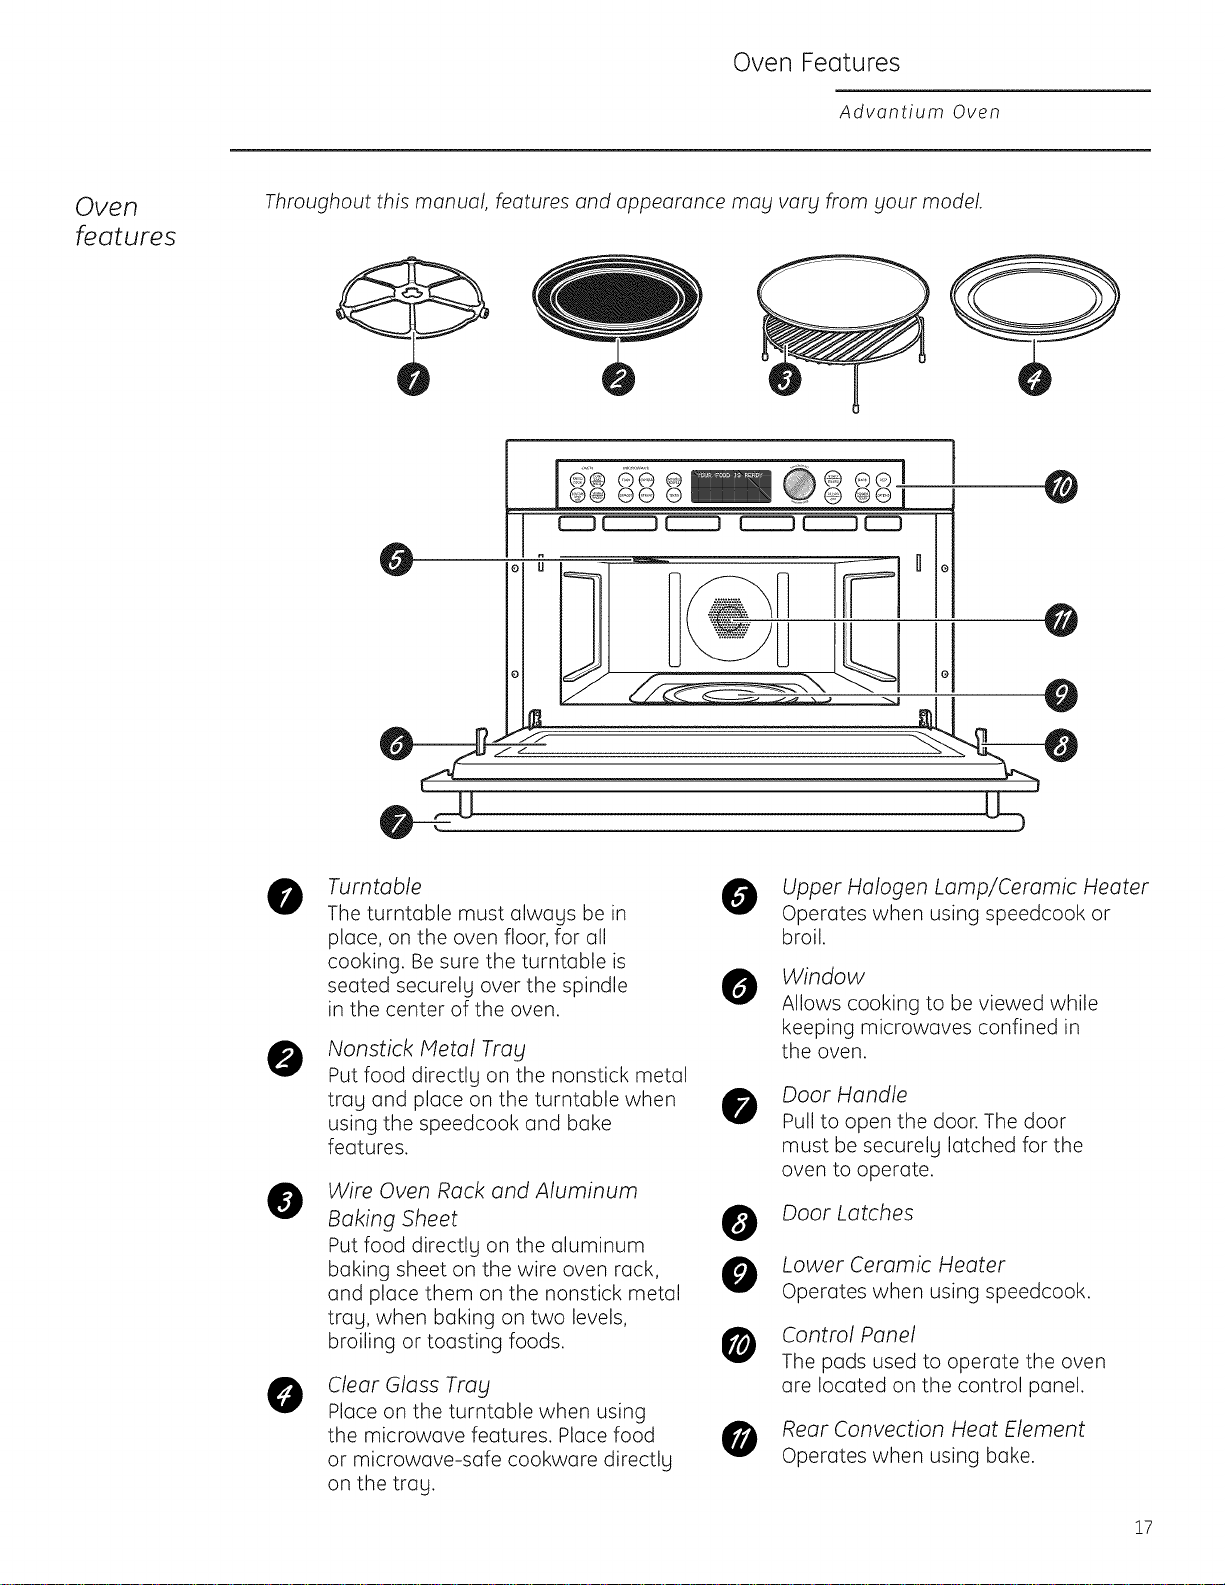
Oven Features
Advantium Oven
Oven
features
Throughout this manual, features and appearance may vary from your model.
0
0
0
@
O
Turntable
The turntable must always be in
place, on the oven floor, for all
cooking. Be sure the turntable is
seated securely over the spindle
in the center of the oven.
Nonstick Metal Trabl
Put food directly on the nonstick metal
tray and place on the turntable when
using the speedcook and bake
features.
Wire Oven Rack and Aluminum
Baking Sheet
Put food directly on the aluminum
baking sheet on the wire oven rack,
and place them on the nonstick metal
tray, when baking on two levels,
broiling or toasting foods.
Clear Glass Trabl
Place on the turntable when using
the microwave features. Place food
or microwave-safe cookware directly
on the tray.
Upper Halogen Lamp/Ceramic Heater
Operates when using speedcook or
broil.
0
0
Window
Allows cooking to be viewed while
keeping microwaves confined in
the oven.
Door Handle
Pull to open the door. The door
must be securely latched for the
oven to operate.
Door Latches
Lower Ceramic Heater
Operates when using speedcook.
Control Panel
The pads used to operate the oven
are located on the control panel.
Rear Convection Heat Element
Operates when using bake.
17

Oven Features
Advantium Oven
Cooking
controls
With your Advantium oven,you cancook with high-intensity halogen lights,ceramicheatersand convection
heating elements,and/or conventionalmicrowave energy.
m
18
O
SPEEDCOOK/Repeat Last
Press this pad to access the preset
speedcook menu. Press and hold for
3 seconds to repeat the last cooking
selection.
CONV BAKE/BROIL
Press this pad to convection bake,
broil or toast.
CUSTOM SPEEDCOOK
Press this pad to set your own
speedcook program.
WARM/PROOF
Select WARM to keep hot, cooked
foods at serving temperature.
Select PROOF to set for mworm
environment useful for rising
yeast-leavened products.
COOK (Microwave)
Press this pod to microwave food that
is not in the FAV©RITERECIPES section.
0
EXPRESS(Microwave)
Press for 30 seconds of microwave
cooking time. Each time the pad
is pressed adds on additional 30
seconds to the remaining cooking
time. The oven starts immediately.
DEFROST (Microwave)
Press this pod to defrost, soften or
melt frozen foods.
0
REHEAT (Microwave)
Press this pod to reheat servings of
previously cooked foods or a plate
of leftovers.
FAVORITE RECIPES
Press this pad to add, edit (change) or
remove a recipe from the memory.
TIMER
Press this pad to set the minute timer.
Display
Shows and instructs the use of all
features on the oven.
SELECTOR DIAL
Turn to select, Press to enter. First turn,
then press the dial to make option,
food power level or temperature
selections. Also use the dial to increase
(turn clockwise) or decrease (turn
counterclockwise) cooking times.
START/PAUSE
Press this pad to start or pause any
cooking function.
CLEAR/OFF
Press this pad to cancel ALL oven
programs except the clock and timer.
0
BACK
Press this pad to step buck one or
more levels in the program process,
such as when entering custom recipes.
HELP
Press this pad to find out more about
your oven's features.
@
@
POWER/TEMP
During cooking, press this pad and
turn/press the selector dial to change
the microwave power level, the
convection bake temperature or the
speedcook temperature by adjusting
the upper and lower lamp and heater
settings.
OPTIONS
Press this pod to set the Clock and
access the Beeper Volume, Clock
Display ON/OFF, Display Scroll Speed,
Delay Start and Reminder features.
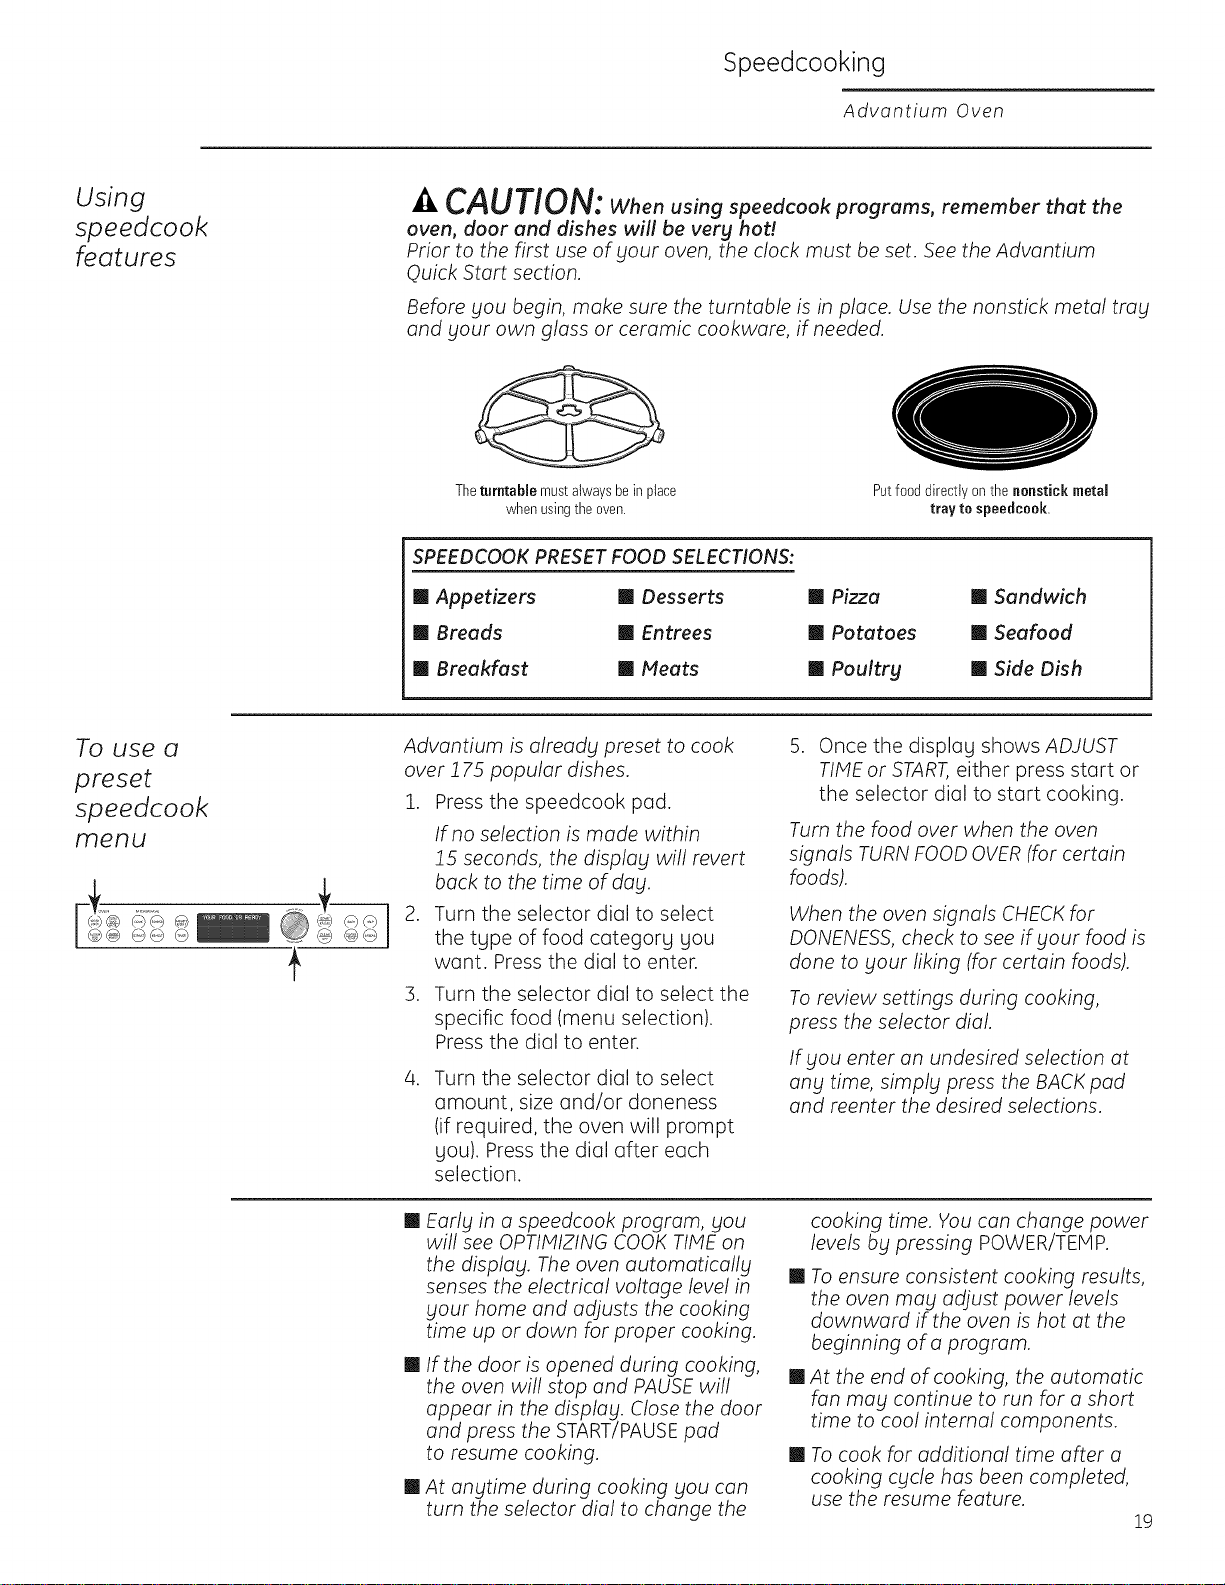
Speedcooking
Advantium Oven
Using
speedcook
features
CAUTION: When using speedcook programs, remember that the
oven, door and dishes will be verg hot!
Prior to the first use of gout oven, the clock must be set. See the Advantium
Quick Start section.
Before gou begin, make sure the turntable is in place. Use the nonstick metal trabt
and btour own glass or ceramic cookware, if needed.
Theturntable mustalwaysbeinplace
whenusingtheoven.
Putfooddirectlyonthe nonstick metal
tray to speedcook.
SPEEDCOOK PRESET FOOD SELECTIONS:
[] Appetizers [] Desserts
[] Breads [] Entrees
[] Breakfast [] Meats
[] Pizza [] Sandwich
[] Potatoes [] Seafood
[] Poultrg [] Side Dish
TO use 0
preset
speedcook
menu
Advantium is alreadg preset to cook
over 175 popular dishes.
1. Press the speedcook pad.
If no selection is made within
15 seconds, the displag will revert
back to the time of dabt.
2. Turn the selector dial to select
the type of food category you
want. Press the dial to enter.
3. Turn the selector dial to select the
specific food (menu selection).
Press the dial to enter.
. Turn the selector dial to select
amount, size and/or doneness
(if required, the oven will prompt
you). Press the dial after each
selection.
5. Once the display shows ADJUST
TIME or START,either press start or
the selector dial to start cooking.
Turn the food over when the oven
signals TURN FOOD OVER (for certain
foods).
When the oven signals CHECK for
DONENESS, check to see if gour food is
done to _lour liking (for certain foods).
To review settings during cooking,
press the selector dial.
If gou enter an undesired selection at
any time, simplg press the BACK pad
and reenter the desired selections.
[] Early in a speedcook program, you
will see OPTIMIZING COOK TIME on
the display. The oven automatically
senses the electrical voltage level in
your home and adjusts the cooking
time up or down for proper cooking.
[]
If the door is opened during cooking,
the oven will stop and PAUSE will
appear in the display. Close the door
and press the START/PAUSEpad
to resume cooking.
[] At angtime during cooking gou can
turn the selector dial to change the
cooking time. You can change power
levels bg pressing POWER/TEMP.
[] To ensure consistent cooking results,
the oven may adjust power levels
downward if the oven is hot at the
beginning of a program.
[] At the end of cooking, the automatic
fan mag continue to run for a short
time to cool internal components.
[] To cook for additional time after a
cooking cgcle has been completed,
use the resume feature.
19
Speedcooking
Advantium Oven
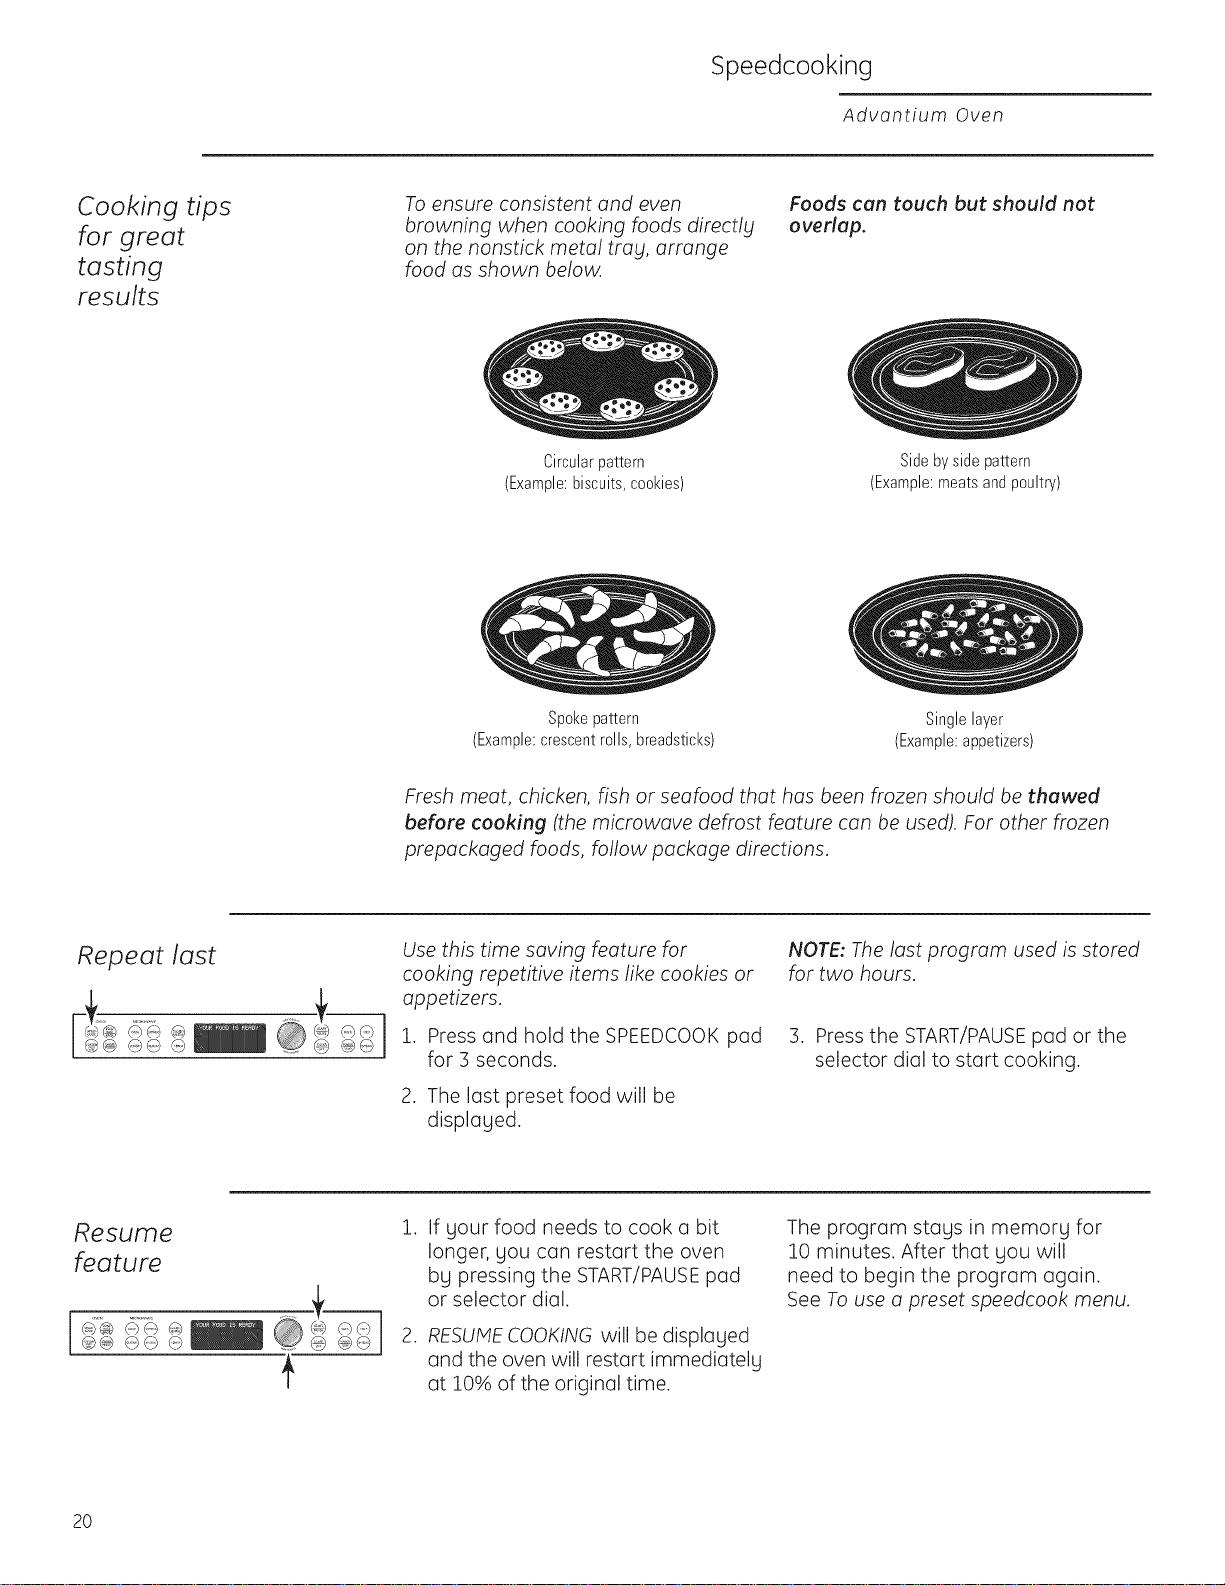
Cooking tips
for great
tasting
results
To ensure consistent and even
browning when cooking foods directl_t
on the nonstick metal trabh arrange
food as shown below.
Circularpattern
(Example:biscuits,cookies)
Foods can touch but should not
overlap.
Sidebysidepattern
(Example:meatsandpoultry)
Spokepattern Singlelayer
(Example:crescentrolls,breadsticks) (Example:appetizers)
Fresh meat, chicken, fish or seafood that has been frozen should be thawed
before cooking (the microwave defrost feature can be used). For other frozen
prepackaged foods, follow package directions.
Repeat last
Use this time saving feature for
cooking repetitive items like cookies or
appetizers.
1. Press and hold the SPEEDCOOK pad
for 3 seconds.
2. The last preset food will be
displaged.
NOTE" The last program used is stored
for two hours.
3. Press the START/PAUSEpad or the
selector dial to start cooking.
Resume
feature
@@ @@ @ ......
1. If gour food needs to cook a bit
longer, gou can restart the oven
bg pressing the START/PAUSEpad
or selector dial.
2. RESUMECOOKING will be displaged
and the oven will restart immediatelg
at 10% of the original time.
The program stags in memorg for
10 minutes. After that gou will
need to begin the program again.
See To use a preset speedcook menu.
20
Speedcooking
Advantium Oven
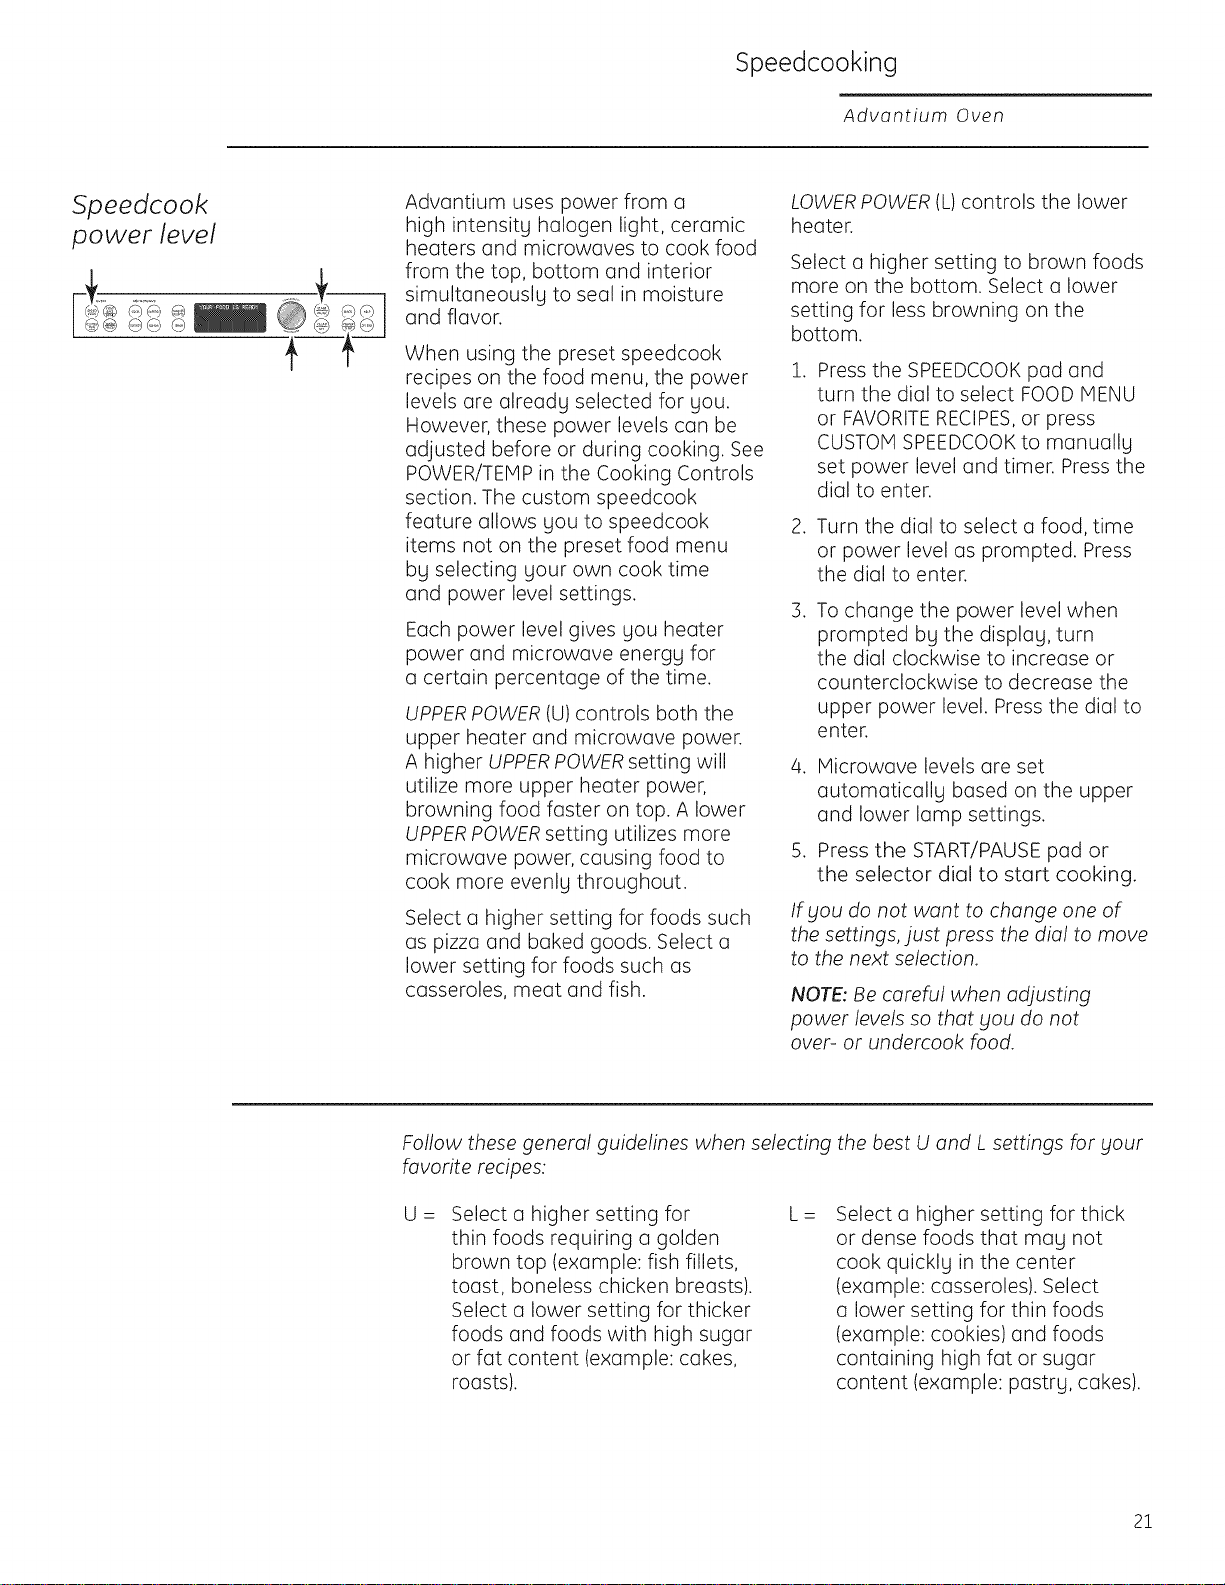
5peedcook
power level
Advantium uses power from a
high intensity halogen light, ceramic
heaters and microwaves to cook food
from the top, bottom and interior
simultaneouslLI to seal in moisture
and flavor.
When using the preset speedcook
recipes on the food menu, the power
levels are alreadg selected for gou.
However, these power levels can be
adjusted before or during cooking. See
POWER/TEMP in the Cooking Controls
section. The custom speedcook
feature allows gou to speedcook
items not on the preset food menu
by selecting your own cook time
and power level settings.
Each power level gives gou heater
power and microwave energg for
a certain percentage of the time.
UPPERPOWER (U)controls both the
upper heater and microwave power.
A higher UPPER POWER setting will
utilize more upper heater power,
browning food faster on top. A lower
UPPERPOWER setting utilizes more
microwave power, causing food to
cook more evenlLI throughout.
Select a higher setting for foods such
as pizza and baked goods. Select a
lower setting for foods such as
casseroles, meat and fish.
LOWER POWER (L) controls the lower
heater.
Select a higher setting to brown foods
more on the bottom. Select a lower
setting for less browning on the
bottom.
,
Press the SPEEDCOOK pad and
turn the dial to select FOOD MENU
or FAVORITE RECIPES,or press
CUSTOM SPEEDCOOK to manuallLI
set power level and timer. Press the
dial to enter.
2. Turn the dial to select a food, time
or power level as prompted. Press
the dial to enter.
,
To change the power level when
prompted by the display, turn
the dial clockwise to increase or
counterclockwise to decrease the
upper power level. Press the dial to
enter.
,
,
Microwave levels are set
automaticallg based on the upper
and lower lamp settings.
Press the START/PAUSE pad or
the selector dial to start cooking.
If _lOUdo not want to change one of
the settings, just press the dial to move
to the next selection.
NOTE: Be careful when adjusting
power levels so that _lOUdo not
over- or undercook food.
Follow these general guidelines when selecting the best U and L settings for _tour
favorite recipes:
U = Select a higher setting for L--
thin foods requiring a golden
brown top (example: fish fillets,
toast, boneless chicken breasts).
Select a lower setting for thicker
foods and foods with high sugar
or fat content (example: cakes,
roasts).
Select a higher setting for thick
or dense foods that mag not
cook quicklg in the center
(example: casseroles). Select
a lower setting for thin foods
(example: cookies) and foods
containing high fat or sugar
content (example: pastrg, cakes).
21
Speedcooking
Advantium Oven
Speedcook
cookware
[] Follow cookware suggestions on the
oven display or in the cookbook or
cooking guide.
[] Cookware will become hot because
of heat transferred from the heated
food. Oven mitts will be needed to
handle the cookware.
[]
[]
[]
Place food directly on the nonstick
metal tray when cooking, unless
prompted by the oven to do
otherwise.
Use the nonstick metal tray in the
same way you would use a shallow
baking pan or baking tray.
In addition to the cookware
provided, you can use non-metal
casserole dishes, pie plates and
other heat-safe cookware. Place
them directly on the turntable.
[]
[]
[]
Be sure to select a size that will
rotate easily.
Place the nonstick metal tray
on the turntable. Place glass or
ceramic cookware on the tray.
Do not use cookware or coverings
made of paper, plastic or foil when
cooking during a speedcook cycle.
Custom
speedcook
I ,
Advantium gives Llou the flexibilitLI
to cook Llour favorite dishes.
If gou want to cook a food item that is
not among the preset selections, use
custom speedcook.
1. Press the CUSTOM SPEEDCOOK
pad.
If no entries are made within 15
seconds, the display will revert back
to the time of day.
2. Turn the selector dial to select
the cooking time. Press the dial
to enter.
The display will prompt you to
select the power level(s).
, Turn the dial clockwise to increase
or counterclockwise to decrease
the upper power level. Press the
dial to enter.
,
,
Turn the dial to change the
lower power level. Press the
dial to enter.
Press the START/PAUSEpad or press
the selector dial to start cooking.
For power level and cooking time
suggestions, use your cooking guide
or cookbook.
22
Speedcooking
Advantium Oven
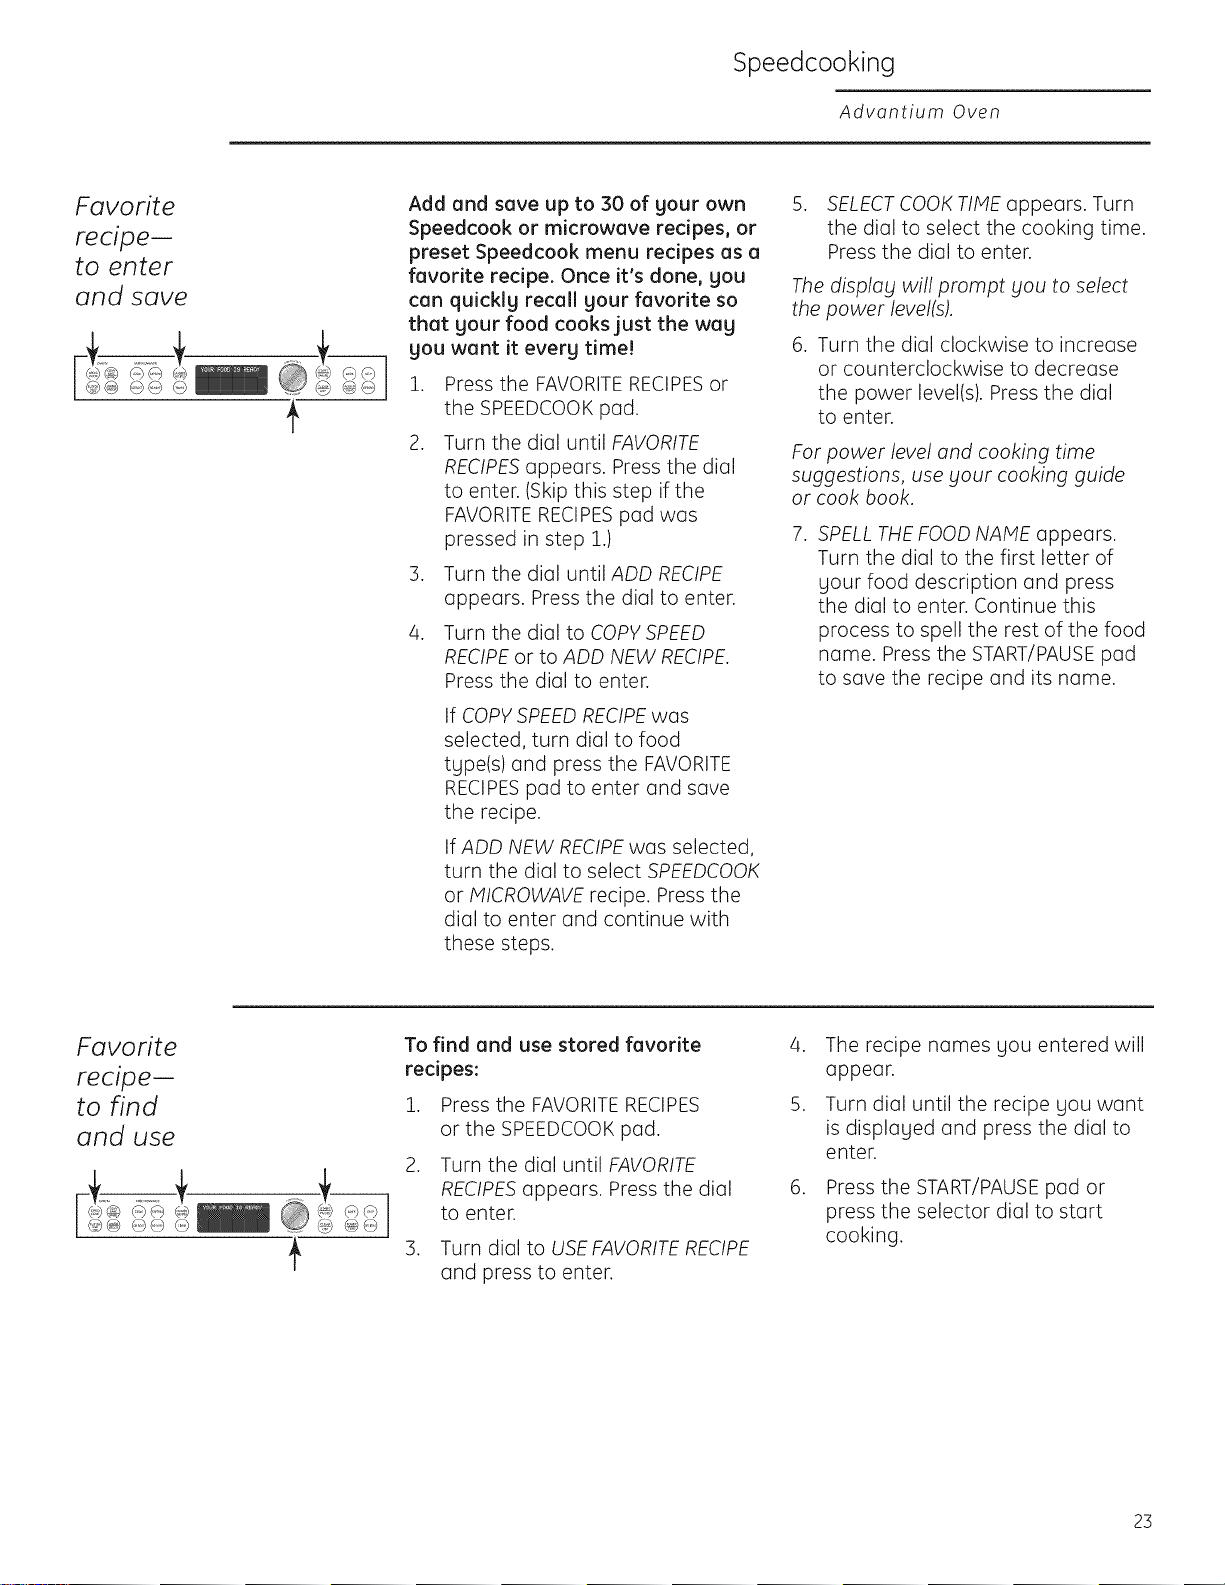
Favorite
recipe--
to enter
and save
Add end save up to 30 of sour own
Speedcook or microwave recipes, or
preset Speedcook menu recipes us e
favorite recipe. Once it's done, SOU
can quickly recall sour favorite so
that sour food cooks just the wag
Sou want it everg time!
1. Press the FAVORITERECIPESor
the SPEEDCOOKpad.
2. Turn the dial until FAVORITE
RECIPESappears. Press the dial
to enter. (Skip this step if the
FAVORITE RECIPESpad was
pressed in step 1.)
3. Turn the dial until ADD RECIPE
appears. Press the dial to enter.
4. Turn the dial to COPYSPEED
RECIPEor to ADD NEW RECIPE.
Press the dial to enter.
If COPYSPEED RECIPEwas
selected, turn dial to food
type(s) and press the FAVORITE
RECIPESpad to enter and save
the recipe.
If ADD NEW RECIPEwas selected,
turn the dial to select SPEEDCOOK
or MICROWAVE recipe. Press the
dial to enter and continue with
these steps.
5. SELECTCOOK TIME appears. Turn
the dial to select the cooking time.
Press the dial to enter.
The display will prompt Sou to select
the power level(s).
. Turn the dial clockwise to increase
or counterclockwise to decrease
the power level(s). Press the dial
to enter.
For power level and cooking time
suggestions, use £our cooking guide
or cook book.
.
SPELL THE FOOD NAME appears.
Turn the dial to the first letter of
sour food description and press
the dial to enter. Continue this
process to spell the rest of the food
name. Press the START/PAUSEpad
to save the recipe and its name.
Favorite
recipe--
to find
and use
"SSSS @
To find and use stored favorite
recipes:
1. Press the FAVORITERECIPES
or the SPEEDCOOK pad.
2. Turn the dial until FAVORITE
RECIPESappears. Press the dial
to enter.
3. Turn dial to USEFAVORITE RECIPE
and press to enter.
4. The recipe names gou entered will
appear.
5. Turn dial until the recipe gou want
is displaged and press the dial to
enter.
.
Press the START/PAUSEpad or
press the selector dial to start
cooking.
2]
Speedcooking
Advantium Oven
Favorite
recipe--
to adjust
or change
@ ...... @@
t
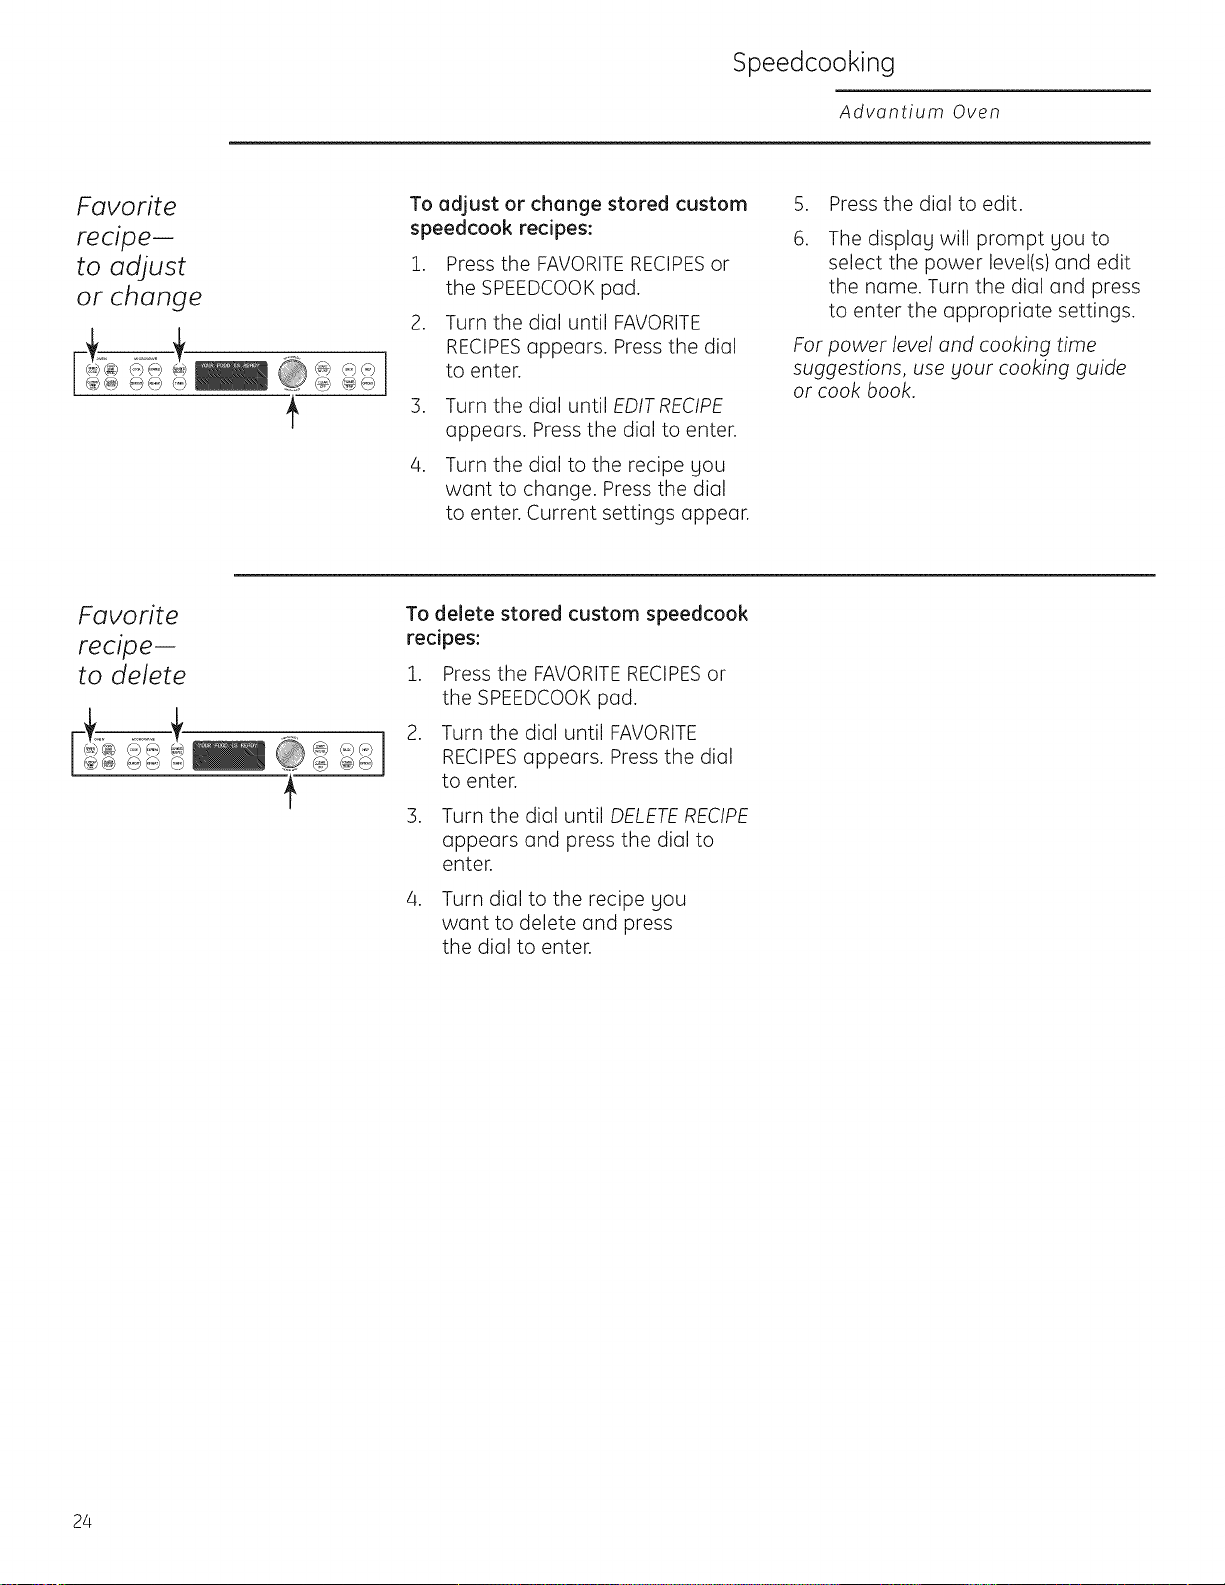
To edjust or chenge stored custom
speedcook recipes:
1. Press the FAVORITE RECIPESor
the SPEEDCOOK pad.
2. Turn the dial until FAVORITE
RECIPESappears. Press the dial
to enter.
3. Turn the dial until EDIT RECIPE
appears. Press the dial to enter.
4. Turn the dial to the recipe gou
want to change. Press the dial
to enter. Current settings appear.
5. Press the dial to edit.
.
The displag will prompt gou to
select the power level(s) and edit
the name. Turn the dial and press
to enter the appropriate settings.
For power level and cooking time
suggestions, use btour cooking guide
or cook book.
Favorite
recipe-
to delete
f
To delete stored custom speedcook
recipes:
1. Press the FAVORITERECIPESor
the SPEEDCOOKpad.
2. Turn the dial until FAVORITE
RECIPESappears. Press the dial
to enter.
3. Turn the dial until DELETE RECIPE
appears and press the dial to
enter.
4. Turn dial to the recipe gou
want to delete and press
the dial to enter.
24
Speedcooking
Advantium Oven
Things that
are normal
Cooking Times
[] When speedcooking preprogrammed foods,
you may see OPTIMIZING COOK TIME in the
display several seconds after you press
START/PAUSE.The oven automatically
senses the electrical voltage level in your
home and adjusts the cooking time up or
down for proper cooking.
Fen/Vent
[]
[]
The fan will be on during cooking. At the
end of cooking, the automatic fan may
continue to run for a short time, and the
display will read Oven is Cooling. The fan
will automatically shut off when the internal
ports of the oven have cooled.
The oven vent will emit warm air while
the oven is on.
Lights
[] When the oven is on, light may be visible
around the door or outer case.
[] The halogen lights will dim and cycle
on and off during u speedcook cycle,
sometimes even at full power levels.
This is normal. The oven senses the
heat level and adjusts automatically.
Oven Heut
[] No preheating time is required during
Speedcook cycles. The oven begins cooking
immediately.
[] The door and inside of the oven will be very
hot. Use caution when opening the door
and removing food.
[] Do not use cookware or coverings made
of paper, plastic or foil when cooking during
a speedcook cycle.
[]
When cooking for an extended period
of time, the oven may automatically
reduce the power levels to maintain the
appropriate level of oven heat.
Sounds
[] Clicks and a fun blowing are normal sounds
during cooking. The relay board is turning
components on and off.
25
Baking, Broiling and Toasting
Advantium Oven
Convection
Baking,
Broiling
and
Toasting
Convection baking allows you to cook foods the same
way as o conventional oven, usingo heating element
to raisethe temperature of the air insidethe oven.Any
oven temperature from 250%to 450°Fmay beset.
Broilingallows you to broilfoods in the same way as
o conventional oven.
Toastingallows you to toast foods the same way as
o conventional oven.
Afan gently circulates heated air throughout the oven,
over and around the food. Becausethe heated air is
kept constantly moving,not permitting o layer of
cooler air to develop around the food, some foods cook
slightly faster than in regular oven cooking.
The turntable must
always be in place when
using the oven.
Putfoodor oven-safe
cool<waredirectlyonthe
nonstick metal tray to bake.
Beforeyou begin,make surethe turntable isin place.
Usethe nonstick metal tray at alltimes when baking.
a,CAUTION:Whenbaking, remember thot
the oven, door and dishes will be very hotI.
How to
Convection Bake
@@() ....
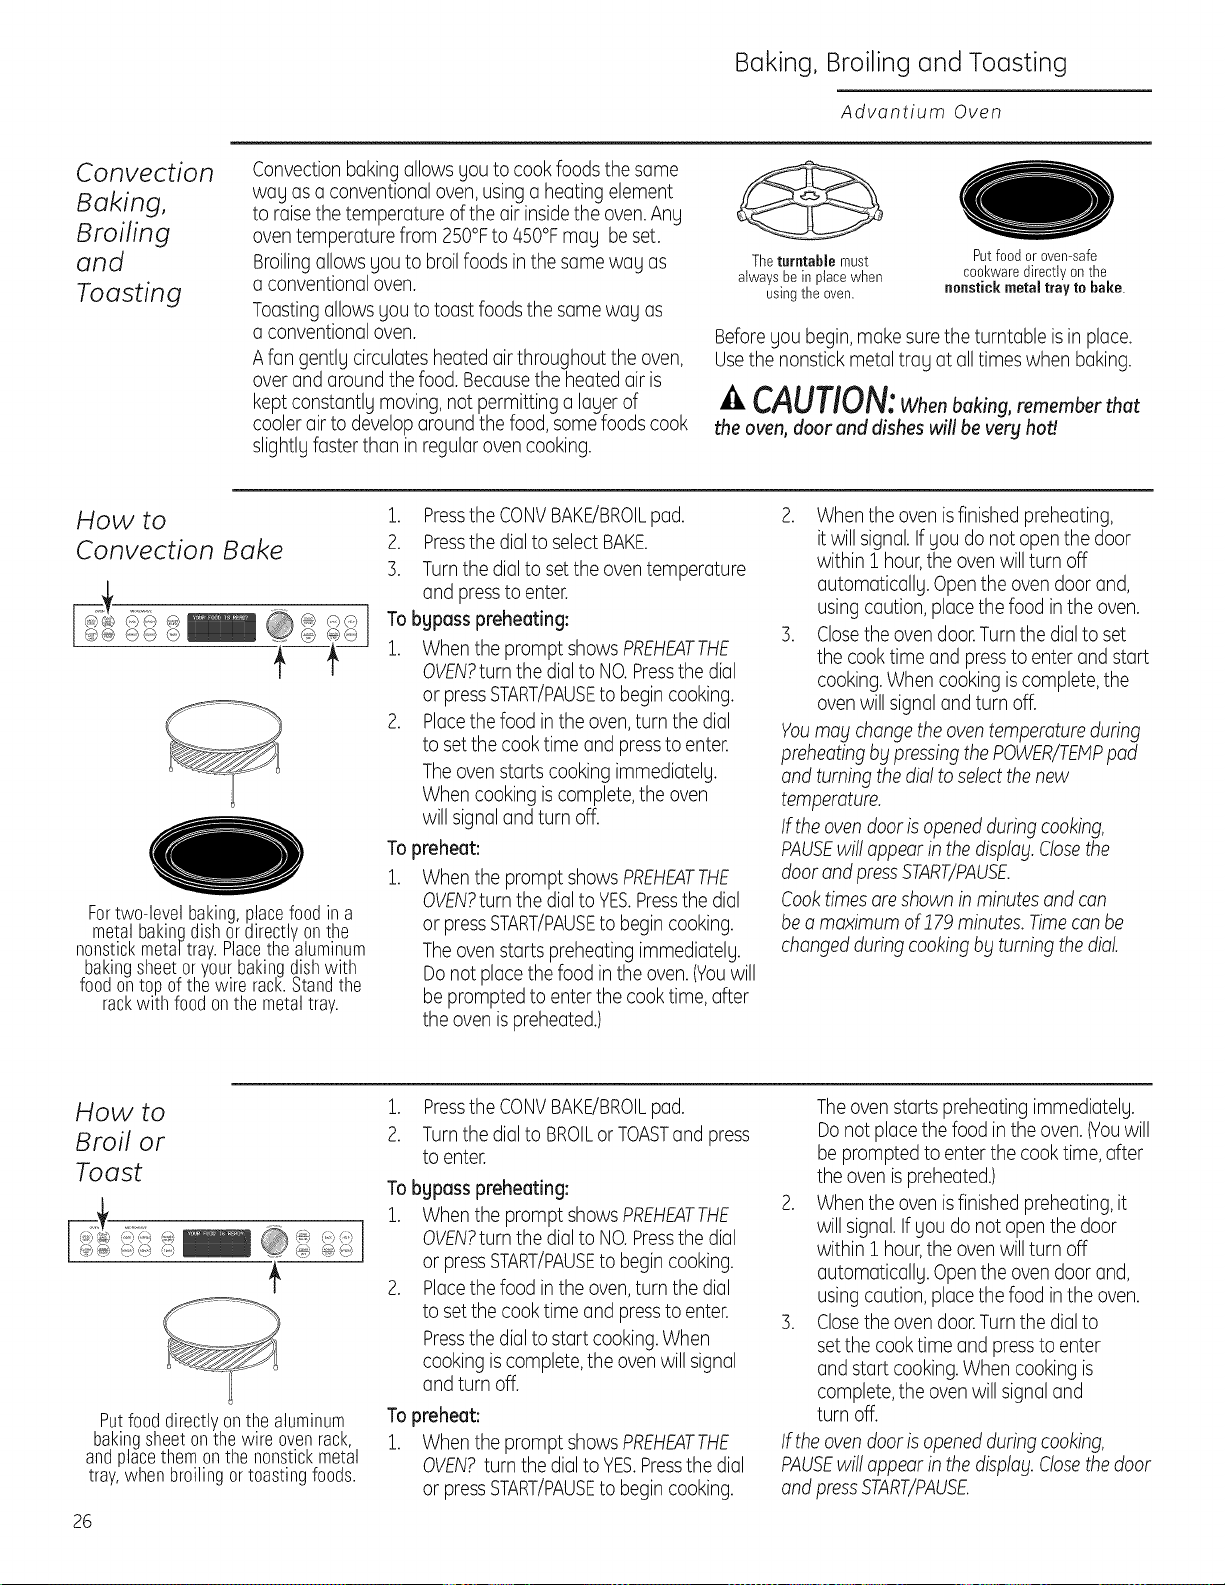
Fortwo-levelbaking,placefoodin a
metalbakingdishordirectlyonthe
nonstickmeta/tray.Placethealuminum
bakingsheetoryourbakingdishwith
foodontop ofthewire rack.Standthe
rackwith foodonthe metaltray.
1. PresstheCONVBAKE/BROILpad.
2. Pressthe dial to selectBAKE.
3. Turnthe dial to set the oven temperature
and pressto enter.
Tobgpasspreheating:
1. When the prompt shows PREHEATTHE
OVEN?turnthe dial to NO.Pressthe dial
or pressSTART/PAUSEto begin cooking.
2. Placethe food in the oven,turn the dial
to set the cook time and pressto enter.
Theovenstarts cooking immediately.
When cooking iscomplete, the oven
will signaland turn off.
Topreheat:
1. When the prompt shows PREHEATTHE
OVEN?turnthe dial to YES.Pressthe dial
or pressSTART/PAUSEto begin cooking.
Theovenstarts preheating immediately.
Do not placethe food in the oven.(Youwill
be prompted to enterthe cook time,after
the oven ispreheated.)
2. Whenthe oven isfinished preheating,
it will signal.If you do not open the door
within 1 hour,the ovenwill turn off
automatically. Open the oven door and,
using caution,placethe food in the oven.
3. Closethe oven door.Turnthe dial to set
the cook time and pressto enter and start
cooking.When cooking iscomplete, the
ovenwill signal and turn off.
Youmabtchangethe oventemperatureduring
preheatingbbtpressingthe POWER/TEMPpad
and turning thedial to selectthenew
temperature.
#the ovendoor isopenedduring cooking,
PAUSEwill appearinthe displabt.Closethe
door and pressSTART/PAUSE.
Cooktimesare shown in minutesand con
be a maximum of 179 minutes. Timecan be
changedduring cookingb_tturning thedial
How to
Broil or
Toast
...........®® I
Putfooddirectlyontile aluminum
bakingsheetonthewire ovenrack,
andplacethemonthenonstickmetal
tray,whenbroilingor toastingfoods.
26
1. PresstheCONVBAKE/BROILpad.
2. Turnthe dial to BROILor TOASTand press
to enter.
Tobgpasspreheating:
1. When the prompt shows PREHEATTHE
OVEN?turnthe dial to NO.Pressthe dial
or pressSTART/PAUSEto begin cooking.
2. Placethe food in the oven,turn the dial
to set the cook time and pressto enter.
Pressthe dial to start cooking.When
cooking iscomplete, the oven will signal
and turn off.
Topreheat:
1. When the prompt shows PREHEATTHE
OVEN?turn the dial to YES.Pressthe dial
or pressSTART/PAUSEto begin cooking.
Theovenstarts preheating immediately.
Do not placethe food inthe oven.(Youwill
be prompted to enterthe cook time,after
the oven ispreheated.)
2. Whenthe oven isfinished preheating, it
will signal.If you do not open the door
within 1 hour,the ovenwill turn off
automatically. Open the oven door and,
using caution,placethe food in the oven.
3. Closethe oven door.Turnthe dial to
set the cook time and pressto enter
and start cooking.When cooking is
complete, the ovenwill signal and
turn off.
If the ovendoor isopenedduring cooking,
PAUSEwill appearinthe displag.Closethedoor
and pressSTART/PAUSE.
Warming and Proofing
Advantium Oven
Warming
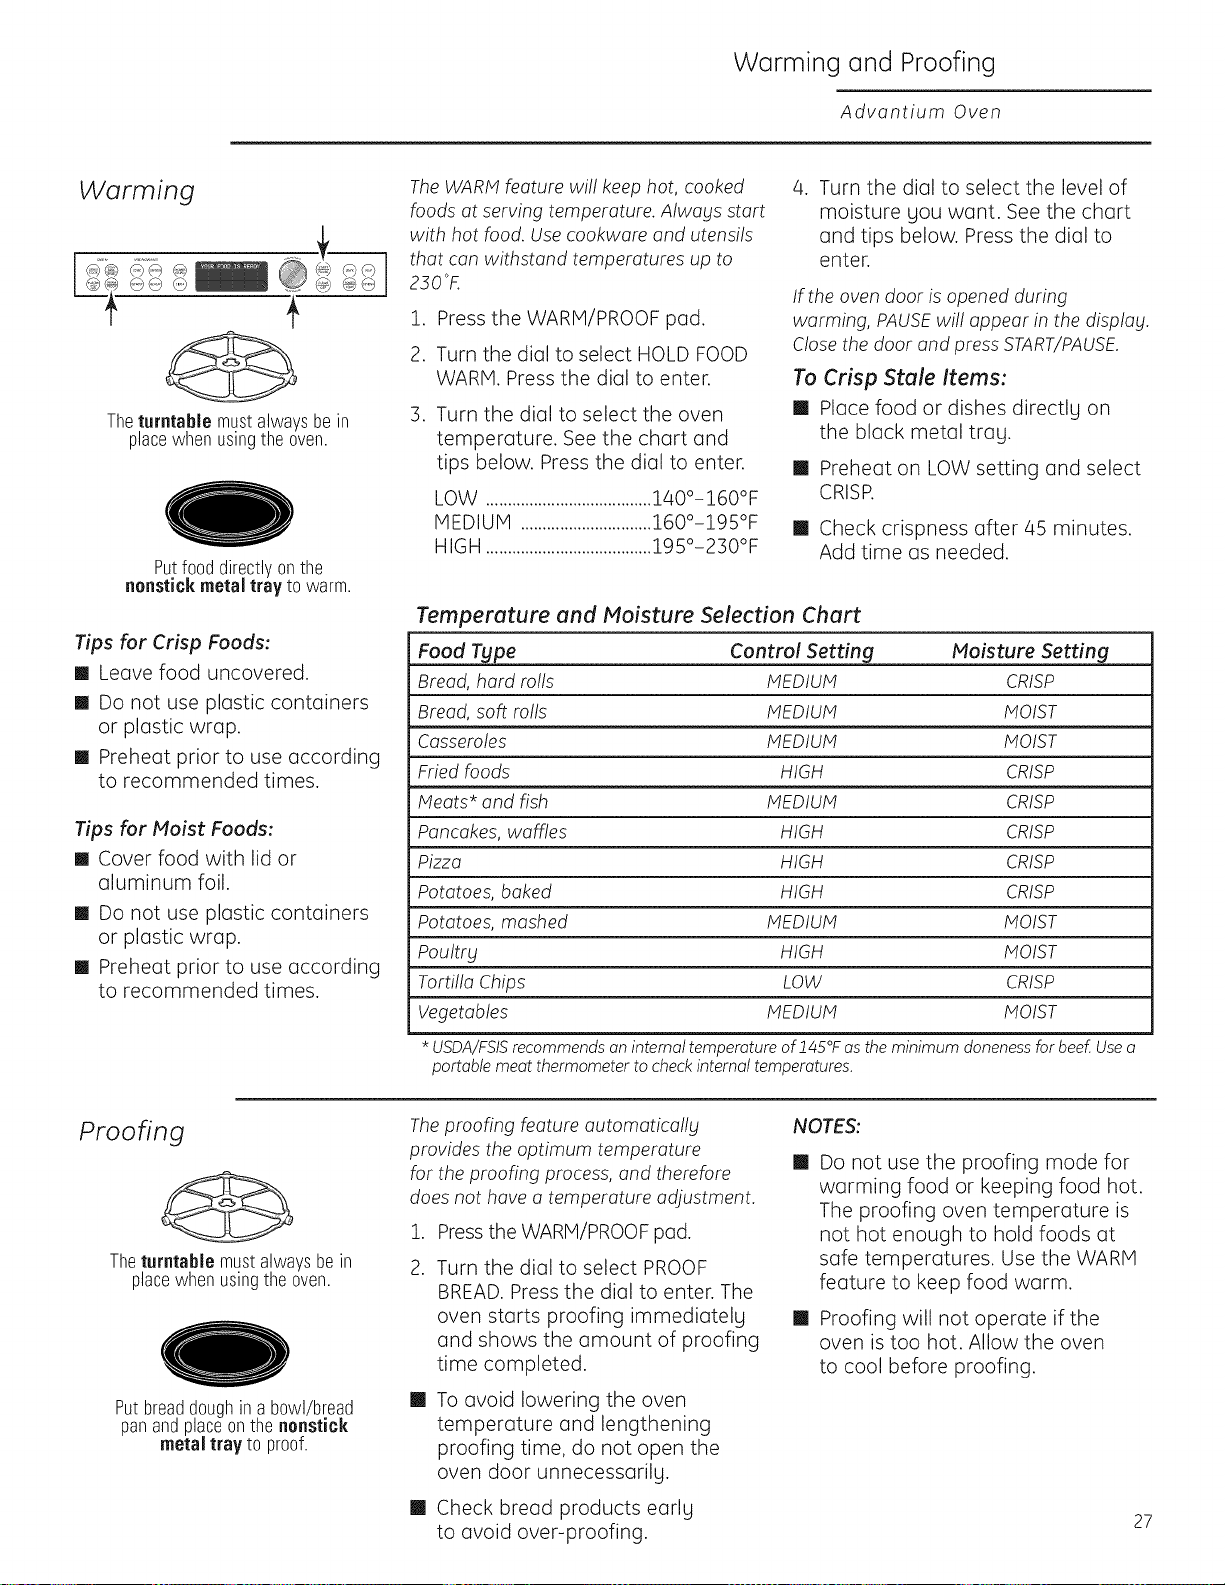
Theturntable mustalwaysbe in
placewhenusingtheoven.
Putfood directly on the
nonstick metal tray to warm.
Tips far Crisp Foods:
[] Leave food uncovered.
[] Do not use plastic containers
or plastic wrap.
[] Preheat prior to use according
to recommended times.
Tips for Moist Foods:
[] Cover food with lid or
aluminum foil.
[] Do not use plastic containers
or plastic wrap.
[] Preheat prior to use according
to recommended times.
TheWARMfeature wi/! keep hot, cooked
foods at serving temperature. Alwags start
with hot food. Use cookware and utensils
that can withstand temperatures up to
230 °F.
1. Press the WARM/PROOF pad.
2. Turn the dial to select HOLD FOOD
WARM. Press the dial to enter.
. Turn the dial to select the oven
temperature. See the chart and
tips below. Press the dial to enter.
LOW ......................................140°-160°F
MEDIUM ..............................160°-195°F
HIGH ......................................195°-230°F
. Turn the dial to select the level of
moisture Sou want. See the chart
and tips below. Press the dial to
enter.
If the oven door is opened during
warming, PAUSEwil! appear in the displag.
Closethe door and press START/PAUSE.
To Crisp Stale Items:
[] Place food or dishes directlg on
the black metal trag.
[] Preheat on LOW setting and select
CRISR
[] Check crispness after 45 minutes.
Add time as needed.
Temperature and Moisture Selection Chart
Food Type Control Setting Moisture Setting
Bread, hard roils MEDIUM CRISP
Bread, soft rolls MEDIUM MOIST
Casseroles MEDIUM MOIST
Fried foods HIGH CRISP
Meats* and fish MEDIUM CRISP
Pancakes, waffles HIGH CRISP
Pizza HIGH CRISP
Potatoes, baked HIGH CRISP
Potatoes, mashed MEDIUM MOIST
Poultry HIGH MOIST
Tortilla Chips LOW CRISP
Vegetables MEDIUM MOIST
* USDA/FSISrecommendsan internal temperature oflaS°F as the minimum donenessfor heel Use a
portable meat thermometer to check internal temperatures.
Proofing
Theturntable mustalwaysbein
placewhenusingthe oven.
Putbreaddoughin a b0wl/bread
panandplaceonthenonstick
metal tray to proof.
Theproofing feature automatica!lg
provides the optimum temperature
for the proofing process, and therefore
does not have a temperature adjustment.
1. Press the WARM/PROOF pad.
. Turn the dial to select PROOF
BREAD. Press the dial to enter. The
oven starts proofing immediatelg
and shows the amount of proofing
time completed.
[]
To avoid lowering the oven
temperature and lengthening
proofing time, do not open the
oven door unnecessarilg.
[] Check bread products earls
to avoid over-proofing.
NOTES:
[]
[]
Do not use the proofing mode for
warming food or keeping food hot.
The proofing oven temperature is
not hot enough to hold foods at
safe temperatures. Use the WARM
feature to keep food warm.
Proofing will not operate if the
oven is too hot. Allow the oven
to cool before proofing.
27

IVlicrowaving
Advantium Oven
Using the
microwave
features
Make sure the turntable and clear glass tray are in place.
Place food or microwavable container directly on the clear glass tray
to cook btour food.
Theturntable mustalways
bein placewhenusingtheoven.
Theclear glasstray shouldalways
be in placewhenmicrawaving.
Cookwure
Ill Make sure that cookware is suitable
for microwaving.
Ill Placefood or microwavable container
directlg on the clear glass trag to cook
sour food.
MICROWAVE PRESETSELECTIONS:
[] Cook [] Defrost
[] Reheot
-By Food Type -1.0 Ib Quick -Beverage
-By Time -By Time -Casserole
-By Time 1 & 2 -By Food Type -Chicken
-Delay Start -By Weight -Pasta
-Heat/Reheat -Delay Start -Pizza
-Beverage -Melt -Plate of Food
-Melt -Soften -Rice
-Slow Cook -Soup
-Soften -Steaks/Chops
-Vegetables
How to
use preset
microwave
selections
1. Press the microwave COOK,
DEFROSTor REHEATpad.
If no selection is made within 15
seconds, the display will revert back
to the time of day.
2. Turn the dial to find the food gou
want to cook, defrost or reheat.
Press the dial to enter.
3.
.
Turn the selector dial to select the
tgpe, amount, weight and/or size.
(As required, the oven will prompt
gou.) Press the dial after each
selection.
Press the dial or the START/PAUSE
pad to start cooking.
To review settings during cooking,
press the selector dial.
If the door is opened during cooking,
the oven will stop and PAUSE will
appear in the display. Close the door
and press START/PAUSEto resume
cooking.
If you enter an undesired selection at
any time, simply press the BACK pad
and reenter the desired selections.
28
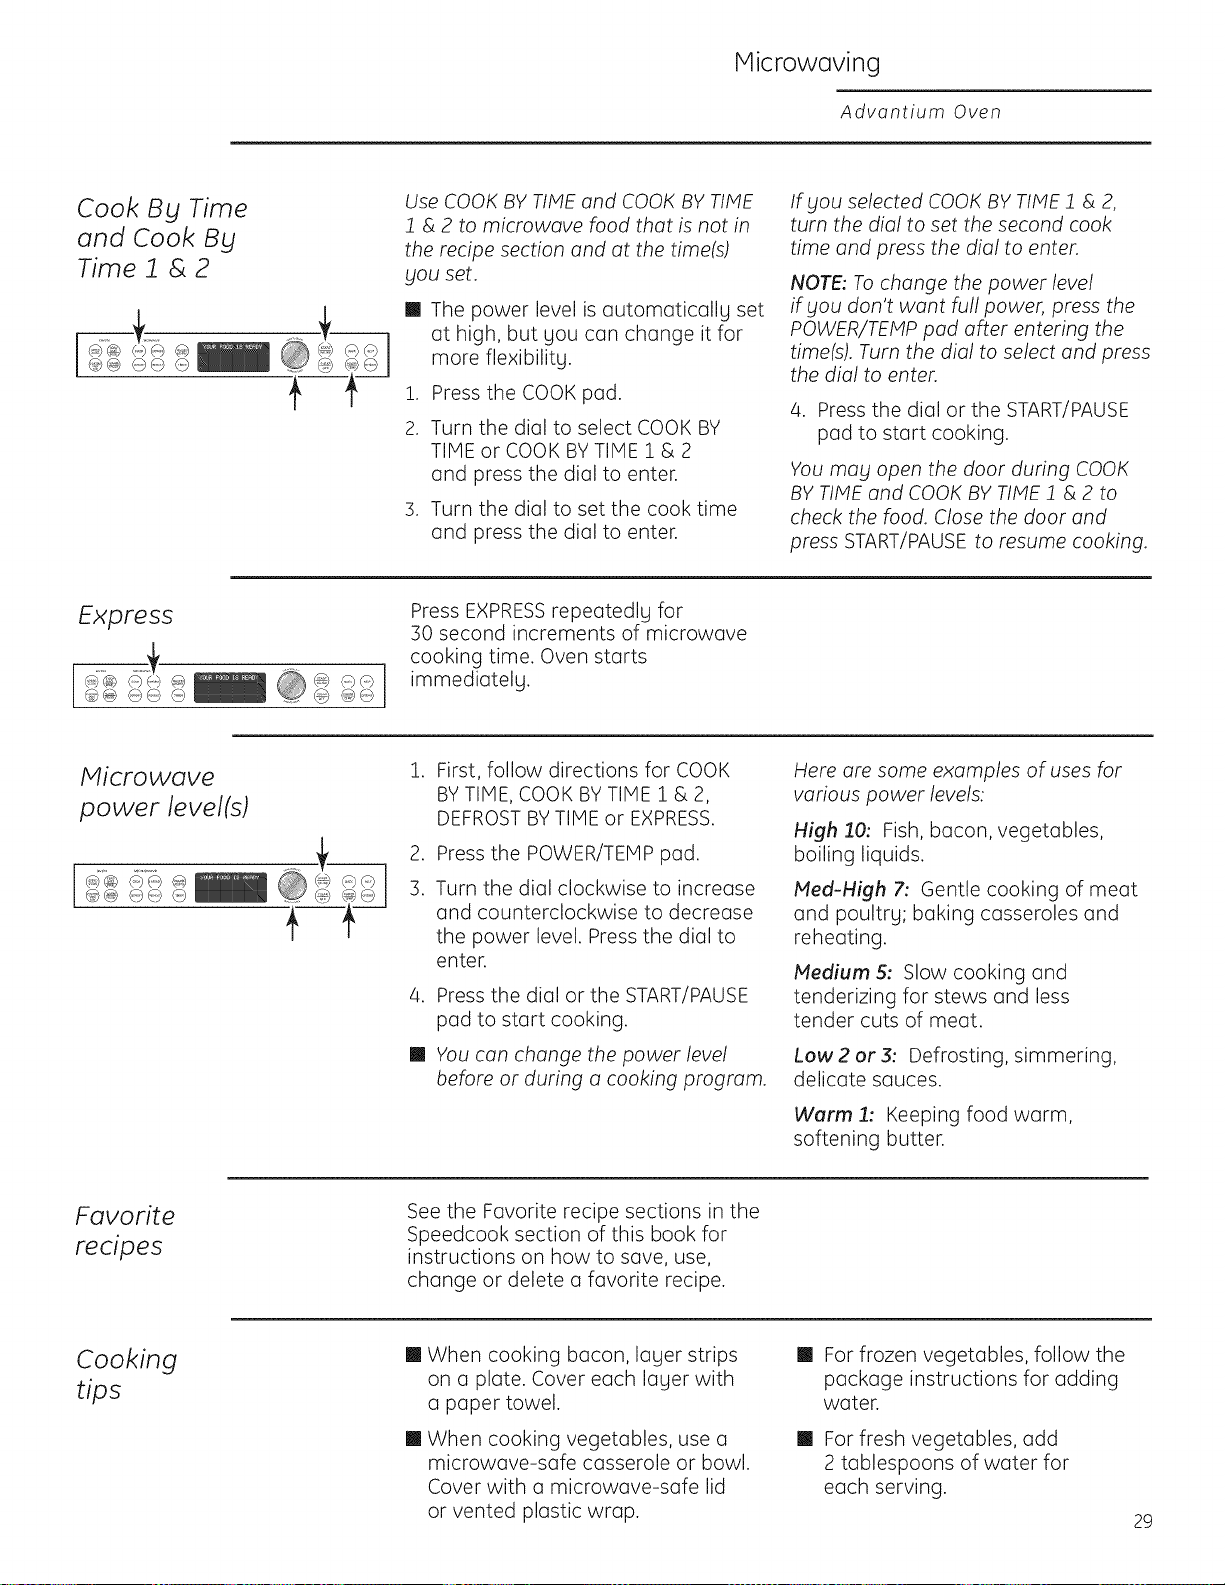
Microwaving
Advantium Oven
Cook Bg Time
and Cook Bg
Time 1 & 2
Use COOK BY TIME and COOK BY TIME
1 & 2 to microwave food that is not in
the recipe section and at the time(s)
you set.
[] The power level is automatically set
at high, but you can change it for
more flexibilitg.
!. Press the COOK pad.
2. Turn the dial to select COOK BY
TIME or COOK BYTIME 1 & 2
and press the dial to enter.
s. Turn the dial to set the cook time
and press the dial to enter.
If you selected COOK BY TIME 1 & 2,
turn the dial to set the second cook
time and press the dial to enter.
NOTE: To change the power level
if you don't want full power, press the
POWER/TEMP pad after entering the
time(s). Turn the dial to select and press
the dial to enter.
a. Press the dial or the START/PAUSE
pad to start cooking.
You may open the door during COOK
BY TIME and COOK BY TIME 1 & 2 to
check the food. Close the door and
press START/PAUSE to resume cooking.
Express
@ ..... G
Press EXPRESSrepeatedlg for
50 second increments of microwave
cooking time. Oven starts
immediatelg.
Microwave ].
power level(s)
.......................
First, follow directions for COOK
BY TIME, COOK BY TIME 1 & 2,
DEFROST BY TIME or EXPRESS.
Press the POWER/TEMP pad.
Turn the dial clockwise to increase
and counterclockwise to decrease
the power level. Press the dial to
enter.
4. Press the dial or the START/PAUSE
pad to start cooking.
[] You can change the power level
before or during a cooking program.
Here are some examples of uses for
various power levels:
High 10: Fish, bacon, vegetables,
boiling liquids.
Med-High 7: Gentle cooking of meat
and poultrg; baking casseroles and
reheating.
Medium 5: Slow cooking and
tenderizing for stews and less
tender cuts of meat.
Low 2 or 3: Defrosting, simmering,
delicate sauces.
Worm 1: Keeping food warm,
softening butter.
Favorite
recipes
See the Favorite recipe sections in the
Speedcook section of this book for
instructions on how to save, use,
change or delete a favorite recipe.
Cooking
tips
[] When cooking bacon, lager strips
on a plate. Cover each lager with
a paper towel.
[] When cooking vegetables, use a
microwave-safe casserole or bowl.
Cover with a microwave-safe lid
or vented plastic wrap.
[] For frozen vegetables, follow the
package instructions for adding
water.
[] For fresh vegetables, add
2 tablespoons of water for
each serving.
29
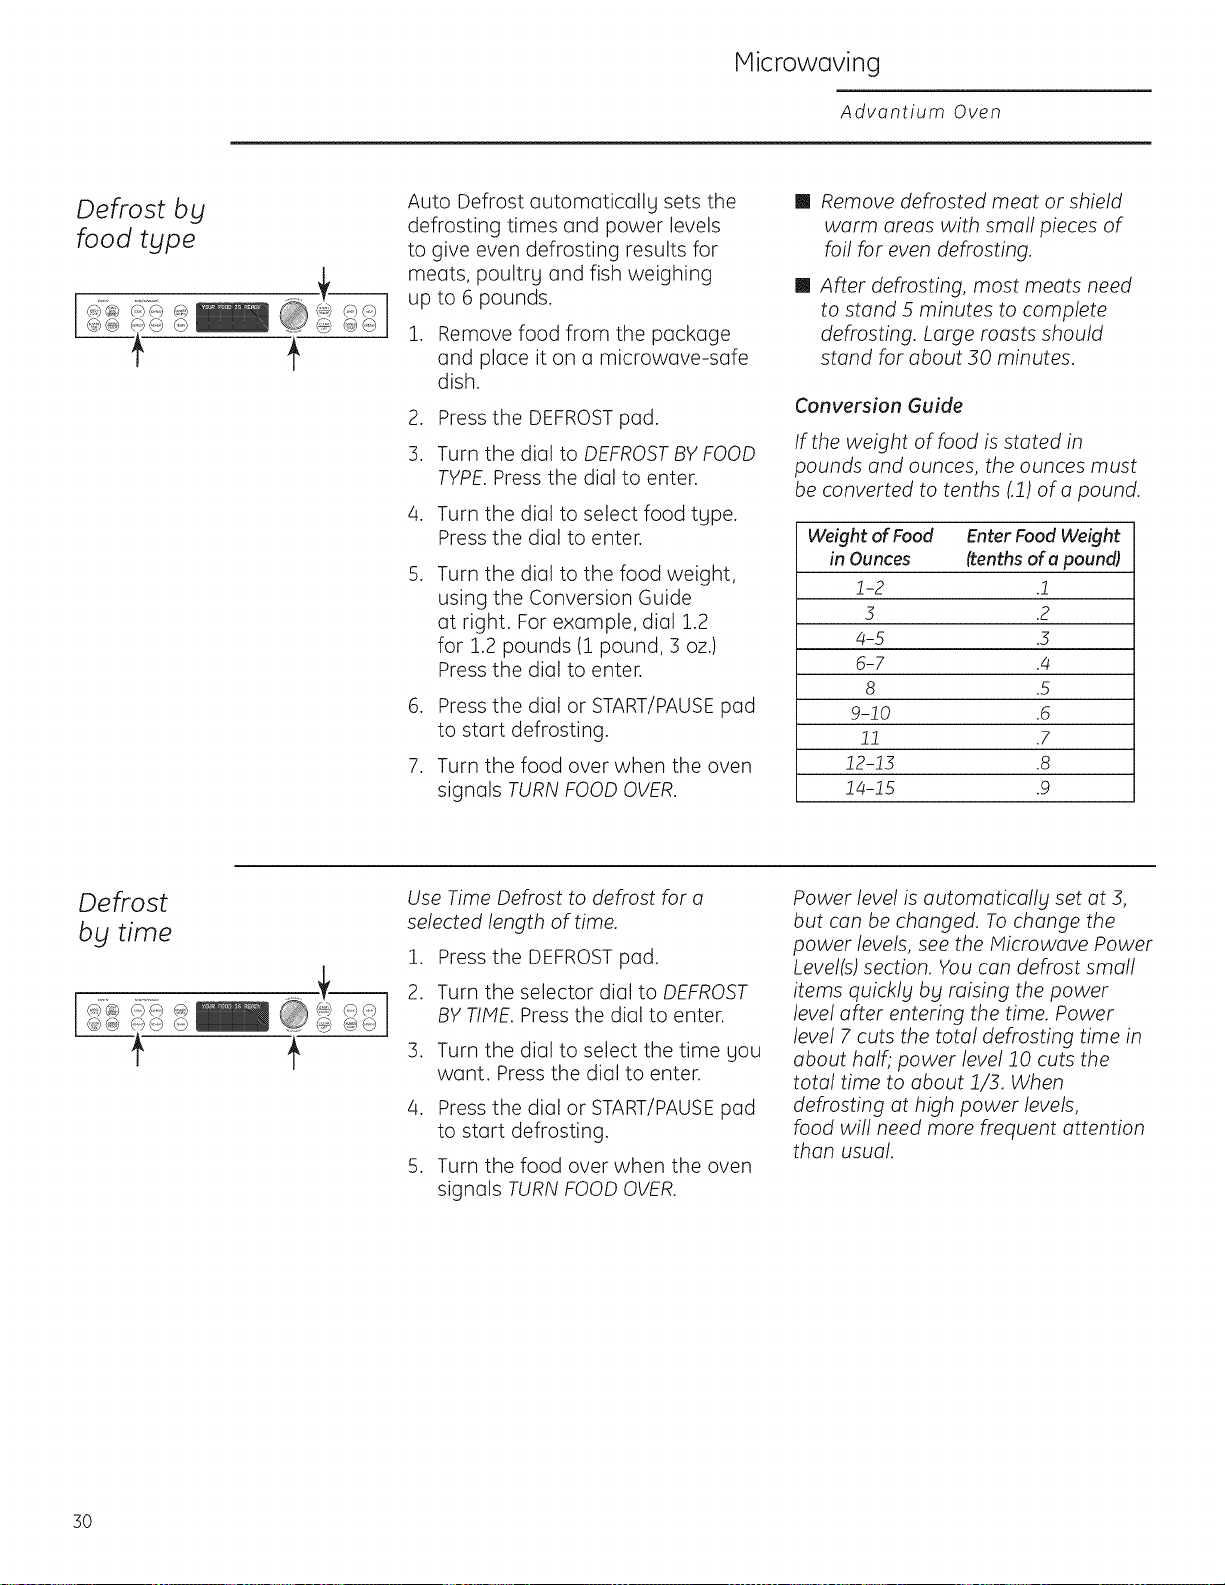
Hicrowaving
Advantium Oven
Defrost bg
food type
Auto Defrost automaticallg sets the
defrosting times and power levels
to give even defrosting results for
meats, poultrg and fish weighing
up to 6 pounds.
1. Remove food from the package
and place it on a microwave-safe
dish.
2. Press the DEFROST pad.
3. Turn the dial to DEFROSTBY FOOD
TYPE.Press the dial to enter.
4. Turn the dial to select food tgpe.
Press the dial to enter.
.
Turn the dial to the food weight,
using the Conversion Guide
at right. For example, dial 1.2
for 1.2 pounds (1 pound, 3 oz.)
Press the dial to enter.
.
.
Press the dial or START/PAUSEpad
to start defrosting.
Turn the food over when the oven
signals TURN FOOD OVER.
[] Remove defrosted meat or shield
warm areas with small pieces of
foil for even defrosting.
[] After defrosting, most meats need
to stand 5 minutes to complete
defrosting. Large roasts should
stand for about 30 minutes.
Conversion Guide
If the weight of food is stated in
pounds and ounces, the ounces must
be converted to tenths (.1) of a pound.
Weight of Food Enter Food Weight
in Ounces (tenths of u pound)
i-2 .i
5 .2
4-5 .5
6-7 .4
8 .5
9-!0 .6
!! .7
12-15 .8
14-15 .9
Defrost
bg time
®@ ()_ @ ...........
Use Time Defrost to defrost for a
selected length of time.
1. Press the DEFROST pad.
2. Turn the selector dial to DEFROST
BY TIME. Press the dial to enter.
3. Turn the dial to select the time gou
want. Press the dial to enter.
4. Press the dial or START/PAUSE pad
to start defrosting.
5. Turn the food over when the oven
signals TURN FOOD OVER.
Power level is automatically set at 3,
but can be changed. To change the
power levels, see the Microwave Power
Level(s) section. You can defrost small
items quickly by raising the power
level after entering the time. Power
level 7 cuts the total defrosting time in
about half; power level 10 cuts the
total time to about 1/3. When
defrosting at high power levels,
food will need more frequent attention
than usual.
30
IVlicrowaving
Advantium Oven
Defrosting
tips
Use DEFROST BY FOOD TYPEfor meat,
poultry and fish. Use DEFROST BY TIME
for most other frozen foods.
[]
[]
[]
Foods frozen in paper or plastic can
be time defrosted in the package,
but foods should be taken out of the
package when using DEFROST BY
FOOD TYPE.Closed packages
should be slit, pierced or vented
after food has partially defrosted.
Plastic storage containers should be
partially uncovered.
Family-size, prepackaged frozen
dinners can be defrosted and
microwaved. If the food is in
a foil container, transfer it to
a microwave-safe dish.
Foods that spoil easily should not
be allowed to sit out for more than
one hour after defrosting. Room
temperature promotes the growth
of harmful bacteria.
[]
For more even defrosting of
larger foods, such as roasts, use
DEFROST BY TIME. Be sure large
meats are completely defrosted
before cooking.
[] When defrosted, food should be
cool but softened in all areas.
If still slightly icy, return to the
microwave very briefly, or let
it stand a few minutes.
31
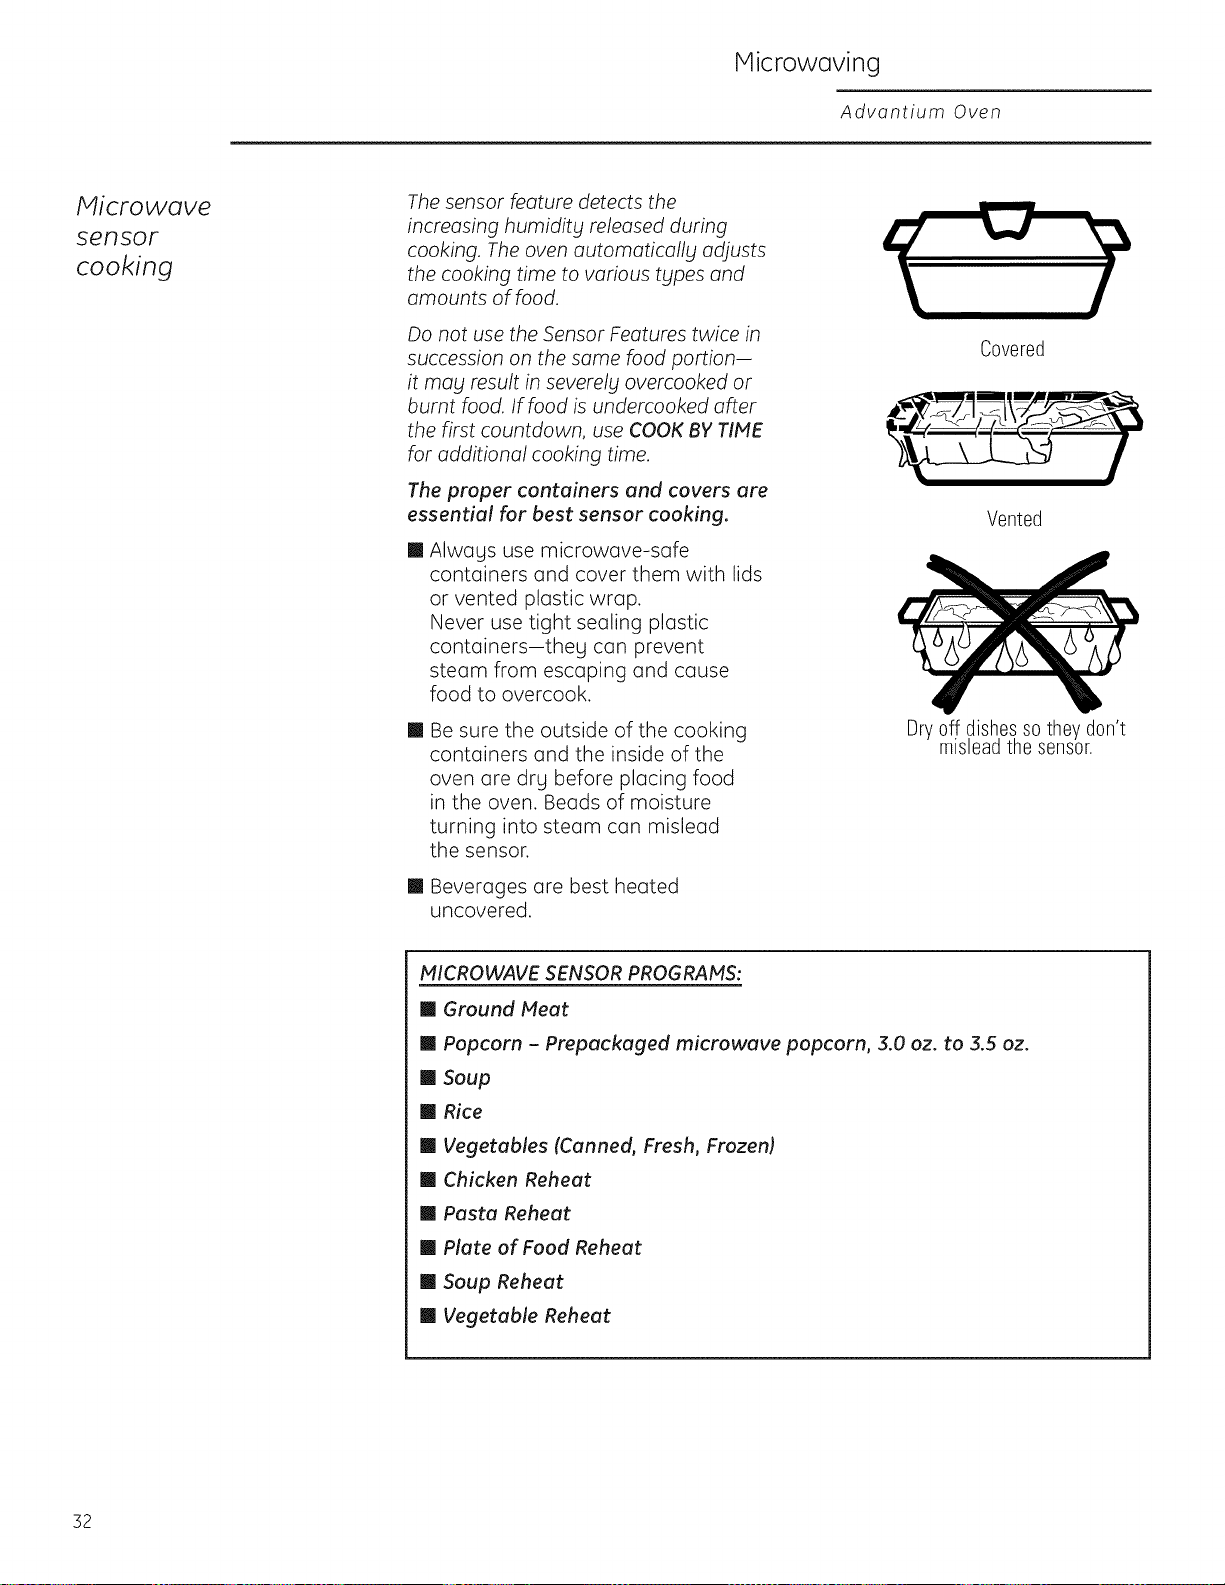
IVlicrowaving
Advantium Oven
Microwave
sensor
cooking
The sensor feature detects the
increasing humidity released during
cooking. The oven automatically adjusts
the cooking time to various tbtpes and
amounts of food.
Do not use the Sensor Features twice in
succession on the same food portion-
it may result in severely overcooked or
burnt food. If food is undercooked after
the first countdown, use COOK BYTIME
for additional cooking time.
The proper containers and covers are
essential for best sensor cooking.
[] Alwags use microwave-safe
containers and cover them with lids
or vented plastic wrap.
Never use tight sealing plastic
containers-theg can prevent
steam from escaping and cause
food to overcook.
[] Be sure the outside of the cooking
containers and the inside of the
oven are drg before placing food
in the oven. Beads of moisture
turning into steam can mislead
the sensor.
[] Beverages are best heated
uncovered.
Covered
Vented
Dry off dishes sothey don't
mislead the sensor.
MICROWAVE SENSOR PROGRAMS:
[] Ground Meat
[] Popcorn - Prepackaged microwave popcorn, 3.0 oz. to 3.5 oz.
[] Soup
[] Rice
[] Vegetables (Canned, Fresh, Frozen)
[] Chicken Reheat
[]Pasta Reheat
[]Plateof Food Reheat
[]Soup Reheat
[] Vegetable Reheat
32
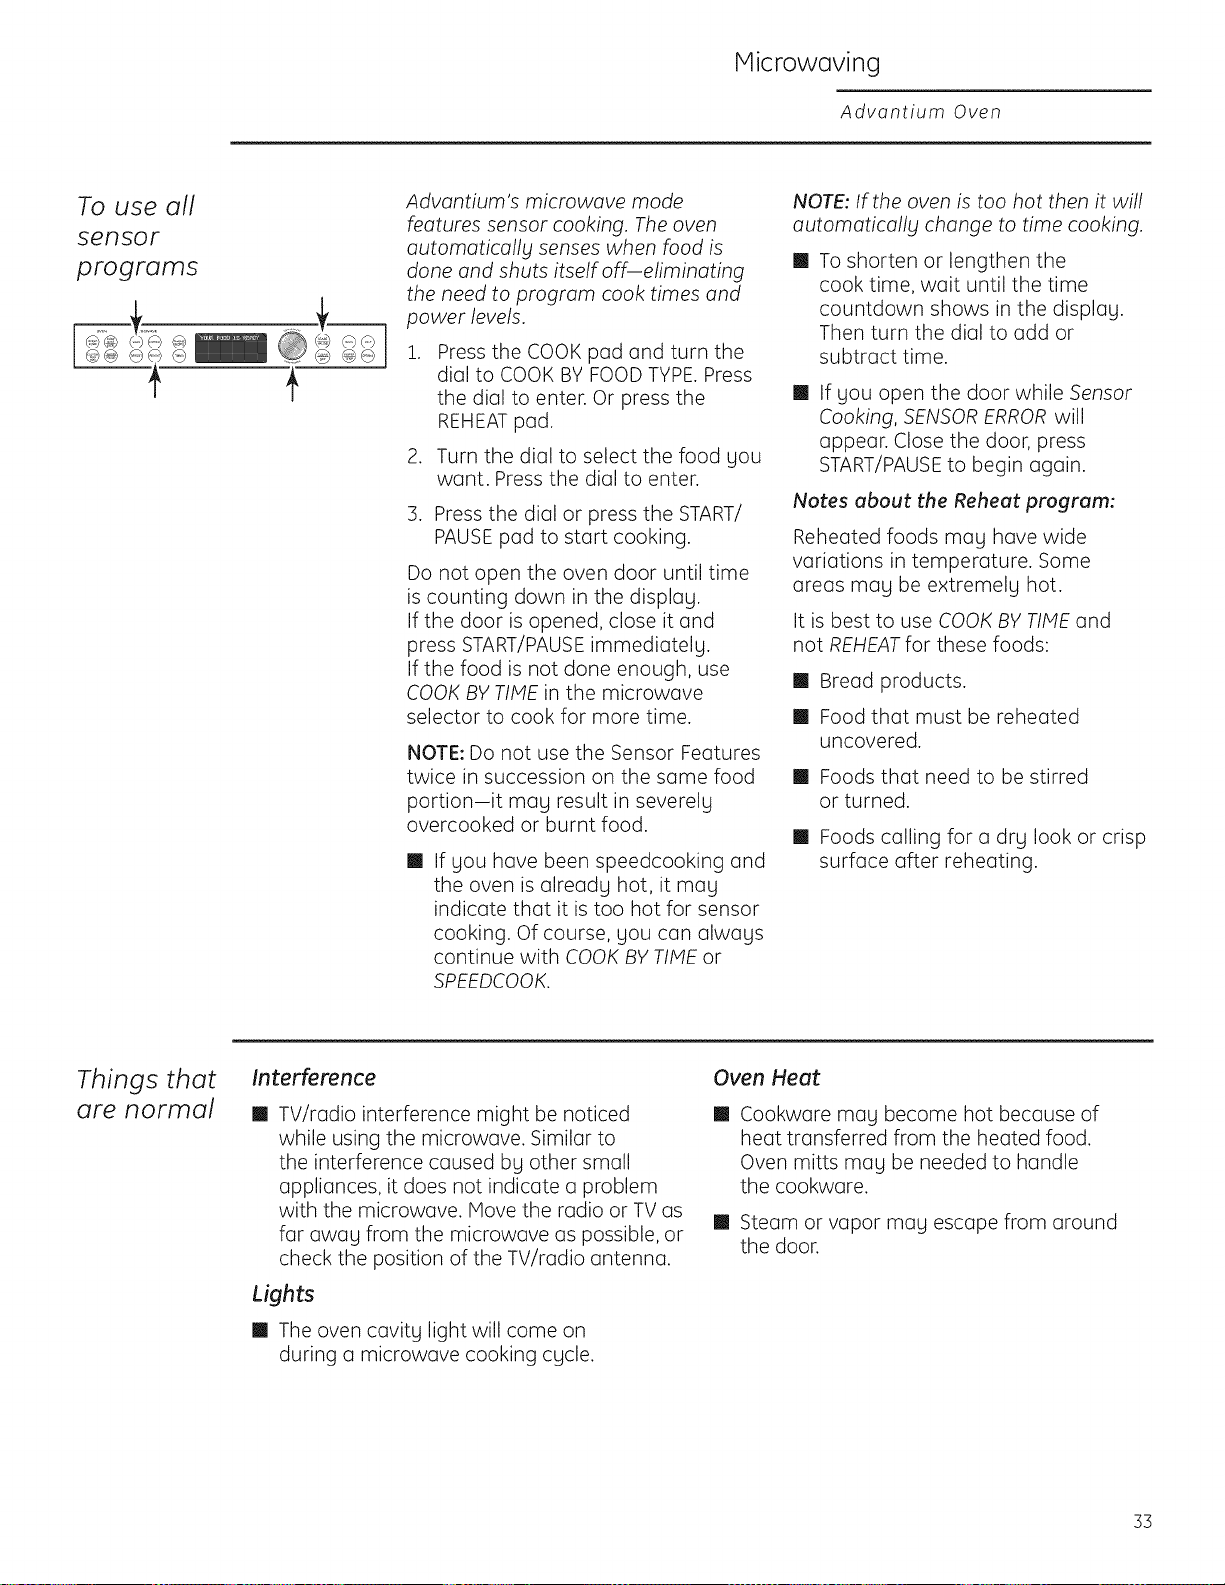
Microwaving
Advantium Oven
To use all
sensor
programs
Advantium's microwave mode
features sensor cooking. The oven
automatically senses when food is
done and shuts itself off-eliminating
the need to program cook times and
power levels.
.
.
.
Press the COOK pad and turn the
dial to COOK BY FOOD TYPE. Press
the dial to enter. Or press the
REHEATpad.
Turn the dial to select the food gou
want. Press the dial to enter.
Press the dial or press the START/
PAUSEpad to start cooking.
Do not open the oven door until time
is counting down in the displag.
If the door is opened, close it and
press START/PAUSEimmediately.
If the food is not done enough, use
COOK BY TIME in the microwave
selector to cook for more time.
NOTE: Do not use the Sensor Features
twice in succession on the same food
portion-it mag result in severelg
overcooked or burnt food.
[]
If gou have been speedcooking and
the oven is alreadg hot, it mag
indicate that it is too hot for sensor
cooking. Of course, gou can alwags
continue with COOK BY TIME or
SPEEDCOOK.
NOTE: If the oven is too hot then it will
automatically change to time cooking.
[]
To shorten or lengthen the
cook time, wait until the time
countdown shows in the displag.
Then turn the dial to add or
subtract time.
[]
If gou open the door while Sensor
Cooking, SENSOR ERROR will
appear. Close the door, press
START/PAUSEto begin again.
Notes about the Reheat program:
Reheated foods mag have wide
variations in temperature. Some
areas mag be extremelg hot.
It is best to use COOK BY TIME and
not REHEATfor these foods:
[] Bread products.
[] Food that must be reheated
uncovered.
[] Foods that need to be stirred
or turned.
[] Foods calling for a dry look or crisp
surface after reheating.
Things that
are normal
Interference
[] TV/radio interference might be noticed
while using the microwave. Similar to
the interference caused by other small
appliances, it does not indicate a problem
with the microwave. Move the radio or TV as
far awag from the microwave as possible, or
check the position of the TV/radio antenna.
Lights
[] The oven cavitg light will come on
during a microwave cooking cgcle.
Oven Heat
[] Cookware mag become hot because of
heat transferred from the heated food.
Oven mitts mag be needed to handle
the cookware.
[] Steam or vapor mag escape from around
the door.
33
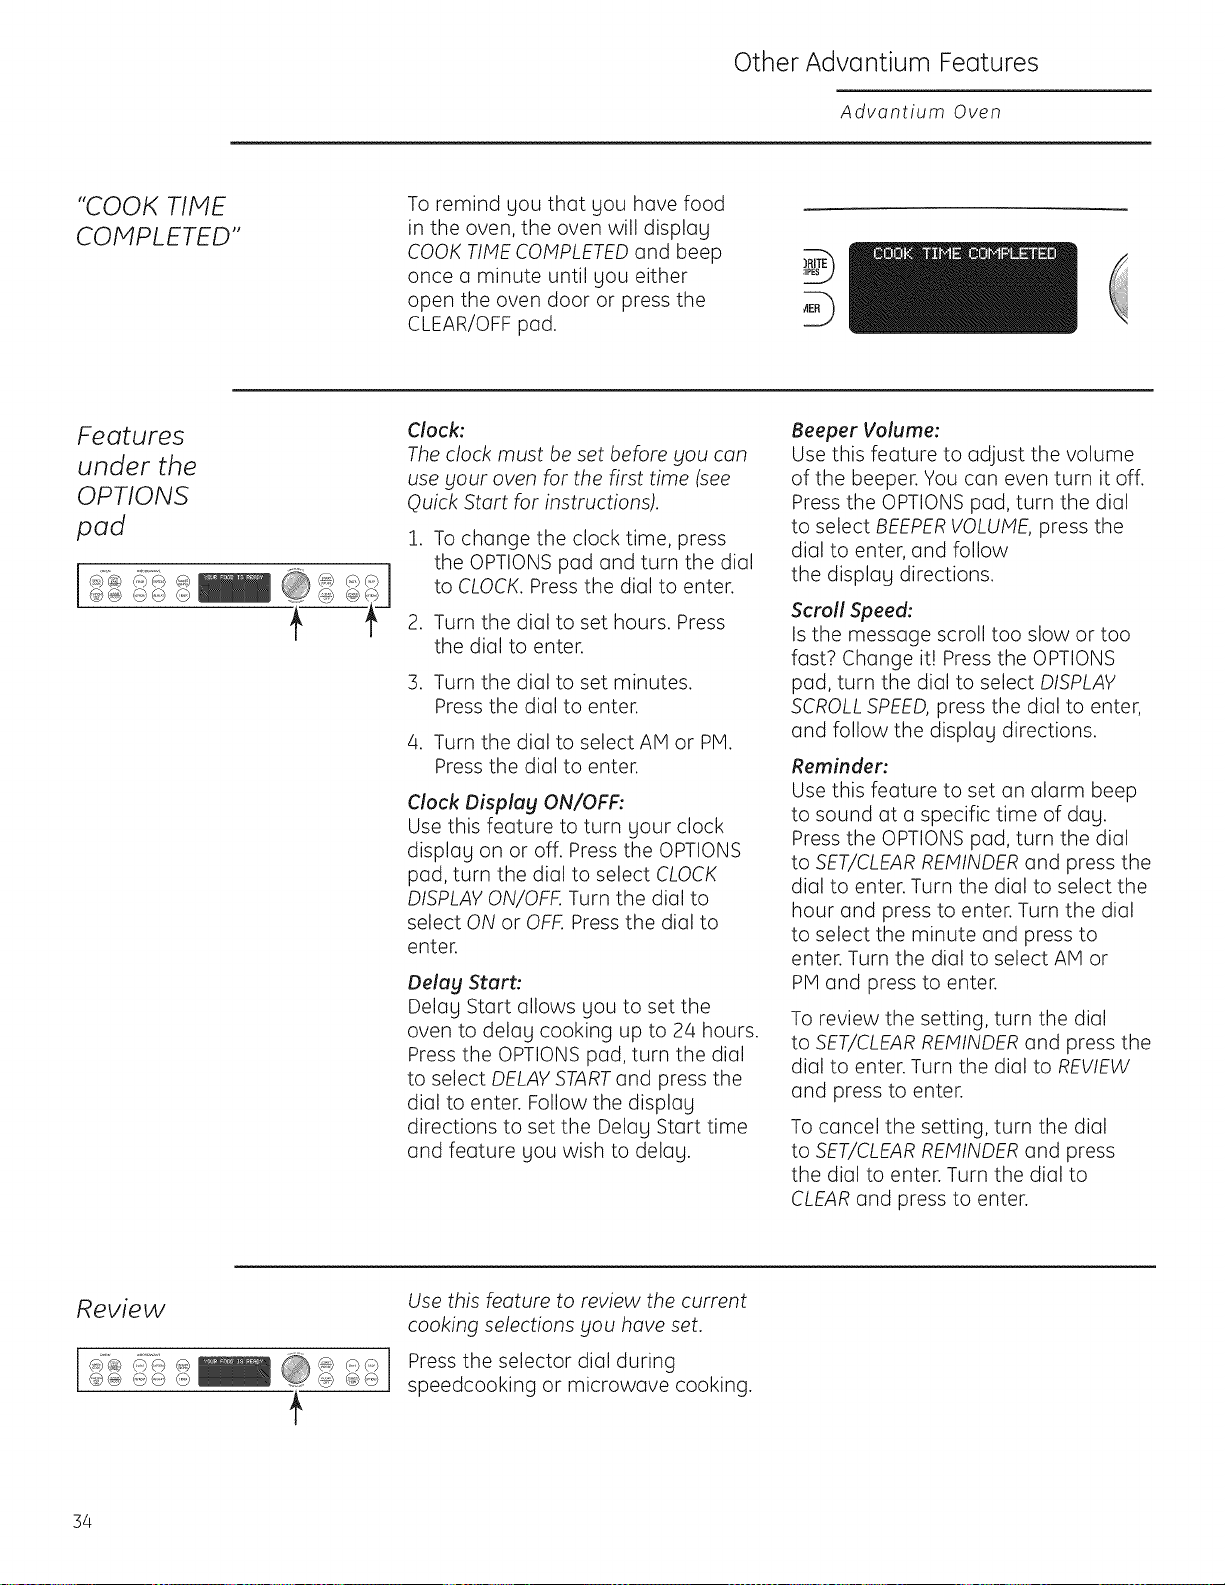
Other Advantium Features
Advantium Oven
"COOK TIME
COMPLETED"
To remind you that you have food
in the oven, the oven will display
COOK TIME COMPLETED and beep
once a minute until you either
open the oven door or press the
CLEAR/OFF pad.
Features
under the
OPTIONS
pad
Clock:
The clock must be set before you can
use your oven for the first time (see
Quick Start for instructions).
1. To change the clock time, press
the OPTIONS pad and turn the dial
to CLOCK. Press the dial to enter.
2. Turn the dial to set hours. Press
the dial to enter.
3. Turn the dial to set minutes.
Press the dial to enter.
4. Turn the dial to select AM or PM.
Press the dial to enter.
Clock Display ON/OFF:
Use this feature to turn your clock
display on or off. Press the OPTIONS
pad, turn the dial to select CLOCK
DISPLAY ON/OFF. Turn the dial to
select ON or OFF.Press the dial to
enter.
Delay Start:
Delay Start allows you to set the
oven to delay cooking up to 24 hours.
Press the OPTIONS pad, turn the dial
to select DELAYSTARTand press the
dial to enter. Follow the display
directions to set the Delay Start time
and feature you wish to delay.
Beeper Volume:
Use this feature to adjust the volume
of the beeper. You can even turn it off.
Press the OPTIONS pad, turn the dial
to select BEEPERVOLUME, press the
dial to enter, and follow
the display directions.
Scroll Speed:
Is the message scroll too slow or too
fast2 Change it! Press the OPTIONS
pad, turn the dial to select DISPLAY
SCROLL SPEED, press the dial to enter,
and follow the display directions.
Reminder:
Use this feature to set an alarm beep
to sound at a specific time of day.
Press the OPTIONS pad, turn the dial
to SET/CLEAR REMINDER and press the
dial to enter. Turn the dial to select the
hour and press to enter. Turn the dial
to select the minute and press to
enter. Turn the dial to select AlVlor
PM and press to enter.
To review the setting, turn the dial
to SET/CLEAR REMINDER and press the
dial to enter. Turn the dial to REVIEW
and press to enter.
To cancel the setting, turn the dial
to SET/CLEAR REMINDER and press
the dial to enter. Turn the dial to
CLEAR and press to enter.
Review
@@ @@ @ ......
t
@@
Use this feature to review the current
cooking selections you have set.
Press the selector dial during
speedcooking or microwave cooking.
34
Other Advantium Features
Advantium Oven
Help
.............. @
@@ @@ @ ......
,t
Use this feature to find out more about
your oven and its features.
1. Press the HELP pad.
2. Turn the dial to select the feature
name. Press the dial to enter.
The displag will show a description for
the program Sou have chosen.
Features found in the HELPfunction.
Adding Time
Back
Bake
Beverage Reheat
Broil
Child Lockout
Clear/Off
Cook
Cook by Time
Cook/Heat by Food
Custom Speed Cook
Defrost
Defrost by Food Type
Defrost by Time
Defrost by Weight
Delay Start
Express Cook
Favorite Recipes
Help
Hold Food Warm
Options
Power/Temp
Proof Bread
Reheat
Repeat Last
Resume
Review
Sensor Cooking
Set Beeper Volume
Set Clock
Set Display On/OFF
Set Display Speed
Set Reminder
Slow Cook
Soften/Melt
Speed Cook
Start/Pause
Time Cook 1 & 2
Timer On/OFF
Toast
Warm/Proof
35

Other Advantium Features
Advantium Oven
Child
lockout
Cb@ ¢) q) C) ...........
You may lock the control panel
to prevent the oven from being
accidentall_l started or used
b_tchildren.
Press and hold CLEAR/OFF for
5 seconds to lock and unlock.
When the control panel is locked,
Control is LOCKED will be displaged
brieflg angtime a pad or dial is
pressed.
Timer
@@ @@ _O ......
Use this feature anytime you need a
general purpose timer. It can even be
used while cooking in the oven.
1. Press the TIMER pad.
2. Turn the dial to select the hours.
Press the dial to enter.
3. Turn the dial to select the minutes.
Press the dial to enter.
To cancel, press TIMER.
Automatic
fan
An automatic fan protects the oven
from too much heat inside the oven
cavitg.
It automaticallg turns on at low speed
if it senses too much heat.
The fan will automaticallg turn off
when the internal parts are cool. It
mag stag on for 30 minutes or more
after the oven control is turned off.
36
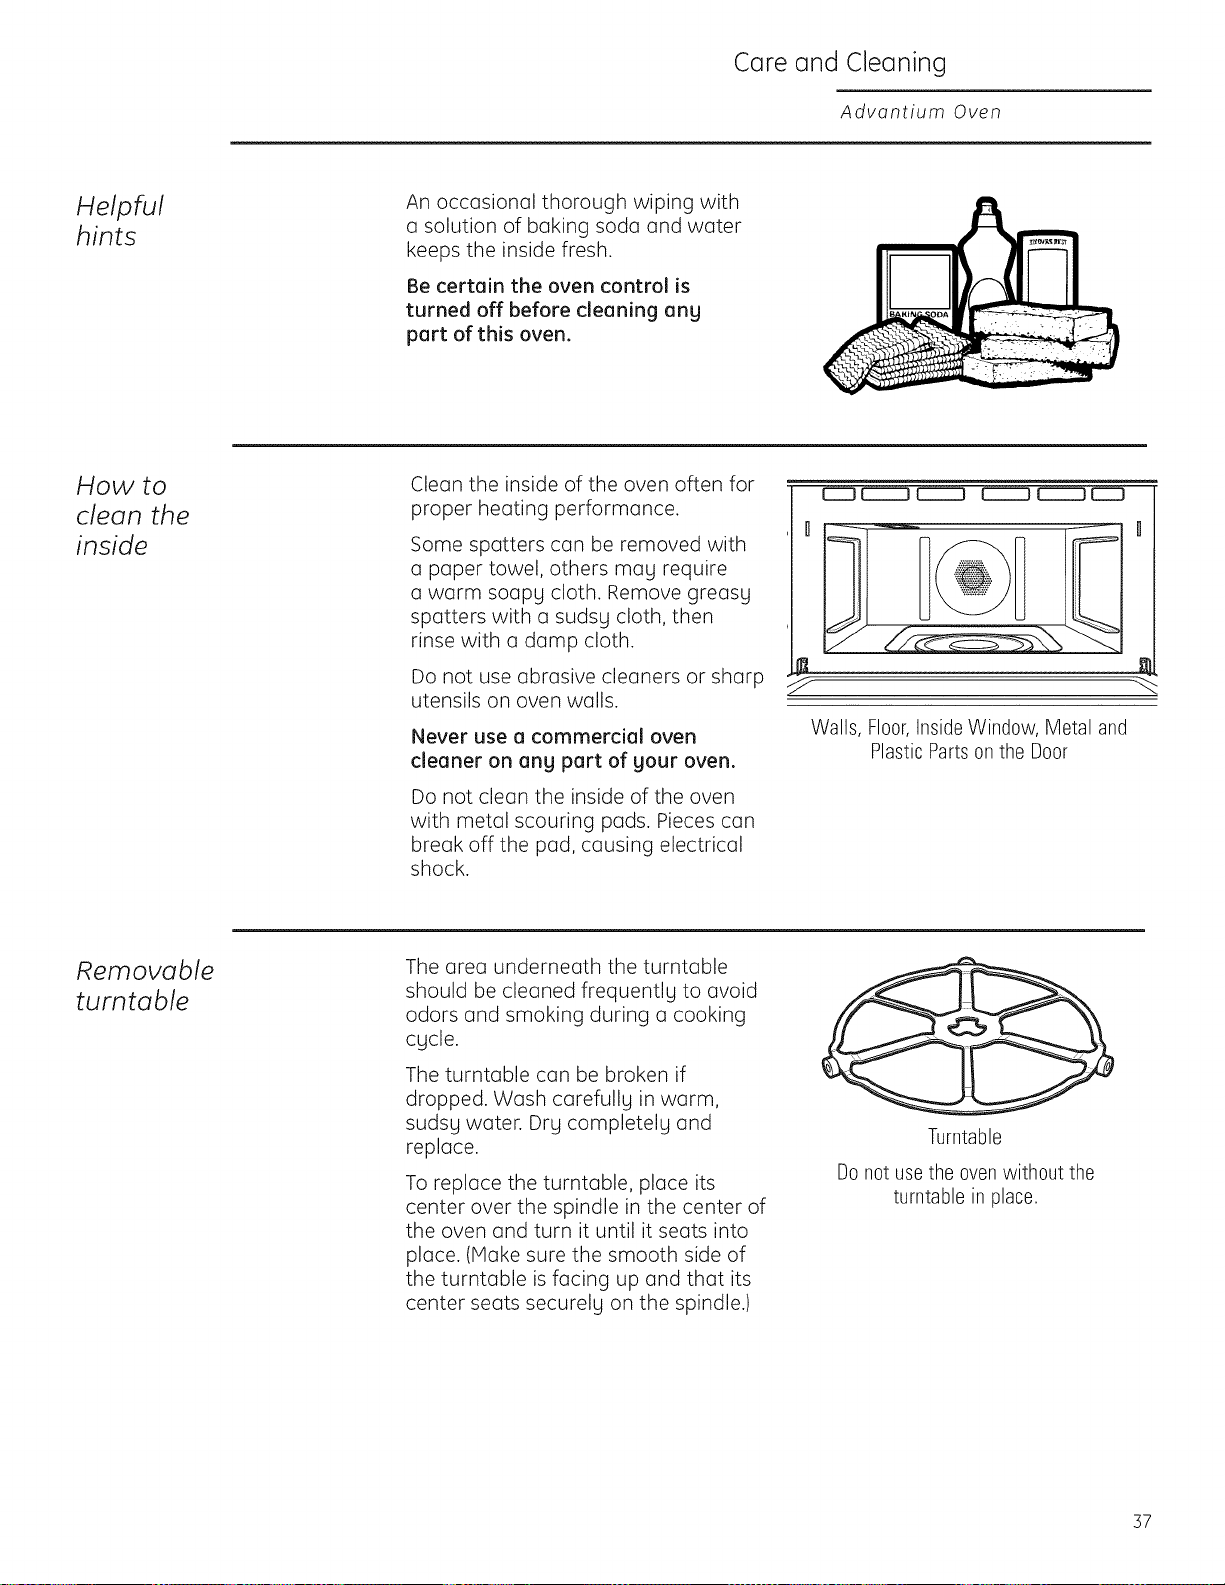
Care and Cleaning
Advantium Oven
Helpful
hints
An occasional thorough wiping with
a solution of baking soda and water
keeps the inside fresh.
Be certain the oven control is
turned off before cleaning ang
part of this oven.
How to
clean the
inside
Clean the inside of the oven often for
proper heating performance.
Some spatters can be removed with
a paper towel, others mag require
a warm soapg cloth. Remove greasg
spatters with a sudsg cloth, then
rinse with a damp cloth.
Do not use abrasive cleaners or sharp
utensils on oven walls.
Never use a commercial oven
cleaner on any part of your oven.
Do not clean the inside of the oven
with metal scouring pads. Pieces can
break off the pad, causing electrical
shock.
Walls, Floor,Inside Window, Metal and
Plastic Partson the Door
Removable
turntable
The area underneath the turntable
should be cleaned frequentlg to avoid
odors and smoking during a cooking
cgcle.
The turntable can be broken if
dropped. Wash carefullg in warm,
sudsg water. Drg completelg and
replace.
To replace the turntable, place its
center over the spindle in the center of
the oven and turn it until it seats into
place. (Make sure the smooth side of
the turntable is facing up and that its
center seats securelg on the spindle.)
Turntable
Do not usethe oven without the
turntable in place.
37
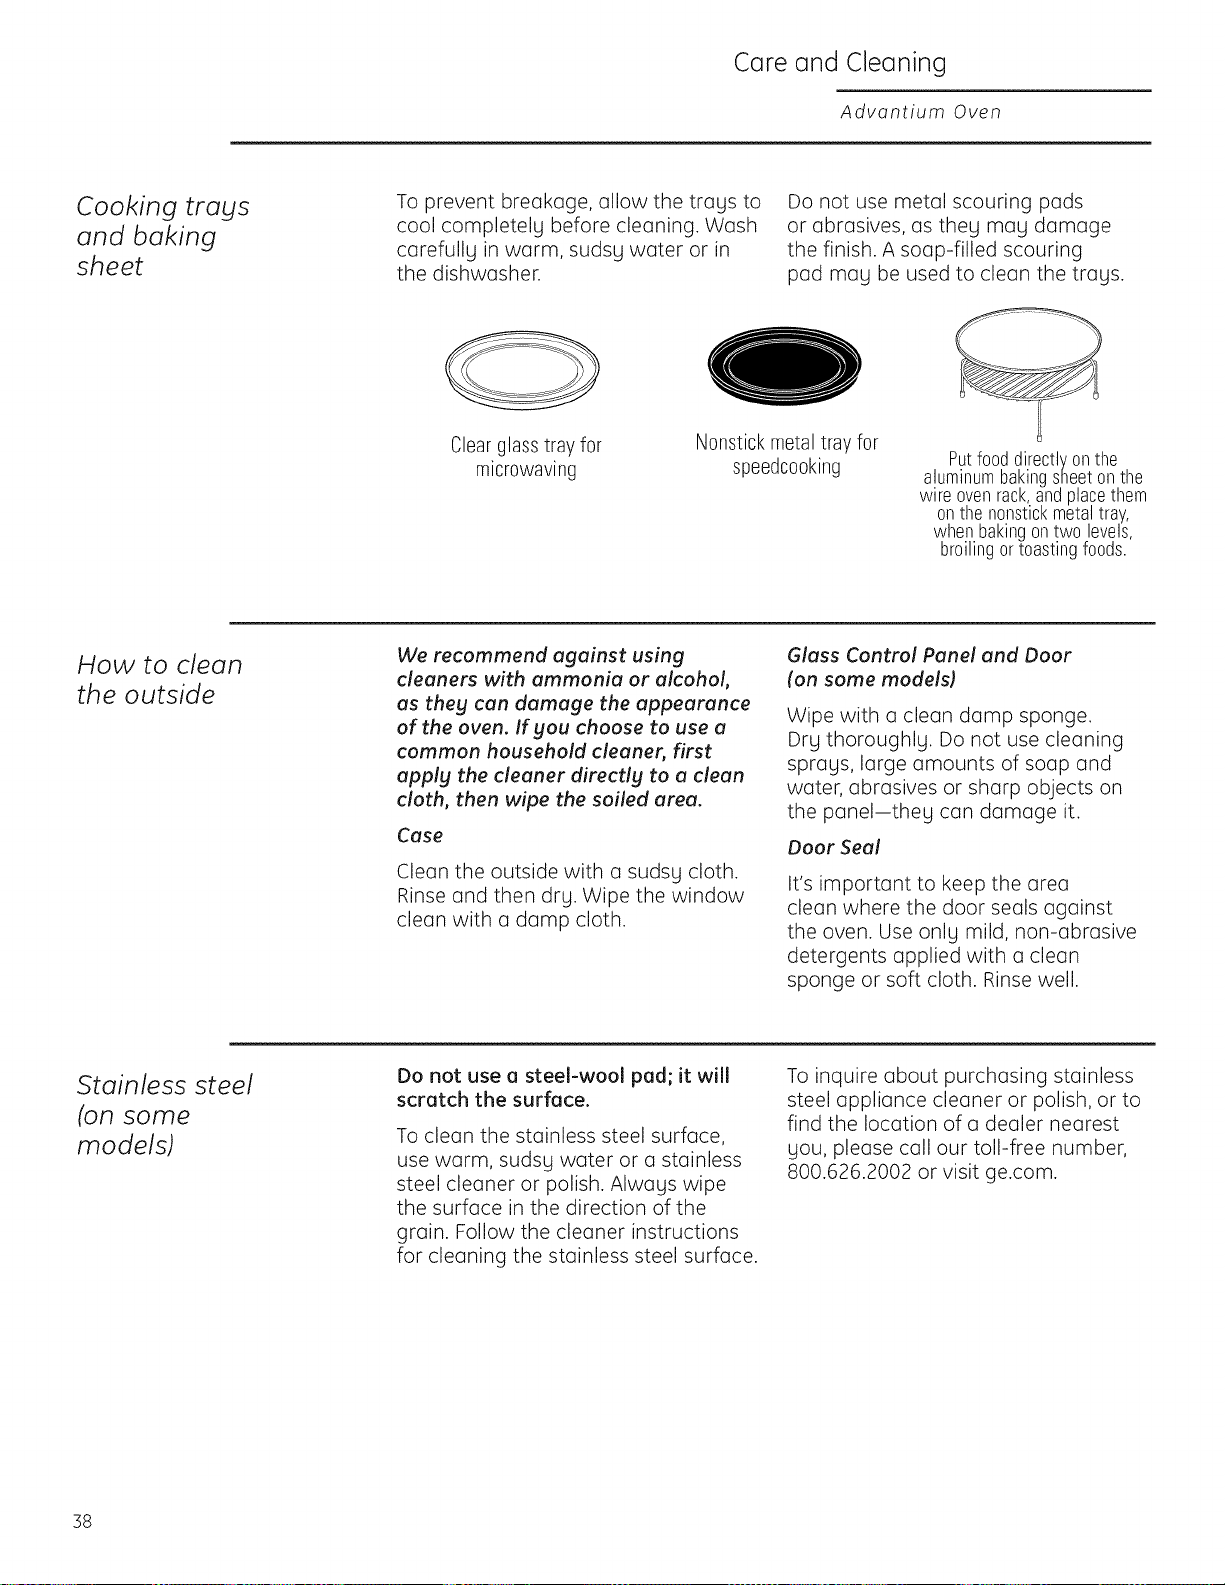
Care and Cleaning
Advantium Oven
Cooking trags
and baking
sheet
To prevent breakage, allow the trays to
cool completely before cleaning. Wash
carefully in warm, sudsy water or in
the dishwasher.
Do not use metal scouring pads
or abrasives, as theg mag damage
the finish. A soap-filled scouring
pad mag be used to clean the trags.
Clearglass tray for
microwaving
Nonstick metal tray for
speedcooking
Putfooddirectlyonthe
aluminumbakingsheetonthe
wire ovenrack,andplacethem
onthenonstickmetaltray,
whenbakingontwo levels,
broilingor toastingfoods.
How to clean
the outside
We recommend against using
cleaners with ammonia or alcohol,
as theg can damage the appearance
of the oven. If gou choose to use a
common household cleaner, first
applg the cleaner directlg to a clean
cloth, then wipe the soiled area.
Case
Clean the outside with a sudsy cloth.
Rinse and then dry. Wipe the window
clean with a damp cloth.
Glass Control Panel and Door
(on some models)
Wipe with a clean damp sponge.
Dry thoroughly. Do not use cleaning
sprays, large amounts of soap and
water, abrasives or sharp objects on
the panel-they can damage it.
Door Seal
It's important to keep the area
clean where the door seals against
the oven. Use only mild, non-abrasive
detergents applied with a clean
sponge or soft cloth. Rinse well.
Stainless steel
(on some
models)
Do not use a steel-wool pad; it will
scratch the surface.
To clean the stainless steel surface,
use warm, sudsg water or a stainless
steel cleaner or polish. Alwags wipe
the surface in the direction of the
grain. Follow the cleaner instructions
for cleaning the stainless steel surface.
To inquire about purchasing stainless
steel appliance cleaner or polish, or to
find the location of a dealer nearest
gou, please call our toll-free number,
800.626.2002 or visit ge.com.
38
Troubleshooting
Advantium Oven
Questions?
Use this
problem
solver
Problem Possible Causes What To Do/Explanation
LIGHTS
Light during a
speedcook cycle
dims and cycles on
and off, even at full
power levels
This is normal.
Power level has been
automatically reduced
because the oven is hot.
• This is normal. The oven senses the
heat level and adjusts automatically.
Light visible around
the door and outer
case while
speedcooking
This is normal.
• When the oven is on, light may
be visible around the door and
outer case.
FAN
Fan continues to run The oven is cooling.
after cooking stops
• The fan will automatically shut off
when the internal parts of the oven
have cooled.
Oven vent emits
warm air while
oven is on
This is normal.
Fan comes on This is normal.
automatically when
using the microwave
COOKING
The oven makes
unusual sounds
while cooking
Clicks and fans blowing
are normal. The relay
board is turning the
components on and off.
• These sounds are normal.
Smoke comes out
of the oven when
I open the door
Food is high in fat
content. Aerosol spray
used on the pans.
• Smoke is normal when cooking
high-fat foods.
Food is not fully
cooked or browned
at the end of a
program
Programmed times
may not match the size
or amount of food you
are cooking.
Increase or decrease time for
doneness or adjust the upper or
lower lamps for browning and cooking
doneness.
SENSOR ERROR
displayed along with
an oven signal
Food amount or type
placed in the oven does
not match the program
that was set.
• Press the CLEAR/OFF pad. Set the
oven program to match the food or
liquid to be cooked or heated.
Steam was not sensed by
the oven because plastic
wrap was not vented, a lid
too tight was on the dish
or a liquid was covered.
o Vent plastic wrap, use a looser lid
or uncover liquids when cooking or
heating.
39

Troubleshooting
Advontium Oven
Questions?
Use this
problem
solver
Problem Possible Causes What To Do/Explanation
DISPLAY
The display is blank The clock displag has ,, Check the OPTIONS menu for clock
been turned off. displag settings. Turn the displag on.
"Control is LOCKED" The control has • Press and hold CLEAR/OFF for
appears in display been locked. 5 seconds to unlock the control.
Control display is Clock is not set. • Set the clock.
lighted get oven
will not start
Door not securelg closed. • Open the door and close securelg.
START/PAUSEpad ',,Press START/PAUSE
not pressed after entering
cooking selection.
Another selection alreadg
entered in oven and
CLEAR/OFF pad not
pressed to cancel it.
• Press CLEAR/OFF.
Size, quantitg or cooking
time not entered after
final selection.
• Make sure gou have entered cooking
time after selecting.
CLEAR/OFF was pressed
accidentallg.
• Reset cooking program and press
START/PAUSE.
OTHER PROBLEMS
The door and inside The heat lamps • This is normal.
of the oven feels hot produce intense heat • Use oven mitts to remove food when
in a small space, when readg.
Oven will not start A fuse in your home • Replace fuse or reset circuit breaker.
may be blown or the
circuit breaker tripped.
The door is not closed. • Open and close the door securelg.
40

Notes
Advantium Oven
4!

Notes
Advantium Oven
42
Consumer Services
Advantium Oven
With the purchase of your new Monogram appliance, receive
the assurance that if you ever need information or assistance
from GE, we'll be there. All you have to do is call--toll- free!
GE Answer Center ®
In the USA:
800.626.2000
Whatever your question about any Monogram major appliance, GEAnswer Center®
information service is available to help. Your call-and your question-will be answered
promptly and courteously. Callthe GEAnswer Center®Monday to Friday, 8 a.m. to 10 p.m. EST,
and Saturday, 8 a.m. to 7 p.m. EST.
OR
Visit our Website at: monogram.cam
In Canada, call 800.56!.]]44.
Repair Service
In the USA:
800.444.1845
In Canada:
800.561.3344
A GEconsumer service professional will provide expert repair service, scheduled at a time that's
convenient for you. To schedule service, call Monday to Friday, 7 a.m. to 10 p.m. EST,or Saturday
and Sunday, 8 a.m. to 6 p.m. EST.Many GEConsumer Service company-operated locations offer
you service today or tomorrow, or at your convenience. Our factory-trained technicians know
your appliance inside and out-so most repairs can be handled injust one visit.
In Canada: Monday to Friday, 7 a.m. to 8 p.m. and Saturday, 8 a.m. to 5 p.m. EDST.
For Customers With
Special Needs...
In the USA:
800.626.2000
SECTION
GEoffers, free of charge, a brochure to assist in planning a barrier-free
kitchen for persons with limited mobility.
Consumers with impaired hearing or speech who have access to a TDD
or a conventional teletypewriter may call 800.TDD.GEAC(800.855.4522)
to request information or service.
Service Contracts
In the USA:
800.626.2224
In Canada:
800.561.3344
You can have the secure feeling that GEConsumer Service will still be there after your
warranty expires. Purchase a GEcontract while your warranty isstill in effect and you'll
receive a substantial discount. With a multiple-year contract, you're assured of future
service at today's prices.
Parts and
Accessories
In the USA:
800.626.2002
In Canada:
800.561.3344
Individuals qualified to service their own appliances can have parts or accessories sent directly
to their home. The GE parts system provides access to over 47,000 parts...and all GEGenuine
Renewal Parts are fully warranted. VISA, MasterCard and Discover cards are accepted.
User maintenance instructions contained in this manual cover procedures intended to be
performed bg any user. Other servicing generally should be referred to qualified service
personnel. Caution must be exercised, since improper servicing may cause unsafe operation.
4]
W(]rr(]ntg for Customers in the USA
Advantium Oven
YOUR MONOGRAM ADVANTIUh4 OVEN WARRANTY
Staple sales slip or cancelled check here. Proof of original
purchase date is needed to obtain service under warranty.
WHAT IS
COVERED
From the Date
of the Original
Purchase
LIMITED ONE-YEAR WARRANTY
For one gear from the date of the original purchase, GEwill replace ony port of the microwove oven which
fails due to a defect in materials or workmanship. During this limited one-gear warrantg, GEwill also provide,
free of charge, all labor and related service to replace the defective part.
FIVE-YEAR LIMITED WARRANTY
For five gears from the date of the original purchase, GEwill replace the mognetron tube, if the magnetron
tube fails due to a defect in materials or workmanship. During this five-gear limited warrantg, gou will be
responsible for ang labor or in-home service costs.
OOOO_O®eOOOOmO®QOO®O_®QOI®®O®®O®®®OOO®QOQ®®®OO®OI®®®O®®O®®O®O®Q®OOOOO®
All warrantg service will be provided bg our Factorg Service Centers or bg our authorized
Customer Care®servicers during normal working hours.
Should gout appliance need service, during warrantg period or begond, in the U.S.A call 800.444.18/45.
Pleasehave serial and model numbers available when calling for service.
WHAT IS NOT
COVERED
• Service trips to your home to teach you how
to use the product.
Improper installation, delivery or
maintenance.
• Product not accessible to provide required service.
Failure of the product or damage to the product if
it is abused, misused (for example, cavity arcing
from wire rack or metal/foil}, or used for other
than the intended purpose or used commercially.
Replacement of house fuses or resetting of
circuit breakers.
* Damage to the product caused bg accident,
fire, floods or acts of God.
, Incidental or consequential damage caused
bg possible defects with this appliance.
Damage caused after delivery.
EXCLUSION OF IMPLIED WARRANTIES--Your sole ond exclusive remedg is product
repair us provided in this Limited Wurruntg. Ang implied warranties, including the
implied warranties of merchuntubilitg or fitness for u particular purpose, ore
limited to one gear or the shortest period allowed bg law.
This warrantg is extended to the original purchaser and ang succeeding owner for products purchased
for home use within the USA. If the product is located in an area where service bg a
GEAuthorized Servicer is not available, gou mag be responsible for a trip charge or gou mag be
required to bring the product to an Authorized GEService Location for service. In Alaska, the warrantg
excludes the service calls to gour home.
Some states do not allow the exclusion or limitation of incidental or consequential damages, so the
above limitation or exclusion mag not applg to gou. This warrantg gives gou specific legal rights, and
gou mag also have other rights which varg from state to state. To know what gout legal rights are in
gout state, consult gout local or state consumer affairs office or gout state's Attorneg General.
Warrantor: General Electric Compang, Louisville, KY40225
Printed in Korea
GE Consumer & Industrial
Appliances
General Electric Comp(]ng
Louisville, KY/40225
ge.com