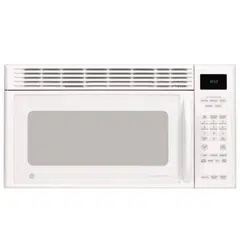
Models:
1000Watts
JVM1640
JVM1642
SpacemakerXL Microwave Oven
Owner's Manual
important Safety Information
2
Operating Instructions
_2
5
2
25
]K!
Helpful Information
If_ J_; I/!/ IiO
ff Something Goes Wrong
@E ,SI_:[_IICQ
GEAnswer Center®
800.626.2000
GEAppliances
READ ALL SAFETY
INFORMATION BEFORE USING
PRE CA UTIONS
TO A VOID
POSSIBLE
EXPOSURE
FOEXCESSIVE
MICR 0 WAVE
ENERGY
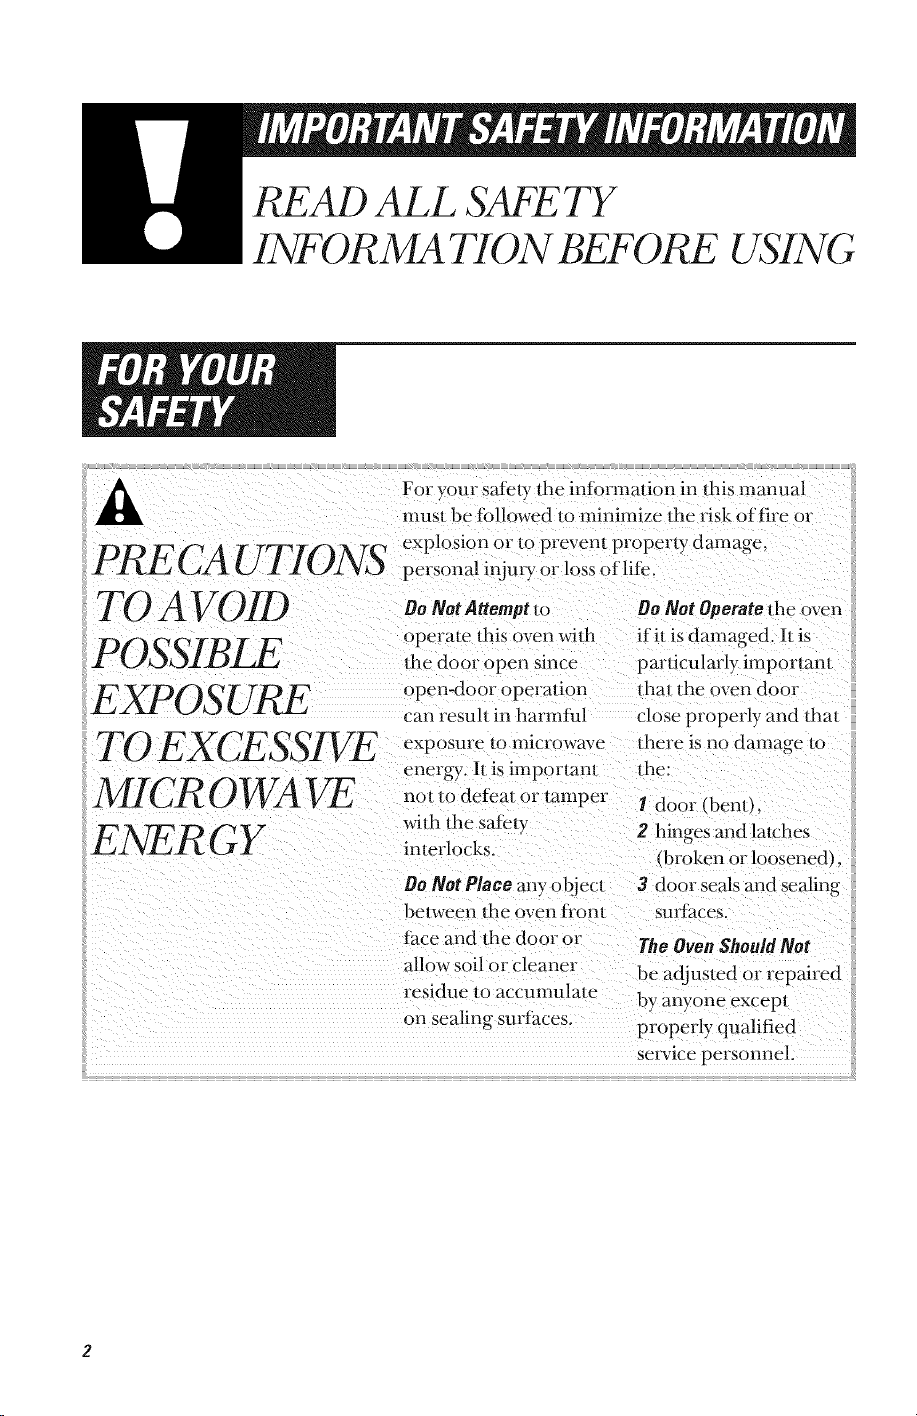
For your safely the information in dfis manual
must be ibllowed 1o minimize lhe risk offire o1"
explosion or to prevent property damage,
personal injm'y or loss of litc.
Oo Not Attempt to Do Not Operate lhe oven
operale this oven wilh if it is damaged. It is
d_e door e pen since particularly important
open-door operation lhat the oven doe1
can result in harmful close properly and/hat
exposure/o microwave there is no damage 1o
energy. It is important the:
not to defeat or tamper I door (benO
wilh the satc/y 2 hinges and lalches
inmrlocks. ,broken or loosened_.
0o Not Place any objecl 3 door seals and scaling
belween the oven ti'ont sm:thces.
thee and ihe door or
Welcometo the GE family.
We're proud of our quality
products and we believe
in dependable se_,ice.
You'll see it in this easy-to-
use manual and you'll hear
it in the fiiendly voices of
OUr consulneI sel_qce
department.
Best of all, you'll
experience these values
each time you use your
microwave. That's
important, because your
new microwave will be part
of your family tbr a long
time.
Start Here!...Before using your Microwave
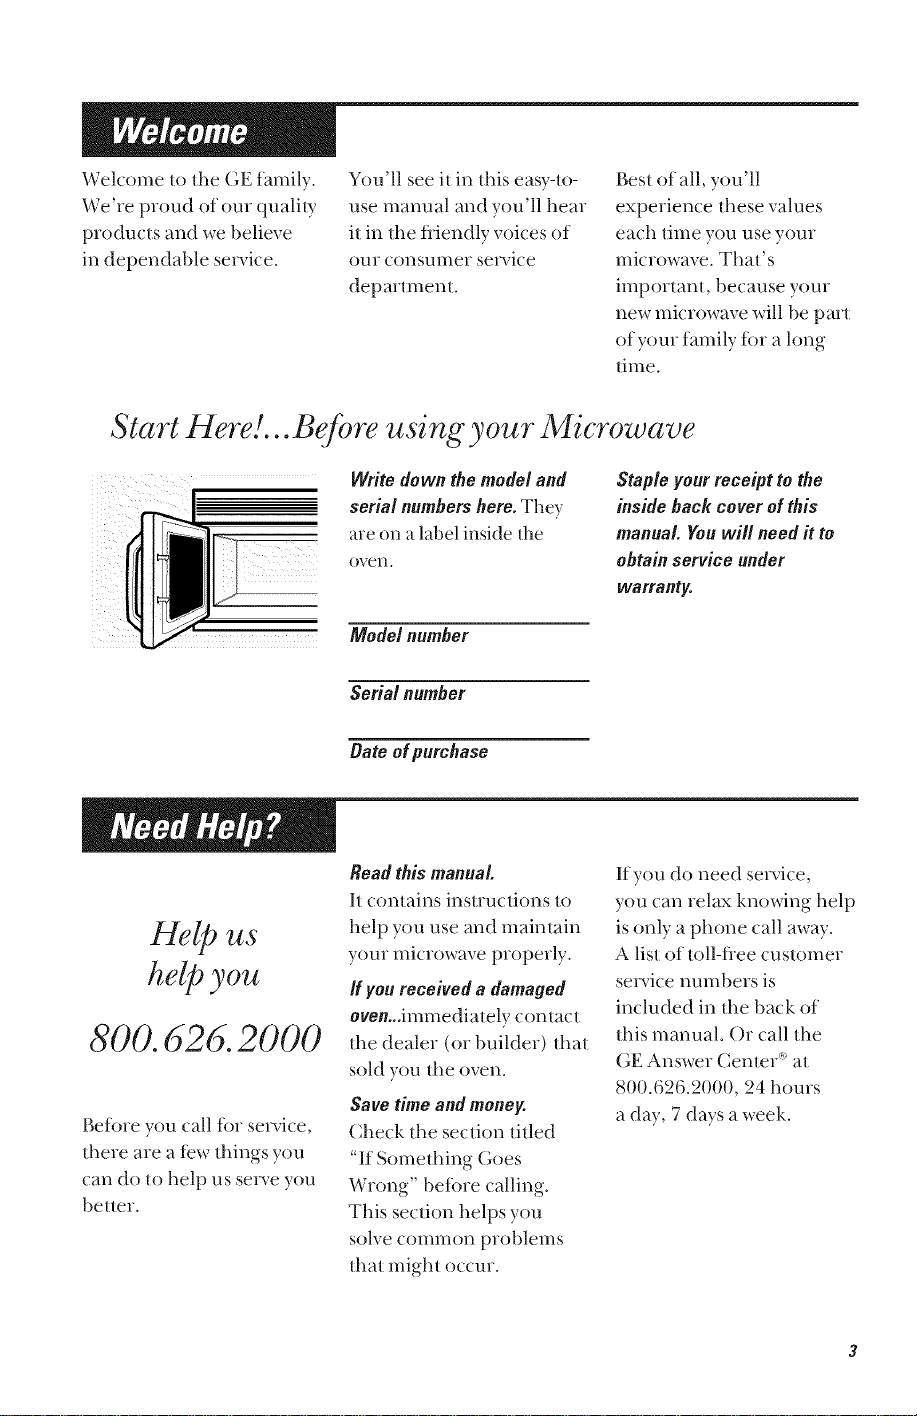
Write down themodel and
serial numbershere They
/
are on a label inside the
oven.
Model number
Serial number
Date of purchase
Staple your receipt to the
inside back cover of this
manual. Youwill needit to
obtain service under
warrant_
Help tts
helpyou
800. 626.2000
Before you call tbr se_qce,
the_e are a tew things you
can do to help us se_ve you
better.
Read thismanual.
It contains instructions to
help you use and maintain
your microwave prope_ly.
If you received a damaged
oven...immediately contact
the deale_ (or builder) that
sold you the oven.
Savetime andmoney.
Check the section titled
"if Something Goes
Wrong" befi)re calling.
This section helps you
solve common problems
that might occur.
If you do need se_qce,
you can relax knowing help
is only a phone call away.
A list of toll-flee customer
se_qce numbers is
included in the back of
this manual. ()r call the
GE Answer CenmF _at
800.626.2000, 24 hours
a day, 7 days a week.
READ ALL SAFETY
INFORMATION BEFORE USING
a listed i,staHatio,
overelectricandgas
ra.oesl
Thismicrowave oven is
not approved Ortested
for marine use.
o Read and follow the o
specific "Precautions to
Avoid Possible Exposure
to Excessive Microwave
Enerw" on page 2.
o This appliance must be
grounded. Connect only *
to properly grounded
outlet. See Grounding
Instructions section on o
page 10.
o Do not mount this
appliance over a sink.
• Install or locate this
appliance only in
accordance with the
provided Installation
Instructions.
This over-the-range oven
was designed for use over
ranges no wider than 42
inches. It may be installed
over both gas and electric
cooking equipment.
Do not operate this
appliance if it has a
damaged power cord or
plug, ifit is not working
properly, or ifit has been
damaged or dropped.
Do not cover or block
aW openings on the
appliance.
Use this appliance only
for its intended use as
described in this manual.
Do not use corrosive
chemicals or vapors in
this appliance. This
nlicrowave oven is
specifically designed to
heat, d_T or cook food,
and is not intended
for laborato_ T or
industrial use.
oDonots/orethis
applianceoutdoors.Do
nolusethisproductnear
wate_fbrexample,ina
wetbasement,neara
swimmingpoolornear
asink.
" Keep power cord away
flom heated surfaces.
,, Do nol immerse power
cord or plug in water.
"To reduce tile risk of fire
in tile oven cavity:
- Do not overcook tood.
Caretully atlend
appliance it paper,
plastic or other com-
bustible mamrials are
placed inside tile oven
while cooking.
- Remove wire twisl-fies
and metal handles flom
paper or plastic con-
tainers be%re placing
them in tile oven.
Do not use tile oven
fbr storage purposes.
Do nol leave paper
producls, cooking
ulensils or food in lhe
oven when nol in use.
If materials inside oven
should ignite, keep tile
oven door closed, turn
tile oven off and
disconnect tile power
cord, or shut off power
al tile fuse or circuit
breaker panel. If tile
door is opened, tile fire
may spread.
" See door surfhce cleaning
instruclions in tile Care
and Cleaning section(s)
of this guide.
* This appliance should
be serviced only by
qualified se_-ice
personnel. Conlact
nearest authorized
service fhcility for
examina6on, repair
or ac!juslmenl.
"As with any appliance,
close supervision is
necessa_ y when used by
children.
SAVE THESE INSTRUCTIONS
m
SPECIAL NOTES ABO UT MICR OWA VING
soo,o,,
th,aEAR/OFFp,d,,d
:!Co ,,tth,P ob/,m,
Arcing is the microwave
term tbr sparks in tile oven.
Arcing is caused by:
* Metal or foil touching tile
side of tile oven. *
o Foil not molded to food
(upturned edges act like
antennas).
Metal, such as twist-ties,
pouln T pins, or ,gold-
rimmed dishes, in the
microwave.
Recycled paper towels
containing small metal
pieces being used in the
microwave.
Do not pop popcorn in
your microwave oven
unless in a special
microwave popcorn
accessoi)_ or unless you
use popcorn labeled for
use in inicrowave ovens.
o Some products such as
whole eggs and sealed
containers-ibr example,
closed jars-_ill explode
and should not be heated
in this microwave oven.
Such use of the microwave
oven could resuh in il_juU.
* Do not boil eggs in a
microwave oven. Pressure
will build up inside egg
yolk and will cause it to
burst, possibly resuhing
in inju U.
* Operating the microwave
with no tbod inside for
more than a minu/e or
two m W cause damage to
the oven and could start a
fire. It increases the heat
around the magnetron
and can shorten the life
of the oven.
Foods with unbroken
outer "skin" such as
potaloes, hot dogs,
sausages, tomatoes,
apples, chicken livers
and other giblets, and
egg yolks should be
pierced to allow smam
to escape during cooking.
SAFETY
FACT
SUPERHEATEDWATER
Microwaved water and
otherliquids donot
always bubblewhen
they reach theboiling
point. They can actually
get superheated and not
bubbleat all.
Superheatedliquid will
bubbleup outof the cup
when it is movedor
when something like a
spoon or tea bag is put
into it.
Toprevent thisfrmn
happeningandcausing
injury,donot heat any
liquid for more than2
minutesper cup. After
heating,let thecup
stand in themicrowave
for 30secondsbefore
movingit orputting
an_hing into it.
Avoid heating baby food
in glass jars, even with the
lid off. Make sure all
infant food is thoroughly
cooked. Stir food to
distribute the heat
evenly. Be careful to
prevent scalding when
warming fbrmula or
breast milk. The container
m W teel cooler than the
milk really is. Always test
the milk betore feeding
the baby.
Spontaneous boiling-
Under certain special
circumstances, liquids
m W start to boil during
or shortly after removal
flom the microwave oven.
To prevent burns flom
splashing liquid, we
recommend the fbll(m_ng:
betbre removing the
container flom the oven,
allow the container to
stand in the oven tor 30
to 40 seconds after the
oven has shut off. Do not
boil liquids in narr()w-
necked containers such
as soft drink bottles, wine
flasks and especially
narrow-necked coffee
cups. Even if the
container is opened,
excessive steam can build
up and cause it to burst
or overflow.
o Don't deflost flozen
beverages in narrow-
necked bottles (especially
carbonamd beverages).
Even if the container is
opened, pressure can
build up. This can cause
the container to burst,
possibly resuhing in
il_juu.
* Hot fbods and steam
can cause burns. Be
caret_al when opening
any containers of hot
tbod, including popcorn
bags, cooking pouches
and boxes. To prevent
possible il_ju U, direct
steam aw W flom hands
and f_tce.
= Do not overcook
potatoes. They could
dehydrate and catch
fire, causing damage to
your oven.
* Cook meat and pouln T
thoroughly-meat to at
least an INTERNAL
temperature of 160 °F.
and pouh D, to at least an
INTERNAL temperature
of 180 °F. Cooking to
these temperatures
usually protects against
toodborne illness.
m
SPECIAL NOTES ABO UT MICR OWA VING
Make sure all cookware
used in your microwave
oven is suitable tor
microwaving. Most glass
casseroles, cooking dishes,
measuring cups, custard
cups, potm U or china
dinner,rare which does not
have metallic trim or glaze
with a metallic sheen can
be used. Some cookware is
labeled "suitable *or
microwaving."
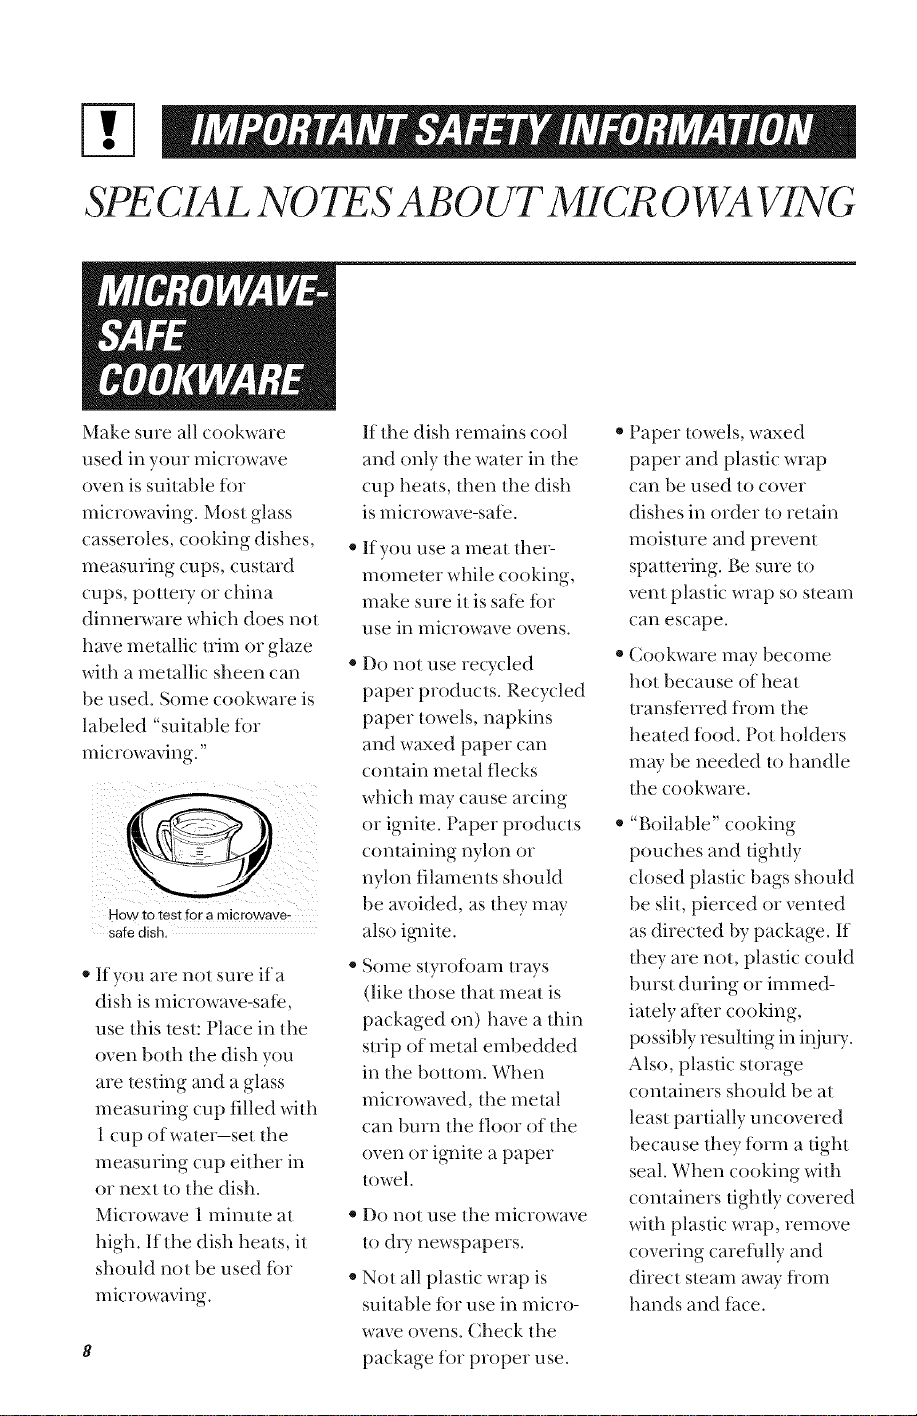
How to test for a microwave-
safe dish.
* If you are not sure ifa
dish is microwave-sate,
use this lest: Place in tile
oven both tile dish you
are testing and a glass
measming cup filled with
1 cup of water--set tile
measuring cup either in
or next to tile dish.
Microwave 1 minute at
high. If tile dish heats, it
should not be used for
microwaving.
If the dish remains cool
and only tile water in tile
cup heats, then tile dish
is microwave-safe.
If you use a meat ther-
mometer while cooking,
make sure it is safe for
use in microwave ovens.
* Do not use recycled
paper products. Recycled
paper towels, napkins
and waxed paper can
contain metal flecks
which may cause arcing
or ignite. Paper products
containing nyhm or
nylon filaments should
be avoided, as they may
also ignim.
e Solne styrof()aln trays
(like those that meat is
packaged on) have a thin
strip of metal embedded
in tile bottom. When
microwaved, tile metal
can burn the floor of the
oven or ignite a paper
towel.
Do not use tile ulicrowave
to dU newspapers.
Not all plastic wrap is
suitable tor use in micro-
wave ovens. Check tile
package for proper use.
* Paper towels, waxed
paper and plastic wrap
can be used to cover
dishes in order to retain
moisture and prevent
spattering. Be sure to
vent plastic wrap so steam
can escape.
* Cookware may become
hot because of heat
transferred flom tile
heated food. Pot holders
may be needed to handle
the cookware.
"Boilable" cooking
pouches and tightly
closed plastic bags should
be slit, pierced or vented
as directed by package. If
they are not, plastic could
burst during or immed-
iately after cooking,
possibly resuhing in il_juU.
Also, plastic storage
containers should be at
least partially uncovered
because they f_rm a tight
seal. When cooking with
containers tightly covered
with plastic wrap, remove
covering caretully and
direct steam aw W fiom
hands and face.
*Usefbilonlyasdirected
inthismanual.TV
dinnersmaybe
microwavedinfbiltrays
lessthan3/4"high;
removetiletopfoilcover
andreturntiletraytothe
box.Whenusingfoilin
themicrowaveoven,
keepthefbilatleast
1inchawayflomthe
sidesoftheoven.
Thefmawilloperate
automaticallyunder
certainconditions(see
AutomaticFanfeature).
Takecaretopreventthe
startingandspreadingof
accidentalcookingfires
whiletheventfanisinuse.
*Cleantheundersideof
themicrowaveoften.Do
nc,Iallow,greaseIt;,build
uponthemicrowaveor
thefanfillers.
Plasticcookware--Plastic
cookwaredesignedfor
microwavecookingisvesT
useful,butshouldbeused
carefully.Evenmicrowave-
safeplasticmaynotbeas
tolerantofovercooking
conditionsasareglassor
ceramicmaterialsand
mWsoftenorcharif
sul)jectedtoshortperiods
ofovercooking.Inlonger
exposurestoover-
cooking,thefoodand
cookwarecouldignite.
Followtheseguidelines:
I Use microwave-safe
plastics only and use
them in s/fict compliance
with the cookware
inanuf_tcturer's
recolnulendalions.
2 Do not microwave empty
containers.
3 Do not permit children
to use plastic cool<ware
without complete
supe_qsion.
In the event of a grease
fire on the surf_tce units
below the microwave
oven, smother a flaming
pan on the surface unit
by covering the pan
completely with a lid, a
cookie sheet or a fiat tray.
Use care when cleaning
the vent fan fihers.
Corrosive cleaning
agents, such as lye-based
oven cleaners, Illay
damage the fillers.
* When preparing
flaming foods under
the microwave, turn the
tim on.
* Never leave surface units
beneath your microwave
oven unattended at high
heat settings. Boilovers
cause smoking and greasy
spillovers that m W ignite
and spread if the
microwave vent f_m is
operating. To minimize
automatic fan operation,
use adequate sized
cookware and use high
heat on surface units only
when necessa_ T.
m
GR0 UNDING INSTR UCTIONS/OPTIONAL KITS
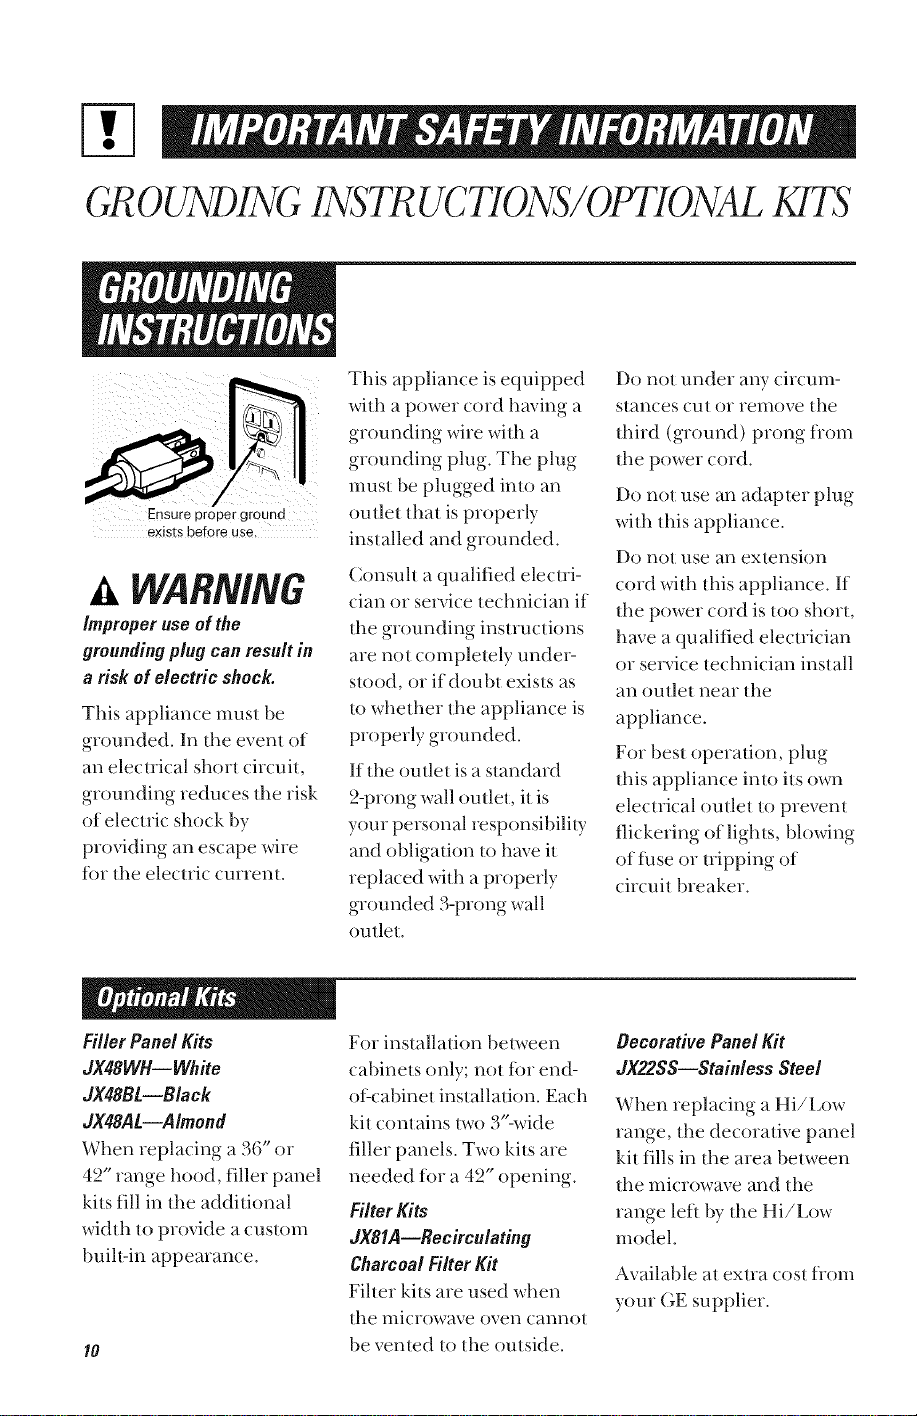
Ensure proper ground
exists before use.
WARNING
Improperuse of the
groundingplug canresult in
a risk of electric shock.
This appliance must be
grounded. In the evenl of
an elec/rical short circuit,
grounding reduces the risk
of electric shock by
providing an escape wire
tbr the electric current.
This appliance is equipped
with a power cord having a
grounding wire witl_ a
grounding plug. The plug
must be plugged into an
outlet that is properly
installed and grounded.
Consuh a qualified electri-
cian or se_,ice technician it
tl_e grounding instructions
are not completely under-
stood, or if doubt exists as
to whed_er tl_e appliance is
properly grounded.
If the outlet is a standard
2-prong wall outlet, it is
your personal responsibility
and obligation to have it
replaced with a properly
grounded 3-prong wall
outlet.
Do not under a W circum-
stances cut or remove the
third (ground) prong fiom
tl_e power cord.
Do not use an adapter plug
witl_ this appliance.
Do not use an extension
cord with this appliance. If
the power cord is too short,
have a qualified elecuician
or se_,ice technician install
an outlet near the
appliance.
For best operation, plug
this appliance into its own
electrical outlet to prevent
tlickering of lights, blowing
of tuse or uipping of
circuit breaker.
Filler Panel Kits
JX48WH--White
JX48Bl--Black
JX48Al--Almond
When replacing a 36" or
42" range hood, filler panel
kits fill in the additional
width to provide a custom
built,in appearance.
10
For installation between
cabinets only; not tbr end-
el:cabinet installation. Each
kit contains two 3"-wide
filler panels. Two kits are
needed tot a 42" opening.
Filter Kits
JXS1A--Recirculating
Charcoal FilterKit
Fiher kits are used when
the microwave oven cannot
be vented to the outside.
Decorative Pane/Kit
JX22SS--Stain/ess Steel
When replacing a Hi/Low
range, the decorative panel
kit fills in the area between
tl_e microwave and the
range left by tl_e Hi/Low
model.
Available at exua cost fiom
your GE supplier.
IO00Wa_s
////!/i 1!!\\
@
2
3
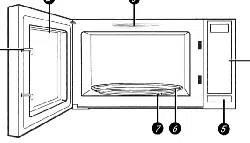
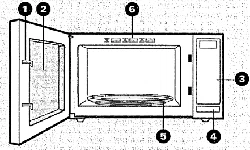
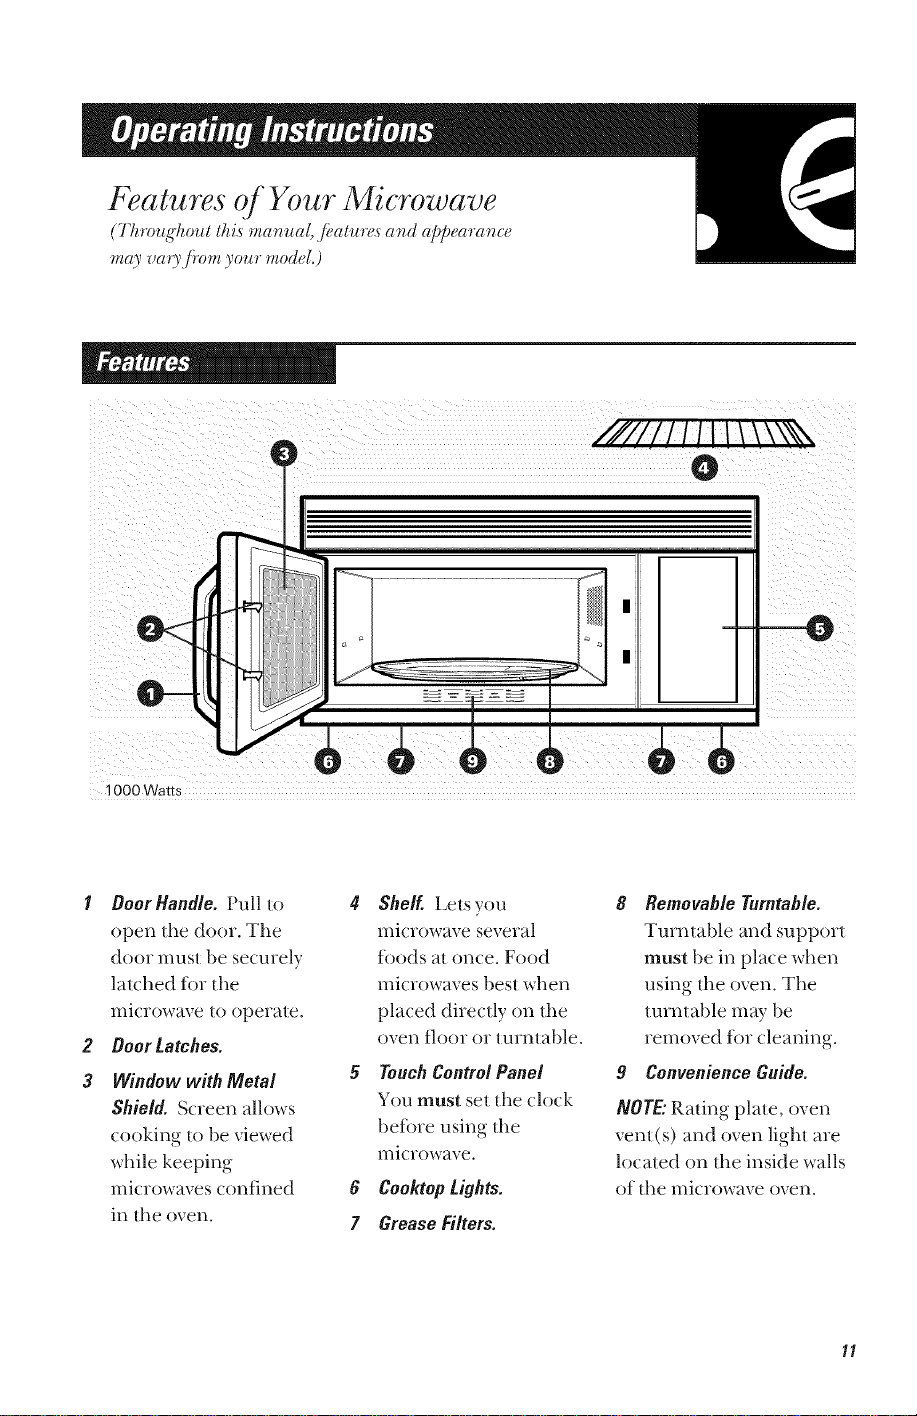
Ooor Handle. Pull to
()pen the door. The
door must be securely
latched for the
inicrowaye to operate.
Ooor Latches.
Window with Metal
Shield. Screen allows
cooking to be viewed
while keeping
microwaves confined
in the oven.
4 Shelf, Lets you
microwave several
tbods at once. Food
microwaves best when
placed directly on the
oven floor or turntable.
5 TouchControlPanel
You must set the clock
betbre using the
microwave.
0 Cooktop Lights.
7 Grease Filters.
8 Removable Turntable.
Turntable and support
must be in place when
using the oven. The
turntable may be
removed for cleaning.
9 Convenience Guide.
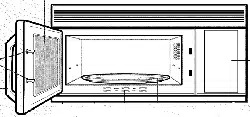
NOTE"Rating plate, oven
vent(s) and oven light are
located on the inside walls
of the microwave oven.
11
rThe Cent ols on Your Microwave Oven
(T/_,roughout tM,s_*m_ua/,,f!_cllure,sclad clppemcmce _'myvclu,f!o_'_your _wdel.)
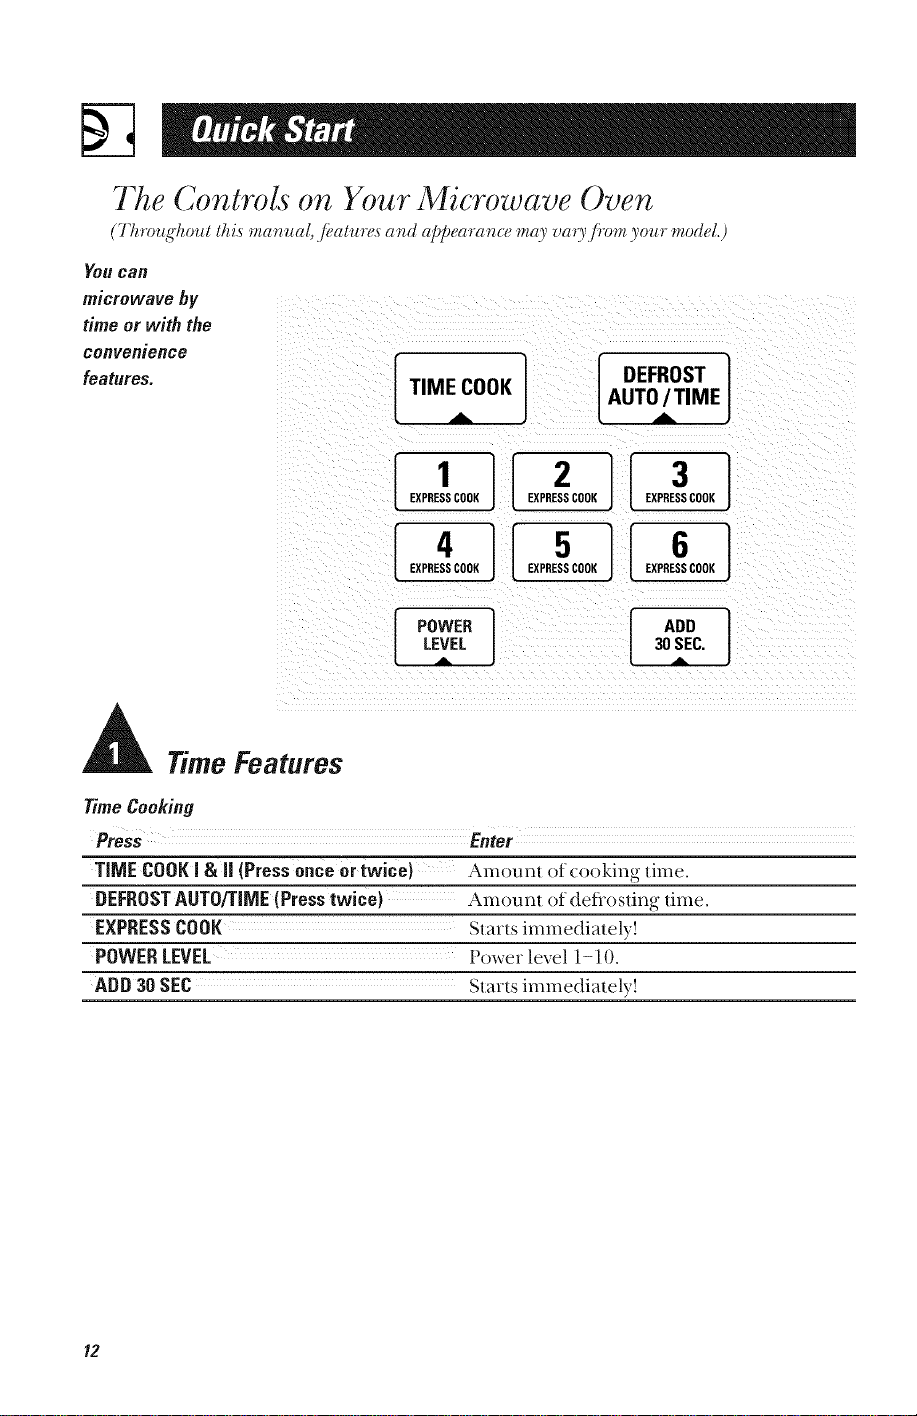
Yoo can
microwave by
time or with the
convenience
features,
[,,o coo 1
_,,.s,s_oo__,._oo_1[
I ADD
30 SjC.
A Time Features
TimeCooking
Press Enter
TIME COOKJ&JJ(Press once or twice)Amoum of cooking time.
DEFROSTAUTO/TIME(Press twice) Amoum of deflosfing time.
EXPRESSCOOK Starts immediately!
POWERLEVEL Power level 1-10.
ADD30 SEC Slarts immediately!
12

i HELP
Press this pad and any
feature pad for usage
instructions and tips.
GUIDE ON MICROWAVE
Before you begin, check
the guide located on the
inside front of the oven
when you open the door.
GUIDES iN BOOR
• Cooking
• Time Defrost
• Reheat
• Snacks
[e0 .. l
• 1
DEFROST
AUTO / TIME
Convenience Features
BEVERAGE}
REHEATA1
POPCORN Starts immediately! more/less time
Pressonce 3.5 oz.
Press twice 3.0 oz.
1.75 oz.
BEVERAGE Starts immediately[ 1-3 sex_qngs
COOR Food typel-9 + weight
REHEAT Food type 1-6 1-3 servings
Food weight
(Press once)
13
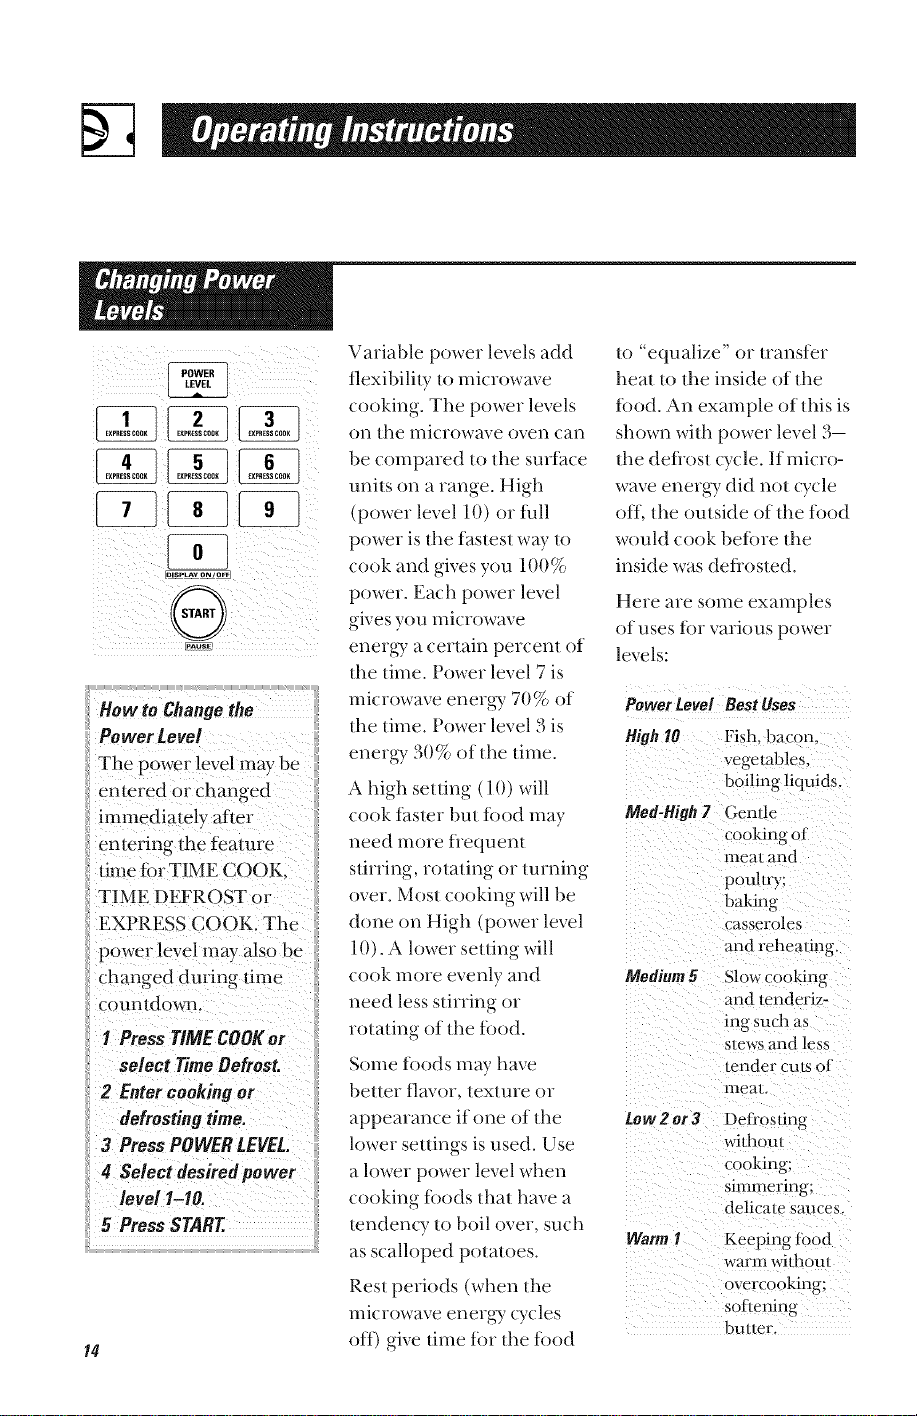
time t_)r TIME COOK;
TIME DEFROST or
EXPRESS COOKI The
P0wer level may a!s0 be
Changed during time
i_Coumdo_m
_g
I Pressr/MECOOKor
select TimeDefrost.
2 Enter CooMngog
defrostingtimel
3 Press POWERLEVEL
4 Se!ectdesiredpower
/eve/l-10.
5 PressSTART
14
Variable power levels add
flexibility to microwave
cooking. The power levels
on the microwave oven can
be compared to the surt_tce
units on a range. High
(power level 10) or t;all
power is the fastest way to
cook and gives you 100%
power. Each power level
gives you microwave
energ T a certain percent of
the time. Power level 7 is
microwave energ T 70% of
the time. Power level 3 is
/o "'equalize" or transfer
heat lo the inside of the
tbod. An example of this is
shown wi/l_ power level 3
the deflost cycle, if micro-
wave ener_'v did not cycle
ott. the outside of the t_)od
would cook betbre the
inside was deflosled.
Here are some exmnples
of uses tbr various power
levels:
Power Level Best Uses
High I0 Fish. bacon.
energ T 30% of the time. vegetables,
A high set 0ng (10) will
cook taster but tood may Med-High7
need more flequent
stirring, rotating or turning
over. Most cooking will be
done on High (power level
10). A lower setting will
cook more evenly and Medium 5
need less stirring or
rot ating of the tbod.
Some toods m W have
better flavor, texture or
appearance if one of the
lower settings is used. Use
a lower power level when
cooking toods that have a
tendency to boil over, such
as scalloped potatoes.
Rest periods (when the
microwave energ Tcycles
off) give time for the food
boiling liquids.
Gentle
cooking of
n_ea! arid
pouhry;
baking
casseroles
and reheming.
Slow cooking
and lenderiz-
ing such as
stowsand less
lender cuts oJ
lrlea].
Low2 or 3 De[i'osdng
without
cooking;
simmering:
delicale sauces.
WarmI Keeping [bod
warm wilhout
ovcrcooking;
soJ['lenin¢
])uller.
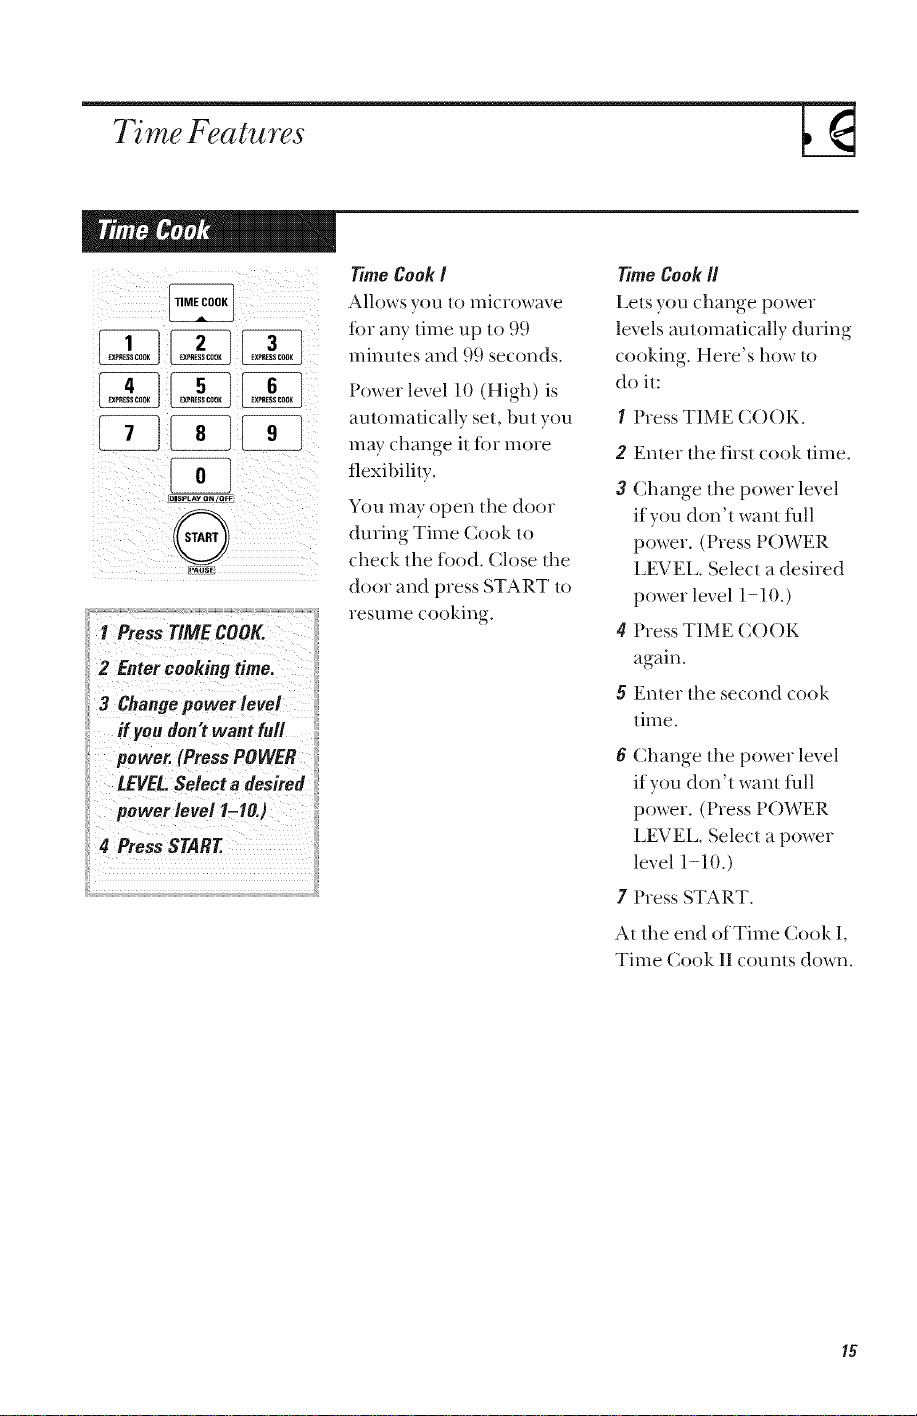
7_me Fea tures
[PAust_
LEVEL:se/ectodesi,ed
p_Wer_1_lo._i¸
4 P_essSTART.
Time Cook /
Allows you to microwave
ibr any time up to 9.(}
minutes and 9.(}seconds.
Power level 10 (High) is
automatically set, but you
may change it for more
flexibility,
You may ()pen the door
during Time (_ook to
check the tbod. Close the
door and press START to
resume cooking.
TimeCook//
Lets you (han,ge power
levels automatically during
cooking. Here's how to
do it:
I Press TIME CO()K.
2 Enter the first cook time.
3 Change the power level
if you don't want tull
power. (Press POWER
LEVEL Select a desired
power level 1-10.)
4 Press TIME CO()K
again.
5 Enter the second cook
time.
Change the power level
if you don't want lull
power. (Press POWER
LEVEL. Select a power
level 1-10.)
Press START.
At the end of Time Cook I,
Time Cook IXcounts down.
15
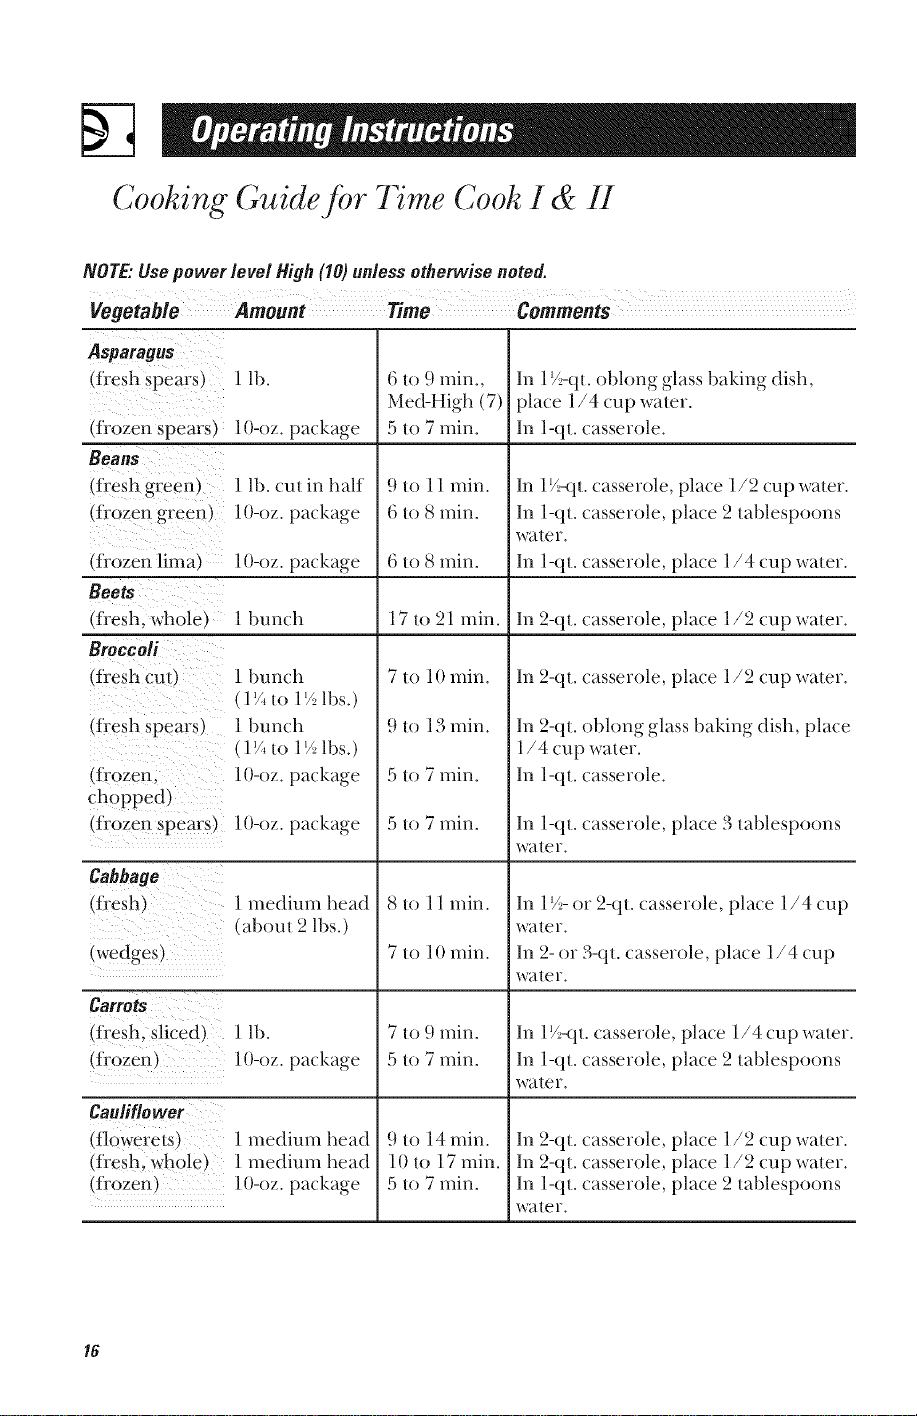
Cooking Guide for Time Cook I & II
NOTE."Usepower/eve/High(10)un/essotherwisenoted.
Vegetable Amount Time Comments
Asparagus
(fi'esh Spears) 111).
(ti'ozen spears) 10-oz. package
Beans
(fresh gree n) 1 lb. cut in half
(fiozen green) 10-oz. package
(fi'ozen lima) 10-oz. package
Beets
(ti'esh, whole) 1 bunch
Broccoli
(ti'esh Cut)1 bunch
(l_+to 1'/:lbs.)
(fl'esh spears) 1 bunch
(1%Io 1% lbs.)
(frozen; 10-oz. package
chopped)
(frozen spears) 10-oz. package
Cabbage
(fresh)
(wedges)
Carrots
if esh;SUCedi
(ii'ozen)
Cauliflower
(flowerets)
(fi'esh, whole)
(ii'ozen)
1 medium head
(about 2 lbs.)
1 lb.
10-oz. package
1 medium head
1 medium head
1O-oz. package
6 to 9 rain.,
Med-High (7)
5 to 7 rain.
9 to 11 rain.
6 to 8 rain.
6 to 8 rain.
17 to 21 rain.
7 to 10 rain.
9 to 13 min.
5 to 7 rain.
5 to 7 rain.
8 to 11 min.
7 to 10 min.
7 to 9 min.
5 to 7 rain.
9 to 14 rain.
10 to 17 rain.
5 to 7 rain.
In 17_,-qLoblong glass baking dish,
place 1/4 cup waler.
In 1-qt. casserole.
In 17,_,4tl.casserole, place 1/2 cup water.
In l-ql. casserole, place 2 lablespoons
Wa[eF.
In 1-ql. casserole, place 1/4 cup waler.
In 2-(11.casserole, place 1/2 cup water.
In 2-(11.casserole, place 1/2 cup water.
In 2-qt. oblong glass baking dish, place
1/4 cup water.
In 1-qt. casserole.
In 1-qt. casserole, place 3 tablespoons
WaleY.
In 1%-or 2-(11.casserole, place 1/4 cup
Wa[eF.
In 2- or 3-(11.casserole, place 1/4 cup
waleY.
In 1%-<tI. casserole, place 1/4 cup water.
In 1-qt. casserole, place 2 tablespoons
waler.
In 2-qt. casserole, place 1/2 cup water.
In 2-qt. casserole, place 1/2 cup water.
In 1-qt. casserole, place 2 tablespoons
WaleY.
16

Vegetable Amount Time Comments
Corn
fi'ozen kernel1 lO-oz package
Corn on the cob
flesh) 1 lo 5 ears
(frozen) l ear
2 |o 6 ears
Mixed
vegetables
(frozen)
Peas
lO-oz package
5 to 7 min.
3 to 4min.
perear
5 to 6 rain.
3 to 4 min.
per ear
5 to 7 min.
In 1-tit. casserole, place 2 tablespoons
water.
In 2-qt. oblong glass baking dish, place
corn. If corn is in husk, use no water; if
corn has been husked, add 1/4 cup
water. Rearrange after half of time.
Place in 2-qt. oblong glass baking dish.
Cover with vented plastic wrap.
Rearrange after half of time.
In 1-tit. casserole, place 3 tablespoons
water.
Itresh, shelled) 2 lbs. unshelled
(frozen} lO-oz package
Potatoes
(flesh. cubed. 4 potatoes
white _ (_ m b oz. each)
9 to 12 min.
5 to 7 min.
9 1Io 2 rain.
In 1-tit. casserole, place 1/4 cup water.
In 1-tit. casserole, place 2 tablespoons
water.
Peel and cut into 1inch cubes. Place in
2-qt. casserole with 1/2 cup water. Stir
(flesh, whole I (6 I() 8 oz.)
sweet or white
Spinach
(fi'esh} 10 Io 16 oz.
(frozen. lO-oz package
chopped
and leaf,
Squash
(flesh. summer 1 lb. sliced
and yellow)
(wdn ter, acorn I to 2 squash
butlernut_ _about I lb. each)
3 to 4 min.
5 to 7 min.
5 to 7 min.
5 to 7 min.
8 to 11 min.
after half of time.
Pierce with cooking fork. Place in
center of the oven. Let stand 5 minutes.
In 2-qt. casserole, place washed spinach.
In 1-qt. casserole, place 3 tablespoons
water.
In 1'/__1t. casserole, place 1/4 cup water.
Cut in half and remove fibrous
membranes. In 2-qt. oblong glass
baking dish, place squash cut-side-
down. Turn cut-side-up after 4 minums.
17
@
PAUSE
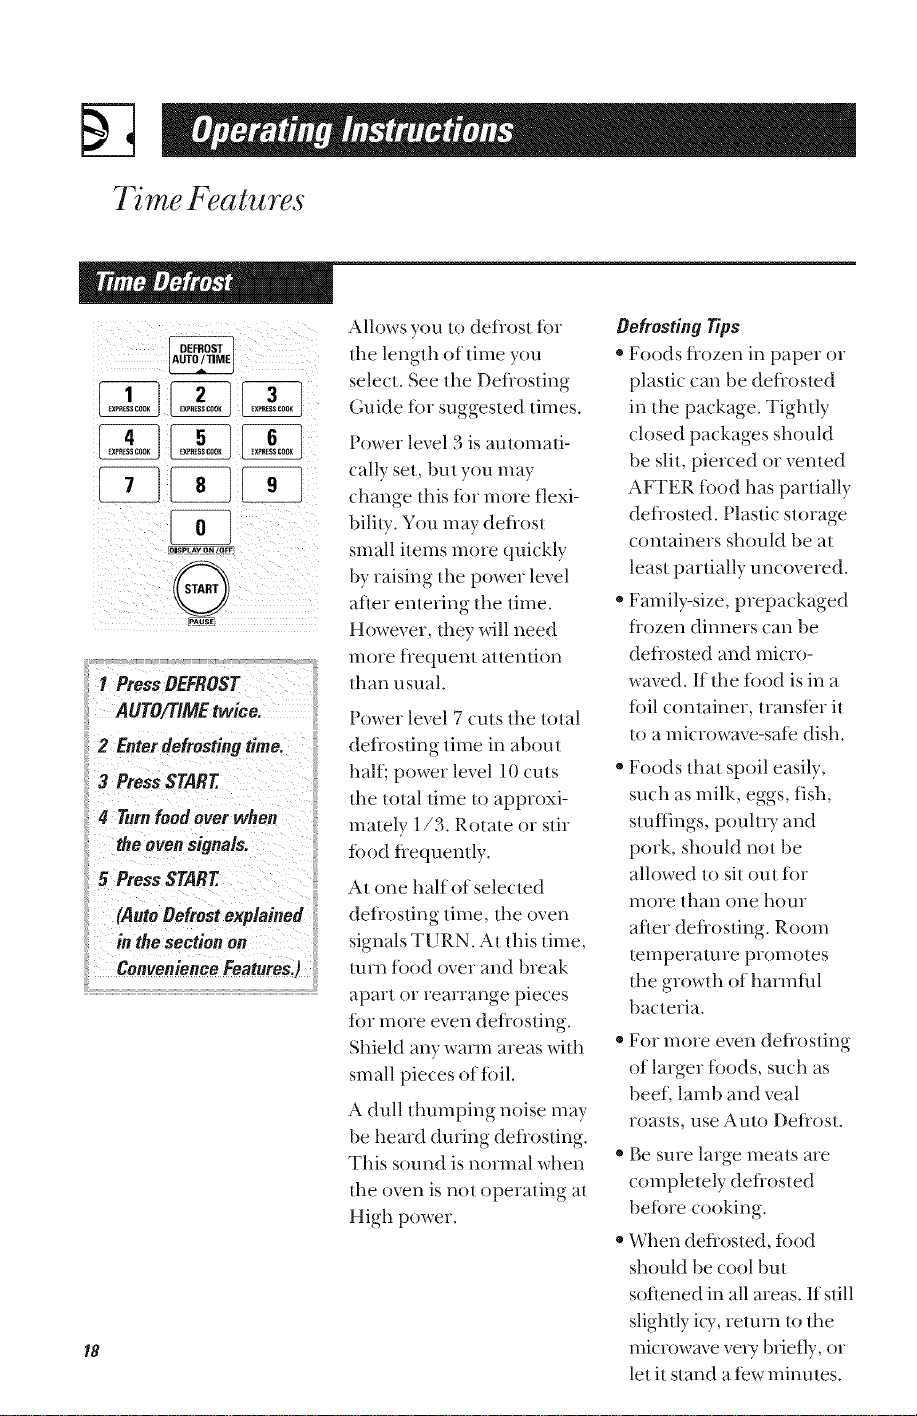
I PressDEFROST
AUTO/T/ME twice.
2 Enterdefrostingtime.
3 PressSTART
4 Turnfoodover when
the oven Mgna/s.
5 PressSTART
(AutoDefrostexplained
in thesectionon
ConvenienceFeatures.)
18
Allows you to deflost tor
the length of time you
select. See tl_e Deflosting
Guide tor suggested times.
Power level 3 is au/omati-
cally set, but you may
change this for more flexi-
bili/y. You may deflost
small items more quickly
by raising tim power level
after entering the time.
However, they will need
more flequent attention
titan usual.
Power level 7 cuts d_e total
deflosting time in about
half; power level f 0 cuts *
flae total time to approxi-
mately f/3. Rotate or stir
tbod fequently.
At one half of selected
deflosting time, the oven
signals TURN. At this time,
turn tbod over and break
apart or rearrange pieces
for more even deflosting.
Shield any warm areas with *
small pieces of foil.
A dull dmmping noise may
be heard during defrosting.
This sound is normal when
fl_e oven is not operating at
High power.
DefrostingTips
, Foods fozen in paper or
plastic can be deflosted
in the package. Tightly
closed packages should
be slit, pierced or vented
AFTER fbod has partially
deflosted. Plastic storage
containers should be at
least partially uncovered.
* Family-size, prepackaged
fozen dinners can be
deflosmd and micro-
waved. If tl_e fbod is in a
foil container, transfer it
to a microwave-safe dish.
Foods that spoil easily,
such as milk, eggs, fish,
stuffings, poulu T and
pork, should not be
allowed to sit out fbr
more fllan one hour
after deflosting. Room
temperatme promotes
the growth of harlnf_al
bacteria.
For more even deflosting
of larger foods, such as
beeL lamb and veal
roasts, use Auto Deflost.
* Be sure large meats are
completely deflosted
befbre cooking.
* When defosmd, fbod
should be cool but
sofened in all areas. If still
slightly iW, return to the
microwave ve_T briefly, or
let it stand a few minutes.
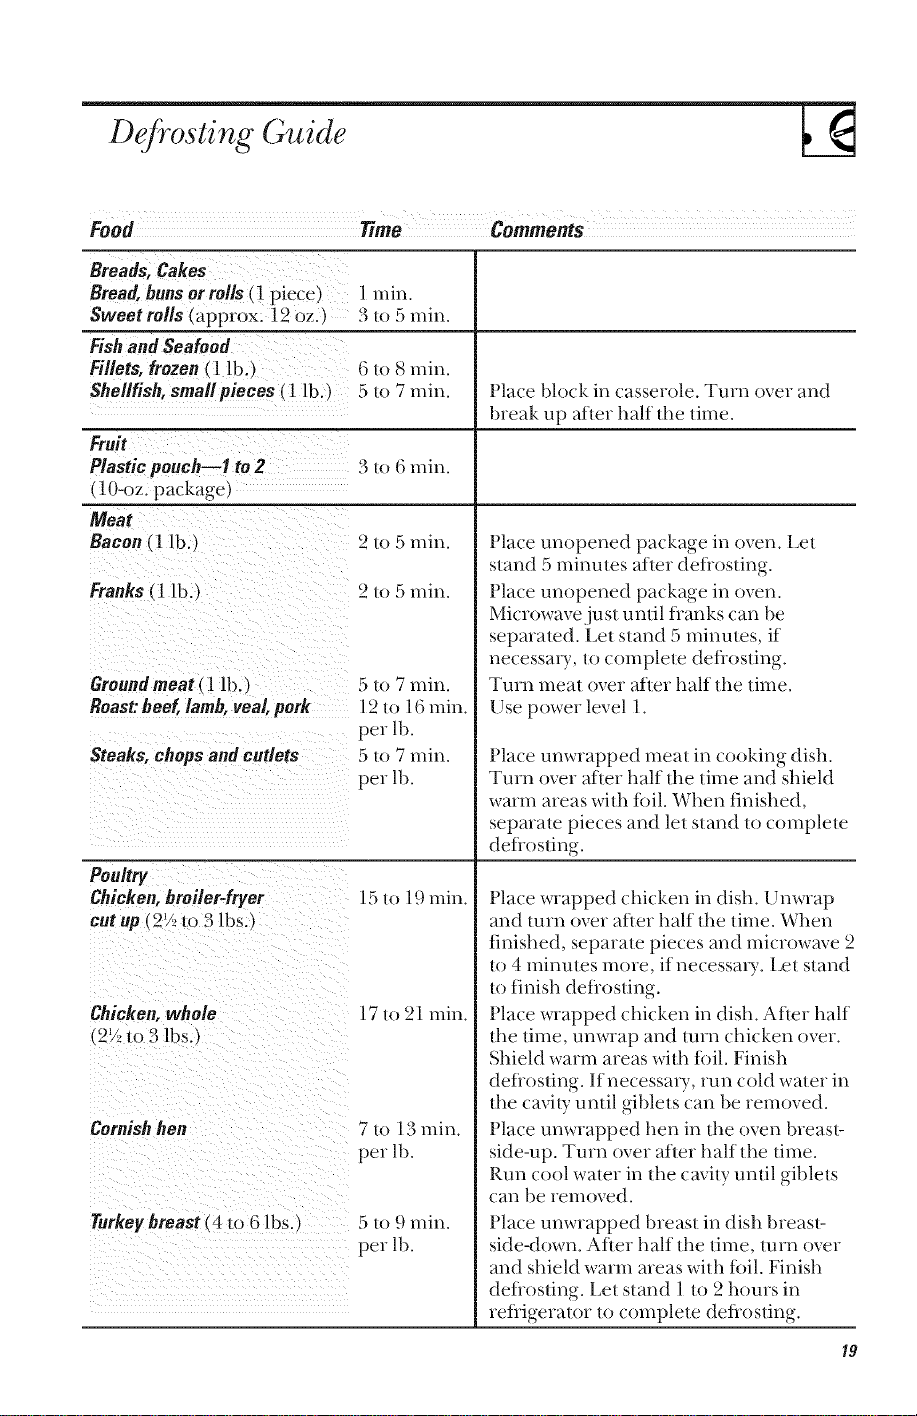
Defrosting Guide
Food time Commoots
Breads, Cakes
Bread, bunsor rolls (t piece)
Sweet rolls _approx. 12 oz.
Fishand Seafood
Fillets, frozen( l lb./
Shellfish, small pieces (1 lb. )
1 min.
3 It 5 rain.
Place block in casserole. Turn over and
break up after half/he lime.
Fruit
Plastic pouch--I to2 3 It 6 rain.
(10-oz. package)
Meat
Bacon (1 lb.)
Franks(1 lb./
Groundmeat ( 1 lb.
Roast:beef,lamb,veal,pork
Steaks, chops and cutlets
Poultry
Chicken,broiler-fryer
cut up (2'A _o 3 lbs.)
Chicken,whole
12% to 3 lbs.
Cornishhen
Turkeybreast(4 to 6 lbs.)
2 _o5 min.
2 _o5 rain.
5 It 7 rain.
12 Io 16 min.
per lb.
5 1o 7 min.
per lb.
15/o 19 rain.
17/o 21 rain.
7 l() 13 min
per lb.
5 it 9 rain.
per lb.
Place unopened package in oven. Let
stand 5 minutes after deflosting.
Place unopened package in oven.
Microwave,just until Danks can be
separated. Let stand 5 minutes, if
necessm T, to complete detiosting.
Turn meal over after half the time.
Use power level 1.
Place unwrapped meat in cooking dish.
Turn over after half the time and shield
warul areas with toil. When finished,
separate pieces and let stand to complete
deflosting.
Place wrapped chicken in dish. Unwrap
and turn over after half the time. When
tinished, separate pieces and microwave 2
to 4 minutes more, if necessm T. Eel stand
to finish detiosting.
Place wrapped chicken in dish. After half
the time, unwrap and turn chicken over.
Shield warm areas with toil. Finish
detiosting. If necessm T, run cold water in
the cavity until giblets can be removed.
Place unwrapped hen in the oven breast:
side-up. Turn over after half tl_e time.
Run cool water in tl_e cavily until giblets
can be removed.
Place unwrapped breast in dish breast:
side-down. After half the time, turn over
and shield warm areas wilh tbil. Finish
deflosting. Let stand 1 to 2 hours in
refligerator to complete deflosting.
19
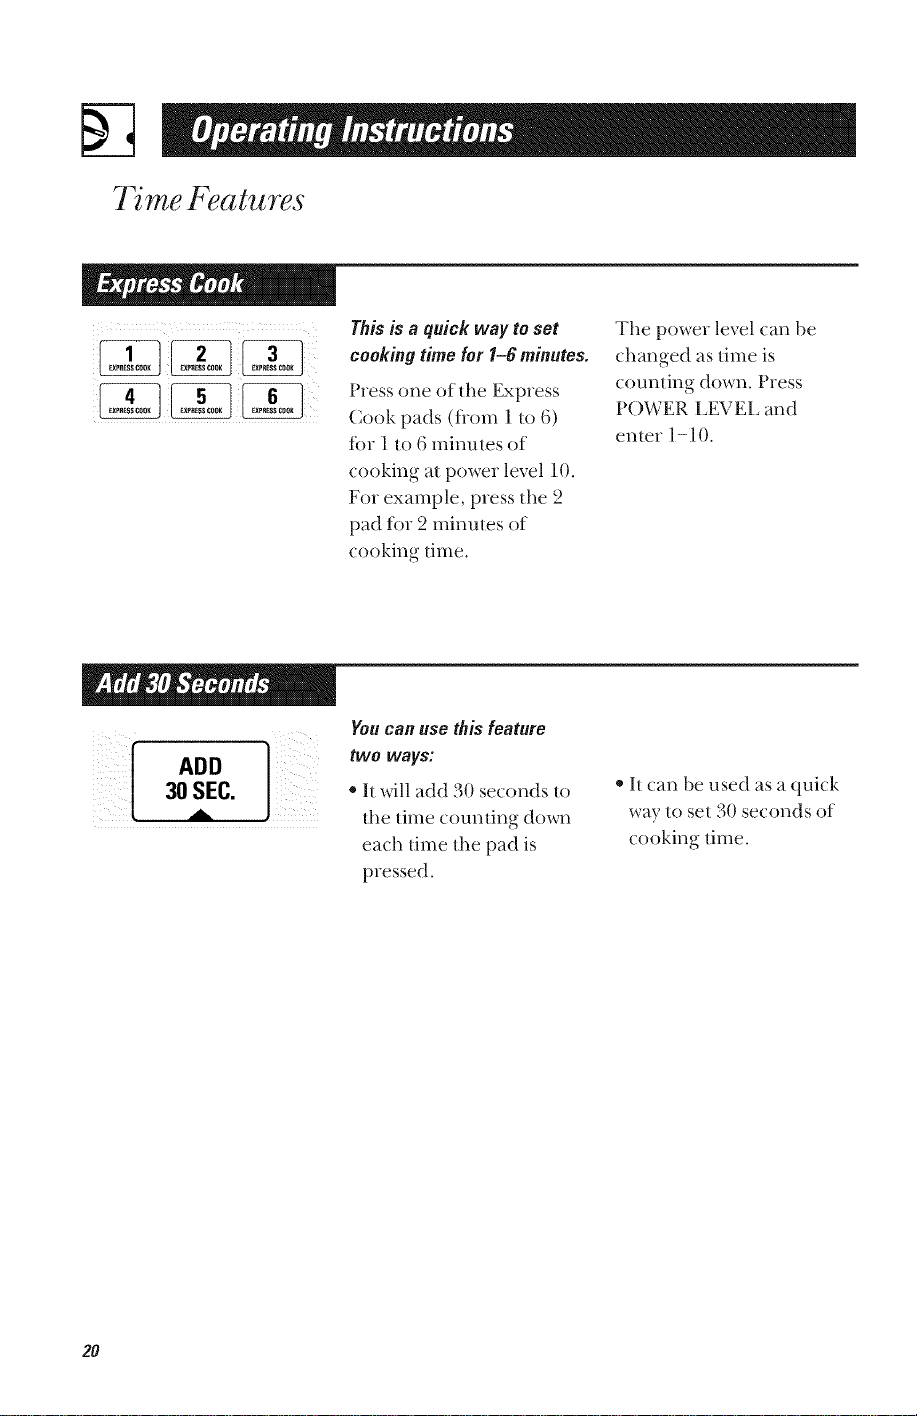
7 me Features
This is a quick way to set
cookingtime for I-6 minutes.
Press one of the Express
Cook pads (tiom 1 to 6)
t()I" 1 tO 6 minutes of
cooking at power level 10.
For example, press the 2
pad f_)r 2 minutes of
cooking lime.
The power level can be
changed as time is
counting down. Press
POWER LEVEL and
enter 1-10.
30 SEC.
You can use this feature
two wavs:
* It will add 30 seconds to
the time counting down
each time the pad is
pressed.
* It can be used as a quick
way to set 30 seconds of
cooking time.
2O
Convenience Features
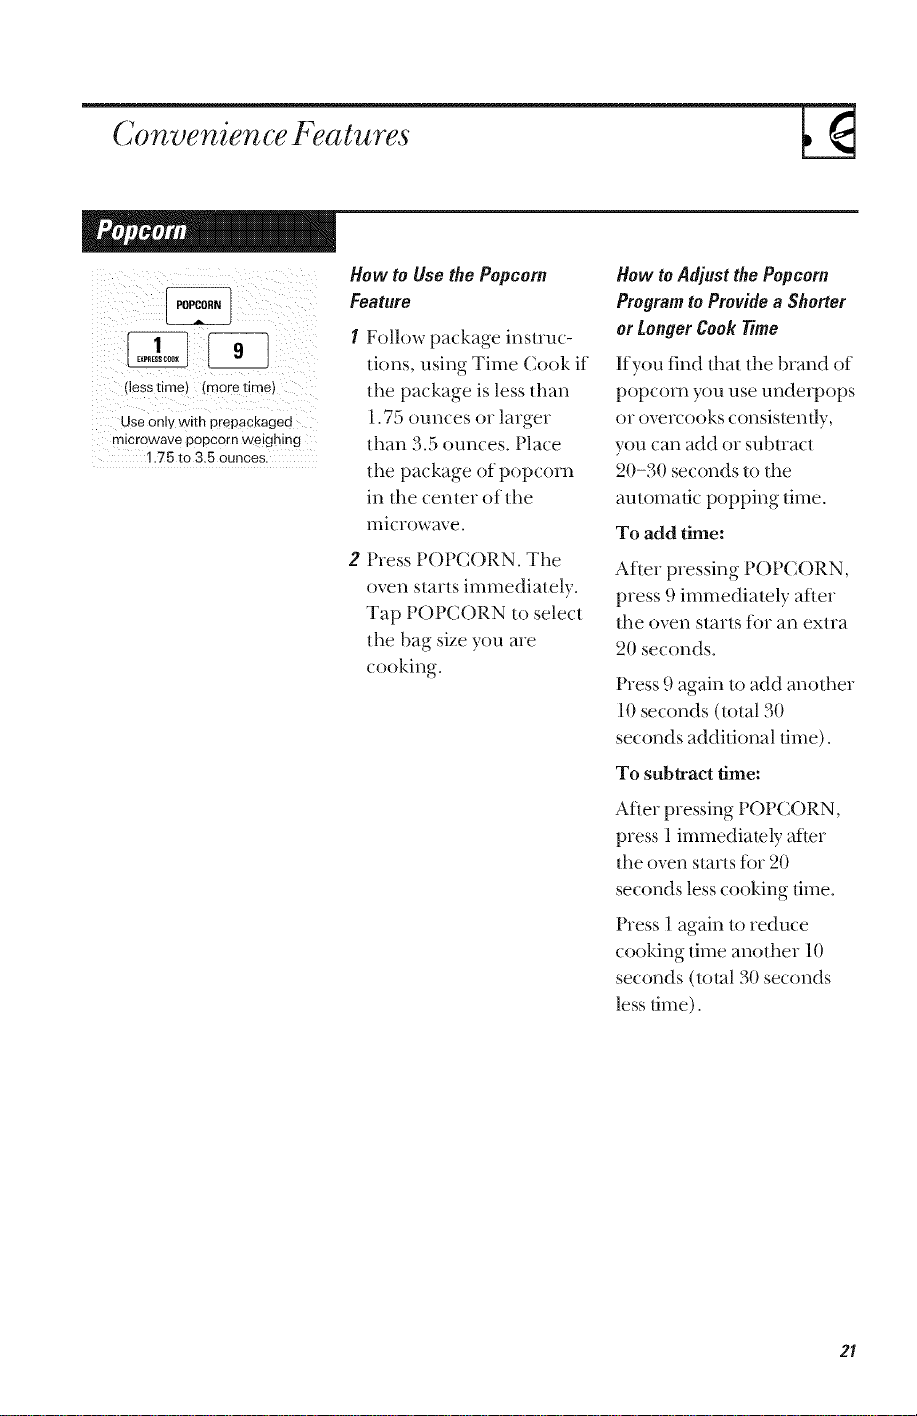
Iless time} Imore ume_
Use only with prepackaged
microwave popcorn weighing
1.75 to 3,5 ounces
How to Use the Popcorn
Feature
Follow package insuuc-
tions, using Time Cook if
the package is less than
1.75 ounces or larger
than 3.5 ounces. Place
the package of popcorn
in the center of the
microwave.
Press P()PCORN. The
oven starts immediately.
Tap POPCORN to select
the bag size you are
cooking.
How toAdjustthePopcorn
Programto Providea Shorter
or LongerCook Time
If you find that the brand of
popcorn you use underpops
or ove_vooks consistently,
you can add or subtract
20-30 seconds to the
autonlatlc popping time.
To add thne:
After pressing P()PCORN,
press 9 immediately after
the oven starts f()r an extra
20 seconds.
Press 9 again to add another
10 seconds (total 30
seconds additional time).
To subtract time:
After pressing POPCORN,
press 1immediamly after
the oven starts tbr 20
seconds less cooking ume.
Press 1 again to reduce
cooking time another 10
seconds (total 30 seconds
less time).
21
Convenience Features
(
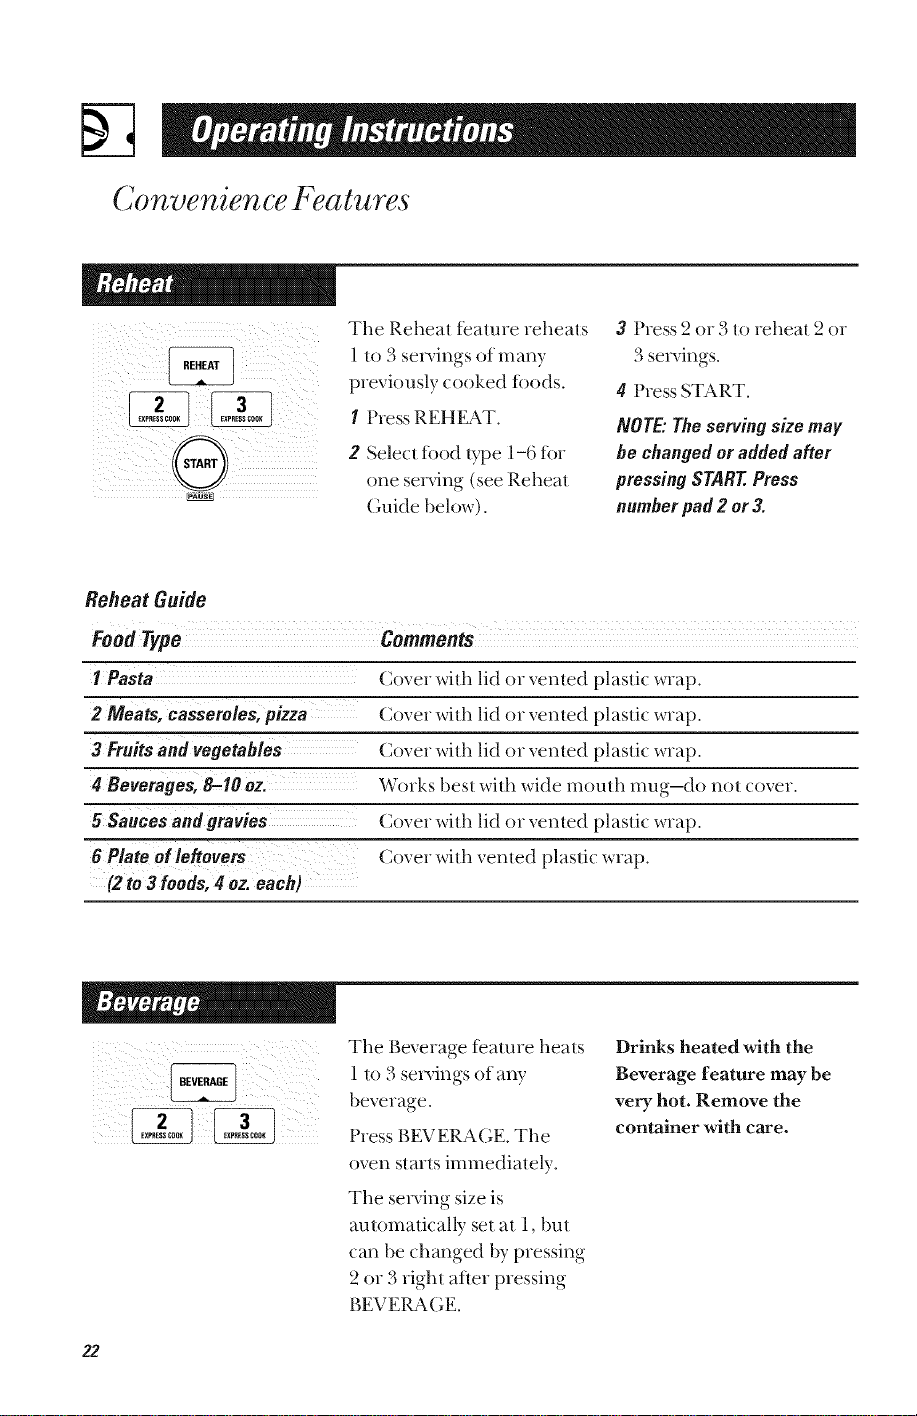
The Reheat feature reheats
1 It) 3 sepdngs of many
previously cooked foods.
1 Press REHEAT.
2 Select food type 1-6 fin
one se_Mng (see Reheat
C,uide below).
3 Press 2 or 3 to reheat 2 or
3 servings.
4 Press START.
NOTE"Theserving size may
he changedor addedafter
pressing START.Press
numberpad2 or 3.
ReheatGuide
lPas-TZ Cover with lid or vented plastic wrap.
2 Meats, casseroles, Cover with lid or vented plastic wrap.
Cover with lid or vented plastic wrap.
4 Beverages, 8-10 Works best with wide mouth mug-do not cover.
5 Sauces and gravies Cover with lid or vented plastic wrap.
Cover with vented plastic wrap.
(2 to3 foods,4 oz.each)
_i_ _ _ _ _iii !ii_i_iII
The Beverage feature heats
1 to 3 se_qngs of a W
beverage.
Press BEVERAGE. The
oven starts immediately.
The se_qng size is
automatically set at 1, but
can be changed by pressing
2 or 3 right after pressing
BEVERAGE.
Drinks heated with the
Beverage feature may be
very hot. Remove the
container with care.
22
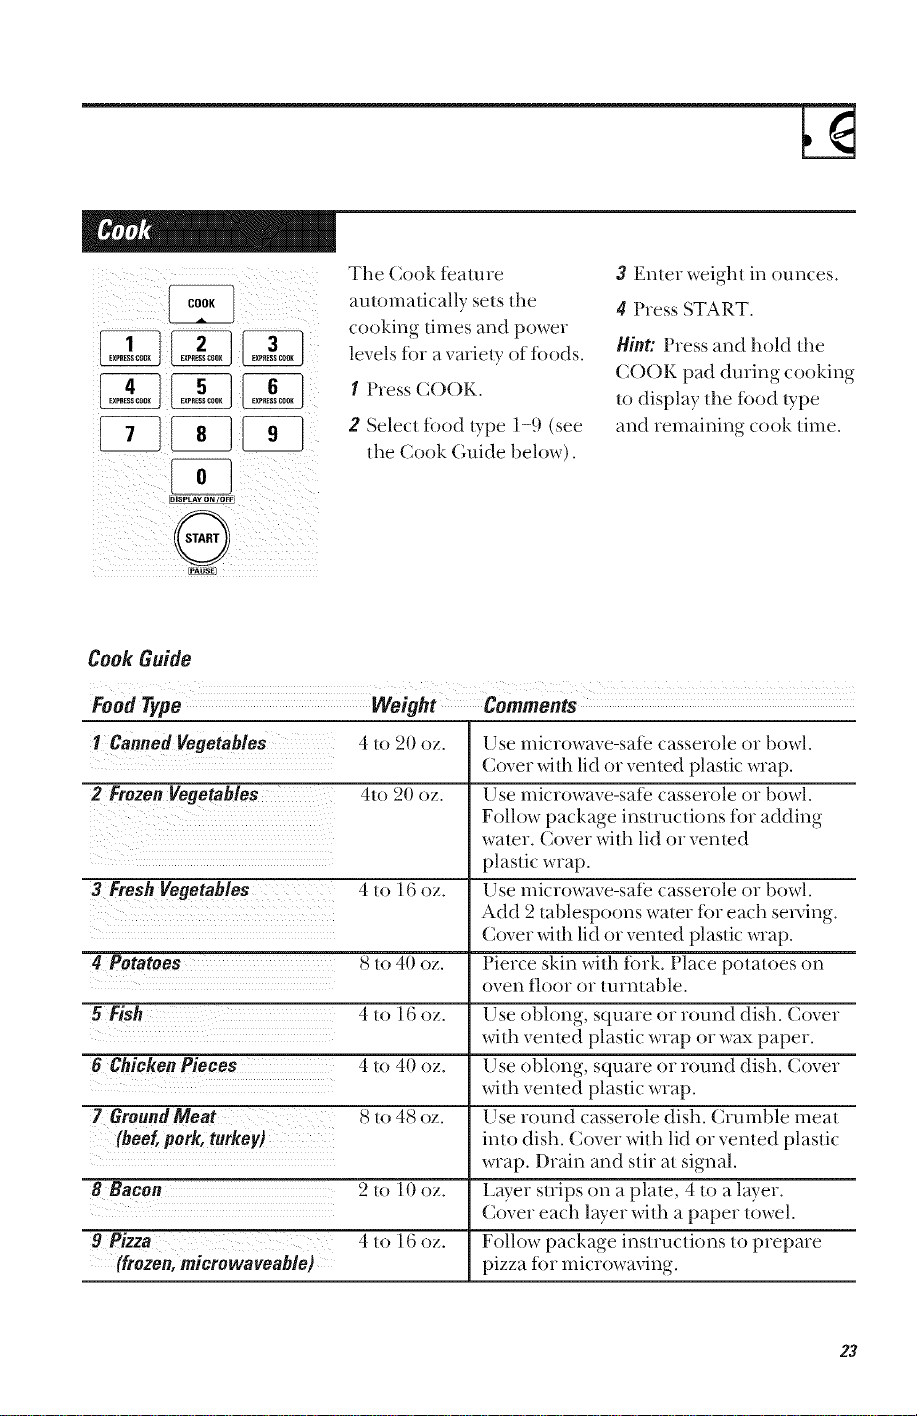
The Cook feature
aulomalically sets the
cooking times and power
levels tbr a variety of tbods.
1 Press CO()K.
2 Select food type 1-9 (see
lhe Cook Guide below).
3 Enter weight in ounces.
4 Press START.
Hint: Press and hold the
CO()K pad during cooking
_o display dm tbod type
and remaining cook time.
CookGuide
FoodType Weight Comrflents
I Canned Vegetables 4 to 20 oz. Use microwave-satE casserole or bowl.
Cover _4/h lid or venled plastic wrap.
2 FrozenVegetables 41o 20 oz. Use microwave-satE casserole or bowl.
Follow package ins/ruc/ions t()r adding
water. Cover wi/h lid or ven/ed
plastic wrap.
3 Fresh Vegetables 4 to 16 oz. Use microwave-safe casserole or bowl.
A
' dd 2/ablespoons water tor each sel_qng.
Cover wi/h lid or venled plastic wrap.
4 Potatoes 8/o 40 oz. Pierce skin wi/h tbrk. Place pota|oes on
oven tloor or/urnlable.
5 Fish 4to 16oz. Use oblong, square or round dish. Cover
wfih vetoed plastic wrap or wax paper.
6 Chicken Pieces 4 to 40 oz. Use oblong, square or round dish. Cover
with venled plastic wrap.
7 GroundMeat 8/o 48 oz. Use round casserole dish. Crumble meat
(beef, pork, turkey) inlo dish. Cover wi/h lid or venled plastic
wrap. Drain and stir at signal.
8 8acon 2 to 10 oz. Layer slrips on a plale, 4 to a layer.
Cover each layer with a paper/owel.
9 Pizza 4 lo 1{5oz. Follow package ins/ruc/ions/o prepare
(frozen,microwaveahle) pizza for microwaving.
23

Convenience Features
@,
Pause
1 PressDEFROST
AUTO/T/MEonce.
2 Usingthe Conversion
Guideat right, enter
foodweight. For
example,presspads I
and2 for 1.2pounds
(I pound,3 ounces).
3 PressSTART.
(TimeDefrost is
explainedin the 77me
Featuressection.)
24
The Defrost Auto/Time
teature gives you/we ways
to deflost flozen roods.
Press DEFROST
AUTO/TIME once tbr
Auto Deflost or twice tor
Time Defrost.
Use Auto Defrost tbr meat,
pouh_ T and fish. Use Time
Defrost f()r most other
frozen toods.
Auto Deflost automatically
sets the deflosOng times
and power levels to give
even deflosting resuhs tor
meats, pouln y and fish
weighing up to six pounds.
There is a handy guide
located on tile inside flont
of tile oven.
Guide
ConversionGuide
It' !h e weigh t 0f fi,od is
stated in pounds and
ounces, the ounces IllUS[
be converted t,o tenths
(!1) 0fa pOUndl
Weighto) EnterFood
Foodin Weight
Ounces. (teothsof
.... a pound)
t_2 21
3 12
4-5 13
6_7 .4
8 .5
9_10 .6
11 .7
12_13 18
14-15 29
o Remove meal flom
package and place on
microwave-sate dish.
* Twice during defrost, the
oven signals TURN. At
each TURN signal, turn
tile toed over. Remove
defrosted meat or shield
warm areas with small
pieces of toil.
*After deflosting, UlOSt
meats need to stand 5
minutes to complete
deflosdng. Large roasts
should stand tor about
30 minutes.
OtherFeatures Your Model May Have
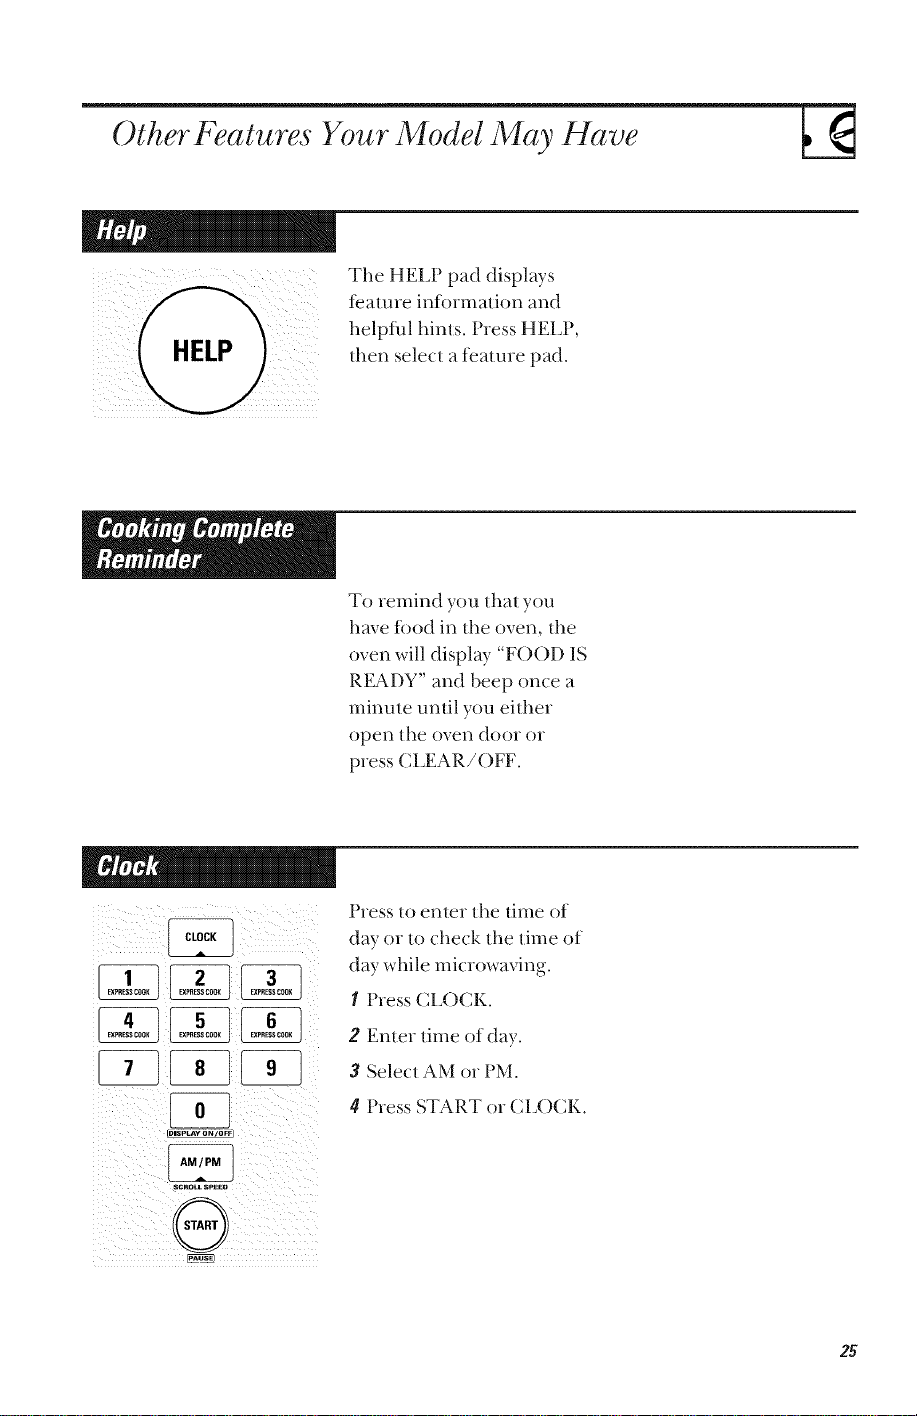
The HELP pad displays
ieature intbrmation and
helptul hints. Press HELP,
then select a feature pad.
To remind you that you
have tbod in the oven, the
oven will display "FOOD IS
READY" and beep once a
minute until you either
open tile oven door or
press (_LEAR/OFF.
SCSO_LS_O
Press to enter the time of
day or to check the time of
day while microwaving.
1 Press CL()CK.
2 Enter time of day.
3 Select AM or PM.
4 P_ess START or CL()CK.
25
OtherFeatures Your Model May Have
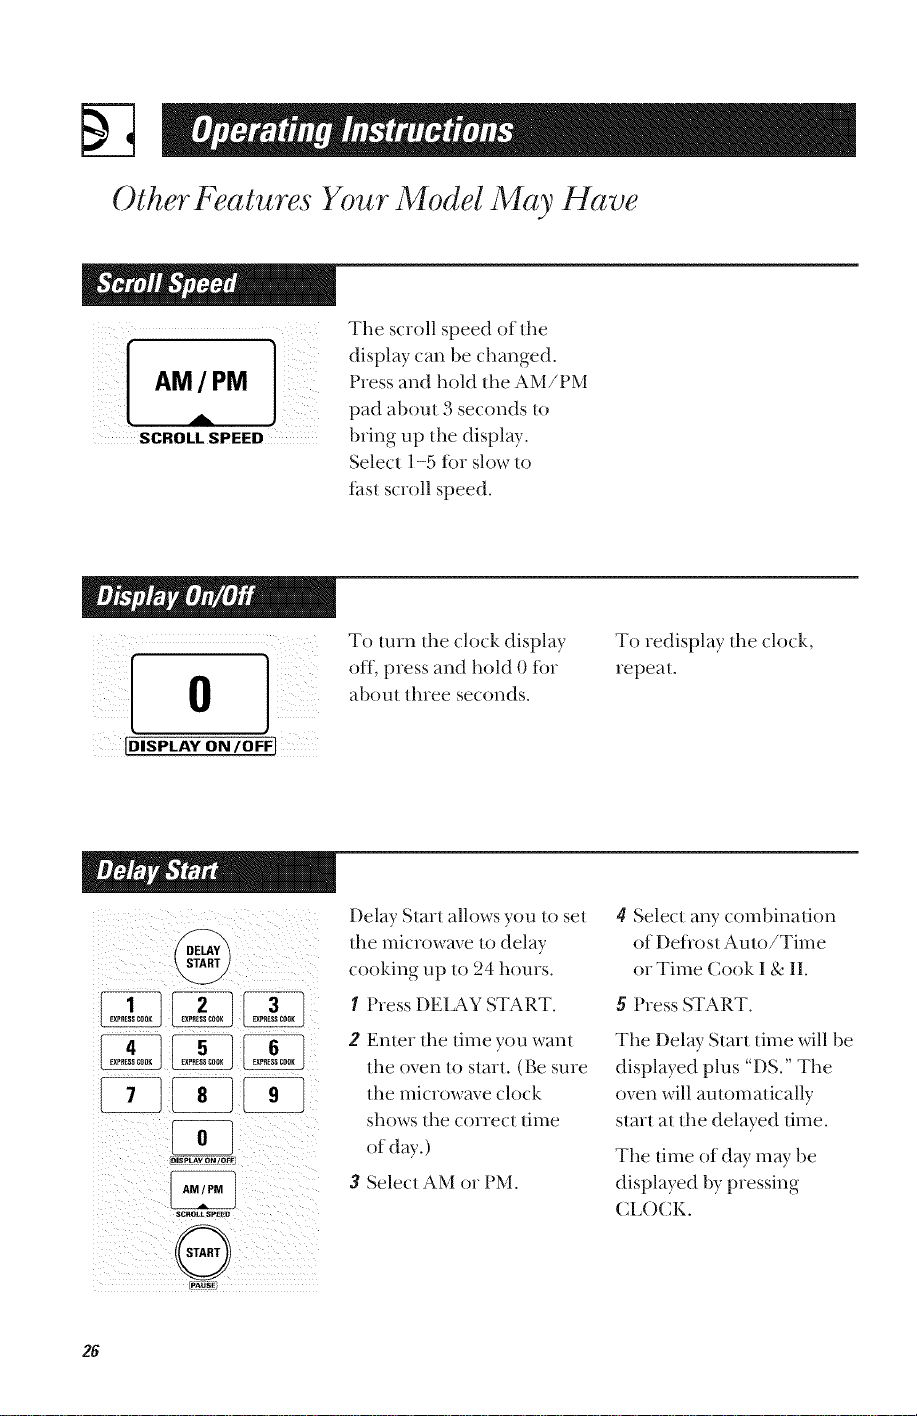
The scroll speed of the
AM PM Press and hold the AM/PM
_. pad about 3 seconds _o
SCROLL SPEED bring up the display.
Select 1-5 for slow to
ti_slscroll speed.
i i i i i i i ii i
To turn the clock display
off, press and hold 0 tor
aboul d_ree seconds.
To redisplay the clock,
repeal.
i_ ii i i i_ i i i _ i_I
Delay Starl allows you to sel
the microwave to delay
cooking up m 24 hours.
1 Press DELAY START.
2 Enter the time you wahl
the oven to starl. (Be sure
the microwave clock
shows the correct time
of day.)
SC_OLLSeE_O
4 Select any combination
of Deflosl Aulo/Time
or Time Cook I & II.
5 Press START.
The Delay Slart time will be
displayed plus "DS." The
oven will automatically
slarl al Ihe delayed time.
The time of day may be
displayed by pressing
CL()CK.
26
jiT illi
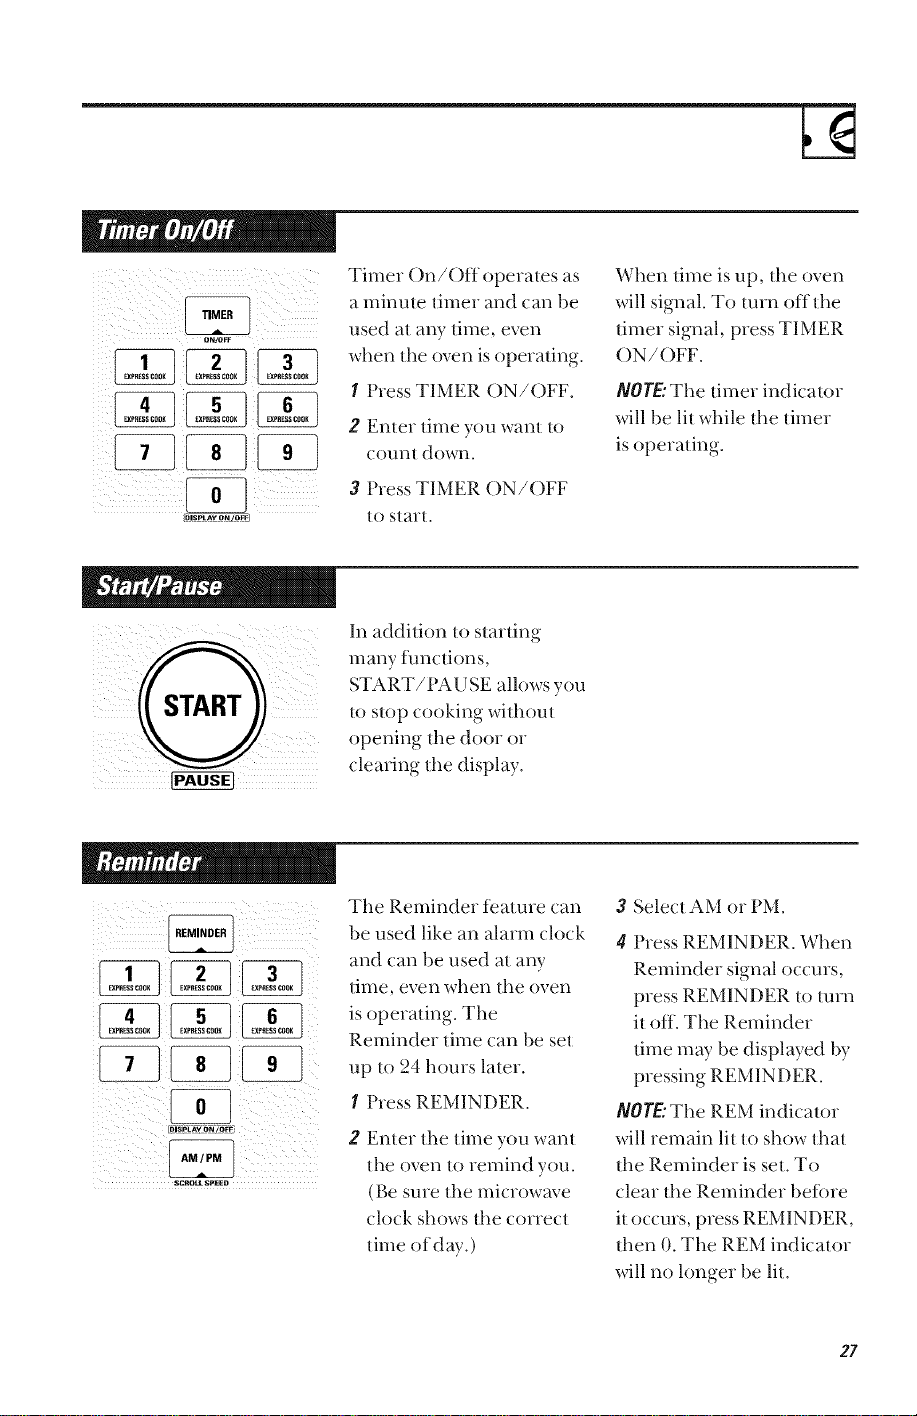
Timer On/Off operales as
a minute timer and can be
used at aW lime, even
when the oven is operating.
I Press TIMER ON/OFF.
2 Enler time you wanl to
count down.
3 Press TINIER ON/OFF
tO start.
When time is up, tlae oven
will signal. To turn off tl_e
timer signal, press TINIER
ON/OFF.
HOLE"The timer indicator
will be lit while the timer
is operating.
In addition to starting
many tunctions
START/PAU SE allows you
to stop cooking without
opening the door or
clearing the display.
i( iii iiilliii ii
LDIS_Ay ON IOFF_
sc_oLtSpE_D
The Reminder teature can
be used like an alarm clock
and can be used at aW
time, even when the oven
is operating. The
Reminder time can be set
up to 24 hours latex.
1 Press REMINDER.
2 Enter the time you want
the oven to remind you.
(Be sure the microwave
clock shows the correct
time of dW. )
3 Select AM or PM.
4 Press REMINDER. When
Reminder signal occurs,
press REMINDER/o turn
it off. The Reminder
time may be displayed by
pressing REMINDER.
HOLE"The REM indicator
will remain lit m show that
the Reminder is set. To
clear the Reminder betbre
it occurs, press REMINDER,
then 0. The REM indicator
will no longer be lit.
27

OtherFeatures Your Model May Have
i i _i _i i I
You may lock the control
panel It) prevent fl_e
rnicrowave flom being
accidentally sialled or used
by children,
To lock or unlock the
conlrols, press and hold
CIJEAR/OFF for about
three seconds. When the
control panel is locked, an
"L" will be displayed to the
exlreme right.
For best cooking resuhs,
,anbeturnedofft .
large dishes. Press
!, _L. ) TURNTABLE to turn
the turntable on or off.
Sometimes the turntable
can become too hot to
touch. Be careful touching
the turntable during and
after cooking.
An automatic fan teature
protects the microwave
tiom too much heat rising
fiom the cooktop below it.
It automatically turns on at
low speed ifit senses too
much heat.
If you have turned the tan
on you may tind that you
cannot turn it off. The fan
will automatically turn off
when the internal parts are
cool. It may stay on tbr 30
minutes or more after tim
cooktop and microwave
controls are turned off.
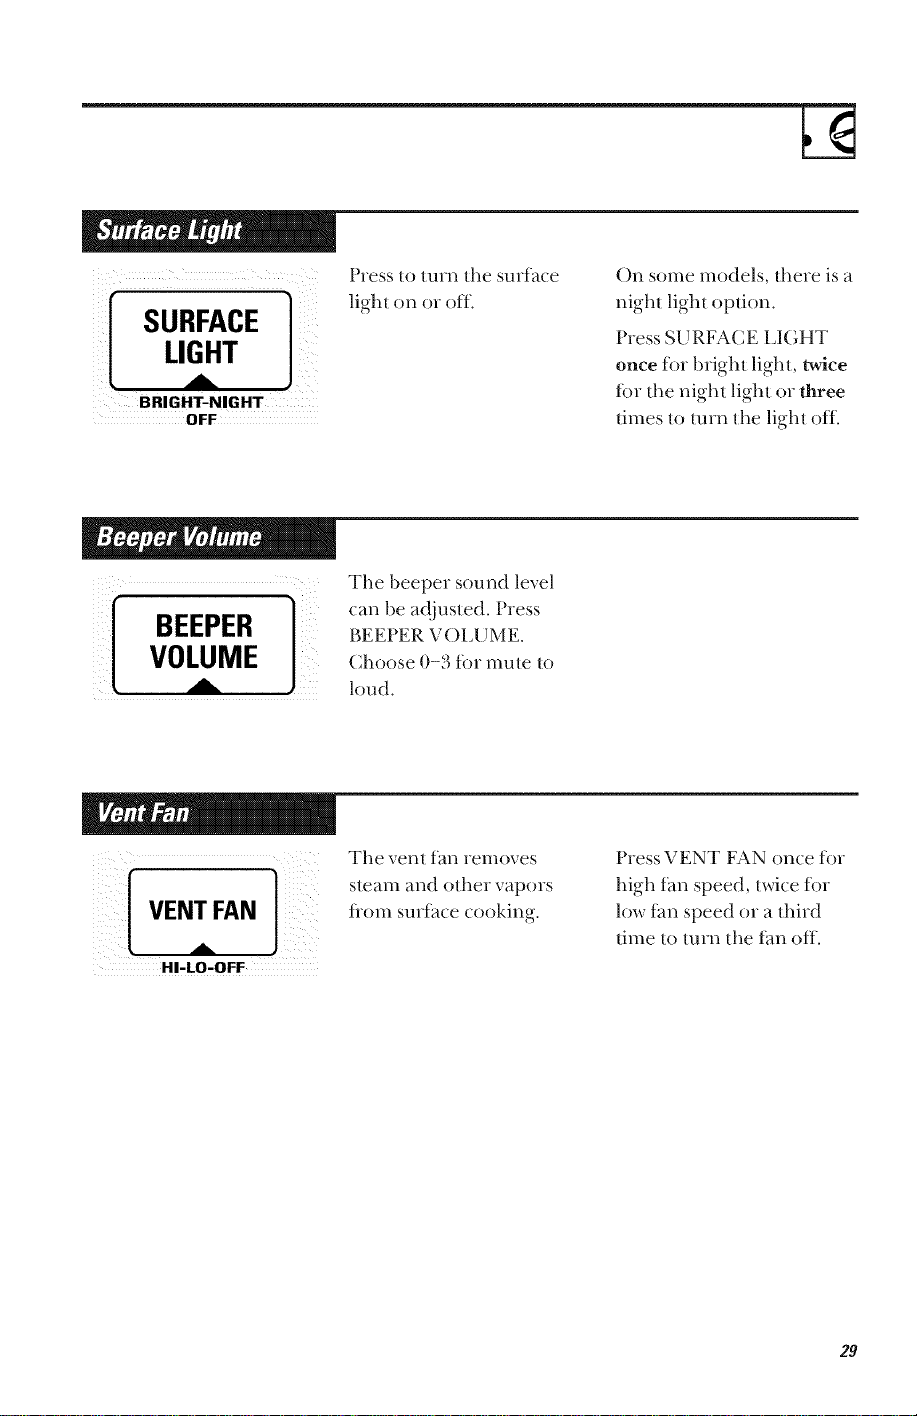
Piess [o [Uln [he sllrface
SURFACE ] ._h_ono,-off,
LIGHT
BRIGHT-NIGHT
OFF
On some models, there is a
nighl light option.
Press SURFACE LIGHT
once tot bright light, twice
fbr file night light or three
times _o turn file ligh_ off.
Tile beeper sound level
{ I p eSSBEEPER I_EH'ERVOLUME.
VOL_UME ChooSelo,d.0-:_*_,_m.te _o
!i It VENTAFAN ]/(
HI-LO-OFF
Tile vel'iI f_ll-i IelllOVeS
steam and other vapors
flom suriace cooking.
Press VENT FAN once for
high fan speed, twice for
low fan speed or a third
time _o mm file fan off.
29

OtherFeatures Your Model May Have
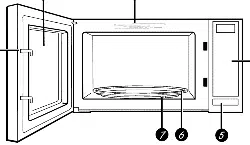
How to Use the She/f
WhenMierowaving
/////I I I Ill\ \ \\_\
• Make sure file shelf is
positioned properly
inside die microwave
to prevent damage lo
the oven ii'om arcing.
• DO itlOt use a
microwave bro_a>
ing dish on the shelf.
The shelf could
overheat.
• Do not use 1he oven
wilh/he shelf on 1he
microwave floor. This
could damage the
microwave.
" Use pot holders when
handling the sheli:-it
may be hot.
=Do not use/he shelf
when cooking
popcorn.
• Do not use lhe shelf
with Sensor Cooking
or Reheat.
Food microwaves best
when placed on tile
turnlable or on tile shelf
in the lower position.
For best cooking resuhs,
remove tile shelf unless you
are reheating on more than
one level.
Uneven results
Tile shelf gives you tile
option to reheat more than
one dish of toed at tile
same time.
2-leve! reheating
38
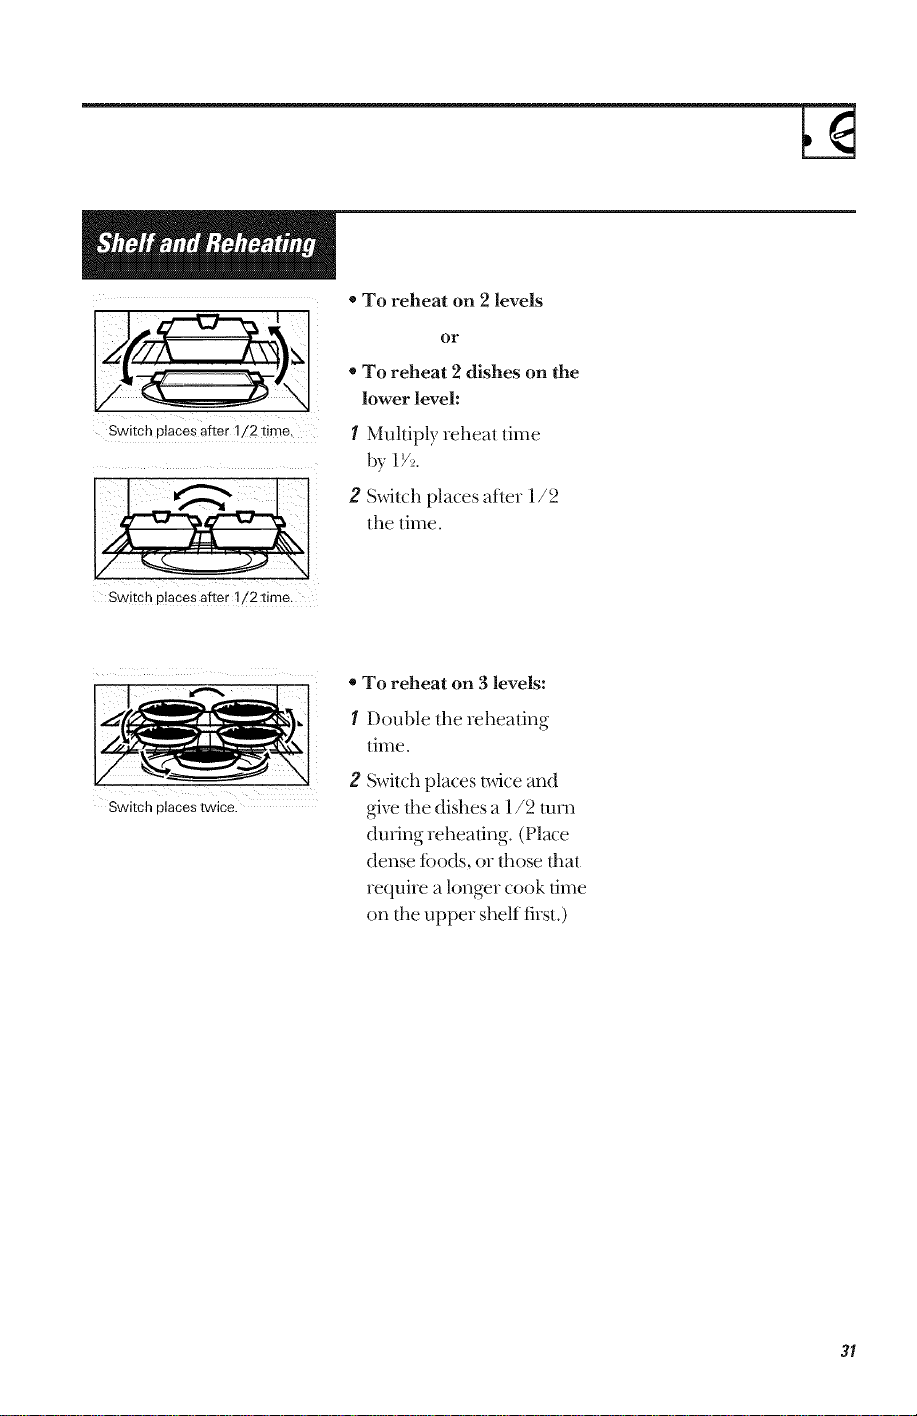
Switch places after 1/2 time,
Switch places after 1/2 Iime.
* To reheat on 2 levels
or
* To reheat 2 dishes on the
lower level:
1 Muhiply rehea| time
by 1>_,.
2 Swilch places arier 1/2
the time.
Switch places twice.
o To reheat on 3 levels:
Double the rehearing
time.
Switchplaces twiceand
give fl_edishes a 1/2 mm
during rehea/ing. (Place
dense foods, or those that
require a longer cook time
on fl_eupper shelf tirsl.)
31
Microwave 7 rms
Arcing....
_i i iiiiiiiiii
i_ iI iii_iii!_!_!_!_!_
Covering
Arcing is the microwave term tbr sparks in the oven. Arcing is
caused by:
* metal or toil touching the side of tim oven.
* t_)il that is not molded to tood (upturned edges act like
antennas).
* metal such as twist lies, pouln T pins, gold-rimmed dishes.
* recycled paper towels containing small metal pieces.
Covers hold in moisture, allow tbr more even heating and reduce
cooking time. Venting plastic wrap or cove_ing with wax paper
allows excess steam lo escape.
Shielding
St.nding
i i i i i
Venting
In a regular oven, you shield chicken breasts or baked toods to
prevent ove>browning. When microwaving, you use small snips of
toil to shield thin parts, such as the lips of wings and legs on pouln T,
which would cook beti)re larger parts.
When you cook with regular ovens, toods such as _oasts o_cakes are
allowed to stand to finish cooking or/o set. Standing time is
especially important in microwave cooking. Note that a microwaved
cake isnot placed on a cooling rack.
After covering a dish with plastic wrap, you vent the plastic wrap by
turning back one coineI so excess steam can escape.
32
Ca e and Cleaning
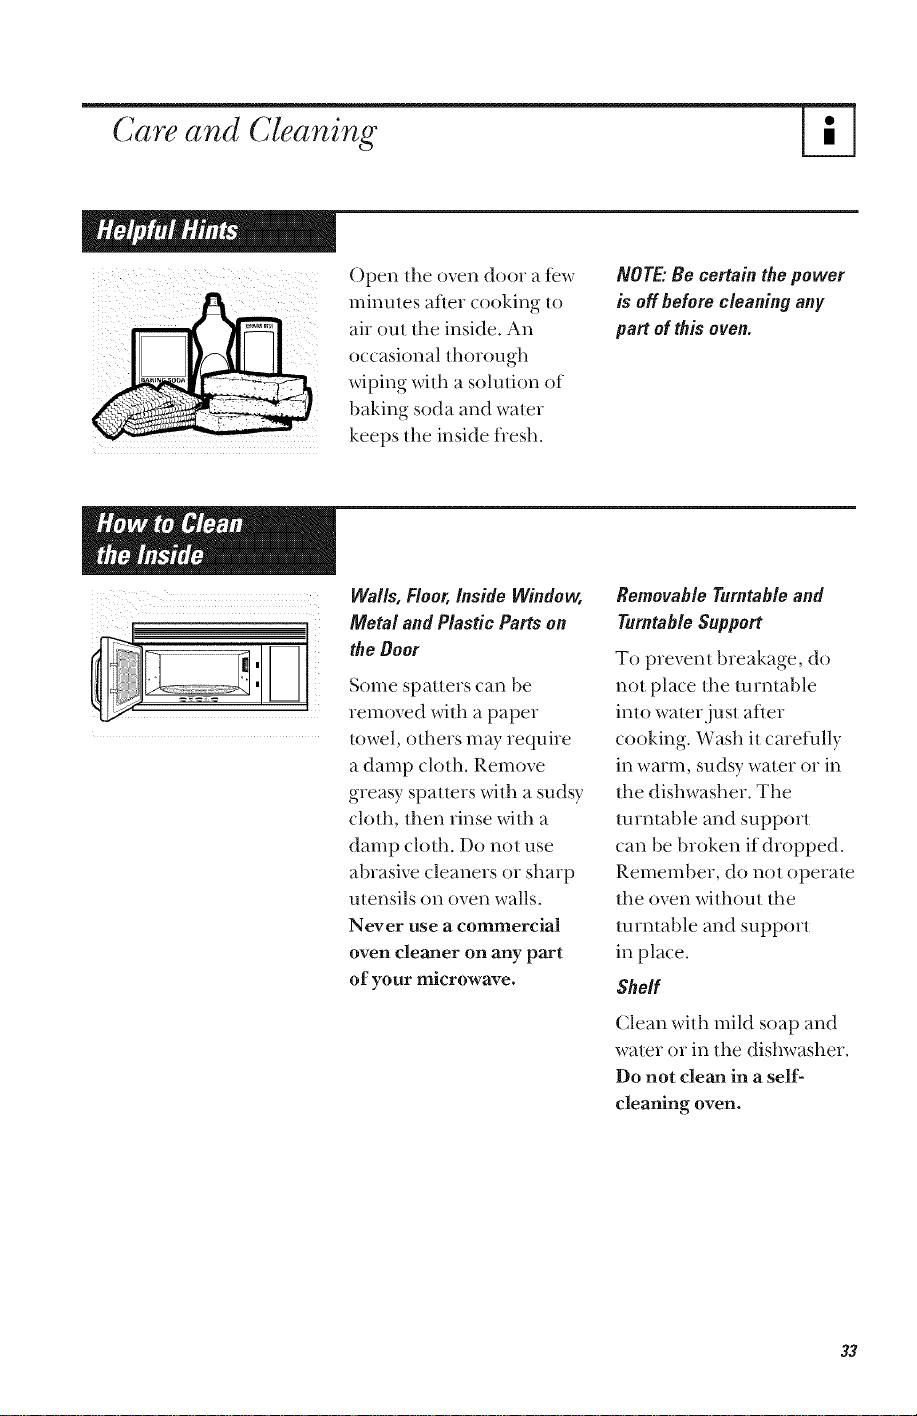
()pen die oven door a tew
minutes after cooking It)
air out tile inside. An
occasional thorough
wiping with a solution of
baking soda and water
keeps tile inside flesh.
NOTE."Be certain the power
is off before cleaning any
part of this oven.
Walls, Floor,Inside Window,
Metal and PlasticParts on
the Ooor
Some spatters can be
removed with a paper
towel, others may require
a damp cloth. Remove
greasy spatmrs widl a sudsy
cloth, then rinse widl a
damp cloth. Do not use
abrasive cleaners or sharp
utensils on oven wails.
Never use a commercial
oven cleaner on any part
of your microwave.
RemovableTurntable and
Turntable Support
To prevent breakage, do
not place the turntable
into water,ju st after
cooking. Wash it caret_ally
in warul, sudsy water or in
tile dishwasher. Tile
turntable and support
can be broken itdropped.
Remember, do not operate
tile oven without tile
turntable and support
in place.
She/f
(]lean with mild soap and
water or in tile dishwasher.
Do not clean in a self-
cleaning oven.
33

%
Ca e and Cleaning
o
ofth, microw,v'.
Clean the outside of the
microwave with a sudsy
cloth. Rinse and then &T.
Wipe the window clean
with a damp cloth.
ControlPanel and Ooor
Wipe with a damp cloth.
D_y thoroughly. Do not use
cleaning sprays, large
amounls of soap and
water, abrasives or sharp
ol_jects on the panel-they
can damage it. Some paper
towels can also scratch the
connol panel.
Ooor Surface
It's importanl to keep the
area clean where the door
seals against the micio-
wave. Use only mild, non-
abrasive detergents
applied with a clean sponge
or soft cloth. Rinse well.
Bottom
Clean off the grease and
dust on the bottom often.
Use a solution of warm
water and detergent.
34
Light Bulb Replacement
b,,/bwitha40,wa_
incandescentb,/b
cwB3 xiooo3 , ,. ble
_!_,omvO,rcEs,pp_ie_.
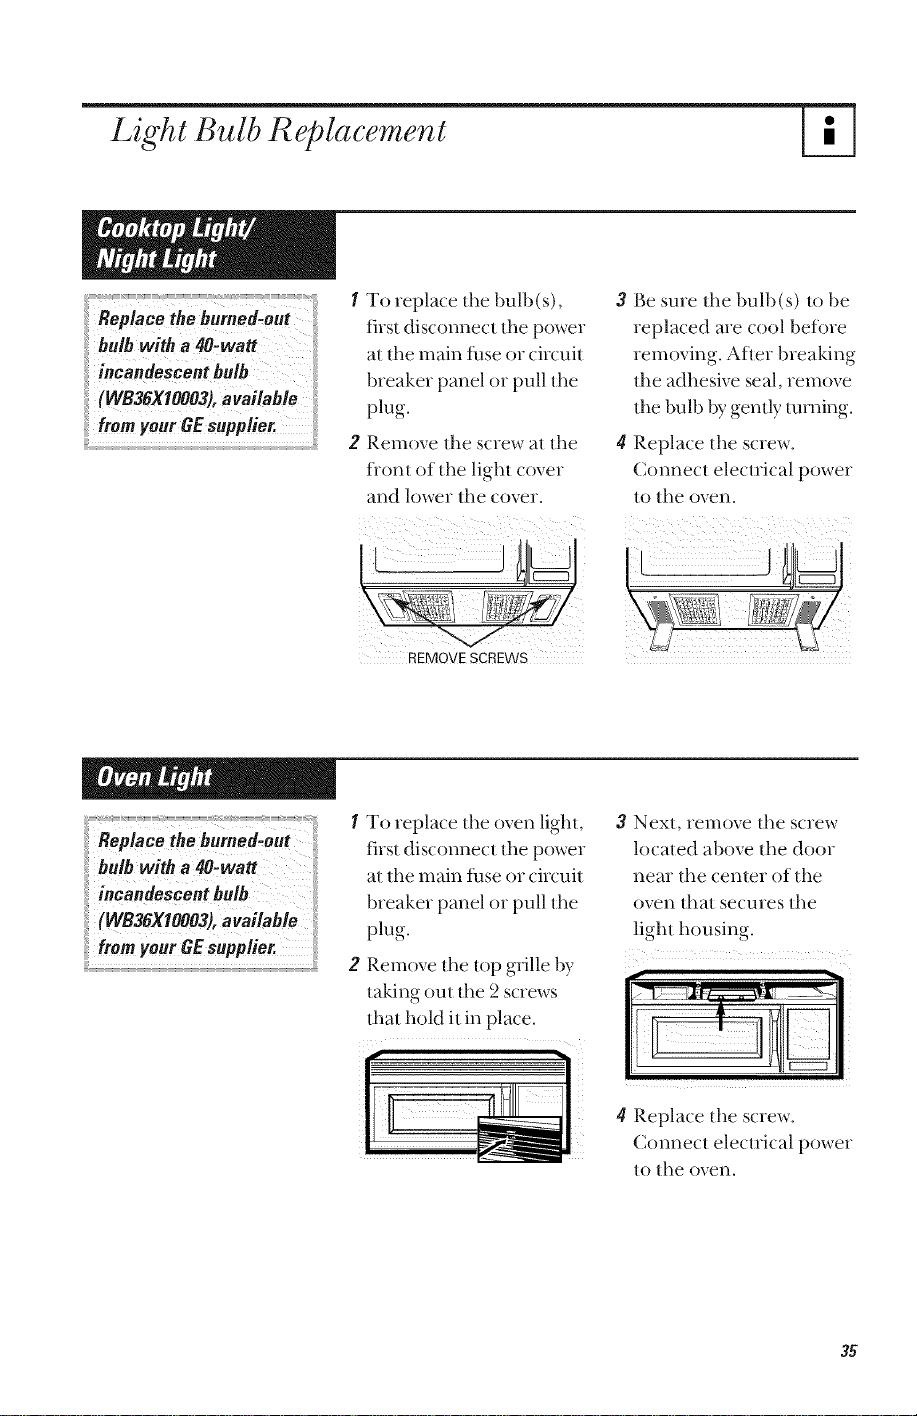
I To replace tile bulb(s),
first disconnect tile power
at tlle nlain f;aseor circuit
breaker panel or pull tile
plug.
2 Remove tile screw at tile
fiont of tlle light cover
and lower tile cover.
3 Be sure the bulb(s) to be
replaced are cool before
renloving. After breaking
tile adhesive seal, remove
tile bulb by gently turning.
4 Replace tile screw.
Connect electrical power
to tile oven.
REMOVE SCREWS
<: {, {{{
Rep/acethe be,ned-Out _i
incandescent bu/b
I To replace tlle oven light,
first disconnect tile power
at tlle nlain f;ase or circuit
breaker panel or pull tile
plug.
2 Renlove tile top grille by
taking out tlle 2 screws
that hold it in place.
3 Next, relnove the screw
located above tlle door
near tile center of tile
oven that secures tile
light housing.
Ib____ _I
Ir iull
4 Replace tile screw.
Connect electrical power
tO tile oven.
%
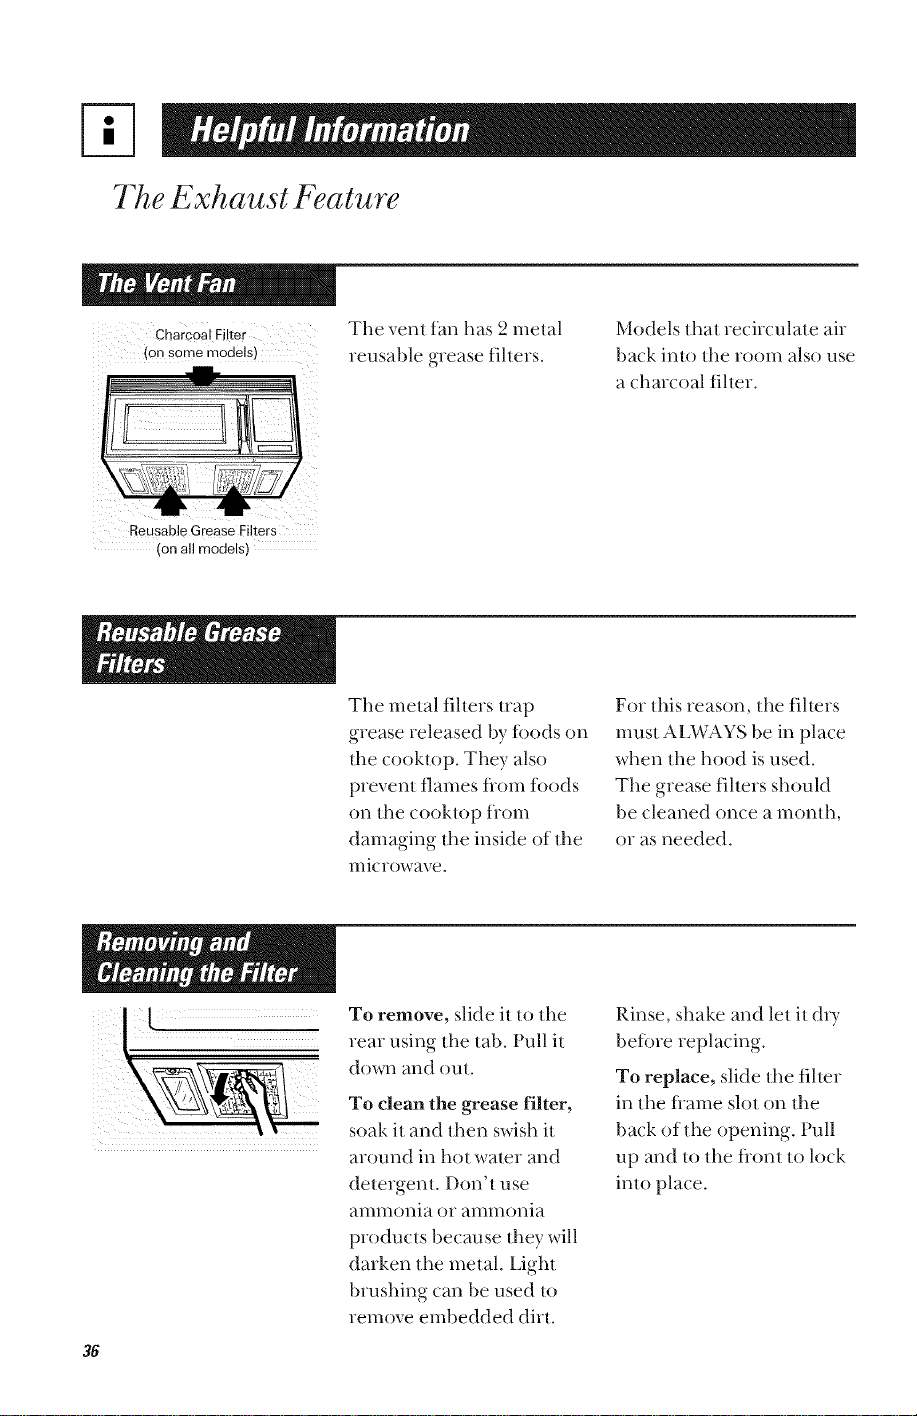
The Exhaust Feature
Charcoal Filter
(on some models,
The vent fan has 2 metal
reusable grease fibers.
Models that recirculate air
back into the room also use
a charcoal fiher.
Reusable Grease Fikers
ion all models}
The metal fihers uap
grease released by foods on
the cooktop. They also
prevent flames fiom foods
t)n the cooktop flom
damaging d_e inside of fl_e
microwave.
For ll_is reason, the fihers
must ALWAYS be in place
when ll_e hood is used.
The grease fibers should
be cleaned once a month,
or as needed.
To remove, slide it to the
rear using the lab. Pull it
down and oul.
To clean the grease filter,
soak it and then swish it
around in hot water and
detergent. Donq use
ammonia or ammonia
products because they will
darken the metal. Light
brushing can be used lo
remove embedded dirt
Rinse, shake and leI iI d_T
befi)re replacing.
To replace, slide fl_e tilmr
in the flame slot on the
back of tl_e opening. Pull
up and to tim tiont to lock
into place.
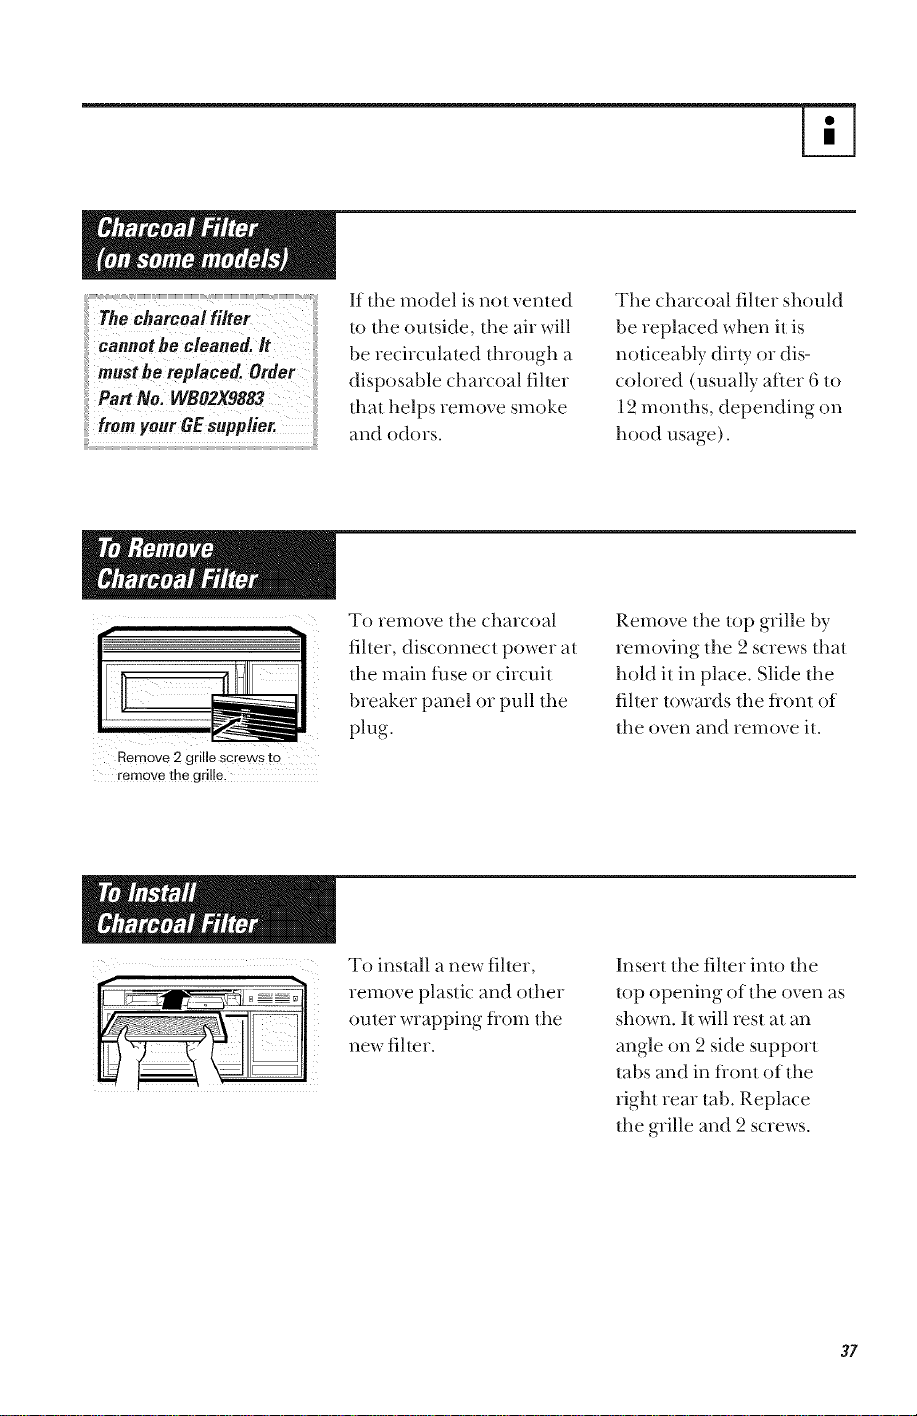
Theoh oo /ti/ter
il mustbe replaced. Order
ii Part Nol WBO2X9883 '
If the model is not venled
to ll_e outside, the air will
be recirculated through a
disposable charcoal filter
that helps remove smoke
and odors.
The charcoal filler should
be replaced when it is
nouceably dirty or dis-
colored (usually after 6 to
12 months, depending on
hood usage).
Remove 2 grille screws tO
remove the grille,
To ielnove lhe charcoal
filler, disconnect power at
lhe main t_ase or circuit
breaker panel or pull the
plug.
Remove the top grille by
removing the 2 screws that
hold it in place. Slide the
fiher towards the flonl of
the oven and remove it.
To install a new fJheI,
remove plastic and other
outer wrapping flom the
new fiher.
Insert the filter inlo the
lop opening of the oven as
shown. It will rest at an
angle on 2 side support
labs and in flont of the
righl rear tab. Replace
the grille and 2 screws.
37
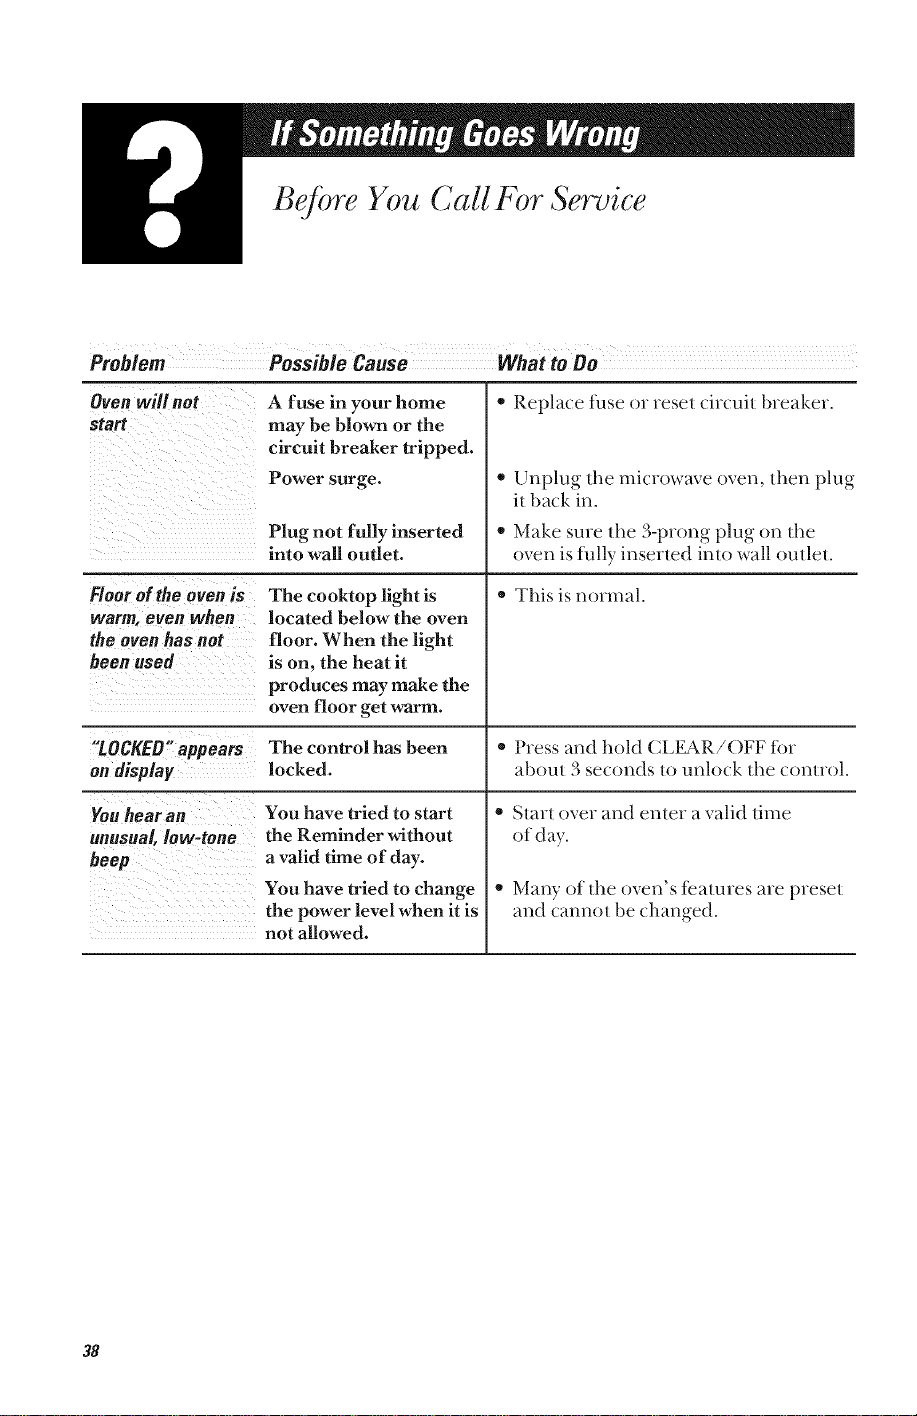
Before You Call For Service
Problem
PossibleCause Whatto Do
Oven will not
start
Floorof tbe ovenis
warm,even when
the ovenhas not
been used
"LOCKED"appears
ondispla?
Youhear an
unusual,low-tone
beep
A fuse in your home
may be blown or the
circuit breaker tripped.
Power surge.
Plug not fully inserted
into wall outlet.
The cooktop light is
located below the oven
floor. When the light
is on, the heat it
produces may make the
oven floor get warm.
o Replace fuse or reset circuit breaker.
o Unplug tile microwave oven, then plug
it back in.
,_ Make sure tile 3-prong plug on tile
oven is tully inserted into wall outlet.
,_This is normal.
The control has been '_Press and hold (_LEAR/OFF for
locked, about 3 seconds/o unlock tile control.
You have tried to start
the Reminder without
a valid time of day.
You have tried to change
the power level when it is
not allowed.
,_ Start over and enter a valid time
of day.
,_Many of the oven's features are preset
and cannot be changed.
38
* Steam or vapor escaping
flom around the door.
* l,ight reflection around
door or outer case.
* Dimming oven light and
change in the blower
sound at power levels
other than high.
* Dull thumping sound
while oven is operating.
TV-radio interterence
might be noticed while
using the microwave.
Similar to the inte_lerence
caused by other small
appliances, it does not
indicate a problem with
the microwave. Plug the
microwave into a different
electrical circuit, move the
radio or TV as i_u away
ii'O1Tlthe lnicrowave as
possible, or check the
position and signal of the
TV/radio antenna.

Notes
40

Notes
41
800.828.2000
We'l! Be Therd
Open 24 hours a day
7 days a week.
We provide expert repair
se*_qce, scheduled at a
800-GE-CARES time that's convenient
(800-432-2737) *_,rrou.
800.828.2000
800-TDD-GEAC
(800-833-q322)
Our ihcto,T-trained
technicians know your
appliance inside and out-
SO Inost repairs can be
handled in,just one visit.
GE ofiers Braille controls
tor a variety of GE
appliances, and a
brochure to assist in
planning a barrier-flee
kitchen tbr persons with
limited mobility.
_With a se*_qce contract GE
800-82&2224 ConsumerSe,_,i,ewinstin
be there after your
warranty expires.
With a muhiple-year
contract, you're assured of
t_ature se*_qce at today's
prices.
42
Individuals qualilied
to se_,ice their own
appliances can have
parts or accessories sent
directly to their home.
(VISA, MasterCard and
Discover cards are
accepted.)
Instructions contained
in this manual cover
procedures to be
performed by any user.
Other servicing generally
should be referred to
qualified service
personnel. Caution
must be exercised, since
improper servicing may
cause unsafe operation.
If for some reason you are
not happy with the se_,ice
you receive, here are three
steps to follow for farther
help.
First, contact the people
who se_,iced your
appliance. Explain why you
are not pleased.
Next, if you are still not
pleased, write all the
details-including
your phone numbe_to:
Customer Relations
GE Appliances
Louisville, KY 40225
Finally,if your problem is
still not resolved, write:
Major Appliance
Consumer Acoon Program
20 North Wacker Drive
Chicago, IL 60606
43
StaSe sal_sslip or cancelled chec,qhere. Proof Oforiginal
purchase date i.sneeded to obtain .senfice under warranty.
FULL ONE-YEAR WARRANTY
For one year flom date of original
purchase, we will provide, flee of charge,
parts and se_:ice labor in your home to
repair or replace ar Uparl o!the microwave
oven that tails because of a manuihcturing
detect.
LIMITED ADDITIONAL
NINE-YEAR WARRANTY
For the second through the tenth year
tiom the date of original purchase, we
willprovide, flee of charge, a replacement
magnelron tubeit the magnetron tu be fails
because of a manuiacturing detect. You
pay for the se_:ice trip to your home and
se_qce labor charges.
This warranty is extended to the original
purchaser and any succeeding owner for
products purchased for ordina_ T home use
in the 48 mainland states, Hawaii and
Washington, D.C. In Alaska the warranty is
the same except that it is LIMITED because
you nmst PW to ship the product to the
se_qce shop or tor the se_qce technician's
travel costs to your honle.
All warranty se_,ice will be provided by our
FactoD_ Se_,ice Centers or by our
authorized Customer Care" se_qcers
during normal working hours.
Should your appliance need se_:ice,
during warranty period or beyond, call
800-GE-CARES (800-432-2737).
Warrantor is not responsibleJbr consequential damages.
* Se_qce trips to your home to teach you
how to use the product.
Read your Owner's Manual, If >)u then
have any questions about operating the
product, please contact your dealer or
our Customer Relations office at the
address below, or call, toll fiee:
GE Answer Center '÷
800.626.2000
consumer infbrmation se_qce
* Improper installation.
If you have an installation problem, contact
your dealer or installer. You are responsible
tot providing adequate electrical,
exhausting and other connecting tacilities.
* Replacement of house fuses or resetting
of circuit breakers.
* Failure of the product ifit is misused, or
used for other than the intended purpose
or used commercially.
* Damage to product caused by accident,
fire, floods or acts of God.
Some states do not all0w the exclusion or limitation 0f incidenm! or (0nsequentia! damages, ]
so the above !in-fitation or exclusion !nay not apply to you. This warranty gives you specific legal ]
rights, and yon may a!so have Other rigl_ts which va_Tii'om state to state_ TOkn0w what yo_n" ]
legal rights are in yOUrState, Consult y0ur !0ca! 0r Slate c°nsumer a£[hirsOffice 0vy°ur State's ]
Attorney (}enera!:
Warrantor:Genera!E!ectriccon,av Iffi,rther help is neededCOneerni_"thisWarrant),,write:
Manager-CustomerRelations, GEAl_liances, Louisville, KY 40225
Part No. 164D337OP081
Pub. No. 49-40082-1
04-99 JR
Printed in Korea
JVM1640
JVM1642