Loading ...
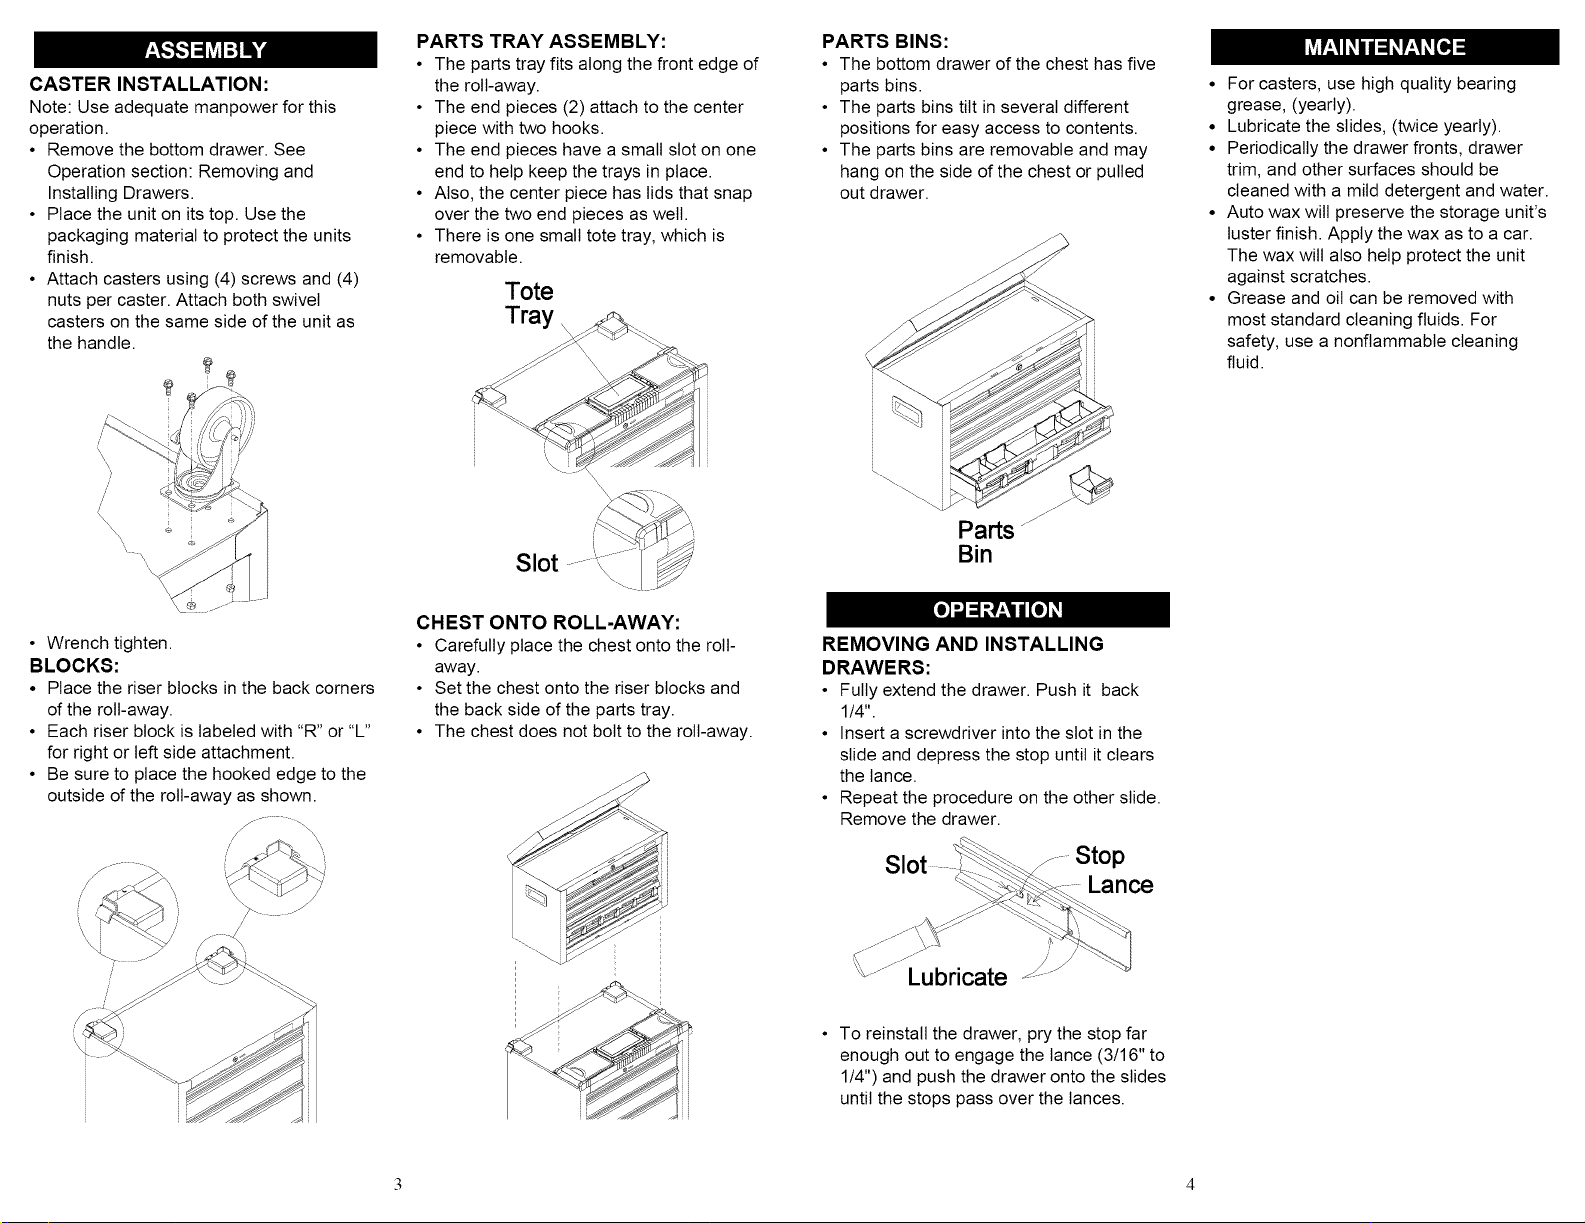
CASTER INSTALLATION:
Note: Use adequate manpower for this
operation.
• Remove the bottom drawer. See
Operation section: Removing and
Installing Drawers.
• Place the unit on its top. Use the
packaging material to protect the units
finish.
• Attach casters using (4) screws and (4)
nuts per caster. Attach both swivel
casters on the same side of the unit as
the handle.
,\
/
/
\\
\
• Wrench tighten.
BLOCKS:
• Place the riser blocks in the back corners
of the roll-away.
• Each riser block is labeled with "R" or "L"
for right or left side attachment.
• Be sure to place the hooked edge to the
outside of the roll-away as shown.
/ \
/
/
/
/
PARTS TRAY ASSEMBLY:
• The parts tray fits along the front edge of
the roll-away.
• The end pieces (2) attach to the center
piece with two hooks.
• The end pieces have a small slot on one
end to help keep the trays in place.
• Also, the center piece has lids that snap
over the two end pieces as welt.
• There is one small tote tray, which is
removable.
Tote
Tray, _.
Slot .......
CHEST ONTO ROLL-AWAY:
• Carefully place the chest onto the roll-
away.
• Set the chest onto the riser blocks and
the back side of the parts tray.
• The chest does not bolt to the roll-away.
PARTS BINS:
• The bottom drawer of the chest has five
parts bins.
• The parts bins tilt in several different
positions for easy access to contents.
• The parts bins are removable and may
hang on the side of the chest or pulled
out drawer.
Parts j
Bin
REMOVING AND INSTALLING
DRAWERS:
• Fully extend the drawer. Push it back
1/4".
• Insert a screwdriver into the slot in the
slide and depress the stop until it clears
the lance.
• Repeat the procedure on the other slide.
Remove the drawer.
/ Stop
Lance
• To reinstall the drawer, pry the stop far
enough out to engage the lance (3/16" to
1/4") and push the drawer onto the slides
until the stops pass over the lances.
• For casters, use high quality bearing
grease, (yearly).
• Lubricate the slides, (twice yearly).
• Periodically the drawer fronts, drawer
trim, and other surfaces should be
cleaned with a mild detergent and water.
• Auto wax wilt preserve the storage unit's
luster finish. Apply the wax as to a car.
The wax wilt also help protect the unit
against scratches.
• Grease and oil can be removed with
most standard cleaning fluids. For
safety, use a nonflammable cleaning
fluid.
3 4
Loading ...
Loading ...