Model No.:
GLR44BKER/
GLR44RDER/ GLR44BEER

For all consumer questions or inquiries, contact our please U.S.
800-562-0738.
customer service line at
Important notice: Please keep this appliance standing upright
during transportation. If the unit must be laid on its side at any time,
please stand the appliance upright for at least 4 hours before using.
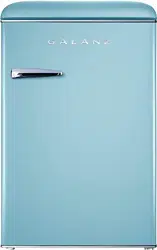
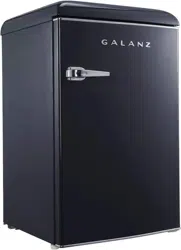
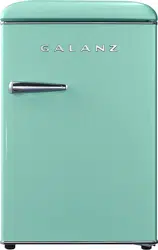
Refrigerator GLR44BKER/GLR44RDER/GLR44BEER
Use and Care Manual
Support:800-562-0738
Compact Refrigerator
SAVE THIS INFORMATION FOR FUTURE REFERENCE
Installing the door handles
Refrigerator
GLR44BKER/GLR44RDER/GLR44BEER
Use and Care Manual Support:800-562-0738
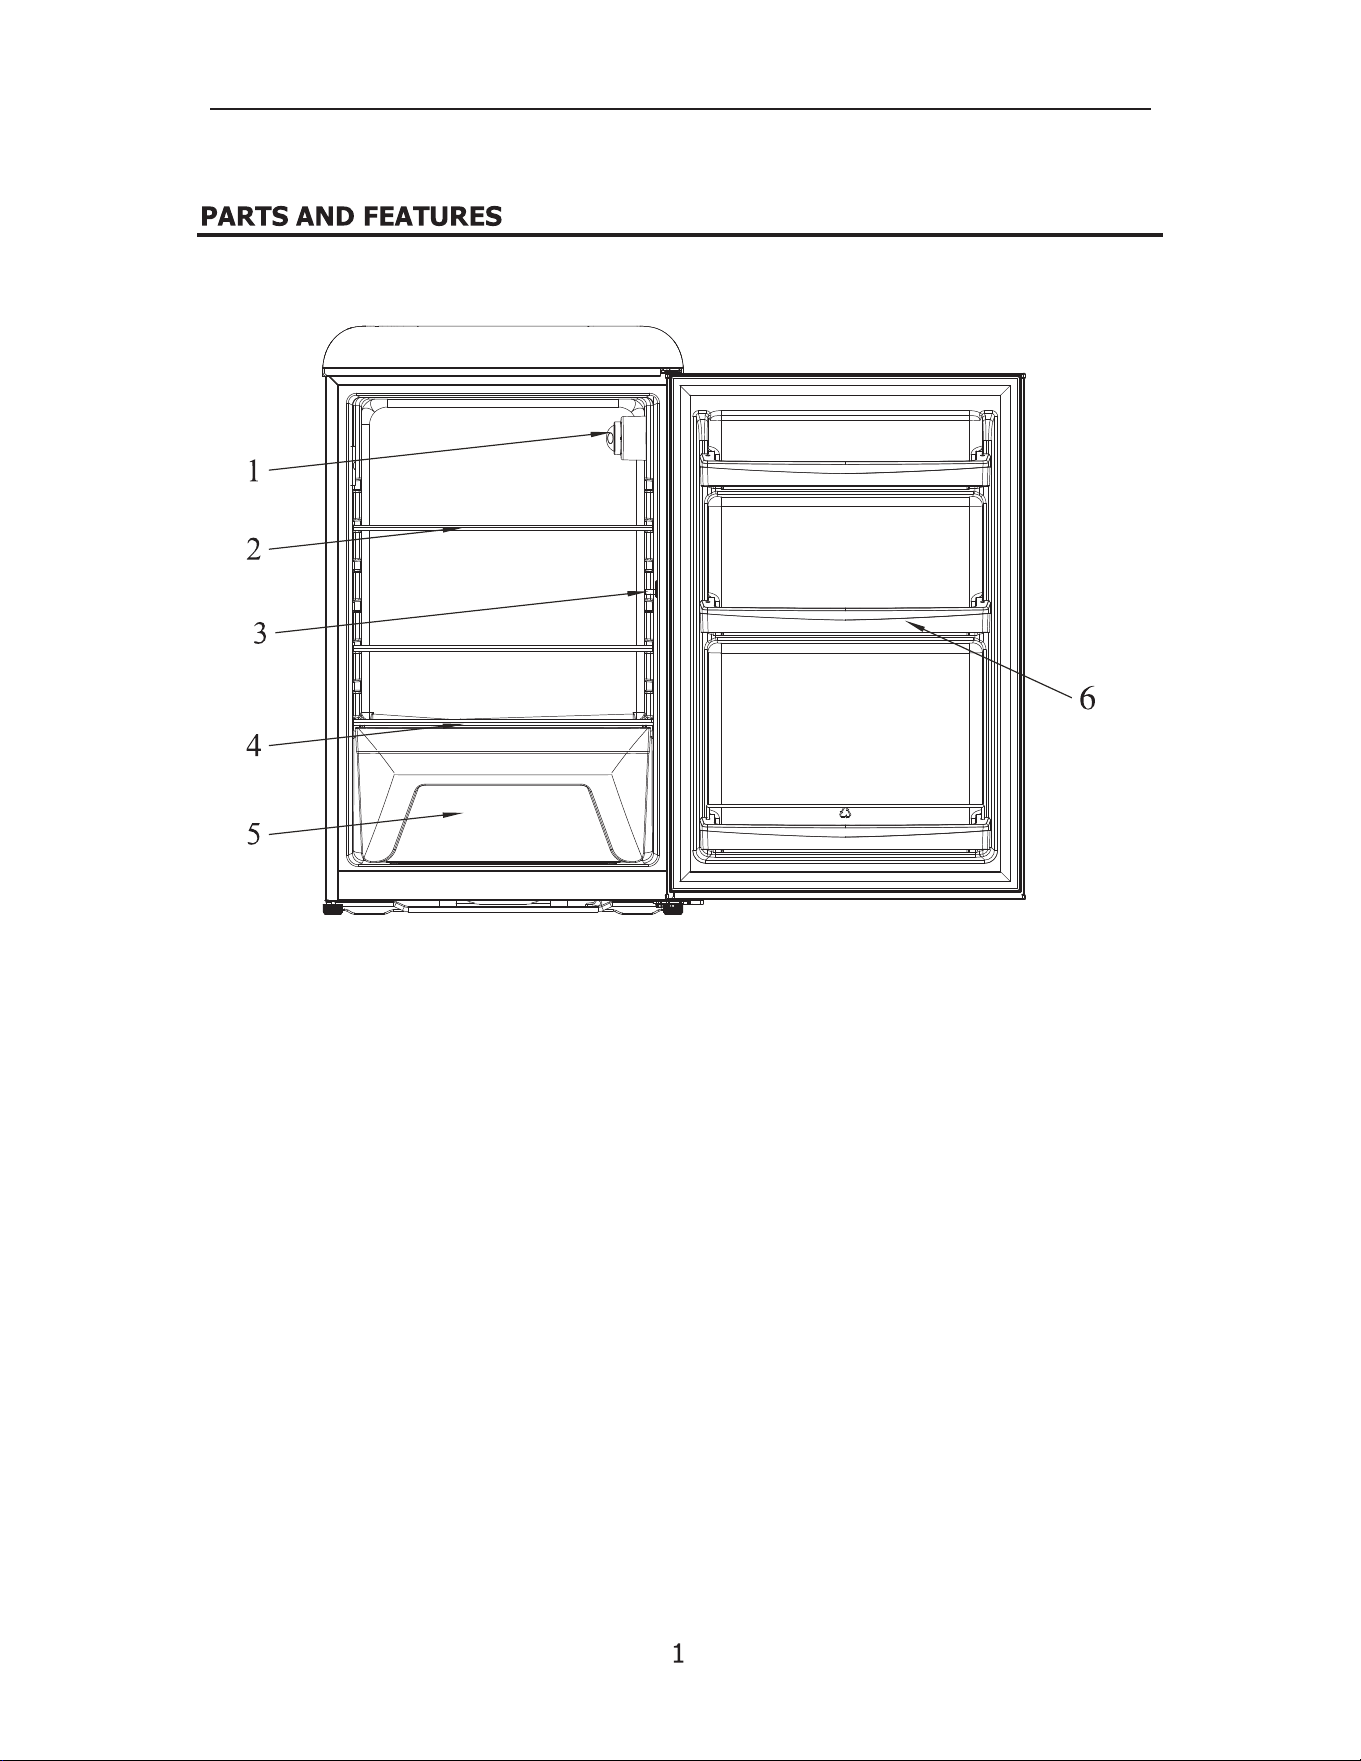
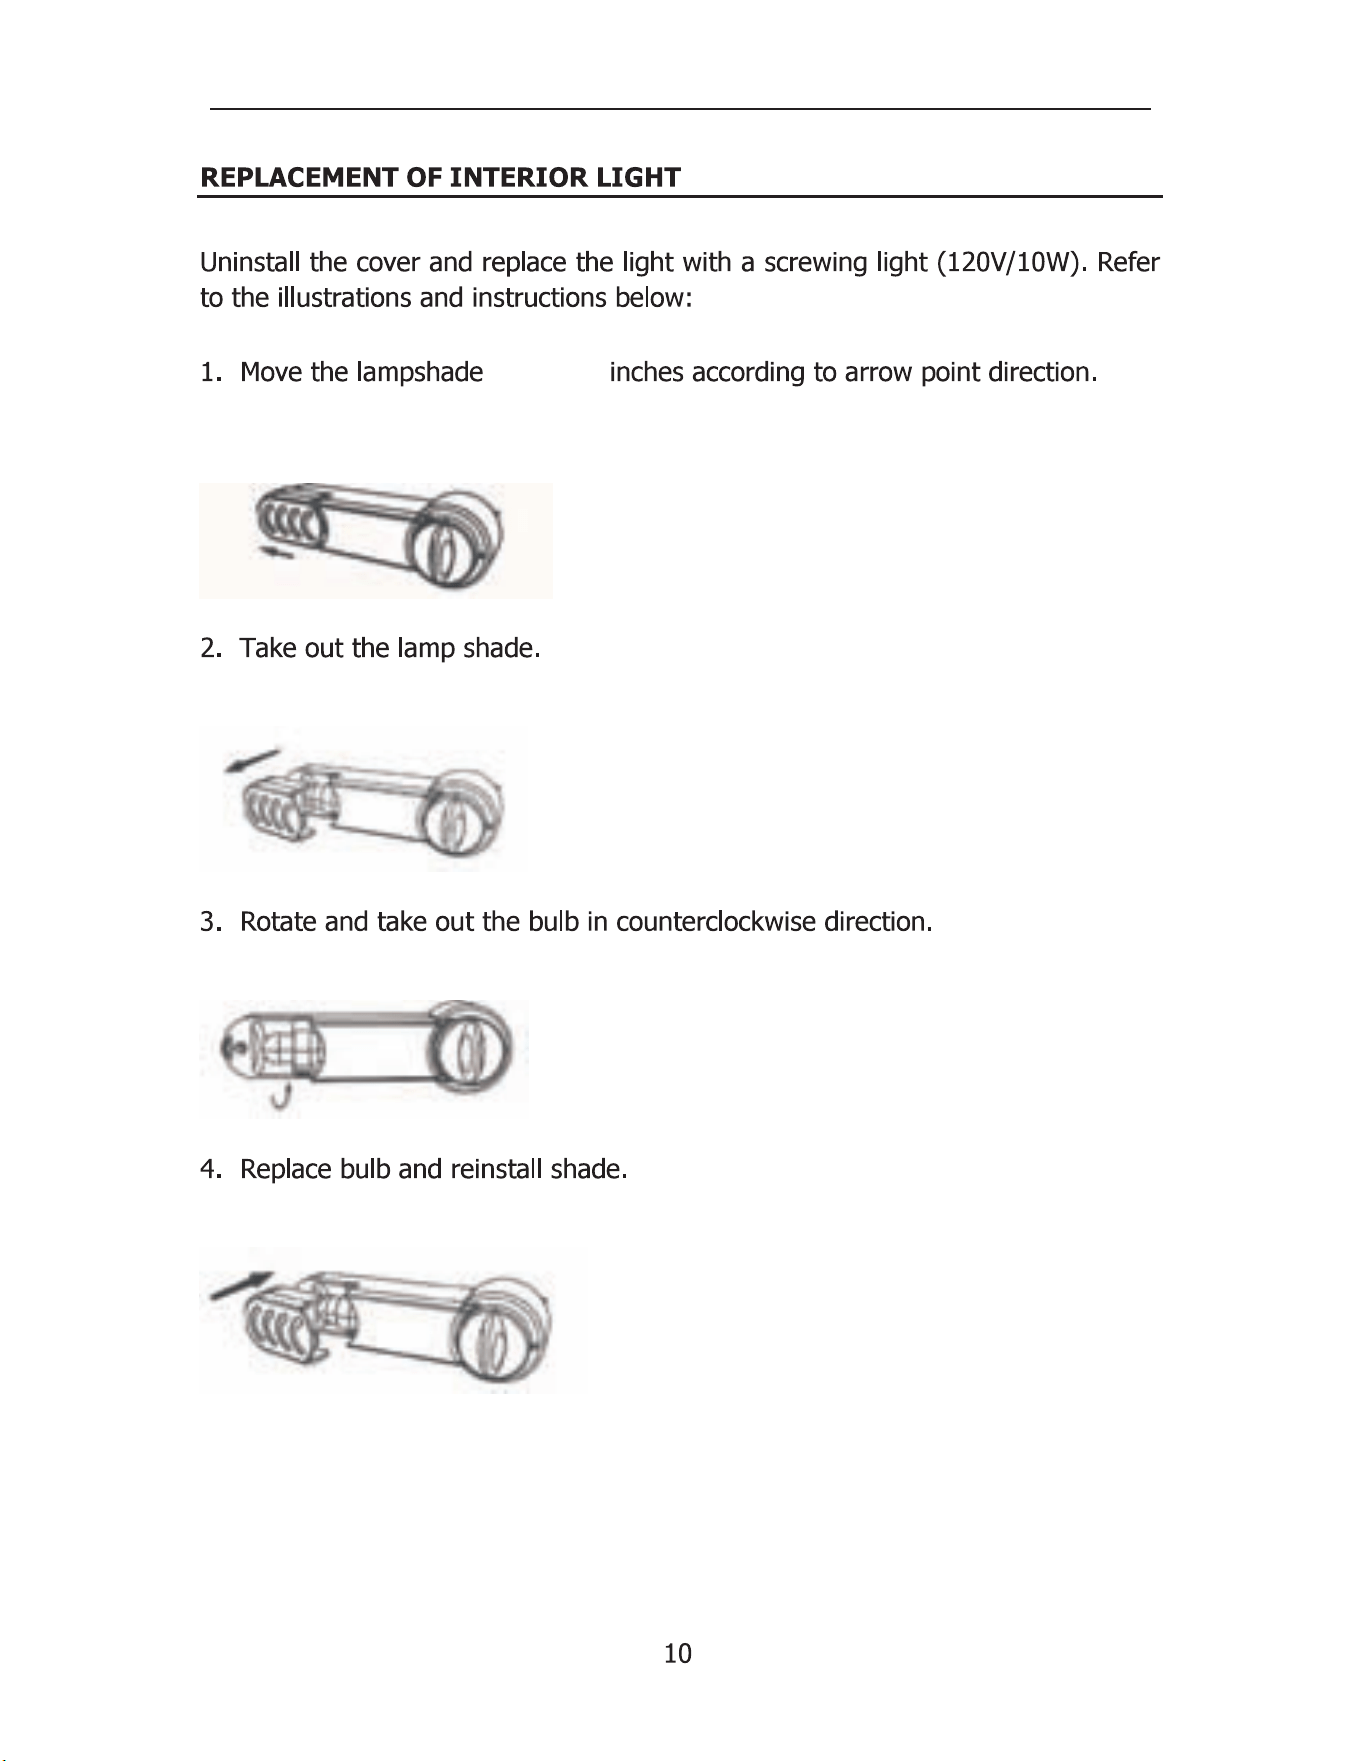
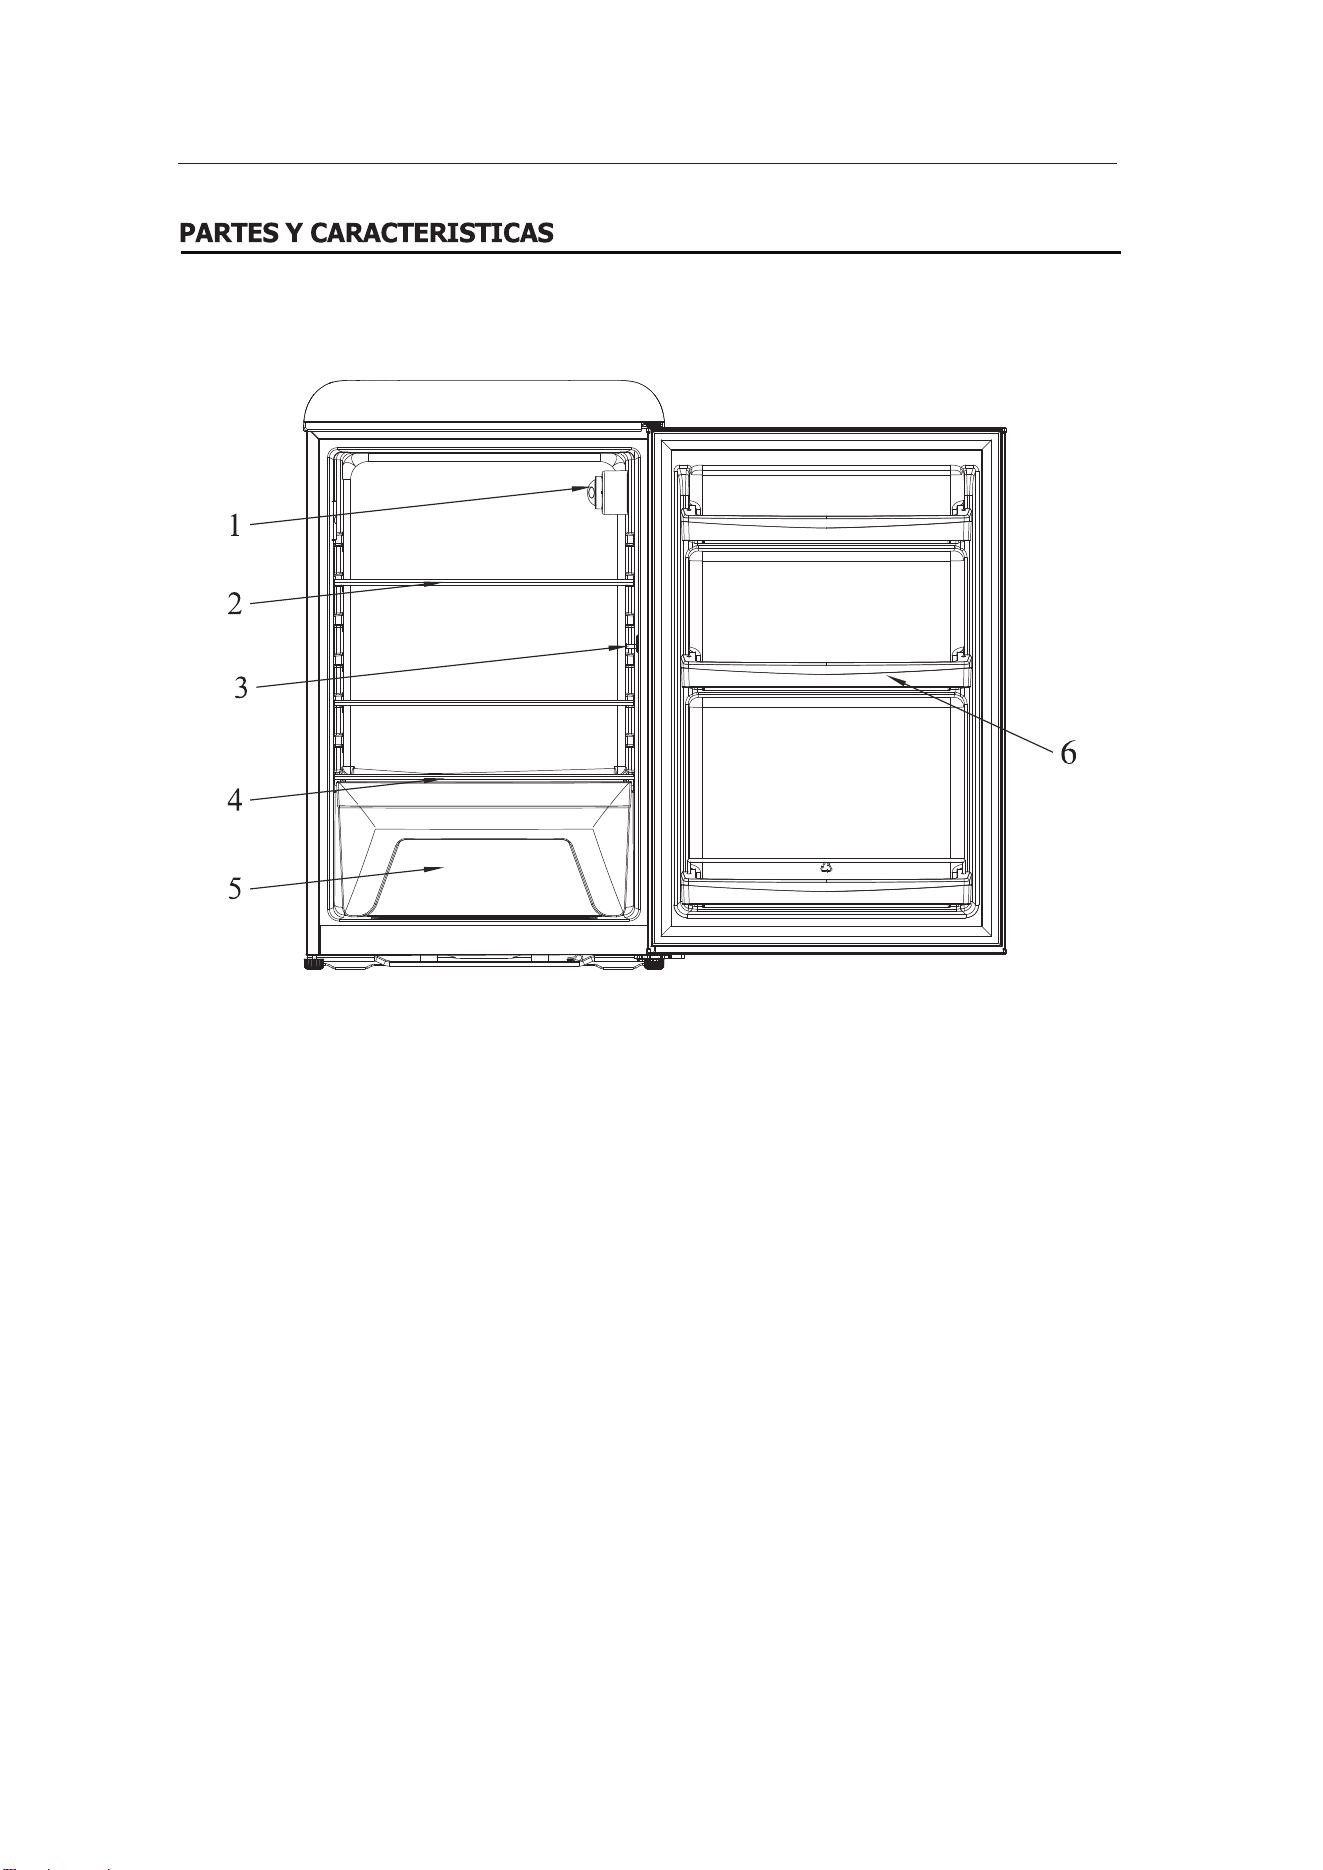
3.Lamp switch
4.Crisper cover
5.Vegetable crisper
6.Door bar
1.Lamp and temperature control knob
2.Glass shelf
Refrigerator
GLR44BKER/GLR44RDER/GLR44BEER
Use and Care Manual
Support:800-562-0738
when

Refrigerator
GLR44BKER/GLR44RDER/GLR44BEER
Use and Care Manual Support:800-562-0738
Refrigerator GLR44BKER/GLR44RDER/GLR44BEER Use and Care Manual Support:800-562-0738
Refrigerator GLR44BKER/GLR44RDER/GLR44BEER Use and Care Manual Support:800-562-0738
Refrigerator GLR44BKER/GLR44RDER/GLR44BEER Use and Care Manual Support:800-562-0738
Refrigerator GLR44BKER/GLR44RDER/GLR44BEER Use and Care Manual Support:800-562-0738
Refrigerator
GLR44BKER/GLR44RDER/GLR44BEER
Use and Care Manual Support:800-562-0738
Refrigerator GLR44BKER/GLR44RDER/GLR44BEER Use and Care Manual Support:800-562-0738
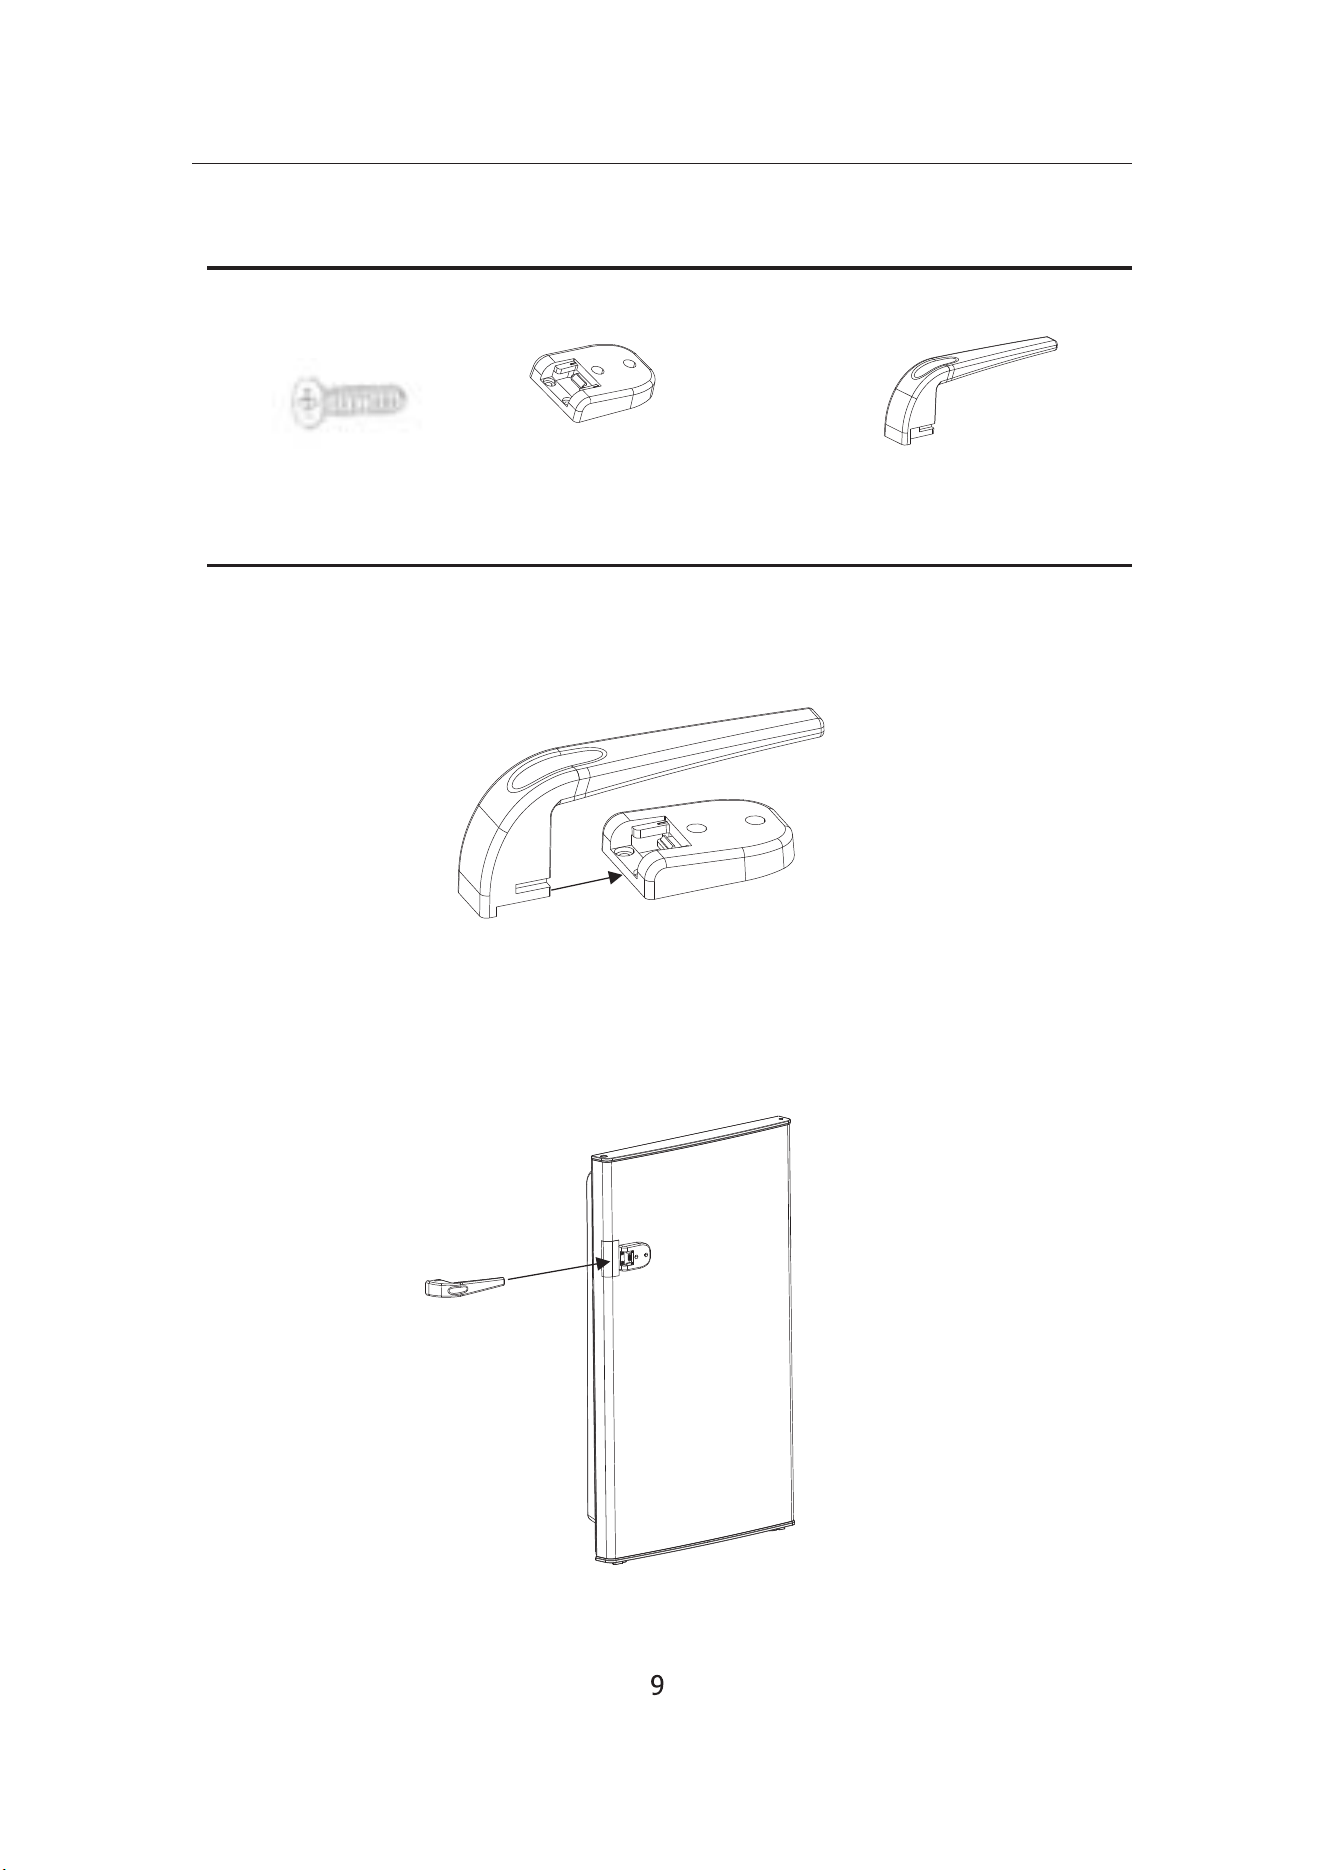
HOW TO INSTALL THE DOOR HANDLES
Hardware
#1 Screw
Qty. 4
#2 Door Plate
Qty. 1
#3 Door Handle
Qty. 1
. Attach #2 Door Plate to door aligning #1 Screws with
holes in door.
corresponding
. Slide #3 Door Handle into #2 Door Plate until locked into place.
Refrigerator GLR44BKER/GLR44RDER/GLR44BEER Use and Care Manual Support:800-562-0738
0.12-0.2

Refrigerator GLR44BKER/GLR44RDER/GLR44BEER Use and Care Manual Support:800-562-0738
21.7
24.3
35.4
0.73
R600a/0.99oz
62.61 lbs
Net weight
4.4
0.6
0~46.4
Refrigerator GLR44BKER/GLR44RDER/GLR44BEER Use and Care Manual Support:800-562-0738
800-562-0738
528429
GLR44BKER/GLR44RDER/GLR44BEER
Refrigerador GLR44BKER/GLR44RDER/GLR44BEER Manual de Uso y Cuidado Servicio al Cliente: 800-562-0738
800-562-0738
La instalación de las manijas de la puerta
3.Interruptor de la lámpara
4.Cubierta de la gaveta
5.Cajón de verduras
6.Barra de la puerta
1.Perilla del Control de Temperatura
2.Anaquel de Vidrio Removible
1
Refrigerador GLR44BKER/GLR44RDER/GLR44BEER Manual de Uso y Cuidado Servicio al Cliente: 800-562-0738
2
Refrigerador GLR44BKER/GLR44RDER/GLR44BEER Manual de Uso y Cuidado Servicio al Cliente: 800-562-0738
3
Refrigerador GLR44BKER/GLR44RDER/GLR44BEER Manual de Uso y Cuidado Servicio al Cliente: 800-562-0738
4
Refrigerador GLR44BKER/GLR44RDER/GLR44BEER Manual de Uso y Cuidado Servicio al Cliente: 800-562-0738
5
Refrigerador GLR44BKER/GLR44RDER/GLR44BEER Manual de Uso y Cuidado Servicio al Cliente: 800-562-0738
6
Refrigerador GLR44BKER/GLR44RDER/GLR44BEER Manual de Uso y Cuidado Servicio al Cliente: 800-562-0738
7
Refrigerador GLR44BKER/GLR44RDER/GLR44BEER Manual de Uso y Cuidado Servicio al Cliente: 800-562-0738
8
Refrigerador GLR44BKER/GLR44RDER/GLR44BEER Manual de Uso y Cuidado Servicio al Cliente: 800-562-0738
9
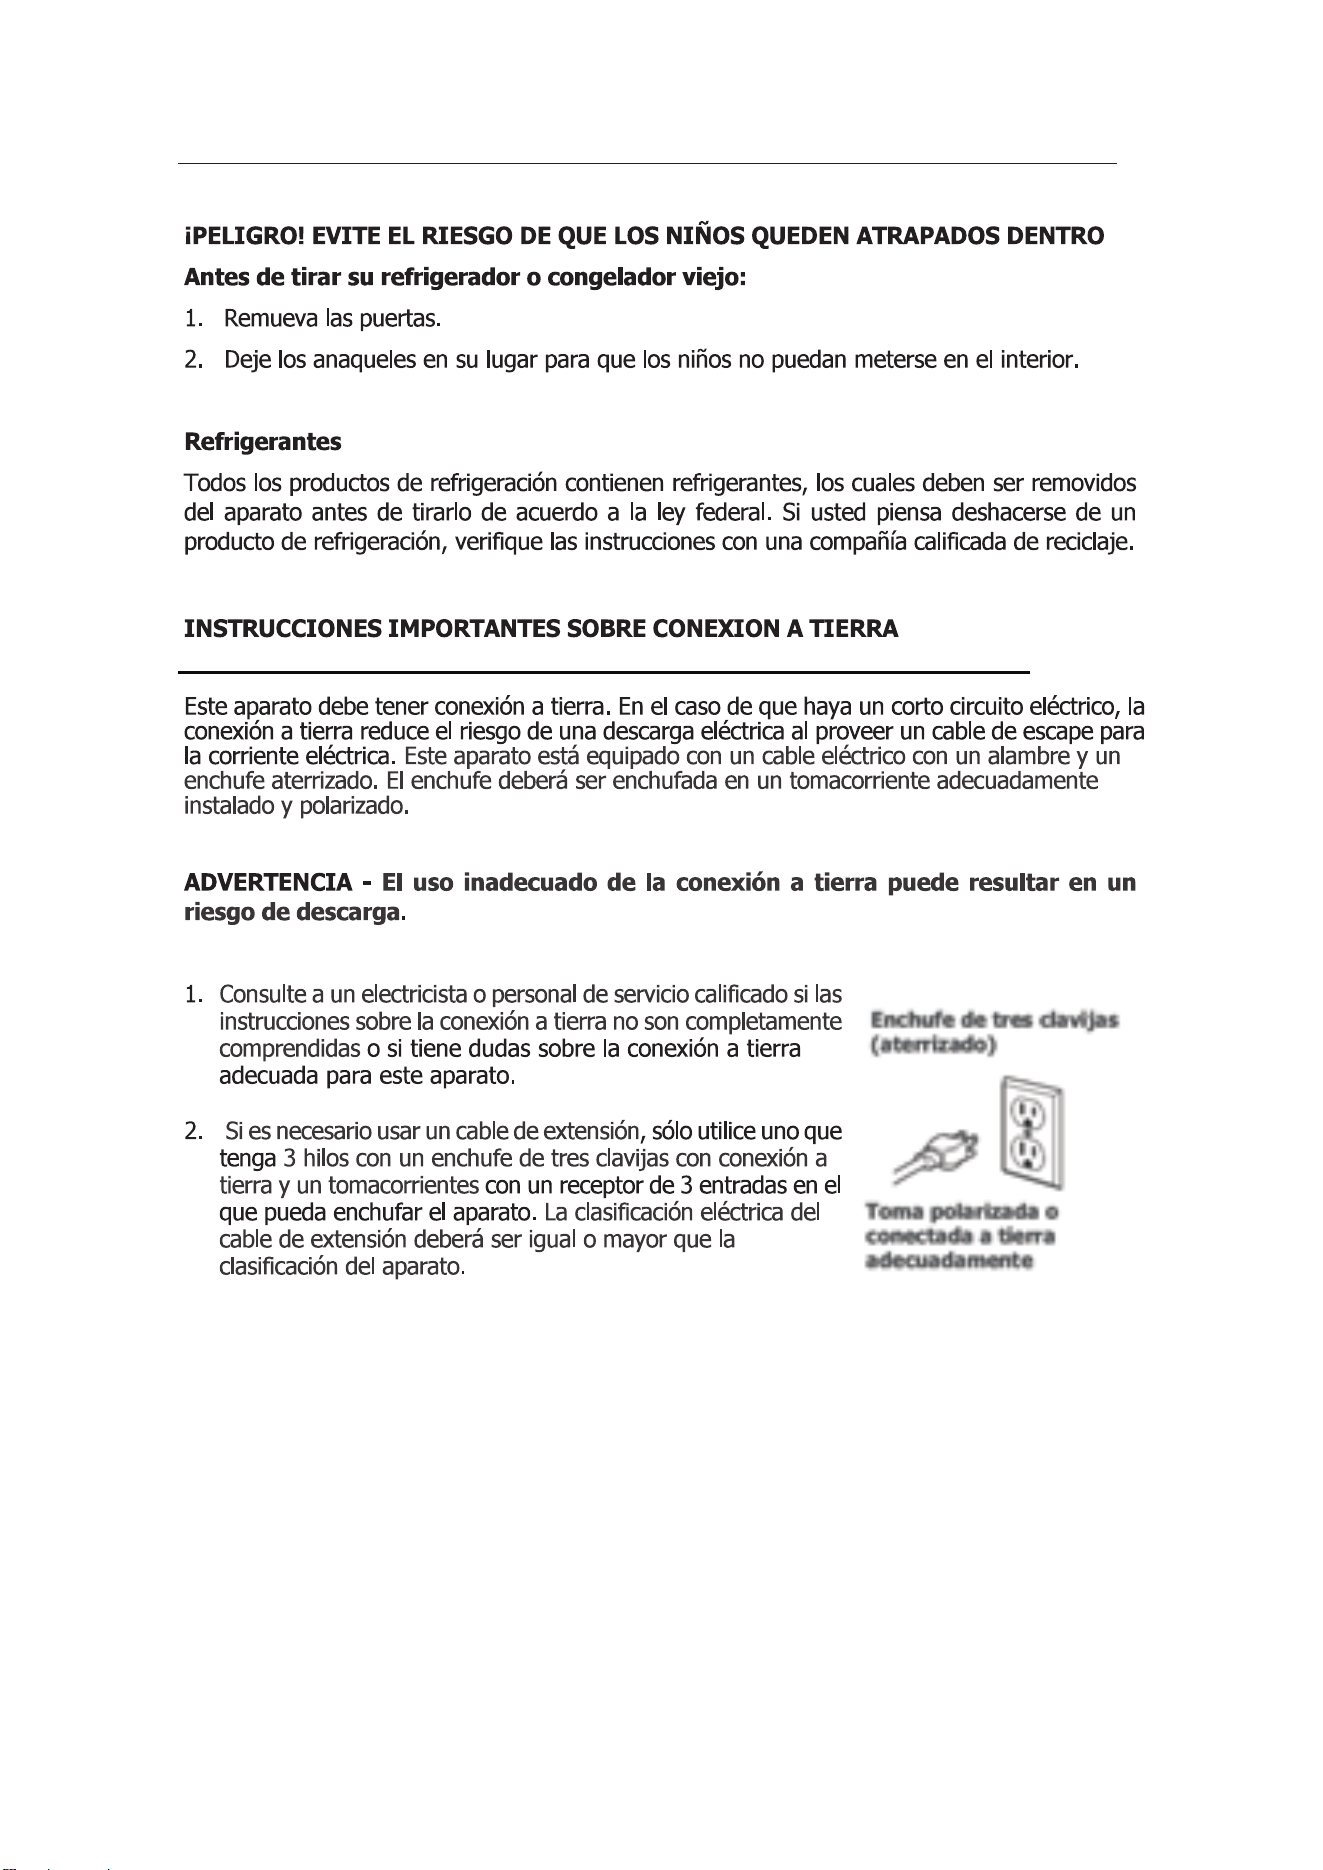
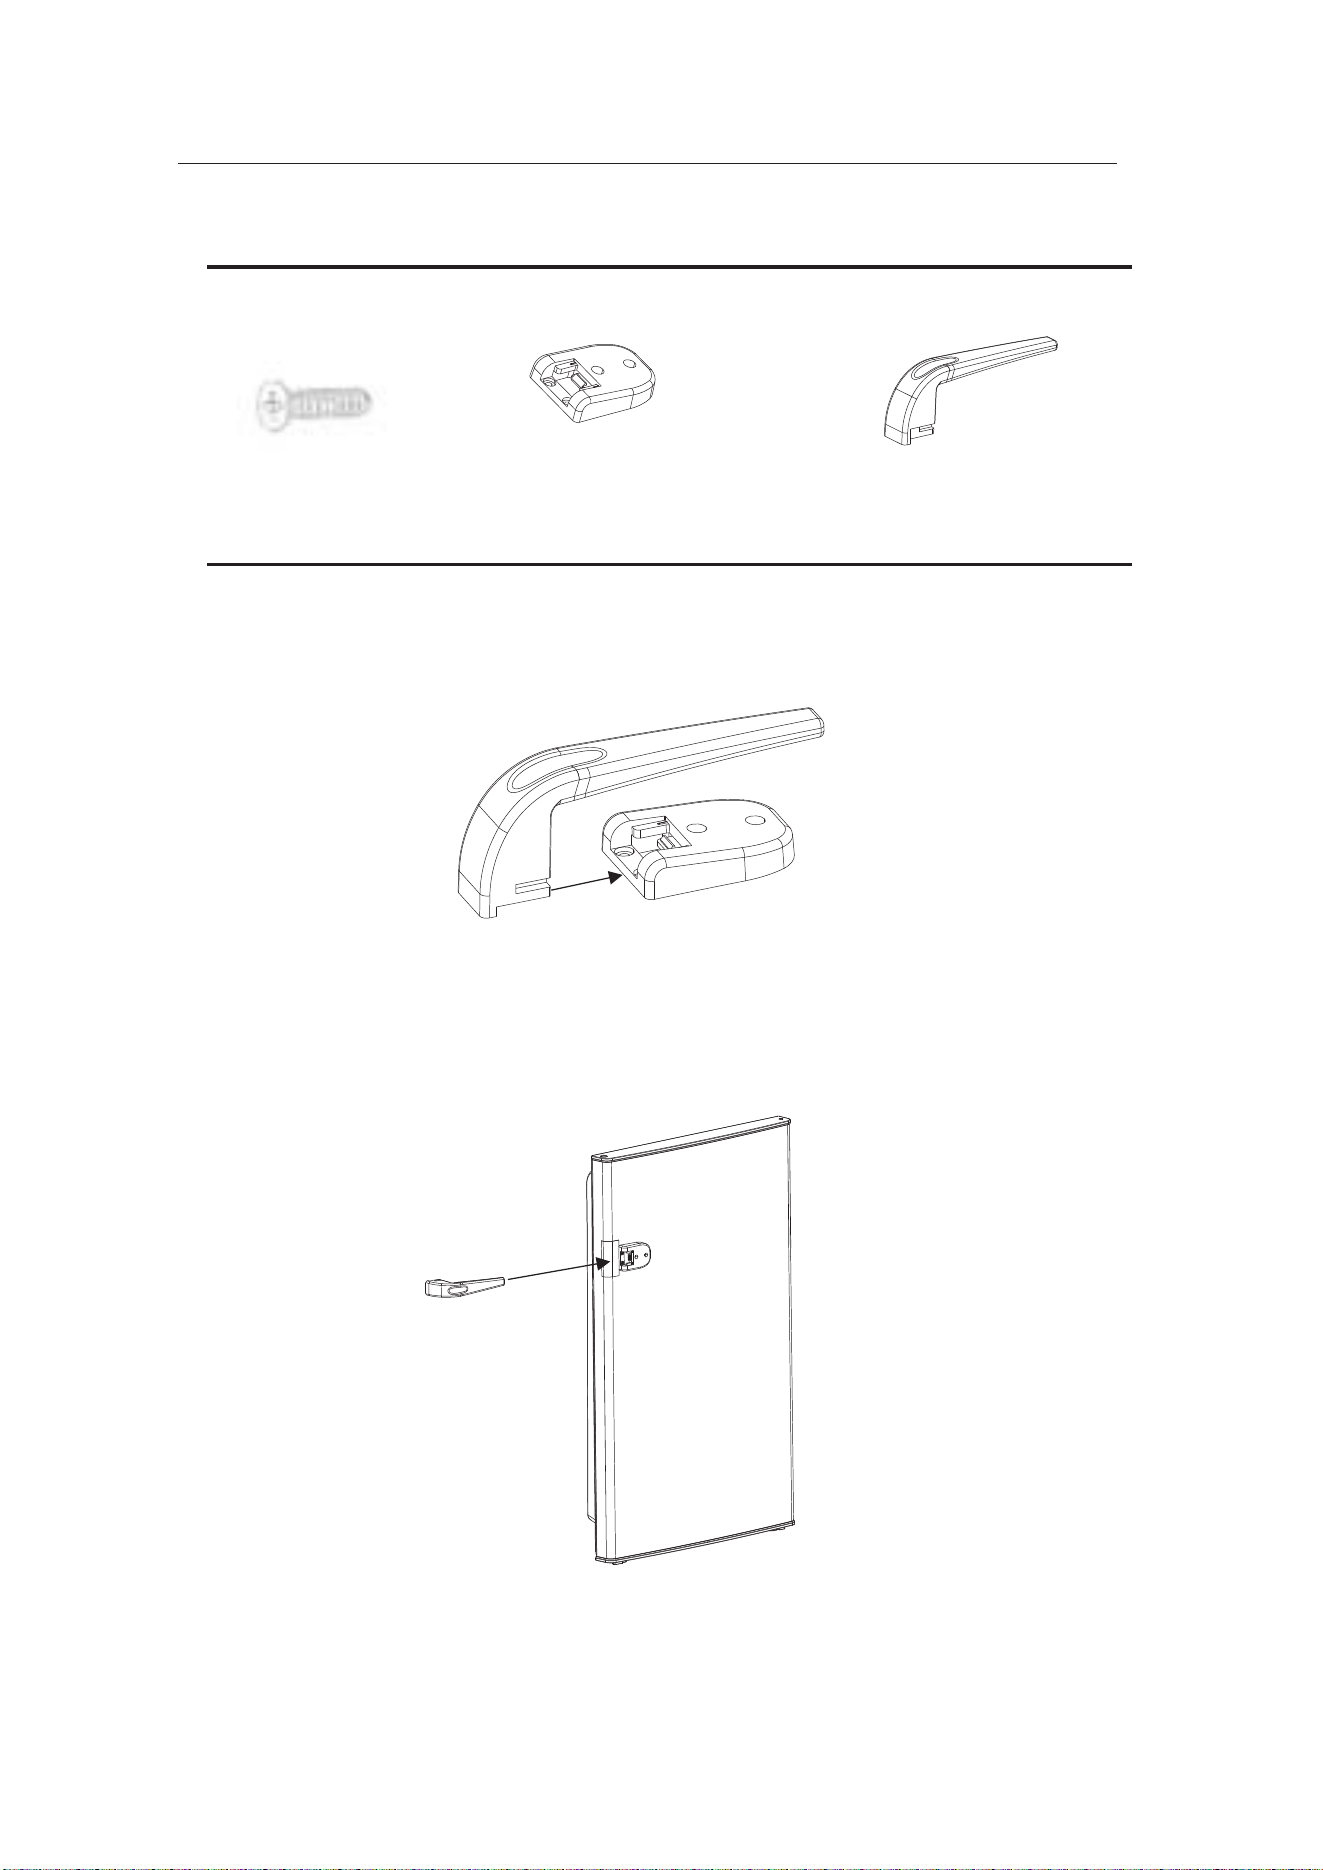
CÓMO INSTALAR LA MANIJAS DE LA PUERTA
Herramientas
#1 tornillo
cantidad. 4
#2 placa de la puerta
cantidad. 1
#3 manija de la puerta
cantidad. 1
. Acoplado # 2 Placa de la puerta a la alineación de la puerta # 1
Tornillos con agujeros correspondientes en la puerta.
. Deslice la manija de la puerta # 3 en la placa de la puerta # 2 hasta
que quede bloqueada en la puerta
Refrigerador GLR44BKER/GLR44RDER/GLR44BEER Manual de Uso y Cuidado Servicio al Cliente: 800-562-0738
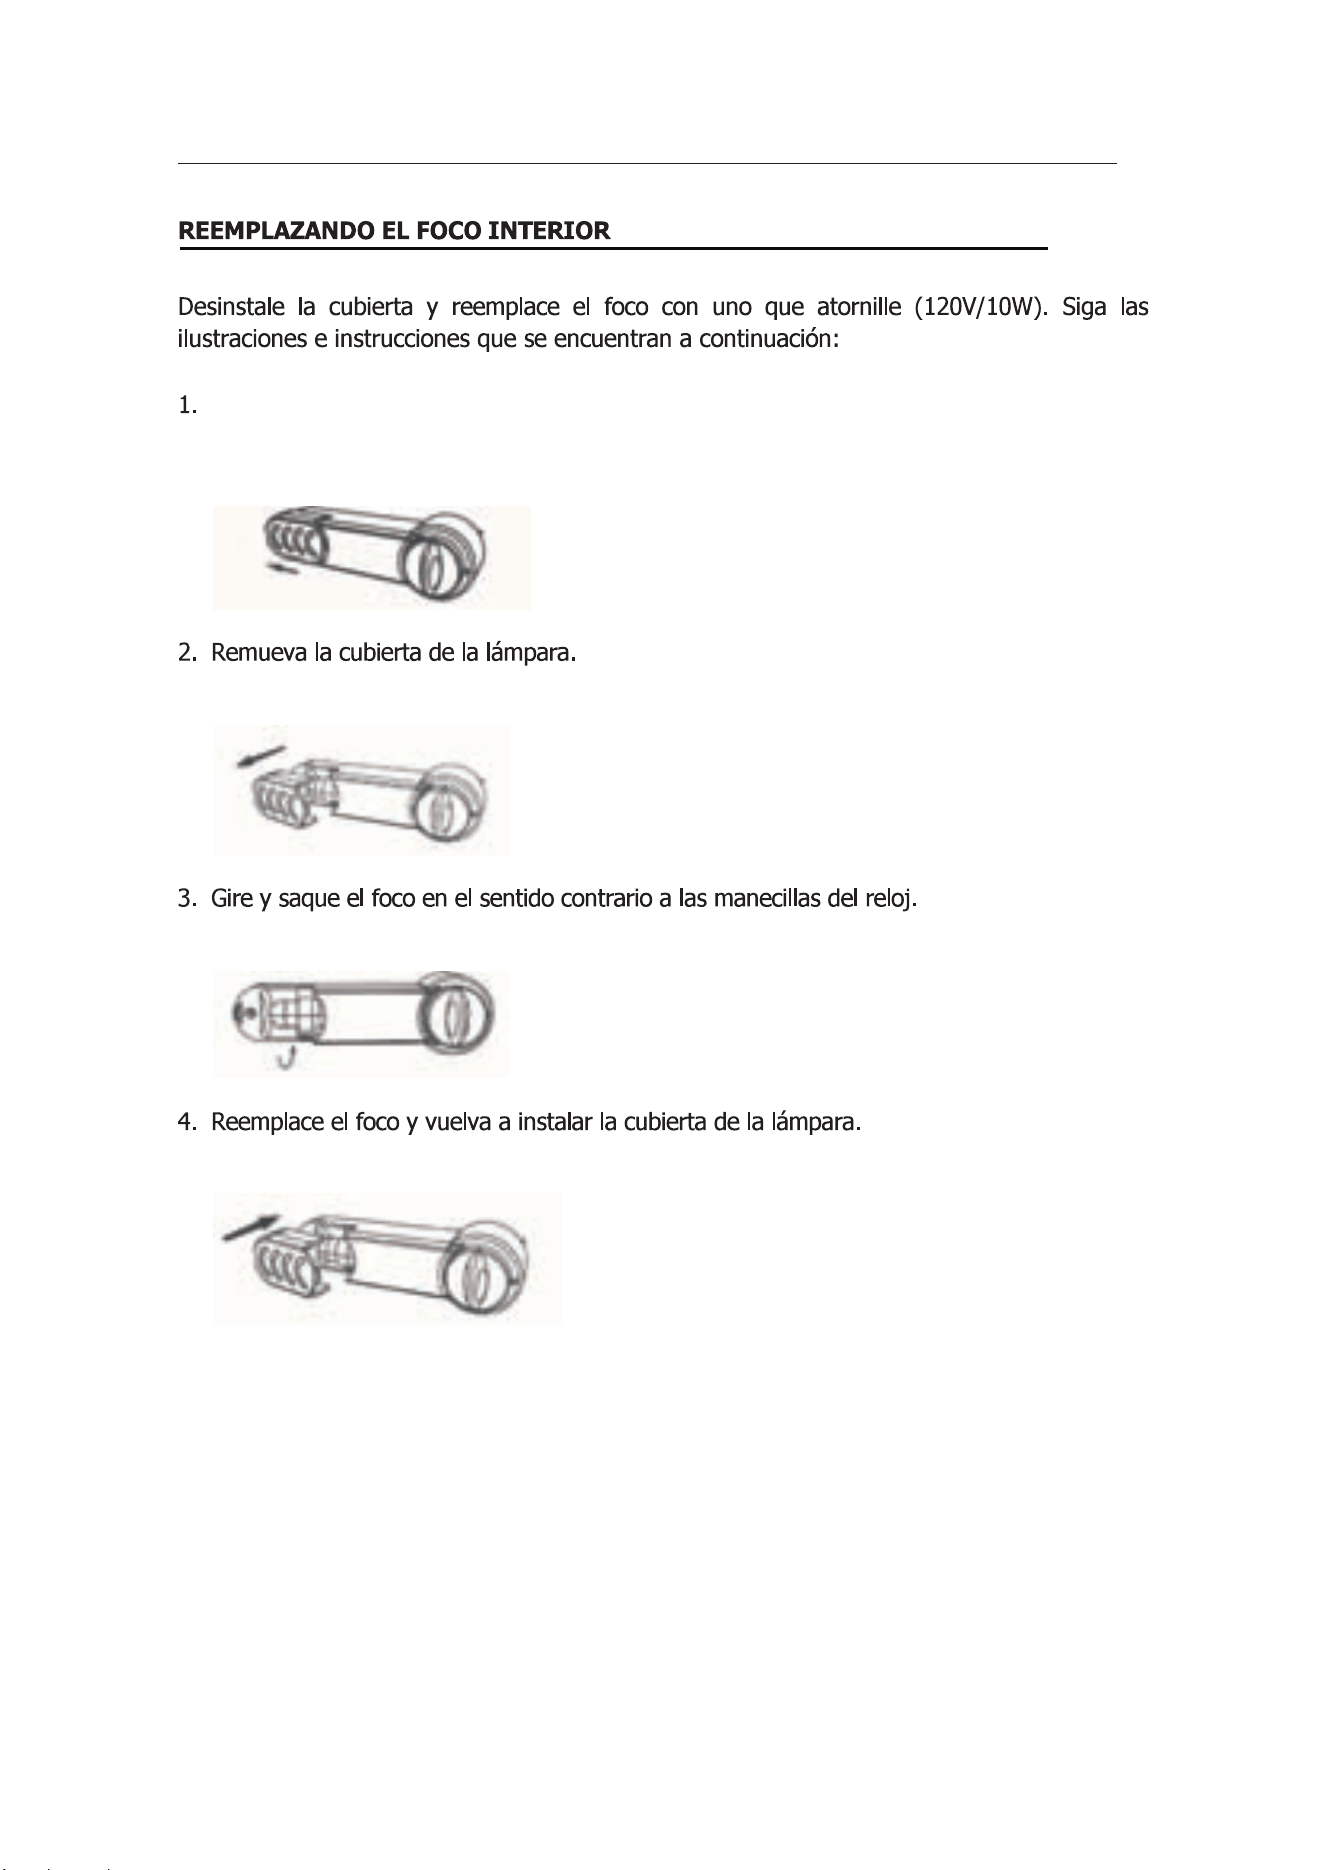
Mueva la cubierta de la lámpara de 0.12 a 0.2 pulgadas hacia la dirección que indica la flecha.
10
Refrigerador GLR44BKER/GLR44RDER/GLR44BEER Manual de Uso y Cuidado Servicio al Cliente: 800-562-0738
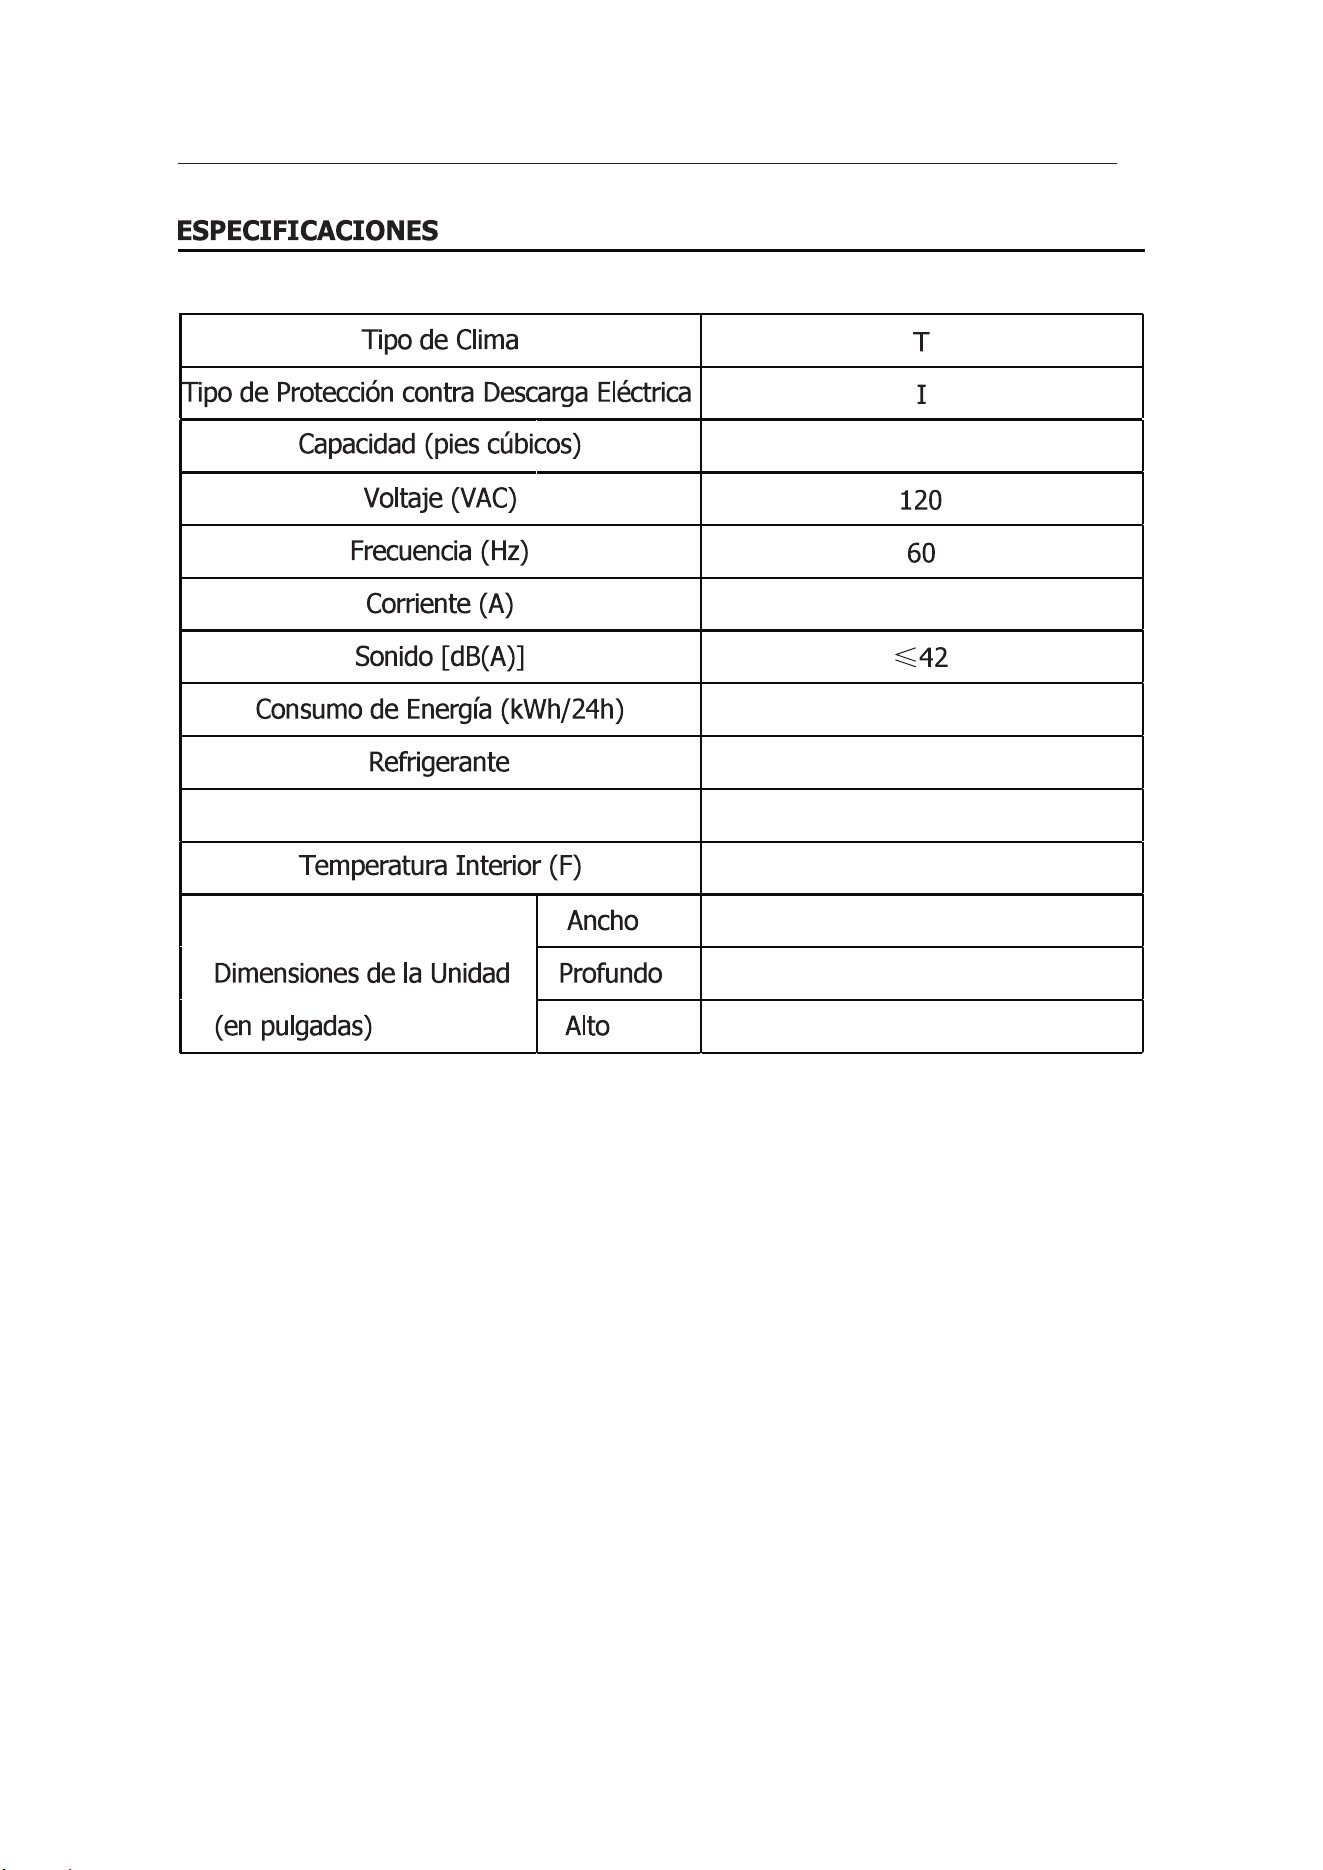
21.7
24.3
35.4
0.73
R600a/0.99oz
62.61 lbs
4.4
0.6
0~46.4
11
Peso Neto
Refrigerador GLR44BKER/GLR44RDER/GLR44BEER Manual de Uso y Cuidado Servicio al Cliente: 800-562-0738
12
800-562-0738
528429
Refrigerador GLR44BKER/GLR44RDER/GLR44BEER Manual de Uso y Cuidado Servicio al Cliente: 800-562-0738