Loading ...
Loading ...
Loading ...
5
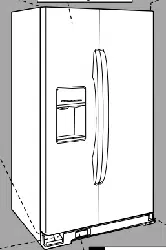
Remove the Doors
1. Unplug refrigerator or disconnect power.
2. Open both doors (refrigerator and freezer) and the water filter
cover door. It is not necessary to remove the water filter itself.
3. Remove the base grille by pulling up on the bottom outside
corners. See Graphic 1.
4. Disconnect the water dispenser tubing located behind the base
grille on the freezer door side. The dispenser tubing runs
through the door hinge, and must be disconnected in order to
remove the door. See Graphic 2.
■ Press blue outer ring against the face of fitting and pull the
dispenser tubing free.
NOTE: Keep the water tubing connector attached to the
tube that runs underneath the freezer. The door cannot be
removed if the connector is still attached to the tube that
runs through the door hinge.
5. Disconnect the wiring located behind the base grille on the
freezer door side. See Graphic 3.
■ Remove the wiring clip using a ¹⁄₄" hex-head socket
wrench.
■ Disconnect wiring plugs.
6. Close both doors and keep them closed until you are ready to
lift them free from the cabinet.
7. Use a ⁵⁄₁₆" hex-head socket wrench to remove the top left hinge
as shown. See Graphic 4.
IMPORTANT: Do not remove either screw A.
8. Lift freezer door straight up off bottom hinge. See Graphic 5.
The water dispenser tubing and wiring remain attached to the
freezer door and pull through the bottom left hinge.
NOTE: This may require two people - one to lift the door and
another to feed the water tubing and wiring through the hinge.
IMPORTANT: Rest the door on its side on a soft, clean surface,
such as a towel, blanket or piece of cardboard. This will help
avoid damaging the door, water tubing and wiring.
9. Remove top right hinge as shown. See Graphic 6.
IMPORTANT: Do not remove either screw A.
10. Lift the refrigerator door straight up off bottom hinge.
IMPORTANT: Rest the door on its side on a soft, clean surface,
such as a towel, blanket or piece of cardboard. This will help
avoid damaging the door.
11. It may not be necessary to remove the bottom hinges to move
the refrigerator through a doorway. Both bottom hinges have
similar construction.
■ If necessary, disassemble the hinges as shown. See
Graphic 7.
IMPORTANT: To aid in door alignment and closing, there is
a shim located between the hinge and the cabinet. When
the hinge is removed, the shim may fall out of place. If this
occurs, set the shim aside so it can be put back in place
when the hinge is reconnected later.
Replace the Doors and Hinges
1. Replace both bottom hinges, if removed. Make sure the shim is
between the hinge and cabinet. Tighten screws.
2. Before replacing the freezer door on the bottom left hinge, feed
the wiring with the yellow plug and the water dispenser tubing
through the hinge. Assistance may be needed.
NOTE: Provide additional support for the doors while the top
hinges are being replaced. Do not depend on the door magnets to
hold the doors in place while you are working.
3. Align and replace the top left hinge as shown. See Graphic 4.
Tighten screws.
4. Reconnect water dispenser tubing and wiring.
IMPORTANT: Do not intertwine the water tubing and wiring
bundles when reconnecting them.
■ Push tubing into fitting until it stops and the black mark
touches the face of fitting. See Graphic 2.
■ Reconnect wiring plugs. Reinstall the wiring clip over the
grommets. Tighten screw. See Graphic 3.
5. Replace the refrigerator door by lifting the door onto the bottom
right hinge.
6. Align and replace the top right hinge as shown. See Graphic 6.
Tighten screws.
7. Replace the ice storage bin (on some models) and any
adjustable door or utility bins.
8. Plug into a grounded 3 prong outlet.
WARNING
Electrical Shock Hazard
Disconnect power before removing doors.
Failure to do so can result in death or electrical shock.
Electrical Shock Hazard
Plug into a grounded 3 prong outlet.
Do not remove ground prong.
Do not use an adapter.
Do not use an extension cord.
Failure to follow these instructions can result in death,
fire, or electrical shock.
WARNING
Loading ...
Loading ...
Loading ...