Loading ...
Loading ...
Loading ...
INSTALLATION INSTRUCTIONS
ENGLISH
6
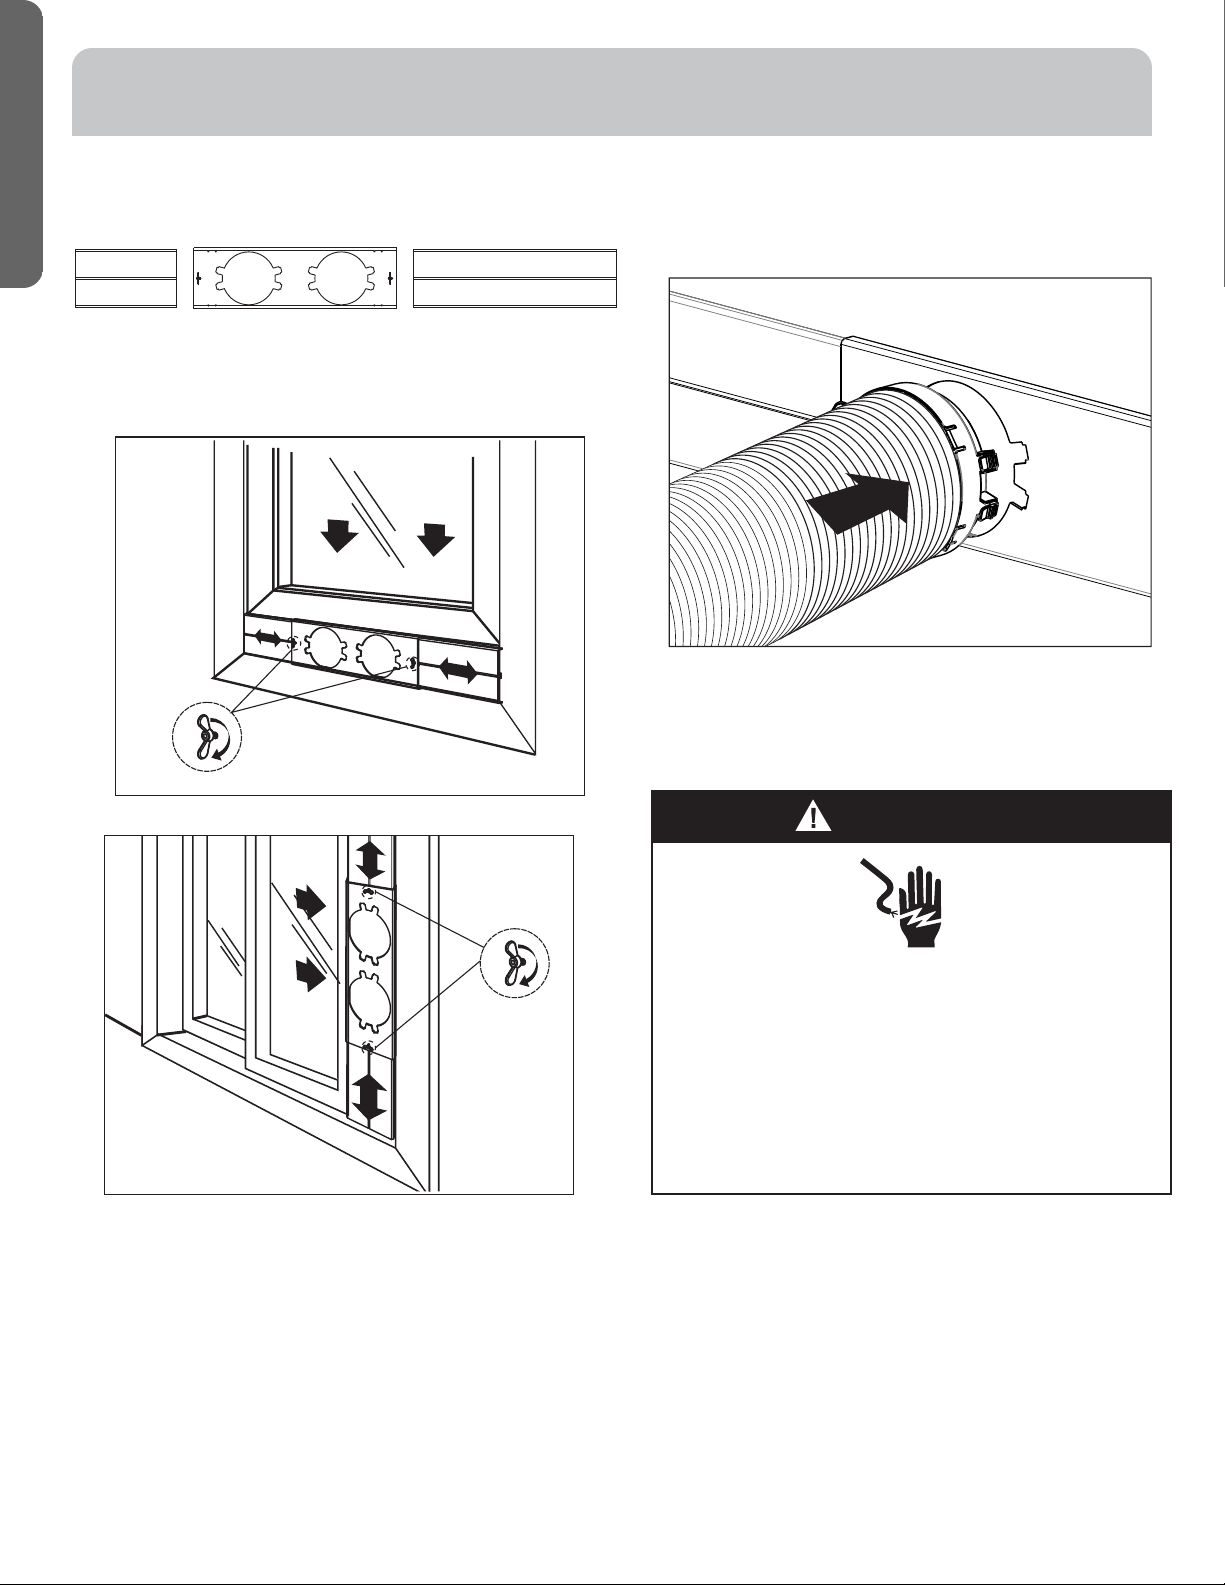
STEP 4 - ATTACH EXHAUST HOSE
TO THE EXHAUST NOZZLE
1. Insert the other end of the exhaust hose assembly (with
hose connector #3) onto the window bracket.
STEP 3 - INSTALL WINDOW PANELS
1. Insert the window panel B and C to each end of the main
óäñèïÊÊçíøö÷÷òĤû÷ëèïèñê÷ëòéúìñçòú
2. Open the window and place window panels into window.
Êçíøö÷÷ëèèû÷èñöìòñóäñèïö÷òĤ÷úìç÷ëòõëèìêë÷òéúìñçòú
by the screw and nut sets mounted on the main panel A.
CA B
WARNING
Electrical Shock Hazard
Plug into a grounded 3 prong outlet.
Do not remove the ground prong from the power
cord plug.
Do not use an adapter.
Do not use an extension cord.
Ïäìïøõè÷òçòöòæäñõèöøï÷ìñçèä÷ëĤõèòõ
electrical shock.
STEP 5 - COMPLETE INSTALLATION
1. Plug the power cord into a grounded 3 prong outlet.
2. Press the Reset button on the power cord to ensure the
safety plug is providing power to the air conditioner.
3. Allow 8” of space around the unit for proper air
circulation.
4. When removing the portable air conditioner for storage,
the window panel may be left in place. Simply place the
cover (#5) over the hole on the window panel.
2. Repeat Steps 2 - 4 for the installation of the second hose
assembly.
Loading ...
Loading ...
Loading ...