Loading ...
Loading ...
Loading ...
4
OPERATION
1. Plug cord into any standard 120 V
AC wall outlet.
2. Place the prepared ingredients into the
compartments, as indicated below.
Note: Bread slices need to be stacked.
3. Cover with glass lid.
4. Rotate the dial to the desired
number of minutes.
5. Toast shade can be adjusted
according to timing.
6. Always disconnect the plug from
the wall outlet when you have
nished cooking
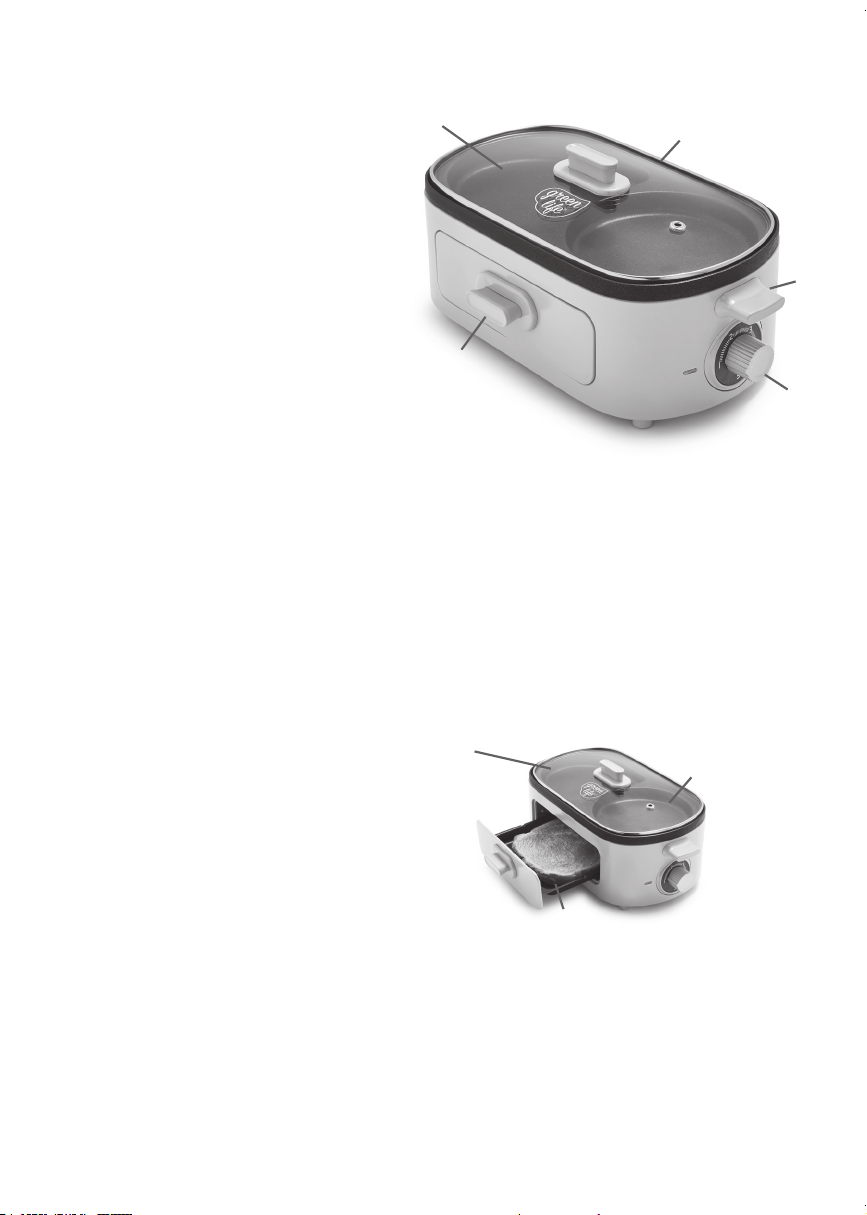
PARTS
1. Healthy Ceramic Nonstick
Griddle Area
Compartmentalized for eggs,
meat, veggies, pancakes & more!
2. Adjustable Timer Dial with Light
Select number of cooking minutes
and light will turn on. Unit and
light will turn off at the end of
cooking time.
3. Healthy Ceramic Nonstick
Toast Tray
Accommodates 2 slices of toast,
or english muns stacked vertically,
or half a bagel.
4. Handles
For easy moving and carrying.
5. Glass Lid
For clear viewing or keeping warm.
BEFORE FIRST USE
Run the Breakfast Maker for 15
minutes before rst use. There will
be slight smoke and smell which is
normal and common to appliances.
1. Carefully unpack the
Breakfast Maker and remove
all packaging materials.
2. Place the Breakfast Maker on
a clean, at surface.
3. Before cooking on the Breakfast
Maker for the rst time, wipe the
non-stick griddle surfaces and
bread tray.
NOTE: Only the lid is dishwasher safe.
4. Coat the ceramic nonstick surfaces
with a high smoke point oil (i.e.
avocado oil) or butter before
heating. If necessary, remove
excess oil with paper towel.
THIS APPLIANCE IS FOR HOUSEHOLD
USE ONLY.
Meat,
Vegetables
Eggs,
Pancakes
Bread
3.
4.
5.
2.
1.
Loading ...
Loading ...
Loading ...