Loading ...
Loading ...
Loading ...
4. Remove freezer door by lifting door off bottom hinge.
• Models have an internal support rod(A) installed in
the hinge socket of door. Remove and retain for
later replacement.
5. Remove center hinge bracket(A) and shim(B) by
removing screws(C) using Phillips screwdriver.
A--_ ( *--B
6. Remove toe grille and bottom hinge cover. Both snap
7. Remove bottom hinge(A) and shim(B) with 3/8" hex nut
driver. Remove hinge pin(C). Remove and retain all
round washer shims(D), if present.
B
To Reverse Doors
If you wish to reverse doors on unit, call 1-800-4-MY-
HOME sm(1-800-469-4663), to schedule a service
appointment. This visit will be free of charge if
appointment is made within three months of purchase
date.
To Replace Doors
1. Replace bottom hinge and shims. Replace bottom
hinge pin in bottom hinge bracket in hole outside of
cabinet, along with all washer shims retained from
hinge removal.
2. Replace center hinge bracket, and shims.
3. Assemble top hinge, hinge shim(s), and positioning
shim together. Attach loosely to cabinet to allow for
door clearance.
4. Place freezer door on bottom hinge pin.
5. Replace center hinge pin with hex nut driver. Make
sure fit is tight. Replace round shims and door
closure.
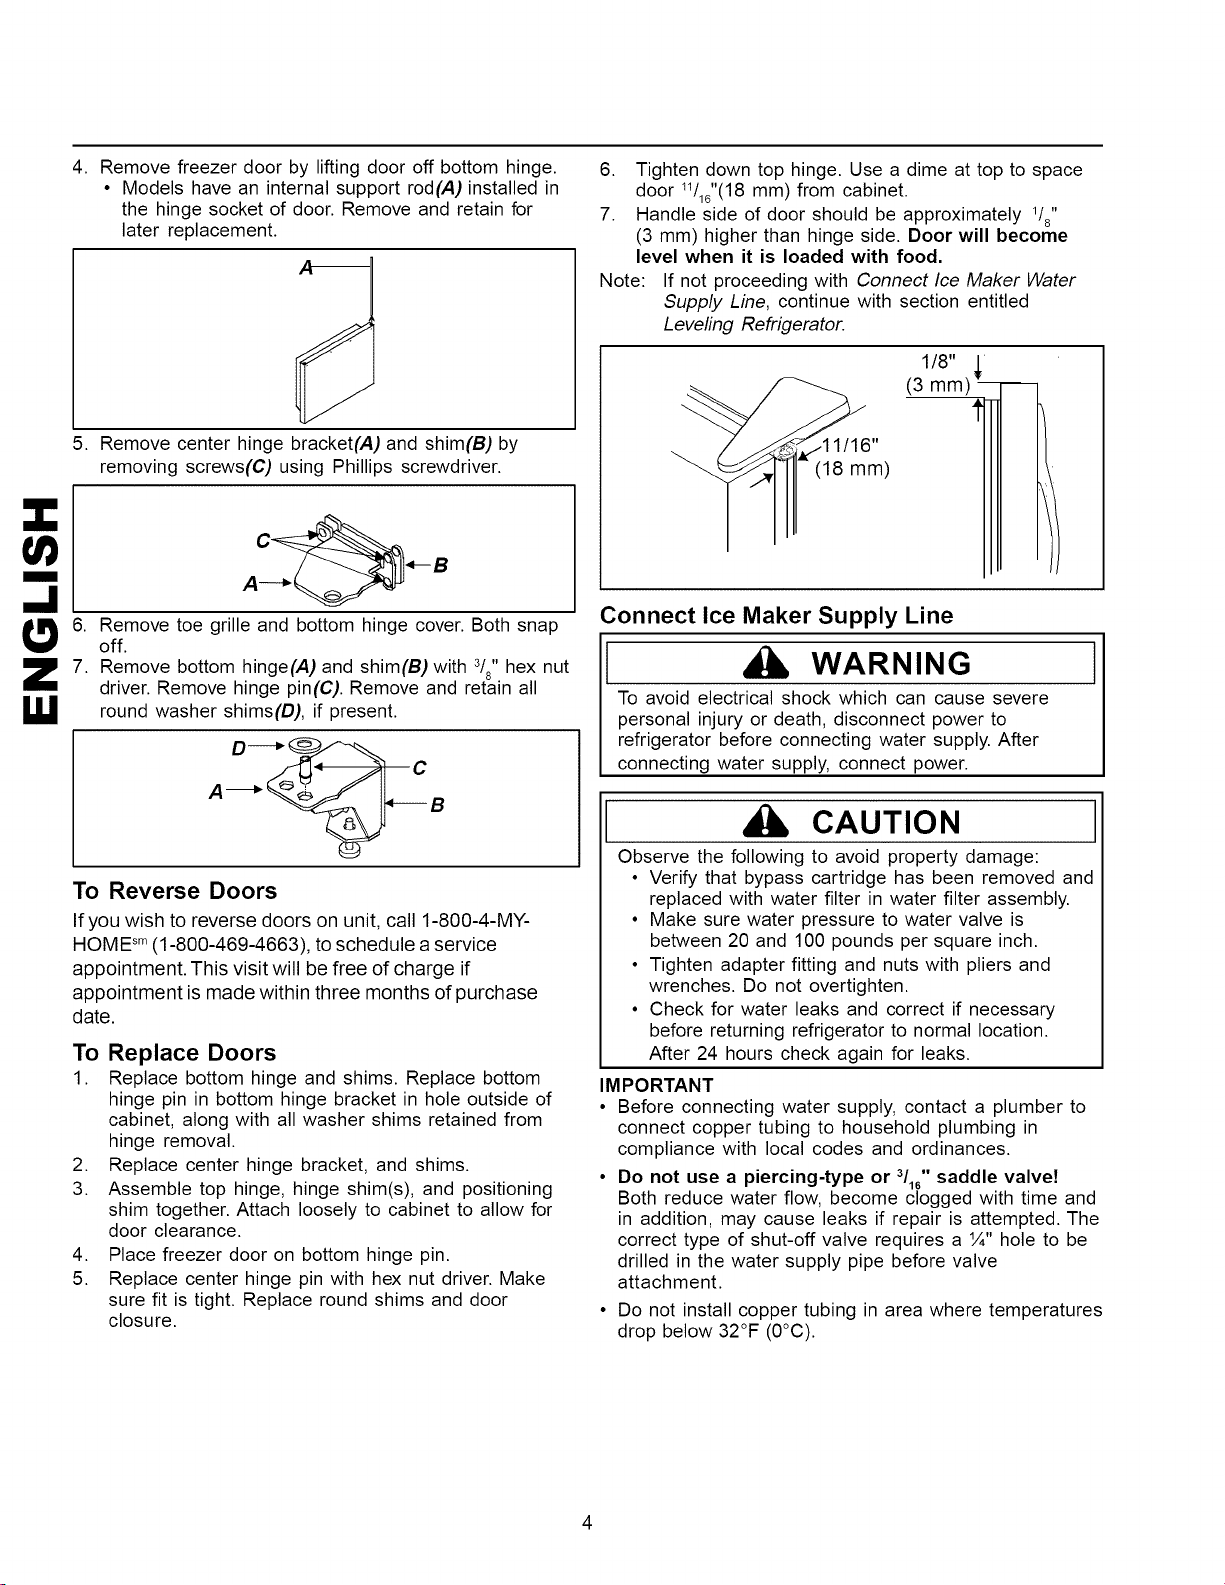
6. Tighten down top hinge. Use a dime at top to space
door W16"(18 mm) from cabinet.
7. Handle side of door should be approximately Vs"
(3 mm) higher than hinge side. Door will become
level when it is loaded with food.
Note: If not proceeding with Connect Ice Maker Water
Supply Line, continue with section entitled
Leveling Refrigerator.
1/8" _,
(3 mm)----
1/16"
(18 mm)
Connect Ice Maker Supply Line
1 WARNING
To avoid electricalshock which can cause severe
personal injuryor death,disconnect power to
refrigeratorbefore connecting water supply.After
connecting water supply,connect power.
CAUTION
Observe the following to avoid property damage:
• Verify that bypass cartridge has been removed and
replaced with water filter in water filter assembly.
• Make sure water pressure to water valve is
between 20 and 100 pounds per square inch.
• Tighten adapter fitting and nuts with pliers and
wrenches. Do not overtighten.
• Check for water leaks and correct if necessary
before returning refrigerator to normal location.
After 24 hours check again for leaks.
IMPORTANT
• Before connecting water supply, contact a plumber to
connect copper tubing to household plumbing in
compliance with local codes and ordinances.
• Do not use a piercing-type or 3/16" saddle valve!
Both reduce water flow, become clogged with time and
in addition, may cause leaks if repair is attempted. The
correct type of shut-off valve requires a ¼" hole to be
drilled in the water supply pipe before valve
attachment.
• Do not install copper tubing in area where temperatures
drop below 32°F (0°C).
Loading ...
Loading ...
Loading ...