Home
Bookmarks
Home
Bosch
Bosch HBB237BS0R/03 User Manual
Page 2
Bosch HBB237BS0R/03 Serie 6 Oven
User Manual - Page 2
For HBB237BS0R/03.
PDF File Manual
,
4 pages
,
Read Online
|
Download pdf file
Ú Installation instructions
Important information – Fig. 1
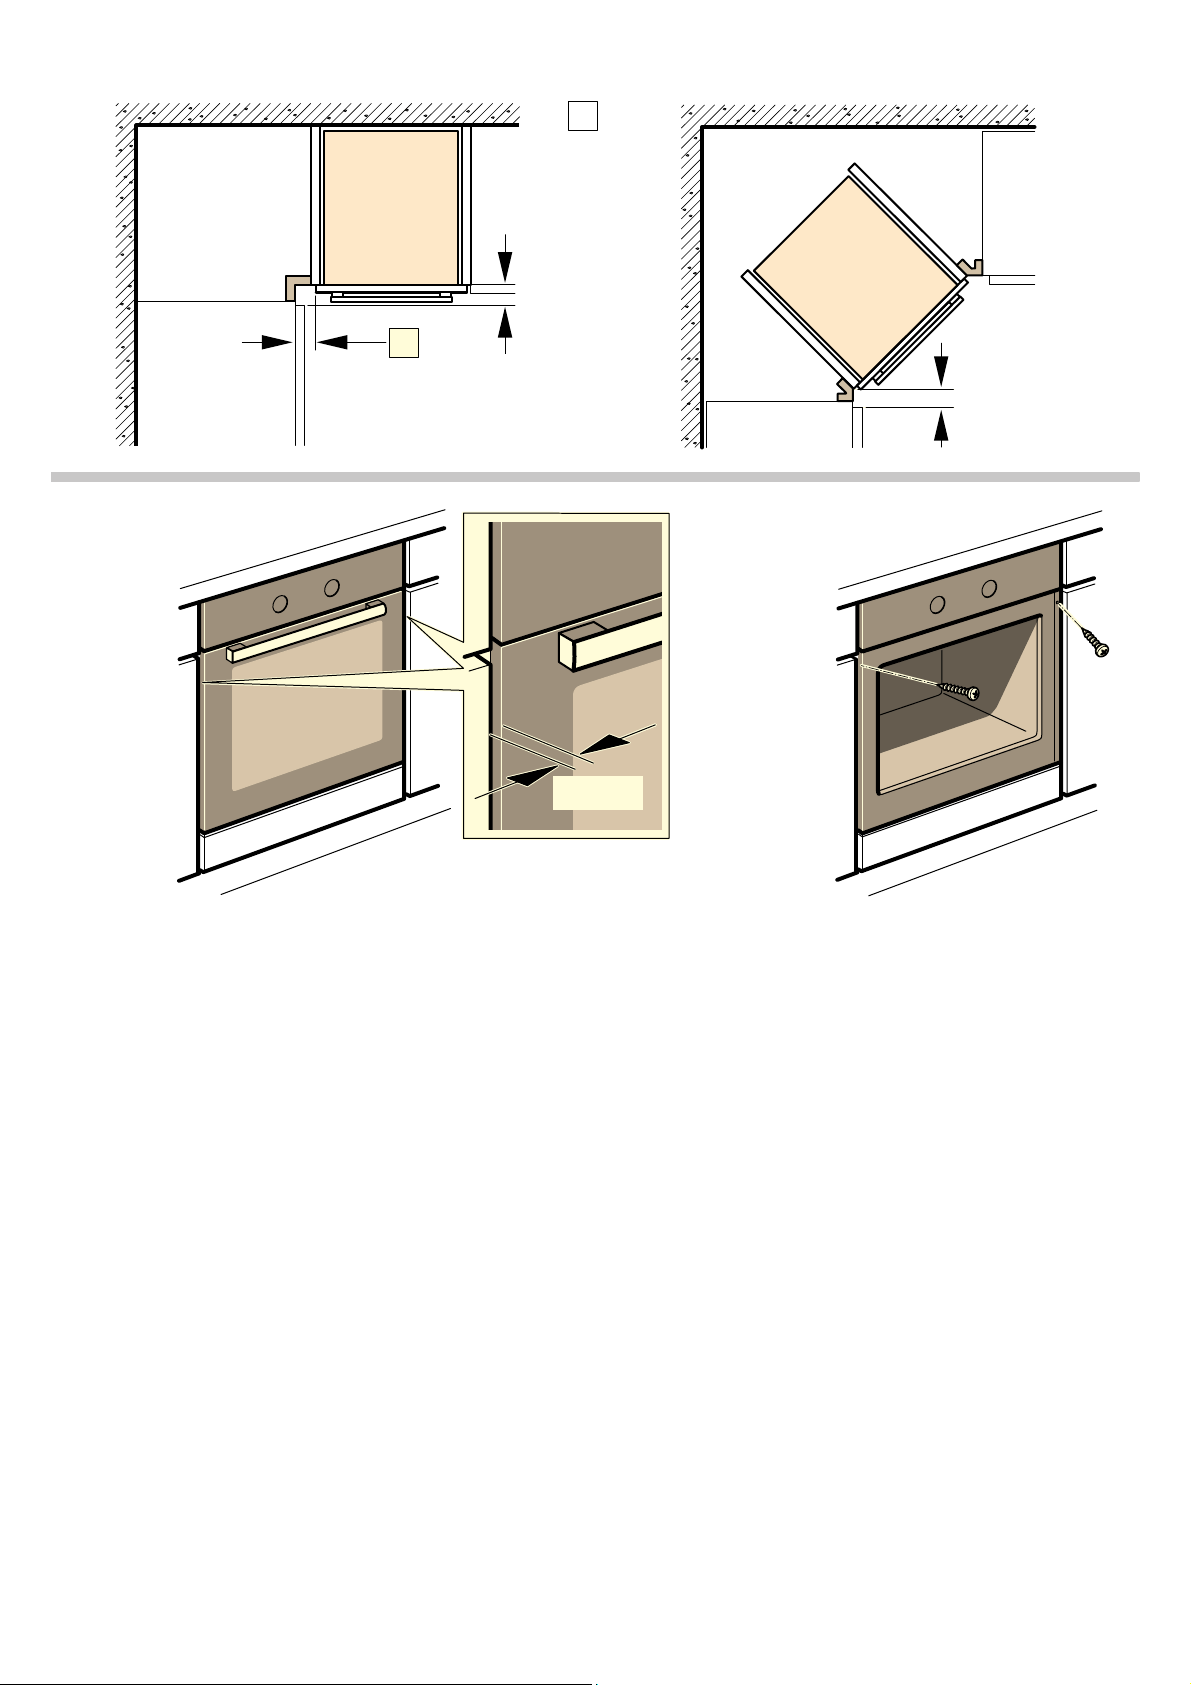
Appliance under the worktop – Fig. 2
Appliance in a tall unit - Fig. 3
Corner installation – Fig. 4
Connecting the appliance to the electricity supply
Power cable with a plug with earthing contact
Power cable without a plug with earthing contact
Only in Sweden, Finland and Norway
Securing the appliance – Fig. 5
1. Slide the appliance all the way in and centre it.
2. Screw the appliance into place.
Removal
1. Disconnect the appliance from the power supply.
2. Undo the securing screws.
3. Lift the appliance slightly and then pull it out completely.
重要信息 – 图 1
将电器安装在工作台下 - 图 2
将电器安装在高柜中 - 图 3
转角处的安装 – 图 4
接通 设备电源
插头带接地触点的电源线
插头不带接地触点的电源线
仅对于瑞典、芬兰和挪威
固定 设备 - 图 5
1. 将设备完全推入并对中。
2. 旋紧设备。
拆除
1. 断开电器电源。
2. 拧开固定螺钉。
3. 稍微抬高电器并将其完全拉出。
Page 2/4
Page 1
Page 2
Page 3
Page 4
Contents
Table of Contents
Search
Previous
Next
Bookmarks
Loading ...
PLQ
'
&
PLQ
PLQ
Loading ...
Loading ...
File type: PDF
File name: 97405553_hbb237bs0r-03.pdf
File size: 212.64 KB
File Language: English
Pages: 4
Author: Bosch
File created: 2017-04-10
Published:
2023-10-28
Updated: 2023-10-28
Download File
Table of Contents
×
Ú Installation instructions
3
Important information – Fig. 1
3
Appliance under the worktop – Fig. 2
3
Appliance in a tall unit - Fig. 3
3
Corner installation – Fig. 4
3
Connecting the appliance to the electricity supply
3
Power cable with a plug with earthing contact
3
Power cable without a plug with earthing contact
3
Only in Sweden, Finland and Norway
3
Securing the appliance – Fig. 5
3
1. Slide the appliance all the way in and centre it.
3
2. Screw the appliance into place.
3
Removal
3
1. Disconnect the appliance from the power supply.
3
2. Undo the securing screws.
3
3. Lift the appliance slightly and then pull it out completely.
3
重要信息 – 图 1
4
将电器安装在工作台下 - 图 2
4
将电器安装在高柜中 - 图 3
4
转角处的安装 – 图 4
4
接通 设备电源
4
插头带接地触点的电源线
4
插头不带接地触点的电源线
4
仅对于瑞典、芬兰和挪威
4
固定 设备 - 图 5
4
1. 将设备完全推入并对中。
4
2. 旋紧设备。
4
拆除
4
1. 断开电器电源。
4
2. 拧开固定螺钉。
4
3. 稍微抬高电器并将其完全拉出。
4
Search:
×
Search