Loading ...
Loading ...
Loading ...

7
ENGLISH
(Original instructions)
u Never attempt to charge
non-rechargeable batteries.
u If the supply cord is damaged, it must
be replaced by the manufacturer or an
authorised BLACK+DECKER Service
Centre in order to avoid a hazard.
u Do not expose the charger to water.
u Do not open the charger.
u Do not probe the charger.
u The appliance/tool/battery must be
placed in a well ventilated area when
charging.
Electrical safety
Your charger has been designed for a
specic voltage. Always check that the
mains voltage corresponds to the voltage
on the rating plate. Never attempt to
replace the charger unit with a regular
mains plug.
Symbols on the charger
Read all of this manual carefully
before using the appliance.
#
This tool is double insulated;
therefore no earth wire is
required. Always check that the
power supply corresponds to
the voltage on the rating plate.
$
The charger is intended for
indoor use only.
Labels on appliance
The following symbols appear on this appliance along with the
date code.
Read all of this manual carefully
before using the appliance.
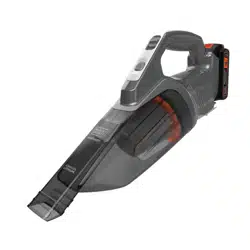
Features
This tool includes some or all of the following features.
1. On/off switch (Slide forward for On. Slide backward for
Off)
2. Bowl release button
3. Dust bowl
4. Filter
5. Battery (Battery included on BCHV001C1 versions only)
6. Battery release button
7. Crevice tool
7a. On board storage for crevice tool
8. Brush tool
Use
Charging the battery (Fig. A)
The standard charger provided will charge a fully depleted
battery in about 5 hours
u Plug the charger (9) into an appropriate outlet before
inserting the battery pack (5).
u Insert the battery pack (5) into the charger (9) as shown in
gure A.
u The green LED (9a) will ash indicating that the battery
is being charged.
u The completion of charge is indicated by the green
LED (9a) remaining on continuously. The pack is fully
charged and may be used at this time or left on the
charger.
Note: Recharge discharged batteries as soon as possible
after use or battery life may be greatly diminished.
Note: The charger and battery pack can be left connected
with the green LED glowing indenitely. The charger will keep
the battery pack fresh and fully charged.
Important charging notes
u Longest life and best performance can be obtained if
the battery pack is charged when the air temperature is
between 18°- 24°C. DO NOT charge the battery pack in
an air temperature below +4.5°C, or above +40.5°C.
This is important and will prevent serious damage to the
battery pack.
u The charger and battery pack may become warm to touch
while charging. This is a normal condition, and does not
indicate a problem. To facilitate the cooling of the battery
pack after use, avoid placing the charger or battery pack
in a warm environment such as in a metal shed, or an
uninsulated trailer.
u If the battery pack does not charge properly:
u Check current at receptacle by plugging in a lamp or
other appliance.
u Check to see if receptacle is connected to a light switch
which turns power off when you turn out the lights.
Loading ...
Loading ...
Loading ...