Loading ...
Loading ...
Loading ...
Operating the appliance en
19
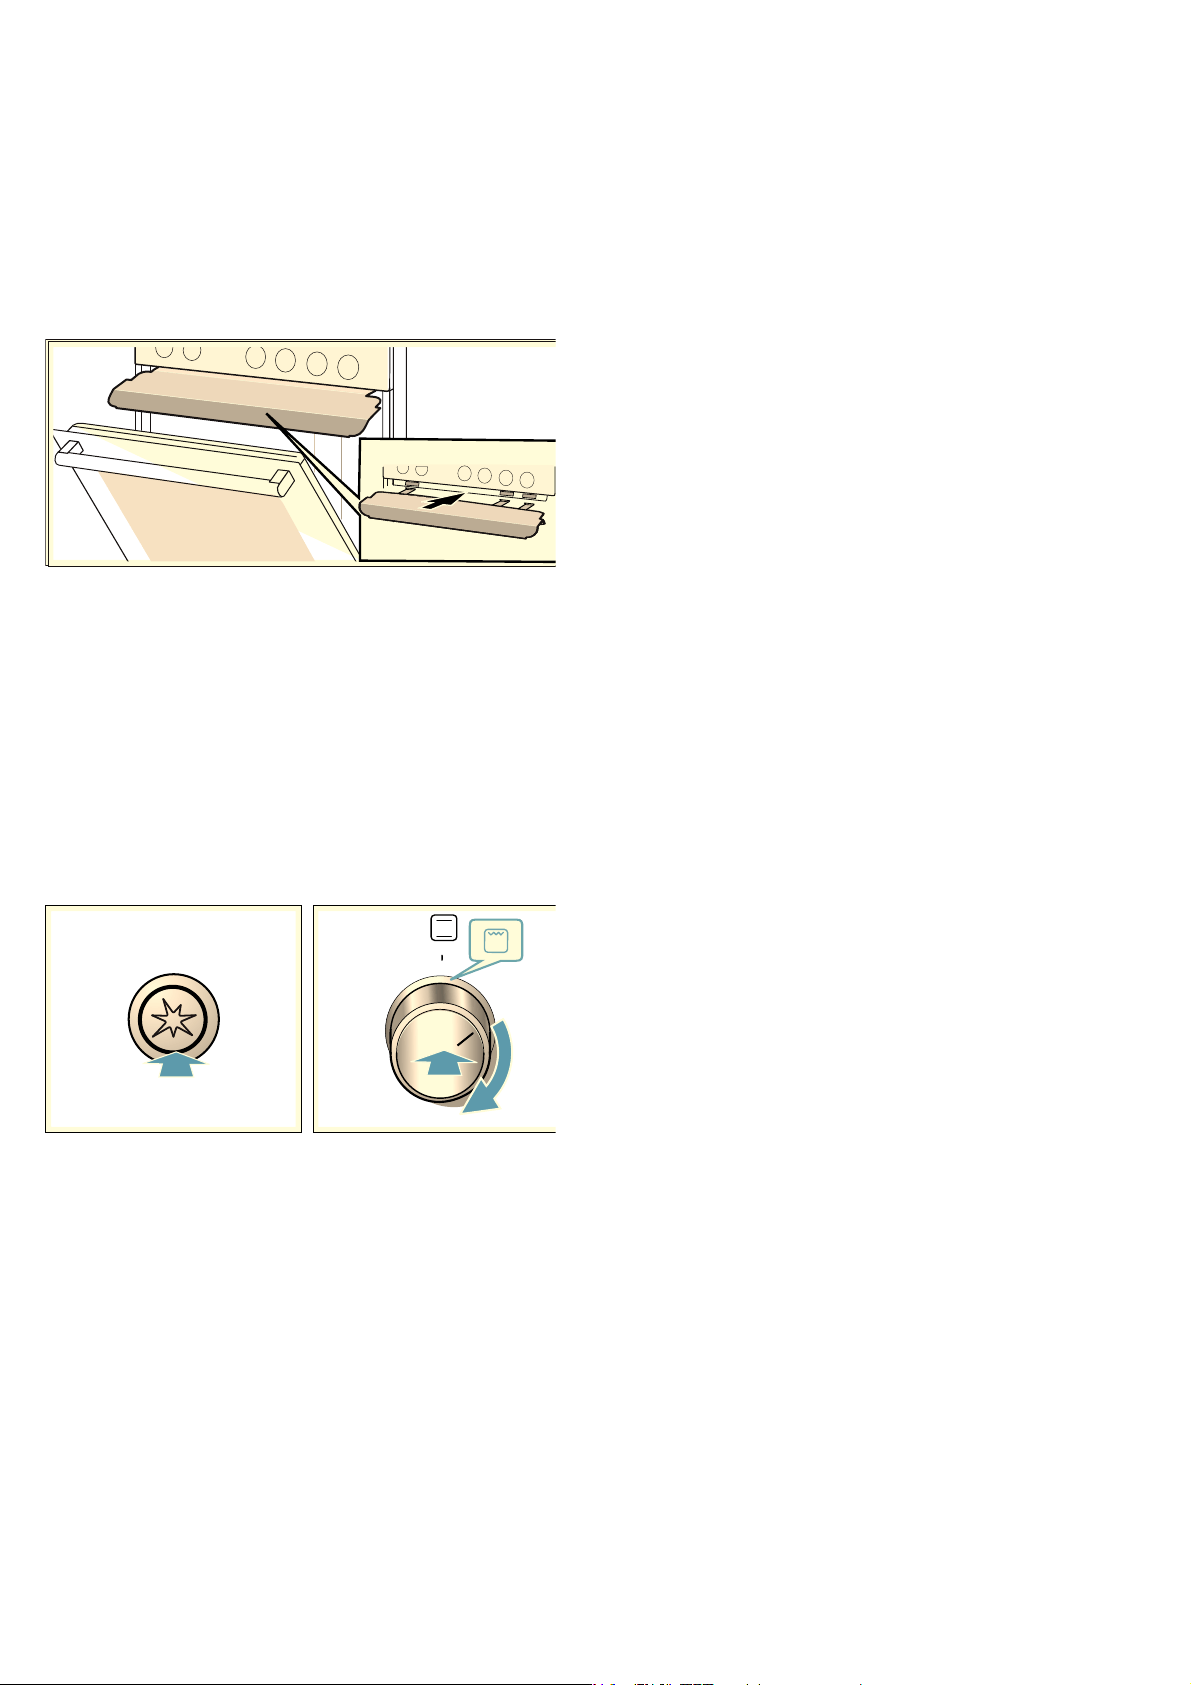
Setting the gas grill
1. Open the top cover. The top cover must remain
open for as long as the cooker is in operation.
2. Turn on the main gas supply to the appliance. Insert
the plug into the socket.
3. Insert the protecting plate into the groove below the
control panel.
Insert the protecting plate with the longer edge at the
front and the curvature at the bottom.
Secure the protecting plate in the groove below the
control panel using the retainers.
Ensure that the protecting plate is engaged in the
retainers. If the protecting plate cannot be removed,
it is properly engaged. You can now safely use the
protecting plate. If it can be removed, insert it into
the groove at a slightly higher angle and make sure
that it engages in the retainers.
4. Close the oven door so that it is as close as possible
to the protecting place.
5. Push in the function selector and turn it clockwise to
the grill setting ( .
6. Keep the function selector pressed in and press the
ignition button 8 at the same time.
7. The gas coming from the gas grill is ignited using
the ignition button. Keep the function selector
pushed in for 10 seconds so that the safety pilot
starts up.
The flame failure device is activated. If the gas flame
goes out, the gas supply is automatically shut off by
the flame failure device.
8. Check whether the flame continues to light up. If the
flame goes out, repeat the process from step 5.
9. Once the food is cooked, switch off the function
selector. Once the oven has cooled down, remove
the protecting plate.
:Warning – Caution!
The hotplate control should not be actuated for longer
than 15 seconds. If the burner does not ignite within 15
seconds, wait at least 1 minute before repeating the
procedure.
Caution!
The gas grill only works when the protecting plate is
inserted.
Make sure that the protecting plate is correctly inserted.
Loading ...
Loading ...
Loading ...