2
READ ALL INSTRUCTIONS CAREFULLY BEFORE USING THE OVEN.
C O N T E N T S
MODEL
M I C R O W A V E O V E N
OPERATION MANUAL
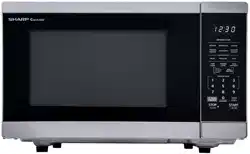
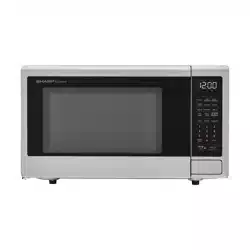
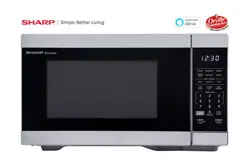
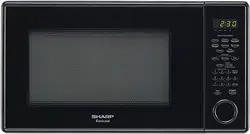
SMC1469HS
※ Keep the waveguide cover clean at all times.
Wipe the oven interior with a soft damp cloth after each use.
If you leave grease or fat anywhere in the cavity it may overheat, smoke or even catch fire
when next using the oven.

PRECAUTIONS TO AVOID POSSIBLE
EXPOSURE TO EXCESSIVE
MICROWAVE ENERGY
(a) Do not attempt to operate this oven with the door open since open-door operation can result
in harmful exposure to microwave energy. It is important not to defeat or tamper with the
safety interlocks.
(b) Do not place any object between the oven front face and the door or allow soil or cleaner
residue to accumulate on sealing surfaces.
(c) Do not operate the oven if it is damaged. It is particularly important that the oven door
close properly and that there is no damage to the: (1) door (bent), (2) hinges and latches
(broken or loosened), (3) door seals and sealing surfaces.
(d) The oven should not be adjusted or repaired by anyone except properly qualied service
personnel.
2
CUSTOMER ASSISTANCE UNITED STATES ONLY
REGISTER YOUR PRODUCT
Registering your new product is easy and offers benets that help you get the most
out of your Sharp product including:
9 Convenience: Ifyoueverneedwarrantysupport,yourproductinformationisalreadyonle.
9 Communication:StayuptodatewithimportantnoticationsandspecialoffersfromSHARP.
9 Support: Quickly access support content including Owner’s Manuals, FAQ’s,
How-toVideos,andmuchmore.
3 EASY WAYS TO REGISTER TODAY!
PRODUCT SUPPORT
If you have questions about the setup or operation of your product, please refer to
the corresponding section within this manual.
Additionally, visit www.sharpusa.com/support to access exclusive content about your
product including:
Æ FAQ’s and How-To Videos
Æ Find or Request Service
Æ Extended Warranty Options
Æ Downloads including the Installation Guide, Spec Sheet, and Owner’s Manual
CONTACT US
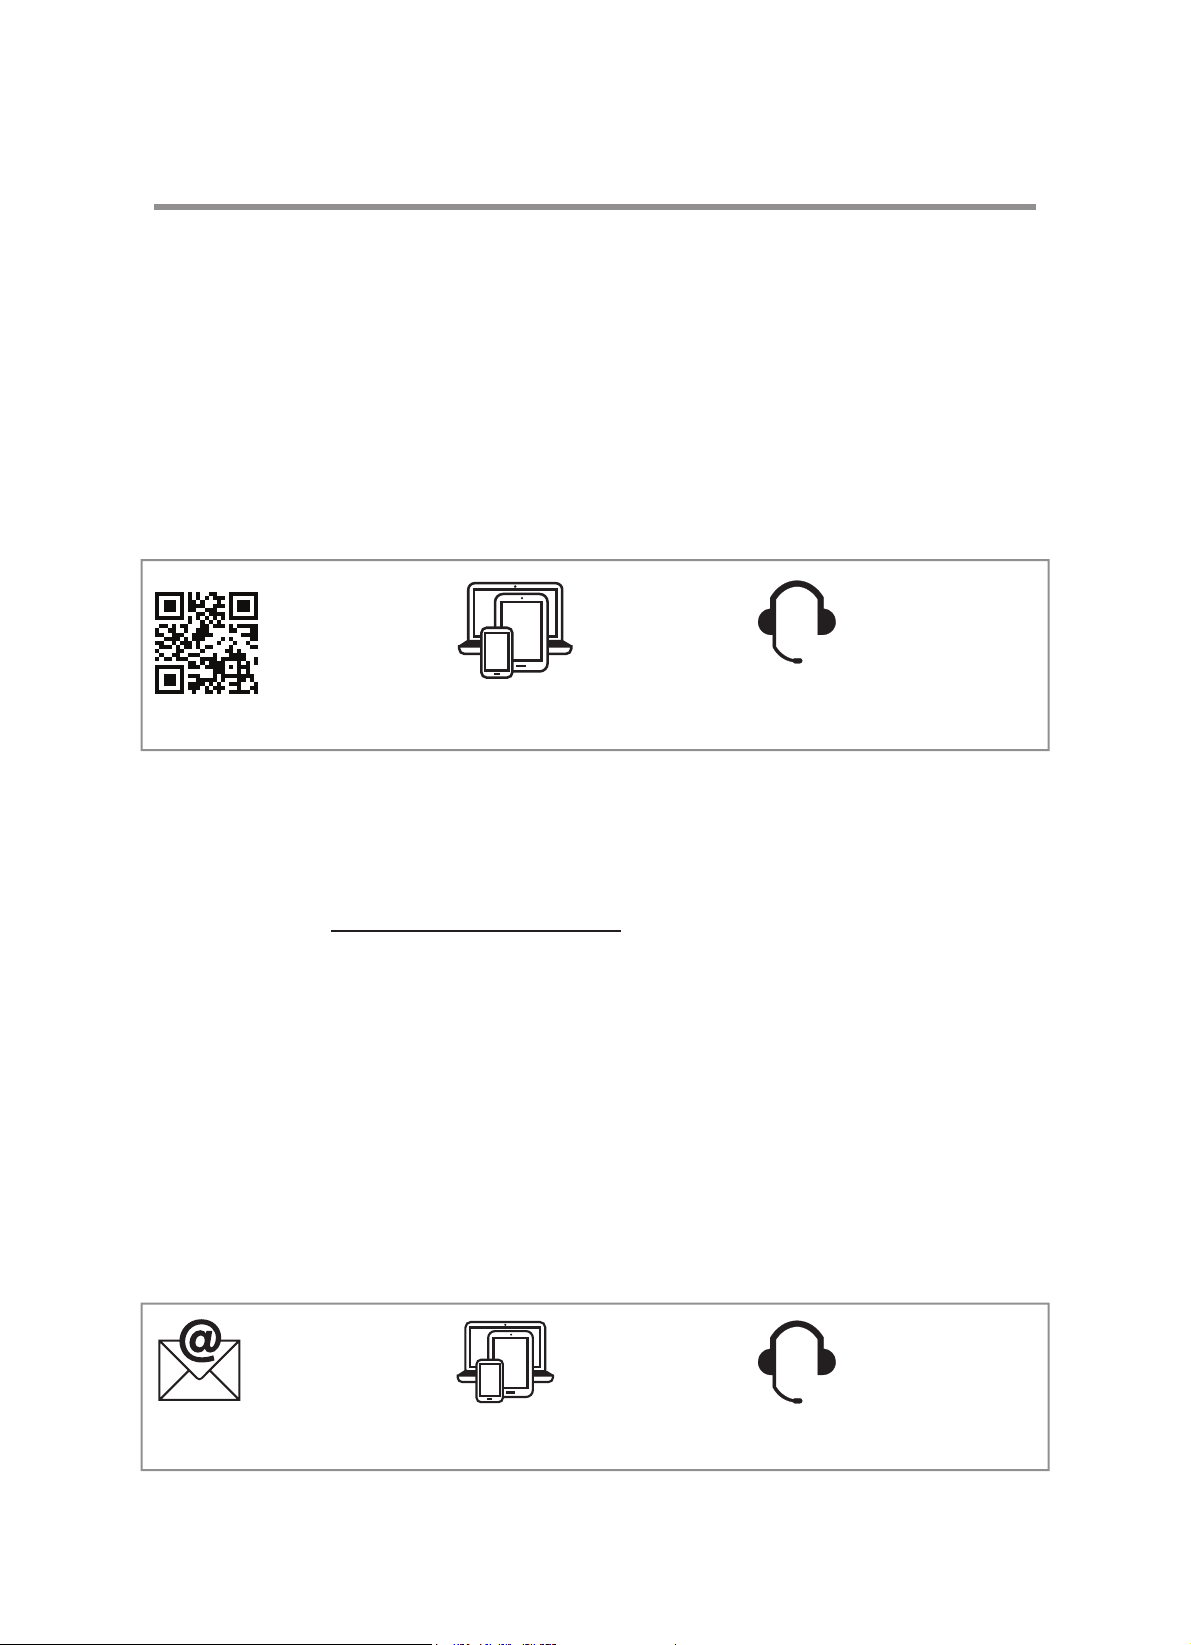
If at any time you have questions or comments concerning your SHARP product,
please contact the SHARP Customer Assistance Center. We are available to
assist you through multiple contact methods for your convenience:
Scan this QR Code on your mobile device Visit http://www.sharpusa.com/register
ONLINE
Visit our sites to
learn more about
your product at
sharpusa.com and
sbl.sharpusa.com
See the Contact Us section on our sites U.S. | www.sharpusa.com/support Contact a Sharp Advisor on the phone
Contact a Sharp Advisor on the phone
CALL US
US 800-BE-SHARP
800-237-4277
Mon-Fri: 7am-7pm CST
Sat-Sun: 9am-7pm CST
CALL US
US 800-BE-SHARP
800-237-4277
Mon-Fri: 7am-7pm CST
Sat-Sun: 9am-7pm CST
EMAIL
Available 24/7
US: sharpusa.com
CHAT ONLINE
Mon-Fri: 7am-7pm CST
Sat-Sun: 9am-7pm CST
SCAN
Use the camera or
QR code scanning
application on your
mobile device
3

SHARP ELECTRONICS CORPORATION warrants to the first consumer purchaser that this Sharp brand
product (the “Product”), when shipped in its original container, will be free from defective workmanship and
materials, and agrees that it will, at its option, either repair the defect or replace the defective Product or
part thereof with a new or remanufactured equivalent at no charge to the purchaser for parts or labor for the
period(s) set forth below.
This warranty does not apply to any appearance items of the Product nor to the additional excluded item(s)
set forth below nor to any Product the exterior of which has been damaged or defaced, which has been
subjected to improper voltage or other misuse, abnormal service or handling, or which has been altered or
modified in design or construction.
In order to enforce the rights under this limited warranty, the purchaser should follow the steps set forth below
and provide proof of purchase to the servicer.
The limited warranty described herein is in addition to whatever implied warranties may be granted to pur-
chasers by law. ALL IMPLIED WARRANTIES INCLUDING THE WARRANTIES OF MERCHANTABILITY
AND FITNESS FOR USE ARE LIMITED TO THE PERIOD(S) FROM THE DATE OF PURCHASE SET
FORTH BELOW. Some states do not allow limitations on how long an implied warranty lasts, so the above
limitation may not apply to you.
Neither the sales personnel of the seller nor any other person is authorized to make any warranties other
than those described herein, or to extend the duration of any warranties beyond the time period described
herein on behalf of Sharp.
The warranties described herein shall be the sole and exclusive warranties granted by Sharp and shall be
the sole and exclusive remedy available to the purchaser. Correction of defects, in the manner and for the
period of time described herein, shall constitute complete fulfillment of all liabilities and responsibilities of
Sharp to the purchaser with respect to the Product, and shall constitute full satisfaction of all claims, whether
based on contract, negligence, strict liability or otherwise. In no event shall Sharp be liable, or in any way
responsible, for any damages or defects in the Product which were caused by repairs or attempted repairs
performed by anyone other than an authorized servicer. Nor shall Sharp be liable or in any way responsible
for any incidental or consequential economic or property damage. Some states do not allow the exclusion
of incidental or consequential damages, so the above exclusion may not apply to you.
“THIS LIMITED WARRANTY IS VALID ONLY IN THE FIFTY (50) UNITED STATES, THE DISTRICT OF
COLUMBIA, AND PUERTO RICO.”
Your Product Model Number &
Home Use Carousel Microwave
Oven
.
(Be sure
to
have
Description: this information available when you need service for
your Product.)
Warranty Period for this Product: One (1) year parts and labor. The warranty period continues for an
additional four (4) years, for a total of five (5) years, with respect to the
magnetron tube in the Product for parts only; labor and service are not
provided free of charge for this additional period.
Additional Item(s) Excluded from Non-functional accessories, turntable and light bulb.
Warranty Coverage (if any):
Where to Obtain Service: From a Sharp Authorized Servicer located in the United States.
To find the location of the nearest Sharp Authorized Servicer, call Sharp
toll free at 1-800-BE-SHARP (1-800-237-4277).
What to do to Obtain Service: Ship prepaid or carry in your Product to a Sharp Authorized Servicer.
Be sure to have Proof of Purchase available. If you ship the Product,
be sure it is insured and packaged securely.
TO OBTAIN SUPPLY, ACCESSORY OR PRODUCT INFORMATION, CALL 1-800-BE-SHARP OR VISIT www.sharpusa.com.
SAVE THE PROOF OF PURCHASE AS IT IS NEEDED SHOULD YOUR OVEN EVER REQUIRE WARRANTY SERVICE.
C O N S U M E R L I M I T E D W A R R A N T Y
SMC146 HS
4
9

SAVE THESE INSTRUCTIONS
I M P O R T A N T S A F E T Y I N S T R U C T I O N S
11. Read all instructions before using the appliance.
12. Read and follow the specific “PRECAUTIONS TO
AVOID POSSIBLE EXPOSURE TO EXCESSIVE
MICROWAVE ENERGY” found on page 2.
13. This appliance must be grounded. Connect only to
properly grounded outlet. See “GROUNDING
INSTRUCTIONS” found on page 6.
14. Install or locate this appliance only in accordance with
the provided installation instructions.
15. Some products such as whole eggs and sealed
containers - for example, closed glass jars are able to
explode and should not be heated in this oven.
16. Use this appliance only for its intended use as
described in this manual. Do not use corrosive
chemicals or vapors in this appliance. This type of
oven is specically designed to heat, cook, or dry food.
It is not designed for industrial or laboratory use.
17. As with any appliance, close supervision is necessary
when used by children.
18. Do not operate this appliance if it has a damaged
cord or plug, if it is not working properly, or if it has
been damaged or dropped.
19. This appliance should be serviced only by qualified
service personnel.
Contact nearest authorized service facility for
examination, repair or adjustment.
10. Do not cover or block any openings on the appliance.
11. Do not store this appliance outdoors. Do not use this
product near water — for example, near a kitchen
sink, in a wet basement, near a swimming pool, or
similar locations.
12. Do not immerse cord or plug in water.
13. Keep cord away from heated surfaces.
14. Do not let cord hang over edge of table or counter.
b) Remove wire twist-ties from paper or plastic bags
before placing bag in oven.
c) If materials inside the oven ignite, keep oven door
closed, turn oven off, and disconnect the power
cord, or shut off power at the fuse or circuit breaker
panel.
d) Do not use the cavity for storage purposes. Do not
leave paper products, cooking utensils, or food in
the cavity when not in use.
17. Liquids, such as water, coffee, or tea are able to be
overheated beyond the boiling point without appearing
to be boiling due to surface tension of the liquid. Visible
bubbling or boiling when the container is removed
from the microwave oven is not always present. THIS
C O UL D R E SU LT I N V E RY H OT L I QU I D S
SUDDENLY BOILING OVER WHEN A SPOON OR
OTHER UTENSIL IS INSERTED INTO THE LIQUID.
Toreducetheriskofinjurytopersons:
a) Do not overheat the liquid.
b) Stir the liquid both before and halfway through
heating it.
c) Do not use straight-sided containers with narrow
necks.
d) After heating, allow the container to stand in the
microwave oven for a short time before removing
the container.
e) Use extreme care when inserting a spoon or other
utensil into the container.
18. Do not use this microwave oven to heat corrosive
chemicals (for example, sulfides and chlorides).
Vapors from such corrosive chemicals may interact
with the contact and springs of the safety interlock
switches thereby rendering them inoperable.
19. Keep the waveguide cover clean at all times.
Wipe the oven interior with a soft damp cloth after
each use. If you leave grease or fat anywhere in the
cavity it may overheat, smoke or even catch re when
next using the oven.
20. Never heat oil or fat for deep frying as you cannot
control the temperature and doing so may lead to
overheating and re.
21. Do not operate the oven without the glass tray in
place. Be sure it is properly sitting on the rotating base.
15.
Separate cleaning instructions are provided
16. To reduce the risk of re in the oven cavity:
a) Do not overcook food. Carefully attend appliance
when paper, plastic, or other combustible materials
are placed inside the oven to facilitate cooking.
. See
door surface cleaning instructions on page
22.
5

This equipment generates and uses ISM frequency energy and if not installed and used properly, that is in
strict accordance with the manufacturer's instructions, may cause interference to radio and television
reception.
It has been type-tested and found to comply with limits for an ISM Equipment pursuant to part 18 of FCC
Rules, which are designed to provide reasonable protection against such interference in a residential
installation.
However, there is no guarantee that interference will not occur in a particular installation.
If this equipment does cause interference to radio or television reception, which can be determined by
turning the equipment off and on, the user is encouraged to try to correct the interference by one or more
of the followings.
• Reorient the receiving antenna of radio or television.
• Relocate the Microwave oven with respect to the receiver.
• Move the microwave oven away from the receiver.
• Plug the microwave oven into a different outlet so that microwave oven and receiver are on different
branch circuits.
THE MANUFACTURER is not responsible for any radio or TV interference caused by
UNAUTHORIZED MODIFICATION to this microwave oven. It is the responsibility of the user to correct
such interference.
This appliance must be grounded. In the event of an electrical short circuit, the grounding plug reduces the risk of
electric shock by providing an escape wire for electric current. This appliance is equipped with a cord having a
grounding wire with a grounding plug. The plug must be plugged into an outlet that is properly installed and
grounded.
F E D E R A L C O M M U N I C A T I O N S C O M M I S S I O N
R A D I O F R E Q U E N C Y I N T E R F E R E N C E S T A T E M E N T
G R O U N D I N G I N S T R U C T I O N S
WARNING:
Do not cut or remove the third (ground) prong from the power cord under any circumstances.
WARNING:
Improper use of the grounding can result in a risk of electric shock.
Consult a qualied electrician or serviceman if the grounding instructions are not completely understood, or if
doubt exists as to whether the appliance is properly grounded.
If it is necessary to use an extension cord, use only a 3-wire extension cord that has a 3-blade
grounding plug, and a 3-slot receptacle that will accept the plug on the appliance. The marked rating
of the extension cord shall be equal to or greater than the electrical rating of the appliance.
6
1.
Check for damage such as a misaligned door, broken door or dent in the cavity.
If any damage is visible, DO NOT INSTALL, and notify your dealer immediately.
2.
Install the microwave oven on a level, at surface.
3.
Do not block air vents. If they are blocked during operation, the oven may overheat and eventually cause a
failure.
For proper ventilation, allow 4 inches of space between oven top, sides, rear and adjacent surfaces.
4.
Poor television reception and radio interference may result if the oven is located close to a TV, radio, antenna,
feeder, etc.
Place the oven as far away from them as possible.
5.
Keep the oven away from heat, steam or splashing liquids. These things can adversely affect oven wiring and
contacts.
6.
• Check your local power source.
This microwave oven requires a current of approximately 14 amperes, 120Volts, 60Hz and a grounded outlet.
1. A short power-supply cord is provided to reduce the risks of the user becoming entangled in or tripping over
a longer cord.
2. Longer cord sets or extension cords are available and may be used if care is exercised in their use.
3. If a long cord or extension cord is used:
• The marked electrical rating of the cord set or extension cord should be at least as great as the electrical
rating of the oven.
• The extension cord must be a grounding type 3-wire cord.
• The longer cord should be arranged so that it will not drape the table top or counter where it can be pulled
on by children or tripped over unintentionally.
7.
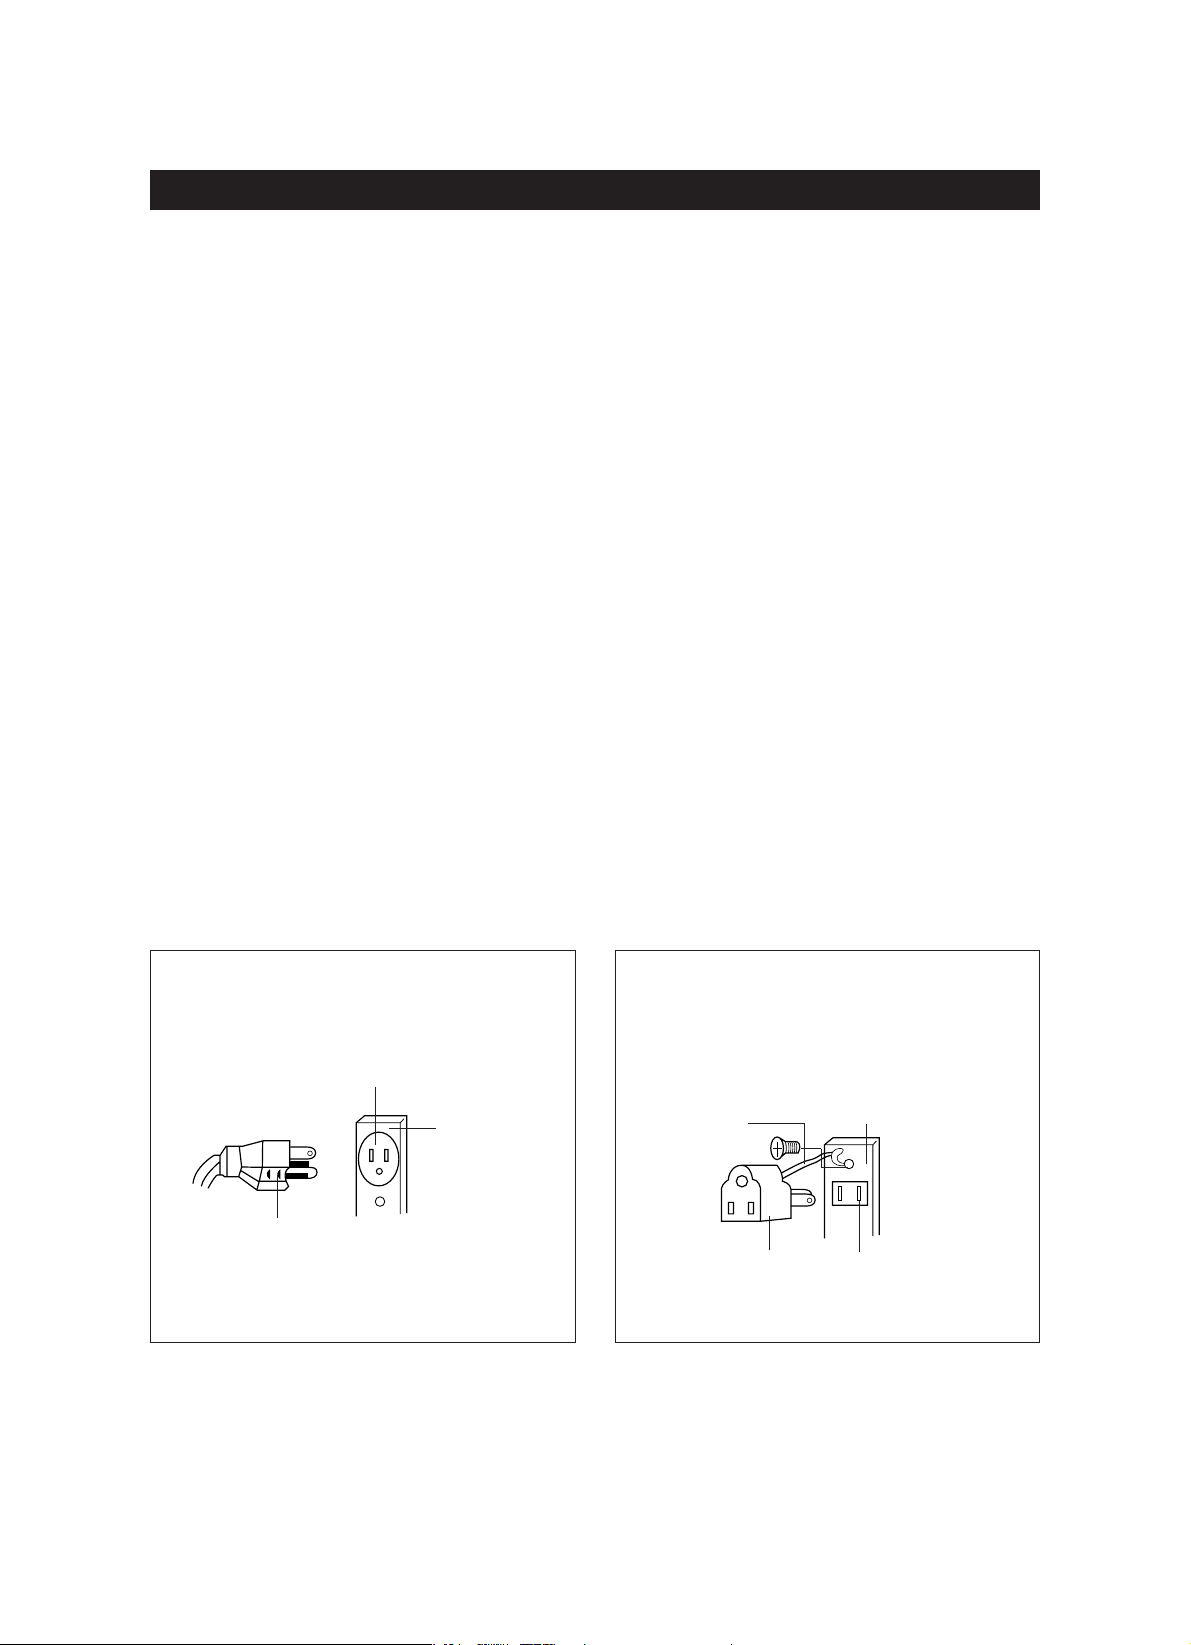
3-prong Receptacle
Receptacle
Box cover
3-prong plug
Receptacle Box Cover
Receptacle
Grounding
Lead
Grounding
Adaptor
“THE CANADIAN ELECTRICAL CODE DOES NOT ALLOW THE USE OF THE GROUNDING ADAPTOR”
I N S T A L L A T I O N G U I D E
7

S P E C I F I C A T I O N S
POWER SUPPLY
120V AC, 60Hz SINGLE PHASE WITH
GROUNDING
MICROWAVE
INPUT POWER 1250 W
ENERGY OUTPUT
FREQUENCY 2,450MHz
OUTSIDE DIMENSIONS (W x D x H)
CAVITY DIMENSIONS (W x D x H)
CAVITY VOLUME
NET WEIGHT APPROX. 27 lbs.
TIMER
POWER SELECTIONS 11 Levels
* Specifications are subject to change without notice.
99 min. 99 sec.
13.9 x 16.1 x 10.4 in.
cu.ft
1100 W
1.4
20.4 x16.8 x 12.4 in.
1
20.4 in
2.4 in
16.8 in
8
1When the door is closed, it will
automatically shut off. If the door is opened
while the oven is operating, the magnetron
will automatically shut off.
2The door seal surfaces prevent
microwaves escaping from the oven cavity.
3
4
5
6
7
8
Protects the microwave
outlet from splashes of cooking foods.
9
This must always be used for
cooking together with the glass cooking tray.
0
This fits over the shaft in the
center of the oven cavity oor.
This is to remain in the oven for all cooking.
q
Made of special heat
resistant glass. The tray must always be in
proper position before operating. Do not
cook food directly on the tray.
Allows viewing of food.
The screen is designed so that light can
pass through, but not the microwave.
1 2 3 4 5
6
7
8
9
0
q
F E A T U R E S D I A G R A M
9
To open the door push
the door open button.
w
w
Automatically turns on when
the oven door is open and operating.
1 Cooking time, power level,
indicators and current time are displayed.
2
3
4
5
Used to set power level.
6
Used to defrost foods for
time.
7
Press to select
8
COOK MENUUsed to select a
Sensor
9
NUMBER BUTTON
time, kitchen timer, etc.
0
Used as a minute timer,
hold setting after cooking.
q
w
Used to stop the oven
operation or to delete the cooking data.
Used to start the oven
and also used to set a reheat time.
F E A T U R E S D I A G R A M
Used to set the cooking K
according to the desired power and time.
Used to set the clock.K
Cook program.
MEMORY BUTTON
Used to set the memory
function.
EXPRESS COOK
Press one of the Express
Cook pads (from 1-6) for 1-6 minutes of cooking
Used to enter the cooking
at 100% (full power).
SENSOR
U
Press to select
DEFROST feature by weight.
POPCORN menu.
Press to select
BEVERAGE menu.
⑭
⑮
: MICROWAVE indicator
: DEFROST indicator
: CLOCK indicator
: LOCK indicator
: AUTO MENU indicator
: WEIGHT(Oz) indicator
: WEIGHT(Lbs) indicator
1
6
7
0
4
5
9
8
2
3
w
⑮
⑭
MELT/SOFTEN - Used to melt or soften food.
delay cooking,
10
: WEIGHT(g) indicator
: WI-FI indicator
Used to turn on or off
your ovens WI-FI connection

Plug power supply cord into a standard 3-pronged
14 Amp, 120V AC 60Hz power outlet.
After placing the food in a suitable container, open
the oven door and put it on the glass tray.
The glass tray and roller guide must always be in
place during cooking.
Close the door. Make sure that it is rmly closed.
The oven light is on when the microwave oven is
operating.
The oven door can be opened at any time during
operation.
Each time a pad is touched, a BEEP will sound to
acknowledge the touch.
The oven automatically cooks on full power
unless set to a lower power level.
The display will show “ ” when the oven i
s
plugged in.
Time clock returns to the present time when the
cooking time ends.
When the STOP/CLEAR pad is touched during the
oven operation, the oven stops cooking and all
information retained. To erase all information(except
the present time), touch the STOP/CLEAR pad
If the
START
pad is touched and the oven
does
not
operate, check the area between the door
and door
seal for obstructions and make sure
the door is
closed securely. The oven will not start
cooking
until
the door is completely closed or the
program has
been reset.
Make sure the oven is properly installed and
plugged into the electrical outlet.
WATTAGE OUTPUT CHART
O P E R A T I O N P R O C E D U R E
This section includes useful information about oven operation.
T O U C H T H E N U N M B E R P A D
P O W E R L E v E L ( D I S P L A Y )
A P P R O x I M A T E P E R C E N T A G E O F P O W E R
PL10 100%
PL9 90%
PL8 80%
PL7 70%
PL6 60%
PL5 50%
PL4 40%
PL3 30%
PL2 20%
PL1 10%
oven operation, all information is retained.
once more. If the oven door is opened during the
0:00
/+30 SEC
9
8
7
6
5
4
3
2
1
shut off.
The oven will automatically
•
The power level is set by setting a cooking time, then selecting Power Level, then press number keys to
choose the power level needed. The chart shows the display, the power level and the percentage of power.
10
PL0 0%
0
11

OPERATION PROCEDURE
SETTING UP ALEXA ON YOUR MICROWAVE OVEN
Your microwave oven can be controlled with Alexa using any Alexa-enabled device such as Echo or
Echo Dot. To control your microwave oven using Alexa, you’ll need to set up your microwave and
connect to Alexa using one of the below pairing methods.
1. Plug the microwave oven into a power outlet that is grounded.
2. Ensure that home Wi-Fi is on and the device is in setup mode.
3. If the Wi-Fi icon stops blinking and stays on steadily, the device is ready to be controlled by using
Alexa. (If the Wi-Fi icon is off, press the Wi-Fi button once to turn the Wi-Fi on.)
4. Open Alexa app on your phone and sign into the same Amazon account as the one above. The
Microwave should appear in the list of devices.
In order to pair using this method, all pre-requisites listed below must be met. If not, go to pairing
method #2 or #3.
You opted-in to store your Wi-Fi credentials to your Amazon account in the past. This occurs
when you previously set up another Echo family device or a Works with Alexa device.
The microwave must have been ordered from the same Amazon account and while ordering you
must have opted to link the device upon purchase. If microwave was purchased/received as a
gift, or user de-selected this option upon purchase, the microwave will not be linked to end user's
Amazon/Alexa account and ZTS will not be enabled. Please go to pairing method #2 or #3.
The microwave would need to be within the Wi-Fi range of the user’s Wi-Fi network.
The microwave should be within the wireless range of an Echo family device, which was signed
into using the same Amazon account.
Pairing Method 1: Zero-Touch Setup (ZTS)
If Zero-Touch Setup (ZTS) is not possible, you can set up your microwave and connect to Alexa using
Barcode Setup (BCS).
1. Install the latest version of Alexa app on your smart device and login with your Amazon account.
2. Plug the microwave oven into a power outlet that is grounded.
3. Ensure that home Wi-Fi is on.
5. Open the Alexa App, tap the Devices icon in the lower right, and tap the “+” icon in the top right.
Pairing Method 2: Barcode Setup (BCS)
If above conditions are met:
•
•
Setup mode : While the device is in setup mode, the Wi-Fi icon is flashing until
successfully paired. Setup mode is activated for 5 minutes. After 5 minutes, setup mode
will time out.
Turning off the Wi-Fi on the device : Used to turn on or off your device’s Wi-Fi
connection. If you turn the Wi-Fi off on the device by pressing the Wi-Fi CONNECT button,
icon is off on the microwave LED display and Alexa will no longer be able to send
commands to your oven. But you can still cook using the oven’s keypad.
12
the Wi-Fi
4. When Wi-Fi icon starts flashing, the microwave oven is ready for setup. (If the Wi-Fi icon is off,
reset the microwave oven by pressing Wi-Fi CONNECT button.)
Select “Add Device” and “Microwave” press "Sharp" to begin set up for your microwave oven. Follow
on-screen instructions.
OPERATION PROCEDURE
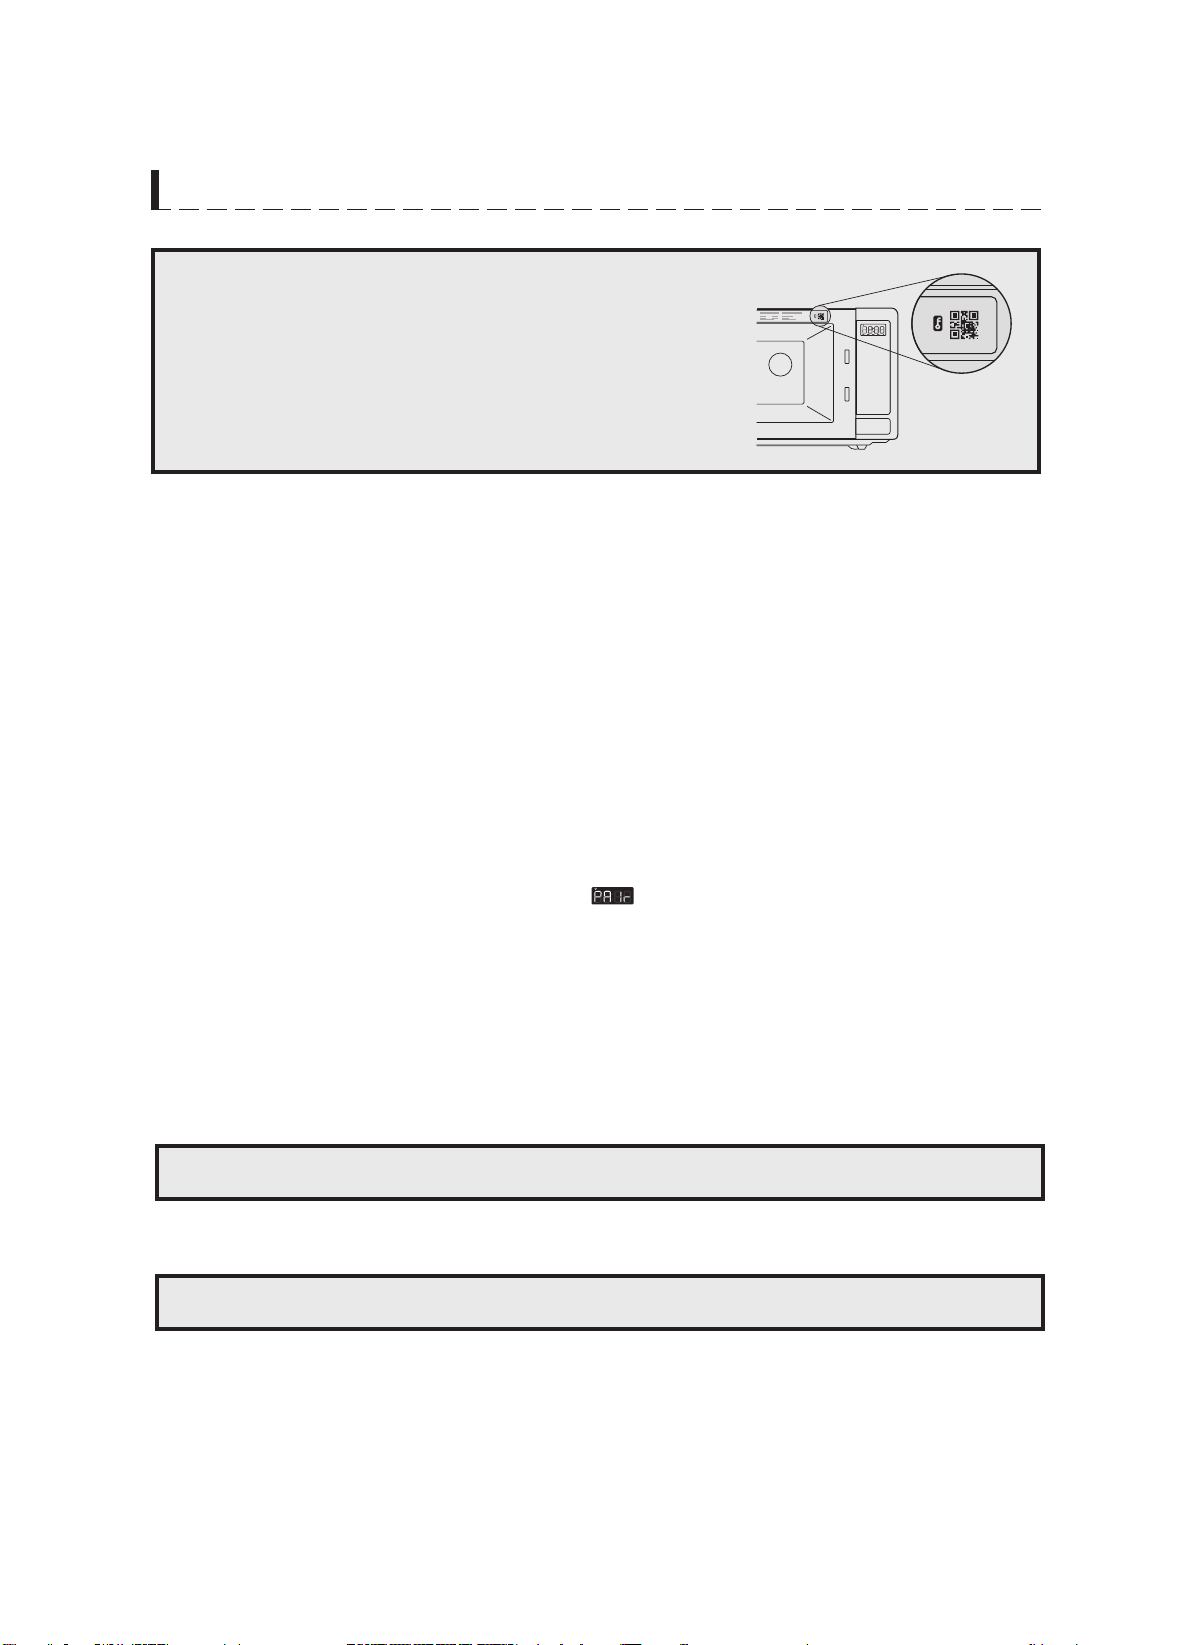
NOTE: The QR code used for microwave oven setup is attached
inside the product. Please open the door and scan the
QR code to the right of a key image on the front side of
the product.
6. If the Wi-Fi icon stops blinking and is off after 5 minutes, reset the microwave oven by pressing
the step 5.
If the QR code on the device is lost or has been damaged and you cannot use Pairing Method #2, you
can set up your microwave and connect to Alexa using User Guided Setup (UGS).
1. Install the latest version of Alexa app on your smart device and login with your Amazon account.
2. Open the Alexa App, tap the Devices icon in the lower right, and tap the “+” icon in the top right.
Select “Add Device” and “Microwave” to begin set up for your microwave
instructions.
3. When a screen with 2D Barcode appears, Press DON’T HAVE A BARCODE to continue setup.
4. And then, follow the on-screen instructions to set up your microwave oven.
a. Plug the microwave oven into a power outlet that is grounded.
b. Ensure that Home Wi-Fi is on.
c.
d. Press NEXT to continue setup.
5. If the Wi-Fi icon stops blinking and is off after 5 minutes, setup times out. Restart from the step
4.c.
After set up, the LED display will turn on the Wi-Fi icon and show local time in your location.
Pairing Method 3: User Guided Setup (UGS)
NOTE: It may take a few minutes for the LED display to show the correct local time.
Once set up is completed, it is automatically set up even after turning the power of the oven off and on.
NOTE: When you delete the product from the Alexa app, you must set up again.
restart from
13
oven. Follow on-screen
Wi-Fi CONNECT button
press "Sharp"
Press WI-Fi CONNECT button once, "Pair" will appear on the microwave LED display. The
Wi_-Fi icon will start blinking.

OPERATION PROCEDURE
OPERATING YOUR MICROWAVE OVEN
You can use your oven without setting it up for Alexa control.
However, we highly recommend using your oven with Alexa control to unlock the full potential.
Throughout this section, the following icons indicate:
instructions to operate the oven with voice.
NOTE: As a safety measure, the oven can only be commanded using voice within 10 minutes
of the door being closed.
14

SETTING THE CLOCK
When the oven is rst plugged in, the display will show “0:00” and a tone will sound. If the AC power ever goes
C O N T R O L S
KITCHEN TIMER MODE
Timer operates as a minute timer, can be set to delay cooking and used to set a holding time after cooking.
However delay cooking cannot be programmed for defrost. Timer operates without microwave energy.
The TIMER indicator starts blinking and the display counts down the time remaining in KITCHEN TIMER mode. When
KITCHEN TIMER mode ends, you will hear 5 beeps.
2) Press the number keys to program current time. For example, to set the
" 1,0,1,2
.
" to finish clock setting. ":" will flash and the clock will be lit.
until valid numbers are input.
selected within 1 minute, the oven will go back to the previous setting automatically.
STOP/C
" "00:00" will display.
"
(1) Press "
(
clock to 10:12, press
(3) Press "
(4) If the numbers are not within the range of 1:00-12:59, the setting will be invalid
Note:
1. In the process of clock setting, if the "
2. If the clock needs to be reset, repeat steps 1- 3.
off, the display show “ 0:00” when the power comes back on.
Press the number keys and enter the timer time. (The maximum cooking time is 99 minutes and
99 seconds)
START/+30SEC. " to confirm setting.
2. When using the kitchen timer, o other program can be set.
TIMER/CLOCK " display will show 00:00 .
" "
.
n
(1) Press "
(2)
(3) Press "
(4) When the timer time arrives, the buzzer will beep 5 times. If the clock is set, the LED will display the
Note: 1. The kitchen timer is a timer and will not display the "Clock."
current time.
or
to set
the
clock at
5:12,
press
"0,5,1,2"
LEAR" button is pressed or if there is no operation
TIMER/ CLOCK twice
TIMER/ CLOCK
15

C O N T R O L S
TIME COOK" once, the display will show "00:00".
POWER LEVEL
" once, the display will show "PL10". The default power is 100% power. Now you
can press number keys to adjust the power level.
START/+30SEC." to start cooking.
(1) Press "
(2) Press number keys to input the cooking time; the maximum cooking time is 99 minutes and 99 seconds.
(3) Press "
(4) Press "
Note:
In the process of setting, if the " STOP/C
within 1 minute, the oven will go back to the previous setting automatically.
Example: to cook the food with 50% microwave power for 15 minutes.
a. Press "TIME COOK" once. "00:00" displays.
b. Press "1","5","0","0" in order.
c. Press "
" once, then press "5" to select 50% microwave power.
d. Press "START/+30SEC." to start cooking.
MICROWAVE COOK MODE
POWER LEVEL
LEAR" button is pressed or no operation
TIME COOK
NOTE : By default, the oven will microwave at power 10 (maximum power)
"Alexa, microwave for X. "
"Alexa, add X to microwave."
"Alexa, microwave for X on power Y."
To microwave by time, say “Alexa, microwave for X,” where X is the amount of time you’d like to cook for
For example, to cook for 5 minutes, say “Alexa, microwave for 5 minutes.” Or, to cook for 2 minutes and
39 seconds, say “Alexa, microwave for 2 minutes and 39 seconds.”
While microwaving, you can ask to cook for additional time by saying “Alexa, add X in the microwave,”
where X is the amount of time you’d like to add. For example, to add 2 minutes to the cooking time while
the microwave is already running, say “Alexa, add 2 minutes to the microwave.”
By default, your oven will microwave at power 10 (maximum power). To cook at a specific power, say
“Alexa, microwave for X on power Y,” where X is the amount of time you’d like to cook for and Y is the
power level.
For example, to cook at power 5 for 3 minutes, say “Alexa, microwave for 3 minutes at power 5.”
16
C O N T R O L S
EXPRESS COOK
(2) To cook for 30 seconds at 100% powe press
Note: 1). During microwave cooking, time defrost, multi-stage cooking functions, time can be added by
pressing "START/+30SEC."
(1) If not already cooking, press number pads 1-6 to quickly cook from 1-6 minutes at 100% power.
Press " START/+30SEC." to increase the cooking time; the maximum cooking time is 99 minutes
and 99 seconds.
button will increase
cooking time by 30 seconds. The maximum cooking cooking time is 99 minutes
and 99 seconds.
r
"START/+30SEC". Each press on the the same
button.
(3) Press " " first and adjust cooking time,then press "START/+30SEC" to start
cooking with full microwave power.
TIME COOK
2) Under sensor menu cooking and weight defrost state, time cannot be added by
pressing "START/+30SEC."
button.
MELT/SOFTEN
The Melt/Soften feature can be used to melt or soften butter, chocolate, ice cream and cheese.
See the chart for specific settings to use.
(1) Press "MELT/SOFTEN" repeatedly and the display would shows US-1(Butter),
US-2(Chocolate), US-3(Ice Cream), US-4(Cheese) then press " " to confirm.
(2) If choosing US-1, press "MELT/SOFTEN" repeatedly until "3.5", "7.0", oz display
in order.
(3) If choosing US-2, press "MELT/SOFTEN" repeatedly until "7.0",
"10.0", oz display in order.
(4) If choosing US-3, press "MELT/SOFTEN" repeatedly until "8.0", "16", oz display
in order.
(5) If choosing US-4, press "MELT/SOFTEN" repeatedly until "1.75", "3.0", oz display
in order.
(4) Press "START/+30 SEC." to cook, buzzer sounds once. When cooking is finished, a
buzzer sounds five times.
START/+30
sec
17
"Alexa, soften X of Butter"
"Alexa, soften X of Chocolate"
"Alexa, soften X of Ice cream"
" Alexa, soften X of Cheese"
C O N T R O L S
1. Press the START/+30 sec pad. When you press the START/+30 sec pad,
“:30” is
displayed, and the oven starts reheating
+30 SEC
+30 sec allows you to reheat for 30 seconds at 100% (full power) by simply pressing the START/+30
By repeatedly pressing the START/+30 sec pad, you can also extend reheating time to 99 minutes 99 seconds
NOTE : +30 SEC cannot be used with
SENSOR COOK, WEIGHT DEFROST
by 30 second increments.
sec pad.
18
"Alexa, microwave for 30 seconds."
"Alexa, cook for 30 seconds."
"Alexa, add 30 seconds to microwave."
MELT/SOFTEN ITEM CHART
PRESS PAD DISPLAY MELT/SOFTEN ITEM WEIGHT
Butter
Chocolate
Three Times Ice Cream
Four Times Cheese
Once
Twice
US-1
US-2
US-3
US-4
3.5/7.0 oz
7.0/10.0 oz
8.0/16 oz
1.75/3.0 oz

C O N T R O L S
G
AUTO DEFROST lets you easily defrost food by eliminating guesswork in determining defrosting time.
Follow the steps below for easy defrosting.
The defrosting time is automatically determined by the weight selected.
When the defrosting time ends, you will hear 5 beeps.
AUTO DEFROSTIN
(1) Press "Meat" repeatedly until "16", "24", "32", "40" oz display in order.
(2) Press "Poultry" repeatedly until "24", "32", "40", "48" oz display in order.
(3) Press "Fish" repeatedly until "8", "16", "24", "32" oz display in order.
(4) Press "START/+30 SEC." to cook, to start defrosting and the cooking time remaining
will be displayed. When cooking is finished, a buzzer sounds five times.
TIME DEFROSTING
When TIME DEFROST is selected, the automatic cycle divides the defrosting time into periods of alternating defrost
and stand times by cycling on and off.
When you touch START pad, the display counts down the time to show you how much defrosting time is left in the
TIME DEFROST mode.
(1) Press " TIME DEFROST, " the display will show "00:00".
(2) Press number pads to input defrosting time. The effective time range is 0:01-99:99
(4) Press " START/+30SEC. " to start defrosting. The remaining cooking time will be displayed.
.
When the defrosting time ends, you will hear 5 beeps.
(3) The default microwave power is power level 3 (30%). It cannot be adjusted.
"Alexa, defrost X of meat."
"Alexa, defrost for 10 minutes."
19
" Alexa, defrost X of Poultry "
"Alexa, defrost X of Fish "

C O N T R O L S
UULTIl ti-stage
MEMORY FUNCTION
(1) Press "0/MEMORY" repeatedly to choose memory setting 1-3. The display will show 1,2,3.
(2) If the setting has been program ed, press " START/ +30 SEC." to use it. If not,
with your favorite program.
Example: to program the following setting as the second memory to cook food with 80% microwave power
for 3 minutes and 20 seconds.
The steps are as follows:
a. In waiting state, press " 0/MEMORY" twice, the screen displays "2".
b. Press "TIME COOK" once, then press "3", "2", "0" in order.
c. Press " " once, "PL10" displays, then press "8" and "PL8" displays.
e. If power is lost, the "0/MEMORY"
setting
will
need
to
be
reprogram e
.
(3) After finishing the setting, press " If you press " START/ +30 SEC."
d. Press " " to save the setting. Buzzer sounds once and the LED will display "2". If you press
press "START/+30SEC." to run.
"START/+30SEC." again, the setting will be saved as memory 2 and it will start cooking.
f. If you want to run the saved setting, in waiting state, press "0/MEMORY" twice, screen displays "2", then
again it will start cooking.
m
m
d
create the memory setting
Please note: only one or two stages can be set.
POWER LEVEL
START/+30SEC." once to save the setting.
START/+30SEC.
MULTI-STAGE COOKING
At most, 2 stages can be set for cooking. In multi-stage cooking, if one stage is defrosting, then defrosting
shall be placed at the first stage automatically.
Note: Auto cooking cannot work in the multi-stage cooking.
Example: if you want to cook with 80% microwave power for 5 minutes + 60% microwave power for 10
minutes. The cooking steps are as follows:
(1) Press "TIME COOK" once, then press "5","0","0" to set the cooking time;
(2) Press "
POWER LEVEL
" once, then press "8" to select 80% microwave power.
(3) Press "TIME COOK" once, then press "1","0","0","0" to set the cooking time;
(4) Press "
" once, then press "6" to select 60% microwave power.
(5) Press "START/ +30 SEC." to start cooking.
POWER LEVEL
20
One touch cooking allows you to cook or reheat many of your favorite foods by touching just one pad.
To increase quantity, touch the chosen pad until the number in the display is same as desired quantity to cook.
AUTO MENU
"Alexa, microwave classic popcorn."
C O N T R O L S
BEVERAGE " repeatedly until the number you wish appears in the display. "1", "2", "3" cup
will display in order.
For example, press "BEVERAGE" once, "1" appears.
" START/+30 SEC." to cook, buzzer sounds once. When cooking is finish , a buzzer sounds
five times.
BEVERAGE
ed
(1) Press "
(2) Press
SENSOR COOK
POPCORN " repeatedly until the package size of your popco appears in the display,
"3.3", "1.16" will display in order.
five times.
"START/+30 SEC." to cook, buzzer sounds once. When cooking finished, buzzer will sound
POPCORN
rn(1) Press "
(2) Press
For example, press "POPCORN" once, "3.3" appears.
"Alexa, microwave X cup of beverage."
"Alexa, microwave mini popcorn."
To microwave a classic size bag of Orville Redenbacher's microwave popcorn (3.3oz), say “Alexa, microwave
classic popcorn.”
To microwave a single size bag of Orville Redenbacher's microwave popcorn (1.16oz), say “Alexa, microwave
21
"Alexa, microwave potato."
"Alexa, microwave frozen vegetables."
"Alexa, microwave frozen entrée."
mini popcorn.”
" Alexa, reheat X cup of Beverage"
"Alexa, microwave frozen vegetables"
" Alexa, microwave frozen pizza"
" Alexa, reheat dinner"
"Alexa, reheat leftovers"

Sensor Reheat Menu
1) In waiting state, press "SENSOR REHEAT" and put the food into the microwave oven.
"SC-6" is displayed.
2) Press "START/+30SEC" to start sensor reheat function and no need to set time.
3) The sensor will sound twice when the steaming has been emanated. The remaining time will
display, the buzzer will sound 5 beeps when finishing and the oven will turn back to
the waiting state.
Note:
a. Bread and other dry food, such as biscuit, cake.
b. Raw or uncooked food.
c. Beverage and frozen food.
2) The oven cannot cook automatically when the temperature of the oven cavity is high.
3) The reheat food can be covered with the lid, but the lid must have a venthole in order to
emanate the steam. Sealed utensil is forbidden.
4) During sensor cooking process, please do not open the oven door or press
"STOP/C
5) The sensor reheat has different requests for different food.
Stir when time appears in the display window.
LEAR" key. Otherwise, the sensor will make mistakes.
For casseroles, add 3 - 4 tablespoons of water, cover with lid or vented plastic wrap.
1) Food to be avoided in sensor reheating.
or vented plastic wrap. After reheating, let stand for a few minutes.
Plate of food- Arranged food on plate; top with butter, gravy, etc. Cover with lid or vented
plastic wrap. After reheating, let stand for a few minutes.
For canned foods, empty contents into casserole dish or serving bowl, cover dish with lid
emanate the steam. Sealed utensil is forbidden.
Note:
1) When cooking or reheating food, you should do the following in order to have the best effect.
d utensils must dry before putting the food in.
2) During cooking process, following points must be done.
a. Keep the door close when the remaining time does not display or the buzzer
does not sound twice.
b. When the buzzer sounds twice, the time will count down and display the remaining time,
you can open the door to mix the food up, turn over or replace the food. And then go
on the next operation.
3) Please leave the food alone for a while after cooking has finished.
4) During sensor cooking process, if the time does not count down, please do not open the oven
door or press "STOP/C
a. The weight of food must be more than 110g (4 Oz).
b. The cavity, glass tray an
c.
LEAR" key. Otherwise, the sensor will make mistakes.
The reheat food can be covered with the lid, but the lid must have a venthole in order to
22
3) The sensor will sound twice when the steaming is emanated.The remaining time will display,
the buzzer will sound 5 beeps when finishing. At last, the oven will turn back
to the waiting state.
2) Press "START/+30SEC" to start sensor reheat function. There is no need to set a cook time.
1) In waiting state,
put the food in the oven, press a menu key under sensor cook.
C O N T R O L S

C O N T R O L S
If the weight is over 12 Oz. please set the additional
cooking time manually.
Wash thoroughly, add 15ml water per 125g vegetables,
and cover with a lid or vented plastic wrap.
Do not salt/butter vegetables until after cooking.
Pierce each potato with a fork 6 times around its’ surface.
Place potatoes around the edge of a paper-towel-lined
turntable. Do not cover. If additional time is needed,
continue to cook manually. Please let stand for 5 minutes
in the oven after finishing to avoid burning.
Menu
Weight
1~4 Units
(170~ g)
Initial Temp.
(6~8Oz
each one)
Room
Temp.
minus
18 degrees
minus
18 degrees
Additional Instructions
Reheat food on dinner plate. When sensor time finish,
then continue reheating.
5 degrees
cooking time counts down. Now you can mix it and
227
Sensor Cook Chart
“SC-1”
Potato
"SC-2"
VEGGIE (FROZEN
VEGETABLE)
"SC-6"
SENSOR
REHEAT
"SC-5"
FROZEN
ENTREE (PIZZA)
6~12 Oz
4~36 Oz
6~16 Oz
All pieces should be the same size. Wash thoroughly,
add 15ml water per 125g vegetables, and cover with a
lid or vented plastic wrap. When cooking time counts
down, press " STOP/CLEAR " to pause and open the
to mix and then continue to cook.
Room
Temp.
oven door
Be careful when removing the film cover after cooking.
Remove facing away from you to avoid steam burns.
If additional time is needed, continue to cook manually.
Cover the film before cooking and leave a space near
the edge of the container in order to let the steam out.
When buzzer sounds twice, cooking time counts down.
Press " STOP/CLEAR " to pause and open the oven
(283~567g)
minus
18 degrees
door to mix.
"SC-4"
FROZEN
ENTREE
"SC-3"
VEGGIE (FRESH
VEGETABLE)
8~32Oz
4~16 Oz
CHILD SAFETY LOCK
Lock: In waiting state, press " STOP/C
entering into the child-lock state; "Loc" will display.
Lock Cancel: In locked state, press " STOP/CLEAR "for 3 seconds, there will be a long "beep"denoting
that lock is released.
"for 3 seconds, there will be a long "beep" denoting the
LEAR
Press once
Press Twice
Press Twice
Press once
23

C O N T R O L S
INQUIRING FUNCTION
(1) In microwave or multi-stage cooking state, press " ", the display will show the clock for three
(2) In the microwave or multi-stage cooking, press " POWER
and the current microwave power will be displayed. After three seconds, the oven will turn back to the
previous state.
seconds.
LEVEL " to inquire microwave power level,
TO STOP THE OVEN WHILE THE OVEN IS OPERATING
1. Press the STOP/CLEAR pad.
• You can restart the oven by pressing the START/+30 SEC pad.
• Press the STOP/CLEAR pad once more to erase all instructions.
• You must enter in new instructions.
2. Open the door.
• You can restart the oven by closing the door and pressing the START/+30 SEC pad.
NOTE: Oven stops operating when door is opened.
SILENT MODE
To activate the silent mode:
In waiting state, press and hold “8” for 3 seconds. A long beep will sound. When you press the keys, it does
not make a sound. This also disables the end of cooking reminder.
To deactivate the silent mode:
In silent mode, press and hold “8” for 3 seconds. A long beep will sound. When you press the keys, it will
make a sound. This will enable the end of cooking reminder.
TIMER/CLOCK
24
" Alexa, stop the microwave"
"Alexa, pause the microwave"
"Alexa, restart/resume the microwave"
Turn the oven off before cleaning.
Keep the inside of the oven clean. When food
spatters or spilled liquids adhere to oven walls, wipe
with a damp cloth. Mild detergent may be used if the
oven gets very dirty.
The use of harsh detergent or abrasives is not
recommended.
The outside oven surface should be cleaned with
soap and water, rinsed and dried with a soft cloth. To
prevent damage to the operating parts inside the
oven, water should not be allowed to seep into the
ventilation openings.
If the Control Panel becomes wet, clean with a soft,
dry cloth. Do not use harsh detergents or abrasives
on Control Panel.
If steam accumulates inside or around the outside of
the oven door, wipe with a soft cloth. This may occur
when the microwave oven is operated under high
humidity conditions and in no way indicates
malfunction of the unit.
It is occasionally necessary to remove the glass tray
for cleaning. Wash the tray in warm sudsy water or in
a dishwasher.
The roller guide and oven cavity floor should be
cleaned regularly to avoid excessive noise.
Simply wipe the bottom surface of the oven with mild
detergent water or window cleaner and dry. The roller
guide may be washed in mild sudsy water.
1
2
3
4
5
6
7
ROLLER GUIDE
Glass Tray
Roller Guide
The ROLLER GUIDE and oven floor should be
cleaned frequently to prevent excessive noise.
The ROLLER GUIDE MUST ALWAYS be used for
cooking together with the Glass Tray.
1
2
GLASS TRAY
DO NOT operate the oven without the Glass Tray
in place.
DO NOT use any other Glass Tray with this oven.
If Glass Tray is hot, ALLOW TO COOL before
cleaning or placing it in water.
DO NOT cook directly on the Glass Tray.
(Except for popcorn)
1
2
3
4
C A R E O F Y O U R M I C R O W A v E O v E N
25

CARE AND CLEANING
Although your oven is provided with safety features, it is important to observe the following:
1. It is important not to defeat or tamper with safety
interlocks.
2. Do not place any object between the oven front face
and the door or allow residue to accumulate on
sealing surfaces. Wipe the sealing area frequently
with a mild detergent, rinse and dry. Never use
abrasive powders or pads.
3. When opened, the door must not be subjected to
strain, for example, a child hanging on an opened
door or any load could cause the oven to fall forward
to cause injury and also damage to the door. Do not
operate the oven if it is damaged, until it has been
repaired by a competent service technician. It is
particularly important that the oven closes properly
and that there is no damage to the:
i) Door(bent)
ii) Hinges and Hookes(broken or loosened)
iii) Door seals and sealing surfaces.
4. The oven should not be adjusted or repaired by
anyone except a properly competent service
technician.
5. The oven should be cleaned regularly and any food
deposits removed;
6. Failure to maintain the oven in a clean condition
could lead to deterioration of the surface that could
adversely affect the life of the appliance and possibly
result in a hazardous situation.
BEFORE YOU CALL FOR SERVICE
Refer to following checklist, you may prevent an unnecessary service call.
* The oven doesn’t work :
1. Check that the power cord is securely plugged in.
2. Check that the door is rmly closed.
3. Check that the cooking time is set.
4. Check for a blown circuit fuse or tripped main circuit
breaker in your house.
* Sparking in the cavity;
1. Check utensils. Metal containers or dishes with metal
trim should not be used.
2. Check that metal skewers or foil does not touch the
interior walls.
C A R E O F Y O U R M I C R O W A v E O v E N
26

* A : Running the oven empty for a short time will not
d a m a g e t h e o v e n . H o w e v e r , i t i s n o t
recommended.
* A : No. Both the glass tray and roller guide must
always be used in the oven before cooking.
* A : The door can be opened anytime during the
cooking operation. Then microwave energy will be
instantly switched off and the time setting will
maintain until the door is closed.
* A : The moisture on the side of your microwave oven
is normal. It is caused by steam from cooking food
hitting the cool oven surface.
* A : No. The metal screen bounces back the energy to
the oven cavity. The holes are made to allow light
to pass through. They do not let microwave
energy pass through.
* A : When baking or poaching eggs, the yolk may pop
due to steam build-up inside the yolk membrane.
To prevent this, simply pierce the yolk with a
toothpick before cooking. Never cook eggs without
piercing their shells.
* A : Standing time is very important.
With microwave cooking, the heat is in the food,
not in the oven. Many foods build up enough
internal heat to allow the cooking process to
continue, even after the food is removed from the
oven. Standing time for joints of meat, large
vegetables and cakes is to allow the inside to
cook completely, without overcooking the outside.
* A : “Standing time” means that food should be
removed from the oven and covered for additional
time to allow it to finish cooking. This frees the
oven for other cooking.
* A : Check your cooking guide again, to make sure
you’ve followed directions exactly ; and to see
what might cause variations in cooking time.
Cooking guide times and heat settings are
suggestions, to help prevent over-cooking... the
most common problem in getting used to a
microwave oven.
Variations in the size, shape and weights and
dimensions could require longer cooking time.
Use your own judgement along with the cooking
guide suggestions to check whether the food has
been properly cooked just as you would do with a
conventional cooker.
* A : Yes. Never run it empty.
* A : No. If you remove or turn over the turntable, you
will get poor cooking results. Dishes used in your
oven must t on the turntable.
* A : Yes. T he t urn ta ble rotates clo ckw ise or
counterclockwise, depending on the rotation of
the motor when the cooking cycle begins.
* A : Yes. Pop packaged microwave popcorn following
manufacture’s guidelines. Do not use regular
paper bags. Use the “listening test” by stopping
the oven as soon as the popping slows to a “pop”
every 1 or 2 seconds. Do not repop unpopped
kernels. Do not pop popcorn in glass cookware.
Q U E S T I O N S A N D A N S W E R S
27

UTENSIL GUIDE
Only use utensils that are suitable for use in microwave ovens.
To cook food in the microwave oven, the microwaves must be able to penetrate the food, without being reected
or absorbed by the dish used. Care must therefore be taken choosing the utensil. If the utensil is marked
microwave-safe, you do not need to worry. The following table lists various utensil and indicates whether and
how they should be used in a microwave oven.
: Recommended use
: Limited Use
: Not Recommended
C O O K I N G I N S T R U C T I O N S
U T E N S I L S A F E C O M M E N T S
Can be used in small quantities to protect areas against
overcooking. Arcing can occur if the foil is too close to
the oven wall or if too much foil is used.
Do not preheat for more than 8 minutes.
Porcelain, pottery, glazed earthenware and bone china
are usually suitable, unless decorated with a metal trim.
Some frozen foods are packaged in these dishes.
• Polystyrene cups containers
• Paper bags or newspaper
• Recycled paper or metal trims
Can be used to warm food. Overheating may cause
the polystyrene to melt.
May catch re.
May cause arcing.
• Oven-to-table ware
• Fine glassware
• Glass jars
Can be used, unless decorated with a metal trim.
Can be used to warm foods or liquids.
Delicate glass may break or crack if heated suddenly.
Must remove the lid. Suitable for warming only.
• Dishes
• Freezer bag twist ties
May cause arcing or re.
• Plates, cups, napkins and Kitch-
en paper
• Recycled paper
For short cooking times and warming. Also to absorb
excess moisture.
May cause arcing.
• Containers
• Cling lm
• Freezer bags
Particularly if heat-resistant thermoplastic. Some other
plastics may warp or discolour at high temperatures.
Do not use Melamine plastic.
Can be used to retain moisture. Should not touch the
food.
Take care when removing the lm as hot steam will
escape.
Only if boilable or oven-proof. Should not be airtight.
Prick with a fork, if necessary.
Can be used to retain moisture and prevent spattering.
28

ARCING
If you see arcing, open the door and correct the problem.
Arcing is the microwave term for sparks in the oven.
Arcing is caused by:
• Metal or foil touching the side of the oven.
• Foil not molded to food (upturned edges act like
antennas).
• Metal, such as twist-ties, poultry pins, or gold rimmed
dishes, in the microwave.
• Recycled paper towels containing small metal pieces
being used in the microwave.
USE YOUR MICROWAVE OVEN SAFELY
General Use
Food
C O O K I N G I N S T R U C T I O N S
Do not attempt to defeat or tamper with safety
interlocks.
Do not place any object between the oven front frame
and the door or allow residue to build up on sealing
surfaces. Wipe with a mild detergent, rinse and dry.
Never use abrasive powders or pads.
Do not subject the oven door to strain or weight such
as a child hanging on an open door.
This could cause the oven to fall forward resulting in
injury to you and damage to the oven.
Do not operate the oven if door seals or sealing
surfaces are damaged; or if door is bent; or if hinges
are loose or broken.
Do not operate the oven empty. This will damage the
oven.
Do not attempt to dry clothes, newspapers or other
materials in the oven. They may catch on re.
Do not use recycled paper products as they may
contain impurities which may cause sparks or res.
Do not hit or strike the control panel with hard objects.
This can damage the oven.
Never use your microwave oven for home canning. The
oven is not designed for proper home canning.
Improperly canned food may spoil and be dangerous to
consume.
Always use the minimum recipe cooking time. It is
better to undercook rather than overcook foods.
Undercooked foods can be returned to the oven for
more cooking. If food is overcooked, nothing can be
done.
Heat small quantities of food or foods with low moisture
carefully. These can quickly dry out, burn or catch on
re.
Do not heat eggs in the shell. Pressure may build up
and eggs can explode.
Potatoes, apples, egg yolks and sausages are
examples of food with non-porous skins.
These must be pierced before cooking to prevent
bursting.
Do not attempt to deep fat fry in your microwave oven.
Always allow a standing time of at least 20 seconds
after the oven has been switched off to allow the
temperature to even out, stir during heating, if
necessary, and ALWAYS stir after heating. To prevent
eruptive boiling and possible scalding, you should put a
spoon or glass stick into the beverages and stir before,
during and after heating.
Do not leave the oven unattended while popping popcorn.
Do not pop popcorn in a paper bag unless it is the
commercially prepared Microwave Popcorn product.
The kernels can overheat and ignite a brown paper
bag.
Do not put packaged Microwave Popcorn bags directly
on the oven tray. Place the package on a microwave
safe glass or ceramic plate to avoid overheating and
cracking the oven tray.
Do not exceed the Microwave Popcorn manufacturers
suggested popping time.
Longer popping does not yield more popcorn but it can
result in scorch, burn of re. Remember, the Popcorn
bag and tray can be too hot to handle. Remove with
caution and use pot holders.
29
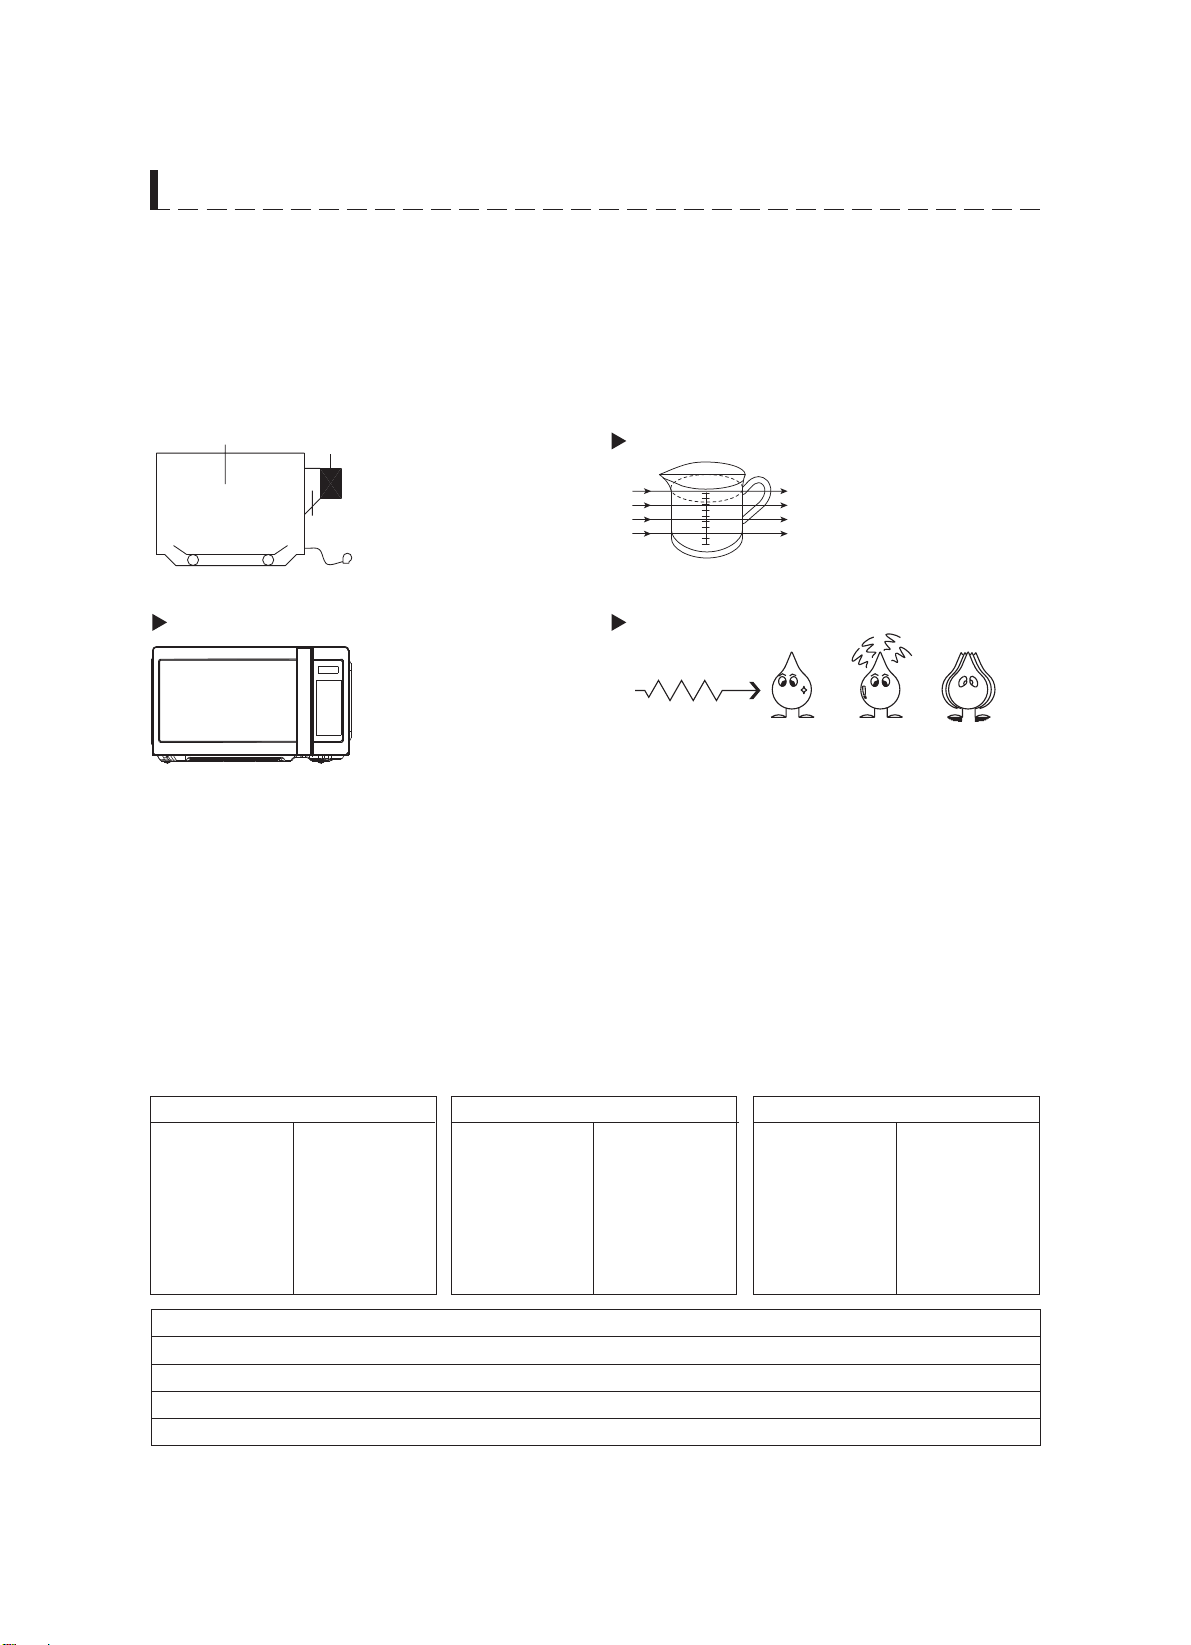
Then they pass through the
cooking containers to be
a b so r b e d by t h e w at e r
molecules in the food, all
foods contain water to a more
or lesser extent.
The microwaves cause the water molecules to vibrate
which causes FRICTION, i.e. HEAT. This heat then cooks
the food. Microwaves are also attracted to fat and sugar
particles, and foods high in these will cook more quickly.
Microwaves can only penetrate to a depth of 1½ - 2
inches(4-5cm) and as heat spreads through the food by
conduction, just as in a traditional oven, the food cooks
from the outside inwards.
MICROWAVING PRINCIPLES
Microwave energy has been used in this country to cook and reheat food since early experiments with RADAR in
World War ll. Microwaves are present in the atmosphere all the time, both naturally and manmade sources.
Manmade sources include radar, radio, television, telecommunication links and car phones.
CONVERSION CHARTS
HOW MICROWAVES COOK FOOD
In a microwave oven,
electricity is converted
into microwave by the
MAGNETRON.
The microwaves bounce
off the metal walls and
the metal door screen.
Oven Cavity
Magnetron
Waveguide
Turntable
Microwave Water Molecule Absorption Vibration
C O O K I N G I N S T R U C T I O N S
15 g
1
/2 oz.
25 g 1 oz.
50 g 2 oz.
100 g 4 oz.
175 g 6 oz.
225 g 8 oz.
450 g 1 lb.
30 ml 1 .oz.
100 ml 3 .oz.
150 ml 5 .oz. (
1
/4 pt)
300 ml 10 .oz. (
1
/2 pt)
600 ml 20 .oz. (1pt)
1.25 ml
1
/4 tsp
2.5 ml
1
/2 tsp
5 ml 1 tsp
15 ml 1 tbsp
1 Cup = 8 .oz = 240 ml
1 Pint = 16 .oz. (UK 20 .oz.) = 480 ml (UK 560 ml)
1 Quart = 32 .oz. (UK 40 .oz.) = 960 ml (UK 1120 ml)
1 Gallon = 128 .oz. (UK 160 .oz.) = 3840 ml (UK 4500 ml)
30

STANDING TIME
Dense foods e.g. meat, jacket potatoes and cakes,
require standing time(inside or outside of the oven) after
cooking, to allow heat to finish conducting to cook the
center completely. Wrap meat joints and jacket potatoes
in aluminium foil while standing. Meat joints need approx.
10-15 minutes, jacket potatoes 5 minutes. Other foods
such as plated meal, vegetables, fish etc require 2-5
minutes standing. After defrosting food, standing time
should also be allowed. If food is not cooked after
standing time, return to the oven and cook for additional
time.
MOISTURE CONTENT
Many fresh foods e.g. vegetables and fruit, vary in their
moisture content throughout the season, particularly
jacket potatoes. For this reason cooking times may have
to be adjusted. Dry ingredients e.g. rice, pasta, can dry
out during storage so cooking times may differ.
DENSITY
Porous airy foods heat more quickly than dense heavy
foods.
CLING FILM
Cling film helps keep the food moist and the trapped
steam assists in speeding up cooking times. Pierce
before cooking to allow excess steam to escape. Always
take care when removing cling film from a dish as the
build-up of steam will be very hot.
SHAPE
Even shapes cook evenly. Food cooks better by
microwave when in a round container rather than square.
SPACING
Foods cook more quickly and evenly if spaced apart.
NEVER pile foods on top of each other.
STARTING TEMPERATURE
The colder the food, the longer it takes to heat up. Food
from a fridge takes longer to reheat than food at room
temperature.
LIQUIDS
All liquids must be stirred before and during heating.
Water especially must be stirred before and during
heating, to avoid eruption. Do not heat liquids that have
previously been boiled. DO NOT OVERHEAT.
TURNING & STIRRING
Some foods require stirring during cooking. Meat and
poultry should be turned after half the cooking time.
ARRANGING
Individual foods e.g. chicken portions or chops, should be
placed on a dish so that the thicker parts are towards the
outside.
QUANTITY
Small quantities cook faster than large quantities, also
small meals will reheat more quickly than large portions.
PIERCING
The skin or membrane on some foods will cause steam
to build up during cooking. These foods must be pierced
or a strip of skin should be peeled off before cooking to
allow the steam to escape. Eggs, potatoes, apples,
sausages etc, will all need to be pierced before cooking.
DO NOT ATTEMPT TO BOIL EGGS IN THEIR SHELLS.
COVERING
Cover foods with microwave cling lm or a lid. Cover sh,
vegetables, casseroles, soups. Do not cover cakes,
sauces, jacket potatoes or pastry items.
COOKING TECHNIQUES
C O O K I N G I N S T R U C T I O N S
31

DEFROSTING GUIDE
▶ Do not defrost covered meat. Covering might allow
cooking to take place. Always remove outer wrap and
tray. Use only containers that are microwave-safe.
▶ Begin defrosting whole poultry breast-side-down.
Begin defrosting roasts fat-side-down.
▶ The shape of the package alters the defrosting time.
Shallow rectangular shapes defrost more quickly
than a deep block.
▶ After
1
/3 of the defrost time has elapsed, check the
food. You may wish to turn over, break apart,
rearrange or remove thawed portions of the food.
▶ During defrost, the oven will prompt you to turn the
food. Follow the techniques listed below for optimum
defrost results.
Then, close oven door, touch the START pad to
complete defrosting.
▶ When defrosted, food should be cool, but softened in
all areas. If still slightly icy, return to microwave oven
very briefly, or let stand a few minutes. After
defrosting, allow food to stand 5-60 minutes if there
are any icy areas.
Poultry and sh may be placed under running cool
water until defrosted
Turn over : Roast, ribs, whole poultry, turkey
breasts, hot dogs, sausages, steaks, or chops.
Rearrange : Break apart or separate steaks, chops,
hamburger patties, ground meat, chicken or seafood
pieces, chunks of meat such as stew beef.
Shield : Use small strips of aluminum foil to protect
thin areas or edges of unevenly shaped foods such
as chicken wings. To prevent arcing, do not allow foil
to come within 1-inch of oven walls or door.
Remove : To prevent cooking, thawed portions
should be removed from the oven at this point. This
may shorten defrost time for food weighing less than
3 lbs.(1350g).
Cooking chart
C O O K I N G I N S T R U C T I O N S
I T E M P O W E R L E v E L
C O O K I N G T I M E
P E R L B . / 4 5 0 G
S P E C I A L I N S T R U C T I O N
Beef joint - Rare
- Medium
- well done
Pork Joint
Bacon joint
PL8
PL8
PL8
PL10
PL10
6-8 min.
7-9 min.
9-11 min.
10-13 min.
8-10 min.
- Chilled meat and poultry should be
removed from the refrigerator at least
30 minutes before cooking.
- Always let the meat and poultry stand,
covered after cooking.
Whole chicken
Portions chicken
Breast (boned)
PL10
PL8
PL8
4-9 min.
5-7 min.
6-8 min.
Fish Fillets
Whole Mackerel, Cleaned
and prepared
Whole Trout, Cleaned
& Prepared
Salmon steaks
PL10
PL10
PL10
PL10
3-5 min.
3-5 min.
4-6 min.
4-6 min.
- Brush a little oil or melted butter over the
sh, or add 15~30ml(1-2 tbsp) lemon
juice, wine, stock, milk or water.
- Always let the sh stand, covered, after
cooking
: The above times should be regarded only as a guide. Allow for difference in individual tastes and preferences.
The times may vary due to the shape, cut, and composition of the food. Frozen meat, poultry and sh
must be thoroughly thawed before cooking.
food over. At this point, open oven door and check the
32

Reheating chart
• Baby food particularly needs to be checked carefully before serving to prevent burns.
• When heating pre-packaged ready-cooked foods, always follow the pack instructions carefully.
• If you freeze foods which were bought from the fresh or chilled counters, remember that they should be thoroughly
thawed before following the heating instructions on the packed. It’s worth putting a note on them so that other
members of the household will remember too.
• Remember metal ties and transfer food from foil containers before reheating.
• Chilled(refrigerated) food takes longer to reheat than food at room temperature (such as just-cooled food or food
from the store cupboard).
• All foods should be reheated using full microwave power.
COOKING & REHEATING CHART
C O O K I N G I N S T R U C T I O N S
I T E M C O O K I N G T I M E S P E C I A L I N S T R U C T I O N S
Baby food
4.5 oz.
20 sec. Empty into a small serving bowl.
Stir well once or twice during heating.
Before serving, check the temperature carefully.
Baby milk
100ml / 4.oz.
225ml / 8.oz.
20-30 sec.
40-50 sec.
Stir or shake well and pour into a sterilized bottle.
Before serving, shake well and check the temperature carefully.
Sandwich roll or bun
1 roll 20-30 sec. Wrap in paper towel and place on glass microwaveable rack.
Lasagna
1 serving
(10 ½ oz./300g)
4-6 min. Place lasagna on microwaveable plate.
Cover with plastic wrap and vent.
Casserole
1 cup
4 cups
1 ½-3 min.
5-7 min.
Cook covered, in microwaveable casserole.
Stir once halfway through cooking.
Mashed potatoes
1 cup
4 cups
2-3 min.
6-8 min.
Cook covered, in microwaveable casserole.
Stir once halfway through cooking.
Baked beans
1 cup 2-3 min. Cook covered, in microwaveable casserole.
Stir once halfway through cooking.
Ravioli or pasta in sauce
1 cup
4 cups
2-3 min.
6-9 min.
Cook covered, in microwaveable casserole.
Stir once halfway through cooking.
33

Cooking Guide for fresh vegetables
Cooking Guide for frozen vegetables
Use a suitable glass pyrex bowl with lid. Add 30-45ml cold water(2-3 tbsp.) for every 250g(1/2 lb.) unless another water
quantity is recommended - see table. Cook covered for the minimum time - see table.
Continue cooking to get the result you prefer. Stir once during and once after cooking. Add salt, herbs or butter
after cooking. Cover during a standing time of 3 minutes.
Hint : cut the fresh vegetables into even sized pieces. The smaller they are cut, the quicker they will cook.
All vegetables should be cooked using full microwave power.
VEGETABLE CHART
C O O K I N G I N S T R U C T I O N S
v E G E T A B L E S W E I G H T T I M E C O M M E N T S
Broccoli ½ lb./250g
1 lb./500g
2-3 min
4-6 min
Prepare even sized orets.
Arrange the stems to the centre.
Brussels sprouts ½ lb./250g 3-4 min Add 60-75ml(4-5 tbsp.) water.
Carrots ½ lb./250g 2-3 min Cut carrots into even sized slices.
Cauliower ½ lb./250g
1 lb./500g
2-3 min
4-6 min
Prepare even sized orets. Cut big orets into halves.
Arrange stems to the centre.
Courgettes ½ lb./250g 2-3 min Cut courgettes into slices. Add 30ml(2tbsp.) water or a
knob of butter. Cook until just tender.
Aubergine
(eggplant)
½ lb./250g 2-3 min Cut aubergine into small slices and sprinkle with 1 table-
spoon lemon juice.
Leeks ½ lb./250g 2-3 min Cut leeks into thick slices.
Mushrooms 0.3 lb./125g
½ lb./250g
1-2 min
2-4 min
Prepare small whole or sliced mushrooms. Do not add
any water. Sprinkle with lemon juice. Spice with salt and
pepper. Drain before serving.
Onions ½ lb./250g 2-3 min Cut onions into slices or halves. Add only 15ml(1tbsp.)
water.
Pepper ½ lb./250g 2-4 min Cut pepper into small slices.
Potatoes ½ lb./250g
1 lb./500g
3-5 min
5-7 min
Weigh the peeled potatoes and cut them into similar sized
halves or quarters.
Turnip cabbage ½ lb./250g 4-6 min Cut turnip cabbage into small cubes.
v E G E T A B L E S W E I G H T T I M E I N S T R U C T I O N S
0.3 lb./125g 1-2 min Add 15ml(1tbsp.) cold water.
½ lb./250g 2½-4 min Add 30ml(2 tbsp.) cold water.
Peas ½ lb./250g 2½-4 min Add 15ml(1 tbsp.) cold water.
Green beans ½ lb./250g 3-5 min Add 30ml(2 tbsp.) cold water.
Mixed vegetables
(carrots/peas/corn)
½ lb./250g 2½-4 min Add 15ml(1 tbsp.) cold water.
Mixed vegetables
(Chinese style)
½ lb./250g 3-5 min Add 15ml(1 tbsp.) cold water.
Spinach
Broccoli
34

TOMATO & ORANGE SOUP
1 oz.(25g) butter
1 medium onion, chopped
1 large carrot & 1 large potato, chopped
1
3
/4lb(800g) canned, chopped tomatoes
juice and grated rind of 1 small orange
1
1
/2pints(900ml) hot vegetable stock
salt and pepper to taste
1. Melt the butter in a large bowl on P-HI for 1 minute.
2. Add the onion, carrot and potato and cook on P-HI
for 4 minutes. Stir halfway through cooking.
3. Add the tomatoes, orange juice, orange rind and
stock. Mix thoroughly. Season with salt and pepper to
taste. Cover the bowl and cook on P-HI for 15
minutes. Stir 2-3 times during cooking, until the
vegetables are tender.
4. Blend and serve immediately.
FRENCH ONION SOUP
1 large onions, sliced
1 tbsp (15ml) corn oil
2 oz.(50g) plain our
2 pints(1.2 liters) hot meat
or vegetable stock
salt and pepper to taste
2 tbsp (30ml) parsley, chopped
4 thick slices French bread
2 oz.(50g) cheese, grated
1. Place the onion and oil in a bowl, mix well and cook on
P-HI for 1 minute.
2. Stir in the our to make a paste and gradually add
stock. Season and add the parsley.
3. Cover the bowl and cook on P-70 for 16 minutes.
4. Pour the soup into serving bowls, submerge bread
and sprinkle generously with cheese.
5. Cook on P-70 for 2 minutes, until the cheese has
melted.
STIR FRIED VEGETABLES
1 tbsp(15ml) sunower oil
2 tbsp (30ml) soy sauce
1 tbsp (15ml) sherry
1"(2.5cm) root ginger,
peeled and nely grated
2 medium carrots, cut into ne strips
4 oz.(100g) button mushrooms,
chopped
2 oz.(50g) beansprouts
4 oz.(100g) mange-tout
1 red pepper, seeded and thinly sliced
4 spring onions, chopped
4 oz.(100g) canned water chestnuts,
sliced
1
/4 head of chinese leaves, thinly sliced
1. Place the oil, soy sauce, sherry, ginger, garlic and
carrots in a large bowl, mix thoroughly
2. Cover and cook on P-HI for 3-5 minutes, stirring
once.
3. Add the button mushrooms, beansprouts, mange-
tout, red pepper, spring onions, water chestnuts and
chinese leaves. Mix thoroughly.
4. Cook on P-HI for 5-6 minutes, until the vegetables
are tender. Stir 2-3 times during cooking.
Stir fried vegetables are ideally served with meat or
fish.
HONEYED CHICKEN
4 boneless chicken breasts
2 tbsp(30ml) clear honey
1 tbsp(15ml) whole grain mustard
1
/2 tsp(2.5ml) dried tarragon
1 tbsp(15ml) tomato puree
1
/4 pint(150ml) chicken stock
1. Place the chicken breasts in a casserole dish.
2. Mix all remaining ingredients together and pour over
the chicken. Salt and pepper to taste.
3. Cook on P-HI for 13-14 minutes. Rearrange and coat
the chicken with the sauce twice during cooking.
RECIPES
C O O K I N G I N S T R U C T I O N S
35

BLUE CHEESE & CHIVE JACKETS
2 baking potatoes,
(approx.9 oz.(250g) each)
2 oz.(50g) butter
4 oz.(100g) blue cheese, chopped
1 tbsp(15ml) fresh chives, chopped
2 oz.(50g) mushrooms, sliced
salt and pepper to taste
1. Prick each potato in several places. Cook on P-HI for
7-9 minutes. Halve and scoop the esh into a bowl,
add the butter, cheese, chives, mushrooms, salt and
pepper, mix thoroughly.
2. Pile mixture into the potato skins and place in a an
dish.
3. Cook on P-50 for 10 minutes.
WHITE SAUCE
1 oz.(25g) butter
1 oz.(25g) plain our
1
/2 pint(300ml) milk
salt and pepper to taste
1. Place the butter in a bowl and cook on P-HI for 1
minute, until melted.
2. Stir in the our and whisk in the milk. Cook on P-HI
for 3-4 minutes, stirring every 2 minutes until thick
and smooth. Season with salt and pepper to taste.
STRAWBERRY JAM
1
1
/2 lb.(675g) strawberries, hulled
3 tbsp(45ml) lemon juice
1
1
/2 lb.(675g) caster sugar
1. Place strawberries and lemon juice in a very large
bowl, heat on P-HI for 4 minutes, or until the fruit has
softened. Add sugar, mix well.
2. Cook on P-70 for 20-25 minutes, until setting point* is
reached, stir every 4-5 minutes.
3. Pour into hot, clean jars. Cover, seal and label.
* setting point : To determine setting point, place 1
tsp(5ml)jam onto chilled saucer. Allow to stand for 1
minute. Move surface of jam gently with your finger, if
the surface wrinkles setting point has been reached.
PLAIN MICROWAVE CAKE
4 oz.(100g) margarine
4 oz.(100g) sugar
1 eggs
4 oz.(100g) self raising our, sifted
2-3 tbsp(30-45ml) milk
1. Line the base of 8" (20.4cm) cake dish with grease-
proof paper.
2. Cream the margarine and sugar together until light
and uffy. Beat in the eggs and fold in the sifted our
alternately with the milk.
3. Pour into prepared container. Cook on P-HI for 4-5
minutes, until a skewer comes out cleanly.
4. Leave the cake to stand for 5 minutes before turning
out.
OMELETTS
1
/2 oz.(15g) butter
4 eggs
6 tbsp(90ml) milk
salt & pepper
1. Whisk together eggs and milk.
2. Place butter in 10"(26cm) an dish. Cook on P-HI for
1 minute, until melted. Coat the dish with the melted
butter.
3. Pour omelette mixture into an dish. Cook on P-HI for
2 minutes. whisk mixture and cook again on P-HI for
1 minute.
C O O K I N G I N S T R U C T I O N S
36

SCRAMBLED EGG
1
/2 oz.(15g) butter
2 eggs
2 tbsp(30ml) milk
salt & pepper
1. Melt the butter in a bowl on P-HI for 1 minute.
2. Add the eggs, milk and seasoning and mix well.
3. Cook on P-HI for 3 minutes, stirring every 30
seconds.
SAVORY MINCE
1 small onion, diced
1 clove garlic, crushed
1 tsp(5ml) oil
7 oz.(200g) can chopped tomatoes
1 tbsp(15ml) tomato puree
1 tsp(5ml) mixed herbs
8 oz.(225g) minced beef
salt and pepper
1. Place onion, garlic and oil in casserole, and cook on
P-HI for 2 minutes or until soft.
2. Place all other ingredients in casserole. Stir well.
3. Cover and cook on P-HI for 5 minutes then P-50 for
8-13 minutes or until the meat is cooked.
C O O K I N G I N S T R U C T I O N S
37


PN.:16170000A95183
SHARPELECTRONICSCORPORATION
100 Paragon Drive, Montvale, NJ 07645