Loading ...
Loading ...
Loading ...

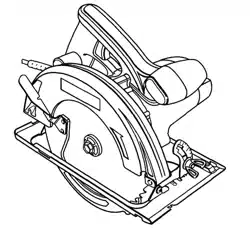
TO ASSEMBLE OR REMOVE BLADE
MODEL 315.10841 O0
See Figures 5, 6, and 7.
• Unplug your saw.
,_ WARNING: Failure to unplug your saw could
result in accidental starting causing possible
serious personal injury.
SPINDLE LOCK BUTTON - MODEL 315.108410
If your saw is model 315.108410 it has a spindle lock
button for lockingthe spindle on your saw ina stationary
position. Depress and hold the spindle lockbutton while
installing, changing or removing the blade.
TO ASSEMBLE BLADE:
• Remove blade wrench from storage area.
See Figure 1.
• Position your saw as shown in Figure 7, depress
spindle lock button, and remove blade screw. See
Figure 5.
Note: Turn blade screw counterclockwise to remove.
• Remove spring washer, and outer blade washer
("D" washer). See Figure 5.
SPINDLE
LOWERBLADE
GUARDHANDLE
BLADE
SPRING
WASHER
BLADE
INNERFLANGE SCREW
BUSHING
OUTER
WASHER
("D" WASHER)
Fig. 5
• Wipe a drop of oil onto inner flange bushing and
outer blade washer ("D" washer) where they
contact blade.
,_ WARNING: If inner flange has been
bushing
removed, replace it before placing blade on
spindle. Failure to do so could cause an accident
since blade will not tighten properly.
• Fit saw blade inside lower blade guard and onto
spindle. Note: The saw teeth point upward at the
front of saw as shown in Figure 5.
• Replace "D" washer and spring washer.
Note: "Cupped" side of spring washer goes
against "D" washer. See Figure 6.
OUTERBLADEWASHER("D" WASHER)
CUPPEDSIDEOF OUTSIDEOF
SPRINGWASHER SPRINGWASHER
Fig. 6
• Depress spindle lock button, then replace blade
screw. Tighten blade screw securely.
Note: Turn blade screw clockwise to tighten.
• Return blade wrench to storage area.
Note: Always place angled portion of blade
wrench up as shown in Figure 1.
REMEMBER: Never use a blade that is too thick to
allow the "D" washer to engage with the flat on
the spindle.
TO REMOVE BLADE:
• Remove blade wrench from storage area.
See Figure 1.
• Position your saw as shown in Figure 7, depress
spindle lock button, and remove blade screw.
Note: Turn blade screw counterclockwise to remove.
• Remove spring washer and outer blade washer
("D" washer). See Figure 5.
Note: Blade can be removed at this point.
DEPRESSTO
LOCK
SPINDLELOCK
BUTTON
TO
TIGHTEN
TO
LOOSEN
BLADE
SCREW
BLADE
WRENCH
Pig. 7
10
Loading ...
Loading ...
Loading ...