Loading ...
Loading ...
Loading ...
www.bissell.com
7
Operations
Getting ready
1. Attach mop pad
A. Set the mop pad flat on the floor.
B. Line up the mop head and place it
inside the mop pad with cord located at rear
of mop head. Tighten cord to ensure tight fit.
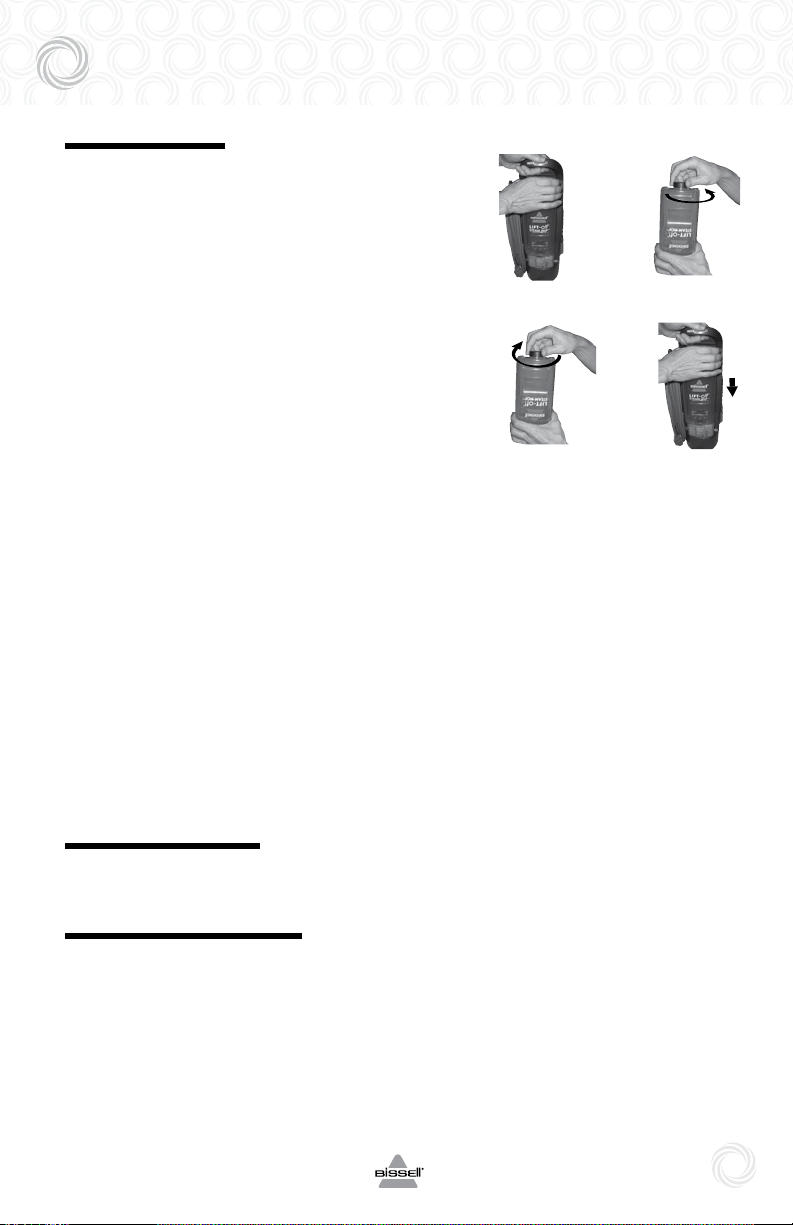
2. Fill water tank
A. Remove tank by lifting straight up and
away from the unit.
B. Unscrew cap and remove from tank.
C. Fill water tank with water. For best results,
water should be at room temperature.
D. Replace the assembly cap and tighten
until snug.
E. Replace water tank by lining up vertical
guides and gently sliding tank into place.
3. Select a steam control setting. Light is for
delicate floors such as hardwood and
laminates. Normal is for everyday cleaning,
and Tough is for hard to clean messes.
4. Twist the Quick Release
™
cord wrap
clockwise to unwrap the power cord
completely and plug into a 220V-240V
grounded outlet as described on the
Important Safety Instructions, page 3.
5. The ready light will illuminate in 30
seconds when the Lift-Off Steam Mop
is ready for use.
Before you clean
Thoroughly sweep or vacuum floor prior to
cleaning with the Lift-Off Steam Mop.
Cleaning hard floors
Your Lift-Off Steam Mop is designed to clean
hard flooring such as ceramic tile, vinyl, laminate,
marble, stone and sealed hard wood floors. Use
of your Lift-Off Steam Mop on waxed or some
unwaxed floors may result in a diminished glossi-
ness. The Lift-Off Steam Mop is not for use on
unsealed wood floors. For best results test in an
inconspicuous area and check the care instruc-
tions from your flooring manufacturer.
2A
2B
2D
2E
Loading ...
Loading ...
Loading ...