www.SereneLifeHome.com
2
Save these IMPORTANT Safety Instructions
READ THESE INSTRUCTIONS:
Read all Safety and Operating instructions carefully before using this product.
DANGER
If you smell gas:
1. Shut o gas to the appliance.
2. Extinguish any open ame.
3. If odor continues, keep away from the appliance and immediately call your
gas supplier or re department.
WARNING
Do not attempt to repair or alter this conversion kit for any assumed defect.
Any modication to this assembly will void your warranty and create the risk of a
gas leak and re. Use only authorized replacement parts supplied by manufacturer.
WARNING
Do not store or use gasoline or other ammable vapors and liquids in the vicinity
of this or any other appliance. An LP cylinder not connected for use shall not be
stored in the vicinity of this or any other appliance.
WARNING
The conversion must only be performed by a licensed gas tter and all connections
MUST be leak tested prior to operating your outdoor gas appliance.
WARNING
Read and follow all Safety, Assembly, and Use and Care Instructions in this Guide
before assembling and using the appliance. Failure to follow all instructions in
this Use and Care Guide may lead to re or explosion which could result in
property damage personal injury or death.
Improper installation, adjustment, alteration, service or maintenance can cause
injury or property damage. Read the owner’s manual thoroughly before installing
or servicing this equipment. If the information in this manual is not followed
exactly, a re or explosion may result causing property damage, personal injury
or loss of life.

www.SereneLifeHome.com
3
WARNING!
IMPORTANT: Read all instructions prior to beginning conversion.
•
NOT FOR USE ON PATIO HEATERS.
•
Natural gas is ammable and hazardous if handled improperly.
Become aware of its characteristics before using any natural gas product.
•
Natural gas characteristics: Flammable, explosive under pressure, lighter
than air and settles in pools in high areas.
•
In its natural state, natural gas has no odor.
For your safety, an odorant has been added.
•
Your natural gas outdoor appliance has been designed to operate on natural
gas only, at a pressure of seven inches water column (7" W.C.).
•
Chemicals known to the state of California to cause cancer, birth defects, or
other reproductive harm are created by the combustion of natural gas.
•
Check with your gas utility for local gas pressure, because in some areas
natural gas pressure varies. Also, check with your gas company or with local
building codes for instructions to install a gas supply line or call a licensed and
qualied installer.
•
It is recommended that an ON/OFF manual shut–o valve be installed at the
gas supply source: Outdoors after the gas line exits outside wall and before
quick disconnect or before gas supply line enters ground.
•
The appliance and its individual shut o valve must be disconnected from the
gas supply piping system during any pressure testing of the system at test
pressures in excess of 1/2 psig (3.5kPa).
•
This appliance must be isolated from the gas supply piping system by closing
its individual manual shut o valve during any pressure testing of the gas
supply piping system at test pressures equal to or less than 1/2 psig (3.5kPa).
•
Make sure the natural gas hose is not in contact with any high temperature
surface or it could melt and leak causing a re.
•
Move the hose out of pathways where people may trip over it or where the
hose may be subjected to accidental damage.
www.SereneLifeHome.com
4
WARNING!
•
The conversion must only be performed by a licensed gas tter and all
connections MUST be leak tested prior to operating your outdoor gas appliance.
•
Conversion should only be done when the appliance is cool in order to avoid
the possibility of burns. Ensure the burner control is "OFF". Gas supply must be
turned o at the source and disconnected from your outdoor appliance prior
to conversion.
•
Once conversion is complete, your outdoor appliance should only be used
with natural gas. The valve, orice and hose are for natural gas only.
•
Ensure all connections are tightened using 2 wrenches.
Do not use Teon tape or pipe dope on any hose connection.
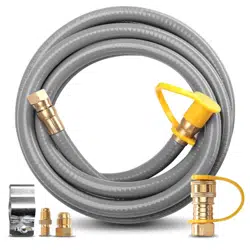
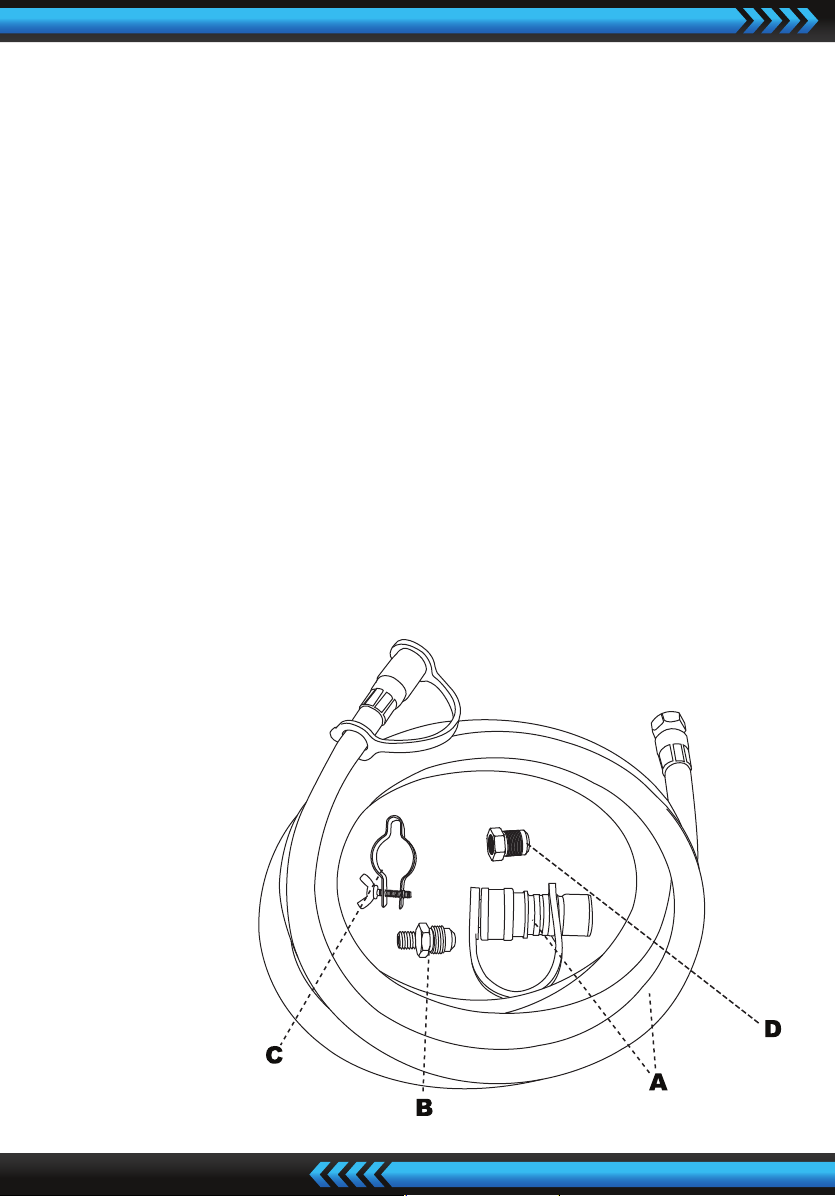
WHAT'S IN THE BOX:
A
Natural Gas Hose and Quick Connect
B
Natural Gas Orice Nozzle
C
Burner Tube Clamp and Wing Screw
D
Connector
ASSEMBLY INSTRUCTIONS
Tools needed:
•
3/4 wrench X 2
•
11/16 wrench X 1
•
5/16 wrench X 1

www.SereneLifeHome.com
5
STEP 1
Remove the control knob and unscrew nut from the valve stem.
Put nut and knob aside for re-assembly later on.
STEP 2
1. Pull existing valve assembly away from the inside of the control panel.
2. Using a 5/16 open end wrench, remove the thermocouple wire.
3. Using an 11/16 open end wrench, stabilize the LP orice nozzle.
Using a 3/4 open end wrench, remove metal ex hose.
Remove
www.SereneLifeHome.com
6
STEP 3
1. Using two 3/4 open end wrenches, remove the metal ex hose and the LP gas
hose from the existing valve. Be sure to rotate in opposite directions.
2. Using an 11/16 wrench, remove the LP orice nozzle from the burner tube.
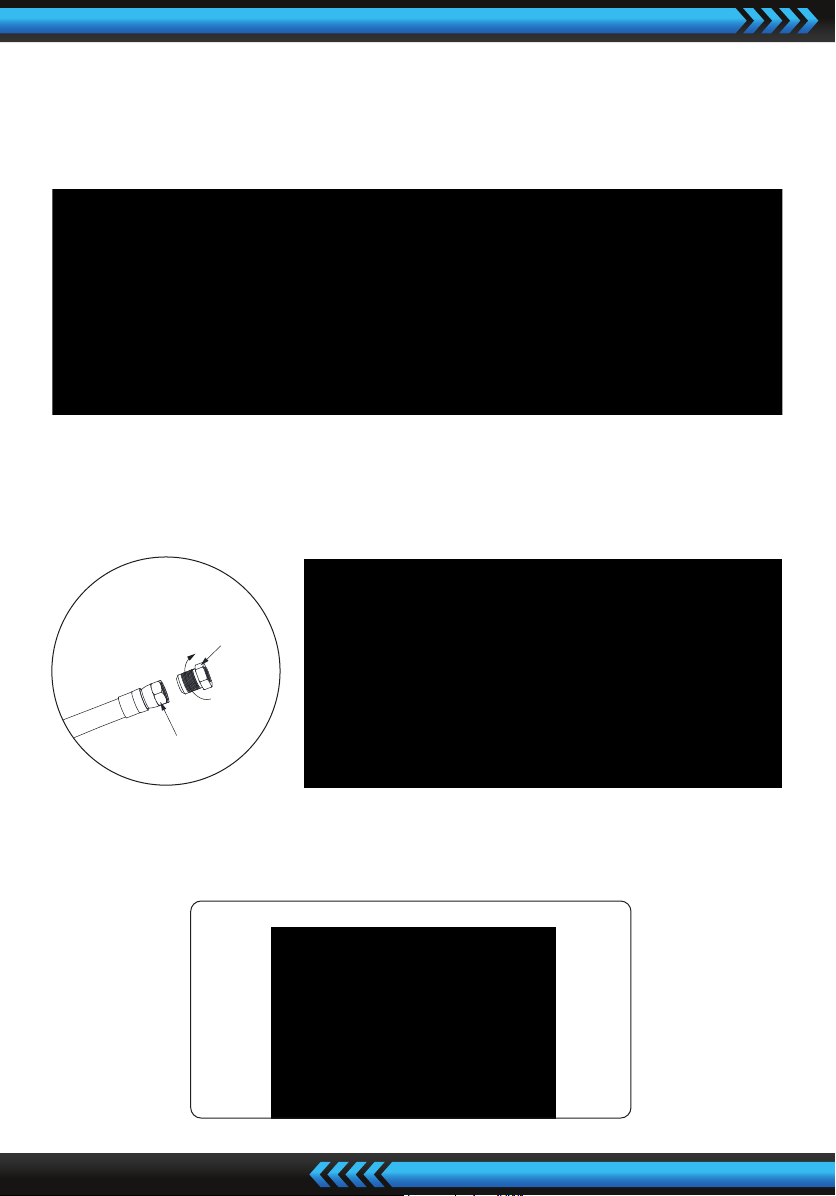
STEP 4
Attach the connector to the quick connector by using wrenches, then using two
3/4 open end wrenches, install the metal ex hose and the natural gas hose to
the existing valve Be sure to rotate in opposite directions.
STEP 5
Slide the clamp over the burner tube and completely cover the air inlet opening
with the clamp. Tighten the clamp completely using the wing screw.
Quick Connector
Connector
Install Clamp
Air inlet
COVERING THE AIR
INLET OPENING
Burner

www.SereneLifeHome.com
7
STEP 6
Hand tighten the new natural gas orice nozzle onto the burner tube.
STEP 7
Using an 11/16 open end wrench, stabilize the natural gas orice nozzle.
Connect the metal ex hose onto the natural gas orice nozzle using a 3/4 open
end wrench.

www.SereneLifeHome.com
8
STEP 8
Using a 5/16 open end wrench, connect the thermocouple wire to the existing
valve.
STEP 9
Insert valve stem through the hole located in the control panel and use nut to
secure. Install control knob.
Install
www.SereneLifeHome.com
9
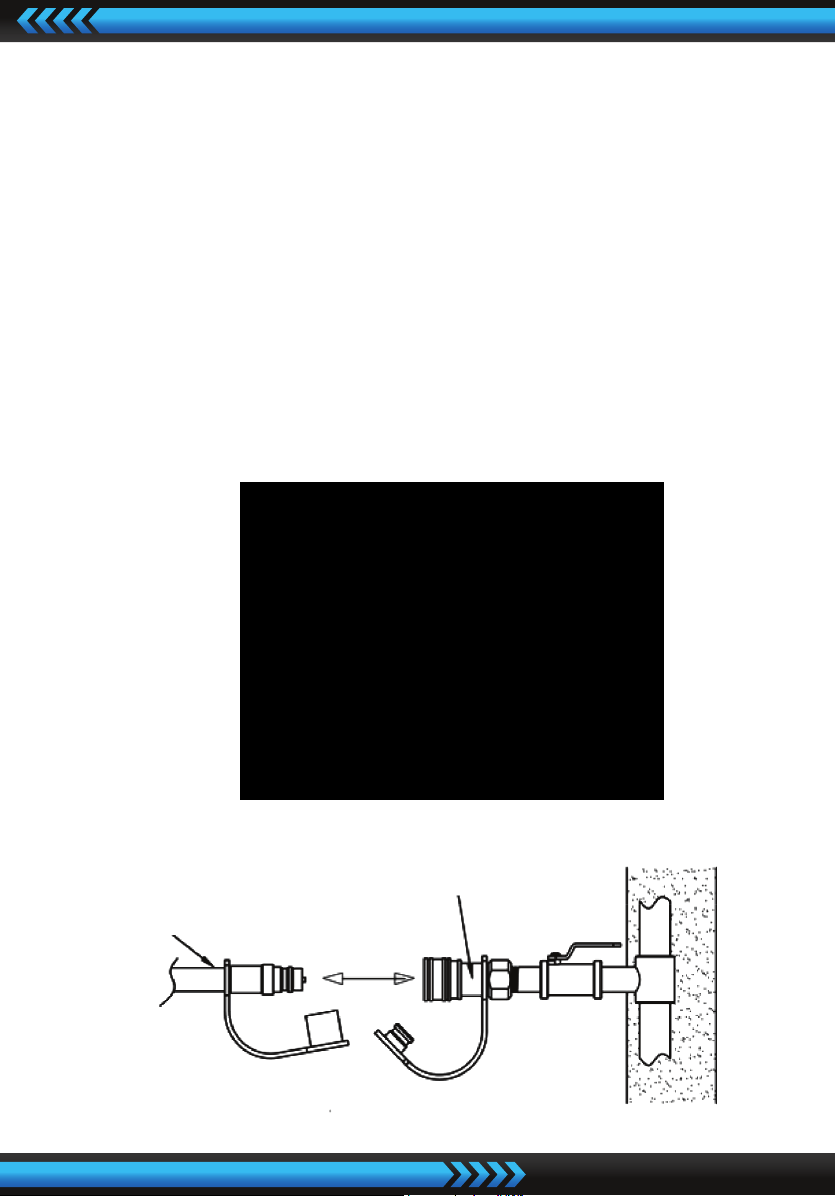
NATURAL GAS CONNECTION
•
Connect a manual shut-o valve to gas supply line.
Apply sealing compound or pipe thread tape of the type resistant to the
action of natural gas on all male pipe threads.
Connect the quick disconnect socket to the manual shut-o valve at the gas
supply.
•
A readily available manual shut-o valve must be installed upstream of and as
close to the quick disconnect as possible.
The quick disconnect must not be installed in an upward direction.
•
Pull back the sleeve on the quick disconnect socket and insert the nipple at the
end of the natural gas hose and release the sleeve to connect the gas supply.
Manual shut-o valve
Wall
Quick disconnect socket
House natural gas piping
NG Gas hose
Quick disconnect socket

www.SereneLifeHome.com
10
LEAK TEST
1. Perform a leak test in a well-ventilated area outside.
2. Make sure any open ames or cigarettes are extinguished.
3. Remove the battery.
4. Ensure the burner control knob is in the "OFF" position.
5. In a bowl, create a soap solution using 1 part water and 1 part liquid detergent.
6. Apply the soapy water solution to all connections.
7. Connect natural gas hose to gas supply.
8. A gas leak will be detected by expanding bubbles originating from the point
of the leak.
9. If a leak is found at any connection point or if you smell gas, disconnect the
natural gas hose from the quick disconnect socket and do not use the
appliance until repairs can be made.
Leak test locations for natural gas connection

www.SereneLifeHome.com
11
FEATURES:
•
Flexible and Durable
•
Connects to Natural Gas Appliances
•
Attaches to the Female Quick Connect Plug
•
Easy to Install, Attach and Remove as Needed
•
Solid Brass Fittings
•
Multi-Layer Structures
•
Long-Lasting Rubber Hose to Provide Safety and No Leakage
•
Weatherproof and Leak-Free\
•
For Outdoor Use Only
•
Works with Model Numbers: SLFPS3, SLFPTL, SLFPX45, SLFPSX55, SLFPTIL49,
and SLFPX69
TECHNICAL SPECS:
•
Gas Type: Natural Gas
•
Hose Inlet: 3/8" Male Quick Disconnect
•
Hose Outlet: 3/8" Female Flare Fitting
•
Connector: 7/16" to 3/8"
•
Hose Material: PVC + Nylon Sewing Thread + Galvanized Steel + Rubber
•
Fitting Material: Brass
•
Length: 10-Foot
•
Adapter: 3/8" Female Quick Connect × 3/8" Female Pipe Thread (NPT) x
Connector
•
1/2” Gas hose, Max.WP 1/2 PSI