Loading ...
Loading ...
Loading ...
• Loosen knob. Using a combination square, set the table
perpendicular to the disc, and secure in position. If
necessary, set pointer at 0°.
Bolt (B)
Figure 3 - Using Table with Disc
To use the table with the belt:
• Loosen bolt in pivot bracket. Move belt assembly to the
vertical position, and secure in position by tightening bolt.
• Insert table supportrod intothe belt assembly bracket.
Secure using bolt (A), making sure bolt tightens onto the
flat surface of the rod.
• Position table assembly on support rod so that gap
between table and belt is _/_e"or less. Secure table in
position with bolt (B).
• Loosen knob. Using a combination square, set the table
perpendicular to the belt and secure in position. If
necessary, set pointer at 0°.
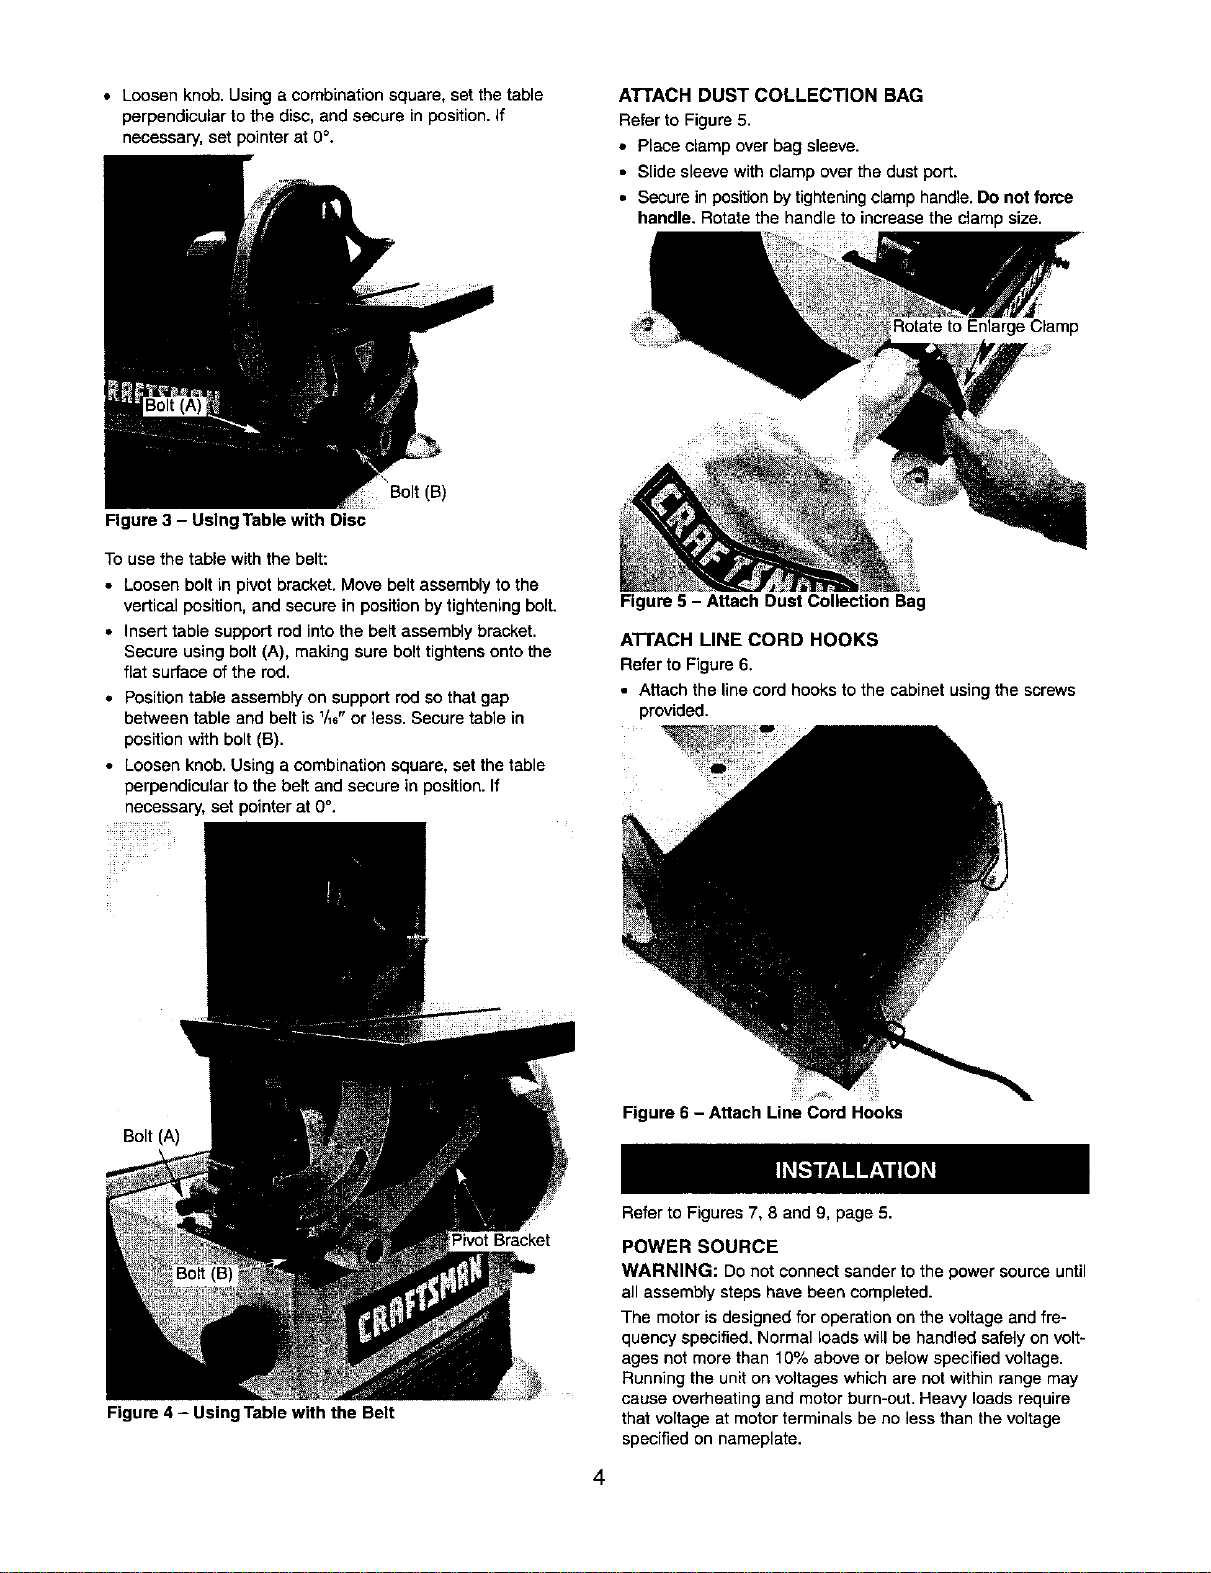
ATI'ACH DUST COLLECTION BAG
Refer to Figure 5,
• Place clamp over bag sleeve.
• Slide sleeve with clamp over the dust port.
• Secure in position by tightening clamp handle. Do not force
handle. Rotate the handle to increase the clamp size.
Rotate to Enlarge Clamp
Figure 5 - Atlach Dust Collection Bag
ATTACH LINE CORD HOOKS
Refer to Figure 6.
• Attachthe line cord hooksto the cabinet using the screws
provided.
Bolt (A)
Figure 4 - Using Table with the Belt
Pivot Bracket
Figure6 - AttachLineCordHooks
4
Refer to Figures 7, 8 and 9, page 5.
POWER SOURCE
WARNING: Do not connectsander to the powersource until
all assembly steps have been completed.
The motor is designed for operation on the voltage and fre-
quency specified. Normal loads will be handled safely on volt-
ages not more than 10% above or below specified voltage.
Running the unit on voltages which are not within range may
cause overheating and motor burn-out. Heavy loads require
that voltage at motor terminals be no less than the voltage
specified on nameplate.
Loading ...
Loading ...
Loading ...