Loading ...
Loading ...
Loading ...
WARNING
To avoid serious injury, perform adjustments
only with engine stopped, key removed and rider
on level ground.
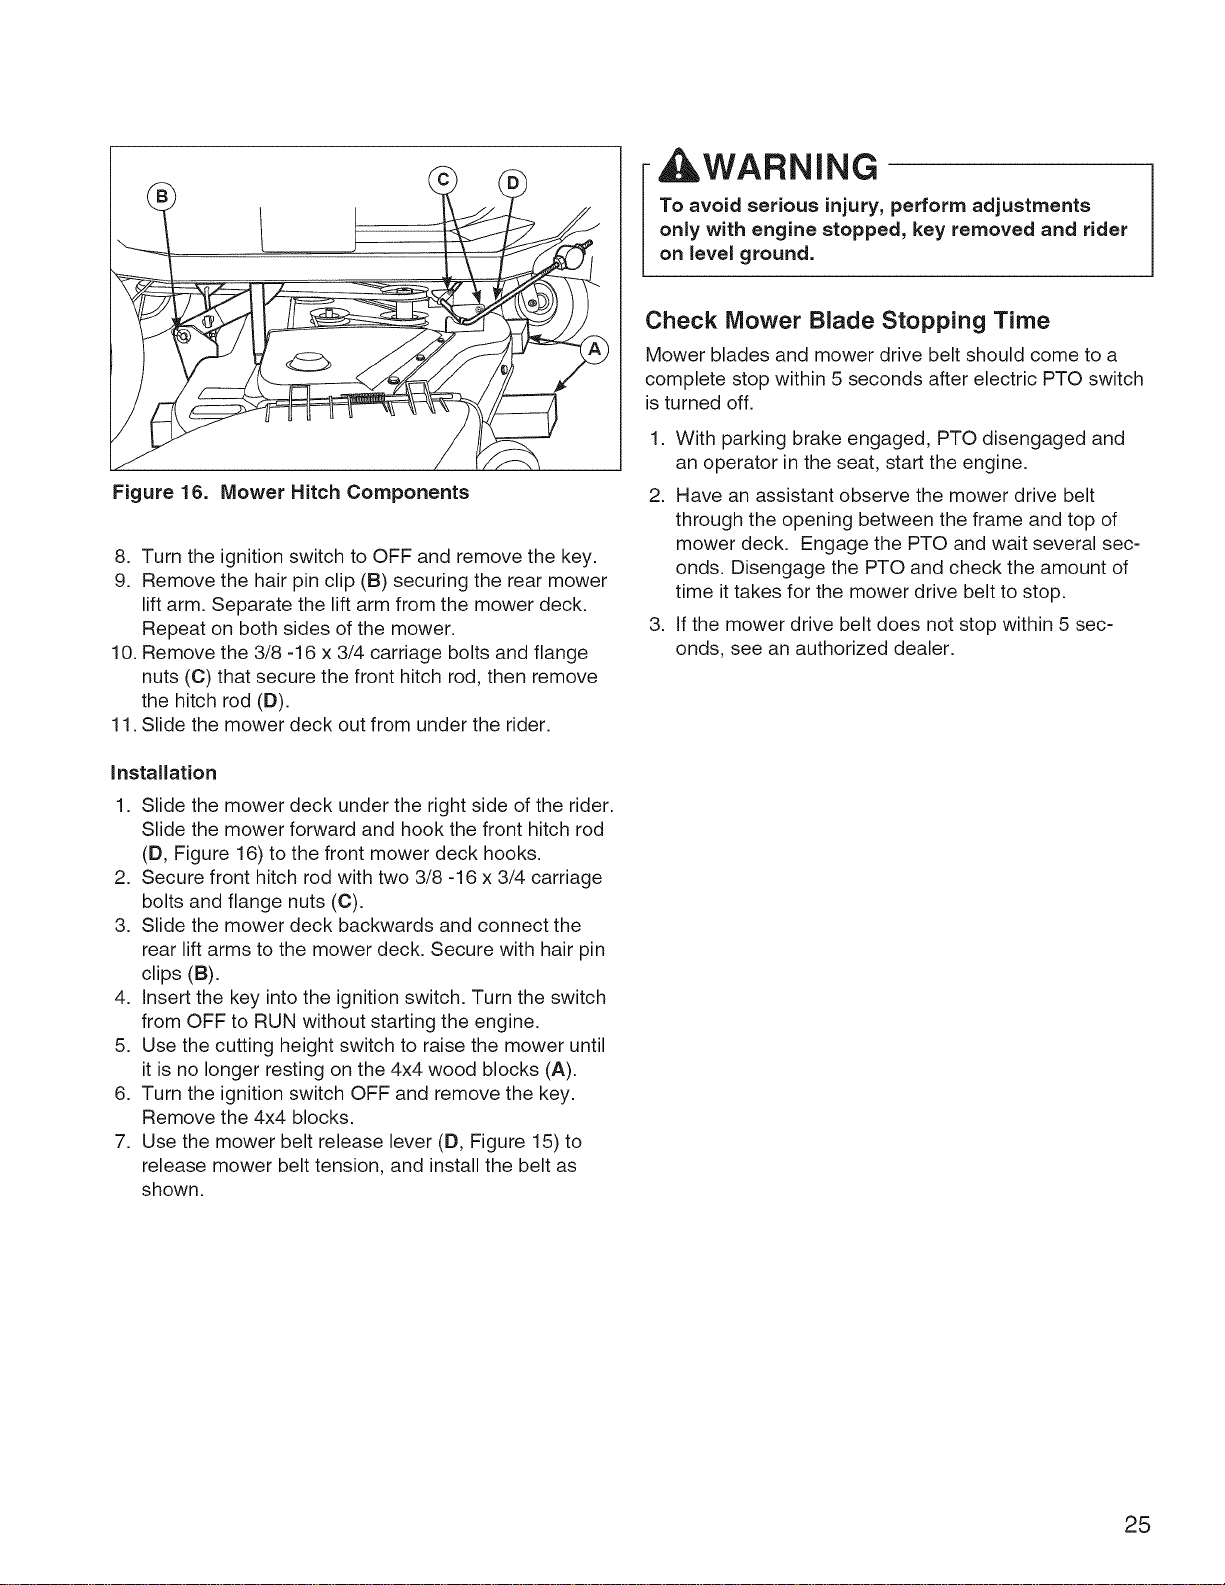
Figure 16. Mower Hitch Components
8. Turn the ignition switch to OFF and remove the key.
9. Remove the hair pin clip (B) securing the rear mower
lift arm. Separate the lift arm from the mower deck.
Repeat on both sides of the mower.
10. Remove the 3/8 -16 x 3/4 carriage bolts and flange
nuts (C) that secure the front hitch rod, then remove
the hitch rod (D).
11. Slide the mower deck out from under the rider.
Installation
1. Slide the mower deck under the right side of the rider.
Slide the mower forward and hook the front hitch rod
(D, Figure 16) to the front mower deck hooks.
2. Secure front hitch rod with two 3/8 -16 x 3/4 carriage
bolts and flange nuts (C).
3. Slide the mower deck backwards and connect the
rear lift arms to the mower deck. Secure with hair pin
clips (B).
4. Insert the key into the ignition switch. Turn the switch
from OFF to RUN without starting the engine.
5. Use the cutting height switch to raise the mower until
it is no longer resting on the 4x4 wood blocks (A).
6. Turn the ignition switch OFF and remove the key.
Remove the 4x4 blocks.
7. Use the mower belt release lever (D, Figure 15) to
release mower belt tension, and install the belt as
shown.
Check Mower Blade Stopping Time
Mower blades and mower drive belt should come to a
complete stop within 5 seconds after electric PTO switch
is turned off.
1. With parking brake engaged, PTO disengaged and
an operator in the seat, start the engine.
2. Have an assistant observe the mower drive belt
through the opening between the frame and top of
mower deck. Engage the PTO and wait several sec-
onds. Disengage the PTO and check the amount of
time it takes for the mower drive belt to stop.
3. If the mower drive belt does not stop within 5 sec-
onds, see an authorized dealer.
25
Loading ...
Loading ...
Loading ...