Loading ...
Loading ...
Loading ...
6 ENGLISH
Overheat protection
Whenthetoolorbatteryisoverheated,thetoolstops
automaticallyandthelampblinks.Inthiscase,letthe
toolandbatterycoolbeforeturningthetoolonagain.
Overdischarge protection
Whenthebatterycapacityisnotenough,thetoolstopsautomatically.
Inthiscase,removethebatteryfromthetoolandchargethebattery.
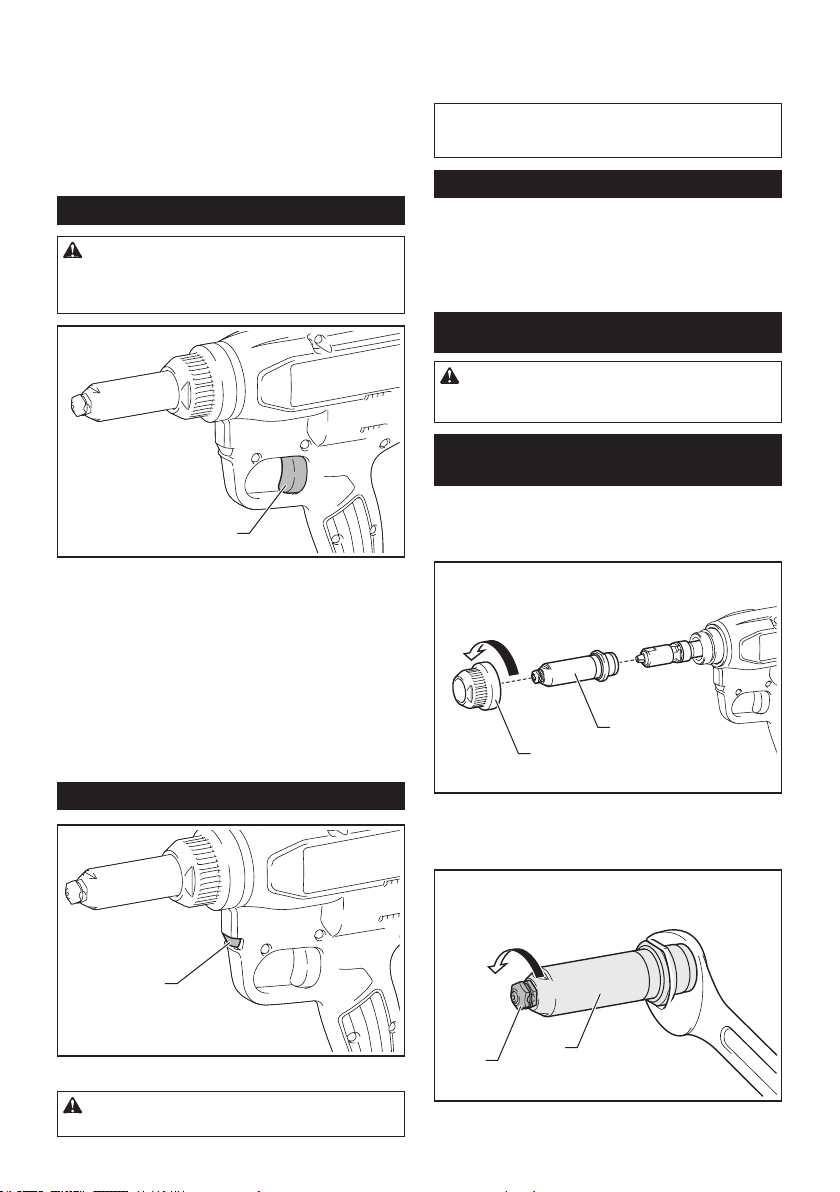
Switch action
WARNING: Before installing the battery car-
tridge into the tool, always check to see that the
switch trigger actuates properly and returns to
the "OFF" position when released.
1
►1. Switch trigger
Tostartthetool,simplypulltheswitchtrigger.When
youreleasetheswitchtrigger,thetoolstopsandthe
returns to the initial position.
Thetoolmaynotintheinitialpositioninthefollowing
cases.Returnthetooltotheinitialpositionbypullingand
releasing the switch trigger before operating the tool.
• Whenusingthetoolforthersttime.
• Afterreplacingthebatterycartridge.
• When the tool stops because of the overload.
• After performing the maintenance.
Lighting up the front lamp
1
►1. Lamp
CAUTION: Do not look in the light or see the
source of light directly.
Pull the switch trigger to light up the lamp. The lamp
keeps on lighting while the switch trigger is being pulled.
Thelampgoesoutapproximately10secondsafter
releasing the switch trigger.
NOTE:Useadryclothtowipethedirtoffthelensof
the lamp. Be careful not to scratch the lens of lamp, or
itmaylowertheillumination.
Electric brake
This tool is equipped with an electric brake. If the tool
consistentlyfailstoquicklystopaftertheswitchtrigger
is released, have the tool serviced at a Makita service
center.
ASSEMBLY
CAUTION: Always be sure that the tool is
switched off and the battery cartridge is removed
before carrying out any work on the tool.
Installing or removing the head
assembly
Toremovetheheadassembly,followthestepsbelow.
1. Loosen the nut of the head, and then remove the
head.
1
2
►1. Nut 2. Head
2. Loosen the nose piece with a wrench while hold-
ing the head with another wrench.
1
2
►1. Nose piece 2. Head
Loading ...
Loading ...
Loading ...