
1
Owner’s Manual
PROTECT YOUR INVESTMENT!
Register your product for quicker service
and ultimate peace of mind.
You could also win an ISOBAR6ULTRA
surge protector—a $50 value!
www.tripplite.com/warranty
1111 W. 35th Street, Chicago, IL 60609 USA • www.tripplite.com/support
Copyright © 2014 Tripp Lite. All rights reserved.
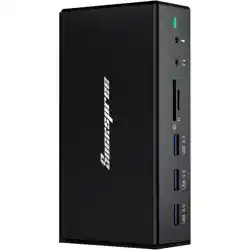
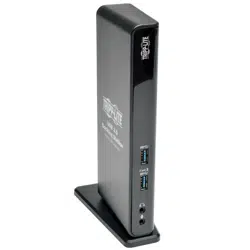
USB 3.0 Dual Head
Docking Station
Model: U342-DHG-402
14-02-073-93330A.indd 1 2/27/2014 10:23:23 AM

2
Product Features
• USB3.0is10timesfasterthanUSB2.0andsupportsdatatransfer
ratesofupto5Gbps
• BackwardcompatiblewithUSB2.0and1.1
• DVI-IandHDMIportsforconnectionofexternalmonitors
• AVGAmonitorcanbeconnectedtotheDVI-IportusingaDVI-to-VGA
adapter,suchasaTrippLiteP556-Seriescable
• ADVImonitorcanbeconnectedtotheHDMIportusinganHDMI-to-DVI
adapter,suchasaTrippLiteP566-Seriescable
• Supportsvideoresolutionsofupto2048x1152
• Automaticallyresumesoperationfromhibernationandsuspendmodes
• GigabitEthernetportsupportstrue10/100/1000Mbpsnetworkspeeds
• IEEE802.3az(EnergyEfcientEthernet)compliant
• Supportsfullduplexandhalfduplexoperations
• SupportsIPv4andIPv6packChecksumOfoadEngine(COE)toreduce
CPUloading
• SupportsWake-onLAN,VLANtaggingandAuto-MDIX
• TwoUSB3.0andfourUSB2.0hubportsforconnectionofadditional
USBperipherals
• OneUSB3.0portsupportsUSBBatteryCharging(BC)specication1.2,
allowingittoprovide1.5ampsofpowerforfasterchargingofmobile
devices
• 3.5mmMiniStereojacksforconnectionofspeakerandmicrophone
• CompatiblewithWindows
®
XP,Vista,7,8and8.1
14-02-073-93330A.indd 2 2/27/2014 10:23:23 AM

3
System Requirements
Package Contents
Optional Accessories
• Windows
®
XP(32-bit),Vista(32-and64-bit),7(32-and64-bit),
8(32-and64-bit)or8.1(32-and64-bit)
• AvailableUSBport(USB3.0requiredforUSB3.0speeds)
• VGA*,DVIorHDMImonitor
• 1.6GHzSingleCoreprocessor(DVDplaybackontheadd-onmonitor
requiresa2.0GHzDualCoreprocessor)
• 1GBRAM
• 30MBofavailablediskspace
* Requires a DVI-to-VGA adapter, such as a Tripp Lite P556-Series cable
• U342-DHG-402
• ExternalPowerSupply(Input:100-240V,50/60Hz,0.8AOutput:5V,4A)
–6ft.
• USB3.0A/BCable–3ft.
• DriverCD
• Owner’sManual
• P312-Series3.5mmMiniStereoAudioCables
• P556-SeriesDVI-to-VGAAdapterCables
• P561-SeriesDVI-DSingleLinkCables
• P566-SeriesHDMI-to-DVIAdapterCables
• P568-SeriesHigh-SpeedHDMICables
• U022-SeriesUSB2.0A/BDeviceCables
• UR022-SeriesReversibleUSB2.0A/BDeviceCables
• U322-SeriesUSB3.0A/BDeviceCables
14-02-073-93330A.indd 3 2/27/2014 10:23:23 AM

4
Product Overview
1
2
5
6
7
8
9
10
3
4
14-02-073-93330A.indd 4 2/27/2014 10:23:24 AM

5
Product Overview
1
Power LED–Illuminateswhenunitisconnectedtotheexternalpower
supplyandpoweredon.
2
USB LED–IlluminateswhenaUSBdeviceisconnected.
3
USB 3.0 Ports–ConnectuptotwoUSB3.0SuperSpeeddevices.The
bottomUSB3.0portsupportsUSBBatteryCharging(BC)specication
1.2,allowingittoprovide1.5ampsofpowerforfasterchargingof
mobiledevices.
4
Speaker and Mic Jacks–3.5mmMiniStereoaudioports.
5
USB 2.0 Ports–ConnectuptofourUSB2.0High-Speeddevices.
6
RJ45 Port–Connecttoa10/100/1000Mbpsnetwork.
7
DVI-I Port –ConnectaDVImonitor.AVGAmonitorcanbeconnectedto
thisportbyusinganadapter,suchasaTrippLiteP556-Seriescable.
8
HDMI Port–ConnectanHDMImonitor.ADVImonitorcanbe
connectedtothisportbyusinganadapter,suchasaTrippLite
P566-Seriescable.
9
USB 3.0 Type B Port–Connecttheunittoacomputerusingthe
includedUSB3.0A/Bcable.
10
Power Jack–Connecttheincludedpowersupplyhereandplugit
intoaTrippLiteSurgeProtector,PowerDistributionUnit(PDU)or
UninterruptiblePowerSupply(UPS).
14-02-073-93330A.indd 5 2/27/2014 10:23:24 AM

6
Installation
Note: Do not connect the U342-DHG-402 to your computer until you have installed
the product driver.
1
InserttheCDthatcamewiththeproductintoyourcomputer’sCD
drive.IfyourcomputerdoesnothaveaCDdrive,youcandownloadthe
productdriversatwww.tripplite.com/support.
2
Locatethedriverapplicabletoyourcomputer’soperatingsystemand
runit.
3
Followtheinstallationpromptsthatappear.
4
Whennished,connecttheU342-DHG-402toanavailableUSBporton
yourcomputerusingtheincludedUSB3.0A/Bcable.Uponconnecting
theunittoyourcomputer,thedevicedriverwillnishinstalling.
5
Youmayberequiredtorestartyourcomputertocompletethe
installation.
6
Onceinstallationiscomplete,youcanconnectyourmonitor,
10/100/1000Mbpsnetwork,USBdevicesandaudiodevices.
14-02-073-93330A.indd 6 2/27/2014 10:23:24 AM
7
Display Configuration
Belowaresomeadditionalsettingsthatareavailableviathedisplayadapter
right-clickmenu.
Note: The settings available in this right-click menu may vary depending on your
operating system.
DisplayLink
Manager
OpenstheAboutDisplayLinkManagerbox,whichdisplaysthecurrent
versionnumber.
Checkfor
Updates
ConnectstotheInternet,checksfornewerversionsoftheDisplayLink
softwareanddownloadsthemifavailable.
USB3.0
DualVideo
Dock
Providesamenuwithalistofsettingsforeachmonitorconnectedto
thedockingstation.
•Screen Resolution–Clickthisoptiontobringupalistofavailable
screenresolutionsfortheadd-onmonitor.Selectthedesired
resolutionfromthelist.
•Screen Rotation–Thissettingallowsyoutorotatethescreen
accordingtoyourdesiredorientation.
•Extend–Extendthedesktoptothecorrespondingmonitor.
•Extend To–Thissettingallowsyoutoselectthedirectiontowhich
toextendtheadd-onmonitor:Right,Left,Up,Down.
•Set as Main Monitor–Thissettingallowsyoutomaketheadd-on
monitortheprimarydisplay.
•Notebook Monitor Off–Thissettingappearsonlaptopcomputers
onlyandallowsyoutoturnoffthelaptopmonitor,leavingonlythe
add-onmonitordisplayed.
•Mirror–Thissettingallowsyoutomirrorthevideooftheprimary
displaytoyouradd-onmonitorsothatthesamethingisdisplayed
onbothscreens.
•Off–Thissettingturnsofftheadd-onmonitor.
•Optimize for Video–Whenplayingvideocontentonanadd-on
monitor,thissettingcanhelptoimproveplaybackperformance.
Note: Text may appear less clear when this is enabled.
•Fit to TV–WhenusingyourdisplayadaptertoconnectaTVtoyour
computer,thedesktopmaynotalwayscompletelyappearonthe
screen.Thissettingcanbeusedtoadjustthepicturetodisplay
properly.
AudioSetup Opensyourcomputer’ssoundsettingsscreen.
VideoSetup Opensyourcomputer’sdisplaysettingsscreen.
14-02-073-93330A.indd 7 2/27/2014 10:23:24 AM
8
Display Configuration
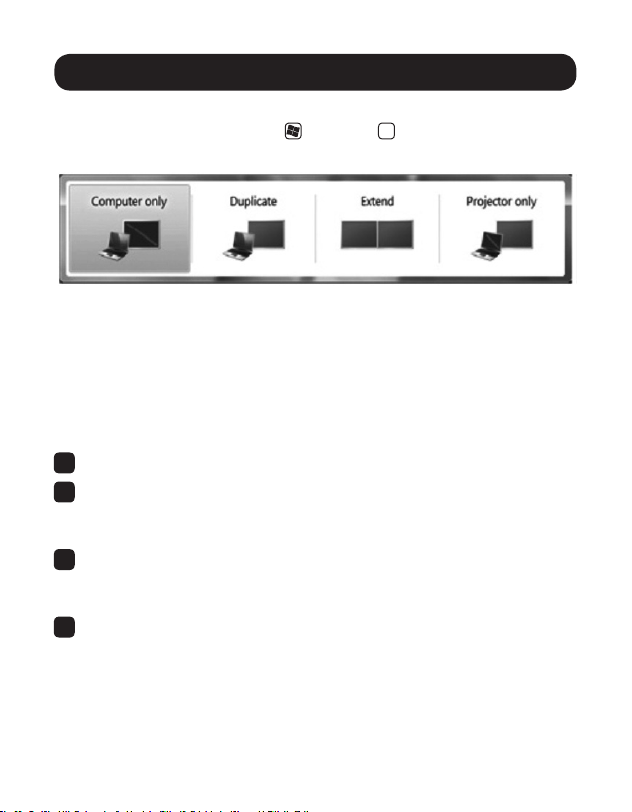
Inadditiontothedisplayadapterright-clickmenu,WindowsVistaand7
userscanpresstheWindowskey
andPkey
P
atthesametimetopull
upthemenubelow,whichquicklyallowsyoutoswitchthedisplaysettings.
Note: Only Mirror mode is supported under Windows Vista Display Driver Model
(WDDM) mode. In addition, the Aero Experience (Flip 3D effect) will be disabled under
Windows Vista Display Driver Model (WDDM) mode as long as the display adapter is
connected.
Extending Video to the Add-On Display
Toextendthevideooftheprimarymonitortotheadd-onmonitor,followthe
stepsbelow:
1
Openyourcomputer’sDisplaySettingspage.
2
Selectthemonitoriconthatrepresentstheadd-ondisplayyouwishto
change,orchoosetheadd-ondisplayfromthedrop-downmenu.The
primarydisplayisalwaysicon1.
3
Onceyou’veselectedthemonitoriconfortheadd-ondisplay,check
thecheckboxtoextendvideoontothemonitor,orselecttheextension
optionfromthedrop-downlist.
4
DragthemonitoriconsintheDisplaySettingspagesothattheyare
positionedtoreplicatethelocationoftheactualdisplays.Forexample,
ifdisplay1isdirectlytotheleftofdisplay2,themonitoriconsshould
bepositionedthatway.Thisaffectswhichsideofthescreenthemouse
isallowedtomovetothenextdisplayfrom,andisthereforeessentialto
ensuresmoothmousemovementbetweendisplays.
14-02-073-93330A.indd 8 2/27/2014 10:23:24 AM

9
Display Configuration
5
ClicktheApplybuttontoactivatethechanges.Thecomputervideowill
nowbeextendedfromtheprimarydisplaytotheadd-ondisplay.
Note: When playing a DVD, it is recommended that you play the DVD on a monitor
connected to the computer via standard cabling and not an add-on monitor connected
via the docking station. If you need to play a DVD on an add-on monitor, you must
have a 2.0 GHz Dual Core CPU with 1GB of RAM, and the screen resolution must be
set to 800 x 600 with 32-bit color. DVD content can only be displayed on one add-on
monitor at a time.
Mirroring Video on the Add-On Display
Todisplaythesamethingonboththeprimaryandadd-ondisplay,followthe
stepsbelow:
1
Openyourcomputer’sDisplaySettingspage.
2
Selectthemonitoriconthatrepresentstheadd-ondisplayyouwishto
change,orchoosetheadd-ondisplayfromthedrop-downmenu.The
primarydisplayisalwaysicon1.
3
UnchecktheboxnexttoExtendthedesktopontothismonitor,orselect
theoptionfromthedrop-downmenutoduplicatethedisplay,andthen
clicktheapplybutton.
Note: In Mirror mode, the add-on display settings are limited by those of the primary
display. If the primary display only supports a resolution of 1280 x 1024, the add-on
monitor will be limited to a resolution of 1280 x 1024 or less.
14-02-073-93330A.indd 9 2/27/2014 10:23:24 AM

10
Display Configuration
Making the Add-On Display the Primary Display
Tomaketheadd-ondisplaytheprimarydisplayforthecomputer,followthe
stepsbelow:
1
Openyourcomputer’sDisplaySettingspage.
2
Selectthemonitoriconthatrepresentstheadd-ondisplayyouwishto
change,orchoosetheadd-ondisplayfromthedrop-downmenu.The
primarydisplayisalwaysicon1.
3
ChecktheboxnexttoThisismymainmonitorandclicktheApply
buttontomaketheadd-ondisplaytheprimarydisplayforthecomputer.
Note:
• Somecomputersrequireyoutounselecttheoriginalprimarydisplaybeforesettinga
new primary display.
• Onceitissetastheprimarydisplay,theadd-ondisplaywillcontinuetobethe
primary display as long as it is connected to the computer. Once it is disconnected,
the primary display will default back to the monitor connected to the computer via
standard cable.
14-02-073-93330A.indd 10 2/27/2014 10:23:24 AM

11
Troubleshooting
Q: Why is the display on the add-on monitor blank?
A:IfthemonitorpowerLEDisGreen,waitamomentforthemonitorto
displaythevideo,asitmaytakesometimeforthevideotobedisplayed
ontheadd-onmonitor.Ifafterafewminutesthevideodoesnotdisplay,
restartyourcomputer.Also,makesurethecomputerisnotinstandbyor
hibernationmode,whichwillcausetheadd-onmonitortobeblank.
IfthemonitorpowerLEDisRed,checkiftheconnectionisproperly
made.Iftheconnectionisneandtheproblemstillexists,uninstallthe
driver,unplugtheadapterandreinstallthedriver.
Q: Why is the add-on monitor flickering?
A:Thisisusuallycausedbyalowrefreshrate.WheninMirrormode,
increasetherefreshrateofthemainmonitor.Thiswillinturnincreasethe
refreshrateoftheadd-onmonitor,whichshouldstoptheickering.When
inExtendedmode,increasetherefreshrateoftheadd-onmonitor.
Q: When I play an MPEG file by Windows Media Player on the
extended monitor, why does the display become abnormal when I
switch it to full screen mode?
A:IfyouareoperatingWindowsXPSP1,upgradingtoSP2willsolvethis
problem.
Q: Why doesn’t the video display properly when in Full-Screen mode?
A: Trythefollowingtipstoimprovethesmoothnessofthemovieplayback:
• Reducetheresolutionofthedisplayto640x480or800x600.
• UsetheadapterinExtendedmode.
• TerminateanyotherCPUintensiveapplicationsrunningonthe
computer.
• AssomemediaplayersrequireDirectXhardwaresupporttocorrectly
operate,tryadifferentmediaplayerwhichrequireslessDirectX
support.
14-02-073-93330A.indd 11 2/27/2014 10:23:24 AM

12
• Dragthemediaplayertotheadd-onscreenandclosetheplayer.
Restarttheplayeranditshouldopenontheadd-onmonitor.Nowtry
playingthemedialeagain.
• Tryreducingthehardwareaccelerationleveloftheprimarydisplay
(NOTtheadd-onmonitor)tolevels1,2or3andrestartingthemedia
player.Thehardwareaccelerationcanbefoundbyright-clickingon
yourdesktopandclicking“Properties>Settings>Advanced>
Troubleshoot.”
• Thevideoplaybackmaybeunusualwhentheadd-onmonitoris
mirroringtheprimarydisplayandthereisanotherextendedscreen
connectedtothecomputer.Theextendedscreenmustbedisabled
beforethecontentwillbecorrectlyclonedtotheadd-onmonitor.
Q: In Extended mode, why does the add-on monitor have a black
border around the desktop?
A:Thishappenswhentheresolutionusedbytheadd-onmonitorislarger
thantheresolutionusedbytheprimarymonitor.Tosolvethisproblem,
conguretheadd-onmonitortousethesameresolutionastheprimary
monitor.
Q: In Extended mode, why does the cursor disappear?
A:Ifyou’reinExtendedmodebuthavenotyetconnectedtheadd-on
monitor,thedesktopwillstillpantotheadd-onmonitor.It’spossiblethat
yourcursorhasmovedtotheextendeddesktopandisnolongervisible
ontheprimarydisplay.Whenthisoccurs,trythefollowing:
• Connecttheadd-onmonitortothedockingstation.Youshouldbeable
toseethemousecursoroncethecomputerscreenisdisplayed.
• Moveyourmousetotryanddragthecursorbackontotheprimary
monitor.
• Unplugthedockingstationfromthecomputertorestorethecursor.
Troubleshooting
14-02-073-93330A.indd 12 2/27/2014 10:23:24 AM
13
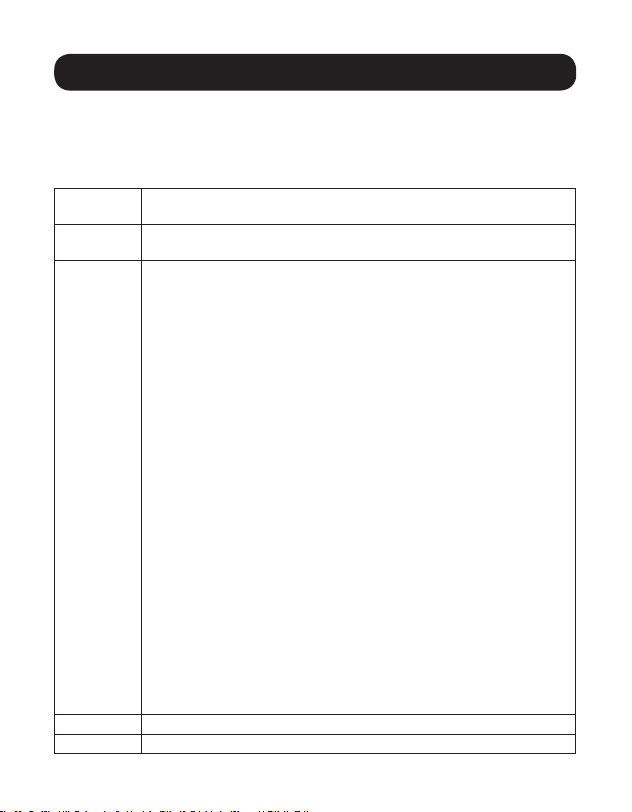
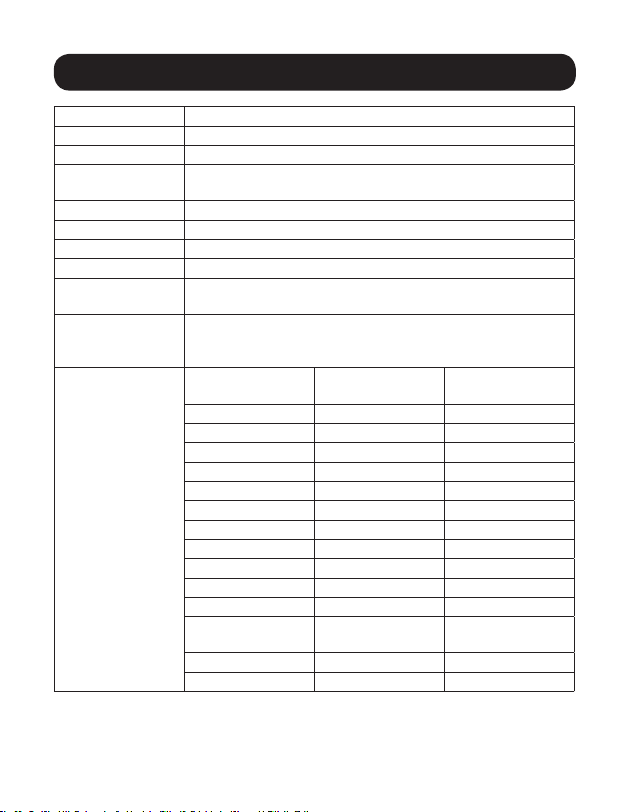
Specifications
Feature Specification
SourceConnector USBAMale(viatheincludedUSBcable)
DisplayConnector DVI-IFemale,HDMIFemale
GigabitEthernet
Connector
RJ45Female
USB3.0HubPorts 2xUSBAFemale
USB2.0HubPorts 4xUSBAFemale
AudioPorts 2x3.5mmMini-StereoAudio
RAM 1GBRAM
Power
Consumption
OperatingPower:14.43W
SuspendModePower:1.95W
Supported
OperatingSystems
WindowsXP(32-bit),Vista(32-and64-bit),
7(32-and64-bit),8(32-and64-bit)and
8.1(32-and64-bit)
SupportedVideo
Resolutions
(Note: Interlaced
and reduced blanking
modes are not sup-
ported)
Resolution
16-Bit
Refresh Rate
32-Bit
Refresh Rate
640x480 60,72,75,85 60,72,75,85
800x600 56,60,72,75,85 56,60,72,75,85
1024x768 60,70,75,85 60,70,75,85
1280x720(720p) 60 60
1280x768 60,75,85 60,75,85
1280x800 60 60
1280x1024 60,75,85 60,75
1366x768 60 60
1400x1050 60,75,85 60,75,85
1600x1200 60 60
1680x1050 60 60
1920x1080
(1080p)
60 60
1920x1200 60 60
2048x1152 60 60
14-02-073-93330A.indd 13 2/27/2014 10:23:24 AM

14
Warranty and Warranty Registration
1-Year Limited Warranty
TrippLitewarrantsitsproductstobefreefromdefectsinmaterialsandworkmanshipfora1-year
periodfromthedateofretailpurchasebyenduser.
TrippLite’sobligationunderthiswarrantyislimitedtorepairingorreplacing(atitssoleoption)any
suchdefectiveproducts.ToobtainserviceunderthiswarrantyyoumustobtainaReturnedMaterial
Authorization(RMA)numberfromTrippLiteoranauthorizedTrippLiteservicecenter.Productsmust
bereturnedtoTrippLiteoranauthorizedTrippLiteservicecenterwithtransportationchargesprepaid
andmustbeaccompaniedbyabriefdescriptionoftheproblemencounteredandproofofdateand
placeofpurchase.Thiswarrantydoesnotapplytoequipmentwhichhasbeendamagedbyaccident,
negligenceormisapplicationorhasbeenalteredormodiedinanyway,includingopeningofthe
unit’scasingforanyreason.Thiswarrantyappliesonlytotheoriginalpurchaserwhomusthave
properlyregisteredtheproductwithin10daysofretailpurchase.
EXCEPTASPROVIDEDHEREIN,TRIPPLITEMAKESNOWARRANTIES,EXPRESSORIMPLIED,
INCLUDINGWARRANTIESOFMERCHANTABILITYANDFITNESSFORAPARTICULARPURPOSE.Some
statesdonotpermitlimitationorexclusionofimpliedwarranties;therefore,theaforesaidlimitation(s)
orexclusion(s)maynotapplytothepurchaser.
EXCEPTASPROVIDEDABOVE,INNOEVENTWILLTRIPPLITEBELIABLEFORDIRECT,INDIRECT,
SPECIAL,INCIDENTALORCONSEQUENTIALDAMAGESARISINGOUTOFTHEUSEOFTHISPRODUCT,
EVENIFADVISEDOFTHEPOSSIBILITYOFSUCHDAMAGE.Specically,TrippLiteisnotliableforany
costs,suchaslostprotsorrevenue,lossofequipment,lossofuseofequipment,lossofsoftware,
lossofdata,costsofsubstitutes,claimsbythirdparties,orotherwise.
Warranty Registration
Visitwww.tripplite.com/warrantytoregisterthewarrantyofyournewTrippLiteproduct.You’llbe
automaticallyenteredintoadrawingforachancetowinaFREETrippLiteproduct!*
*Nopurchasenecessary.Voidwhereprohibited.Somerestrictionsapply.Seewebsitefordetails.
Warning!
Useofthisequipmentinlifesupportapplicationswherefailureofthisequipmentcanreasonably
beexpectedtocausethefailureofthelifesupportequipmentortosignicantlyaffectitssafety
oreffectivenessisnotrecommended.Donotusethisequipmentinthepresenceofaammable
anestheticmixturewithair,oxygenornitrousoxide.
14-02-073-93330A.indd 14 2/27/2014 10:23:24 AM

15
Warranty and Warranty Registration
FCC Notice, Class B
Thisdevicecomplieswithpart15oftheFCCRules.Operationissubjecttothefollowingtwo
conditions:(1)Thisdevicemaynotcauseharmfulinterference,and(2)thisdevicemustacceptany
interferencereceived,includinginterferencethatmaycauseundesiredoperation.
Note:ThisequipmenthasbeentestedandfoundtocomplywiththelimitsforaClassBdigitaldevice,
pursuanttopart15oftheFCCRules.Theselimitsaredesignedtoprovidereasonableprotection
againstharmfulinterferenceinaresidentialinstallation.Thisequipmentgenerates,usesandcan
radiateradiofrequencyenergyand,ifnotinstalledandusedinaccordancewiththeinstructions,may
causeharmfulinterferencetoradiocommunications.However,thereisnoguaranteethatinterference
willnotoccurinaparticularinstallation.Ifthisequipmentdoescauseharmfulinterferencetoradio
ortelevisionreception,whichcanbedeterminedbyturningtheequipmentoffandon,theuseris
encouragedtotrytocorrecttheinterferencebyoneormoreofthefollowingmeasures:
•Reorientorrelocatethereceivingantenna.
•Increasetheseparationbetweentheequipmentandreceiver.
•Connecttheequipmentintoanoutletonacircuitdifferentfromthattowhichthereceiveris
connected.
•Consultthedealeroranexperiencedradio/TVtechnicianforhelp.
AnychangesormodicationstothisequipmentnotexpresslyapprovedbyTrippLitecouldvoidthe
user’sauthoritytooperatethisequipment.
WEEE Compliance Information for Tripp Lite Customers and Recyclers (European Union)
UndertheWasteElectricalandElectronicEquipment(WEEE)Directiveandimplementing
regulations,whencustomersbuynewelectricalandelectronicequipmentfromTrippLite
theyareentitledto:
•Sendoldequipmentforrecyclingonaone-for-one,like-for-likebasis(thisvaries
dependingonthecountry)
•Sendthenewequipmentbackforrecyclingwhenthisultimatelybecomeswaste
TrippLitefollowsapolicyofcontinuousimprovement.Productspecicationsaresubjecttochange
withoutnotice.
14-02-073-93330A.indd 15 2/27/2014 10:23:24 AM

16
1111 W. 35th Street, Chicago, IL 60609 USA • www.tripplite.com/support
14-02-073•93-330A_revA
14-02-073-93330A.indd 16 2/27/2014 10:23:25 AM