Loading ...
Loading ...
Loading ...
13
EN
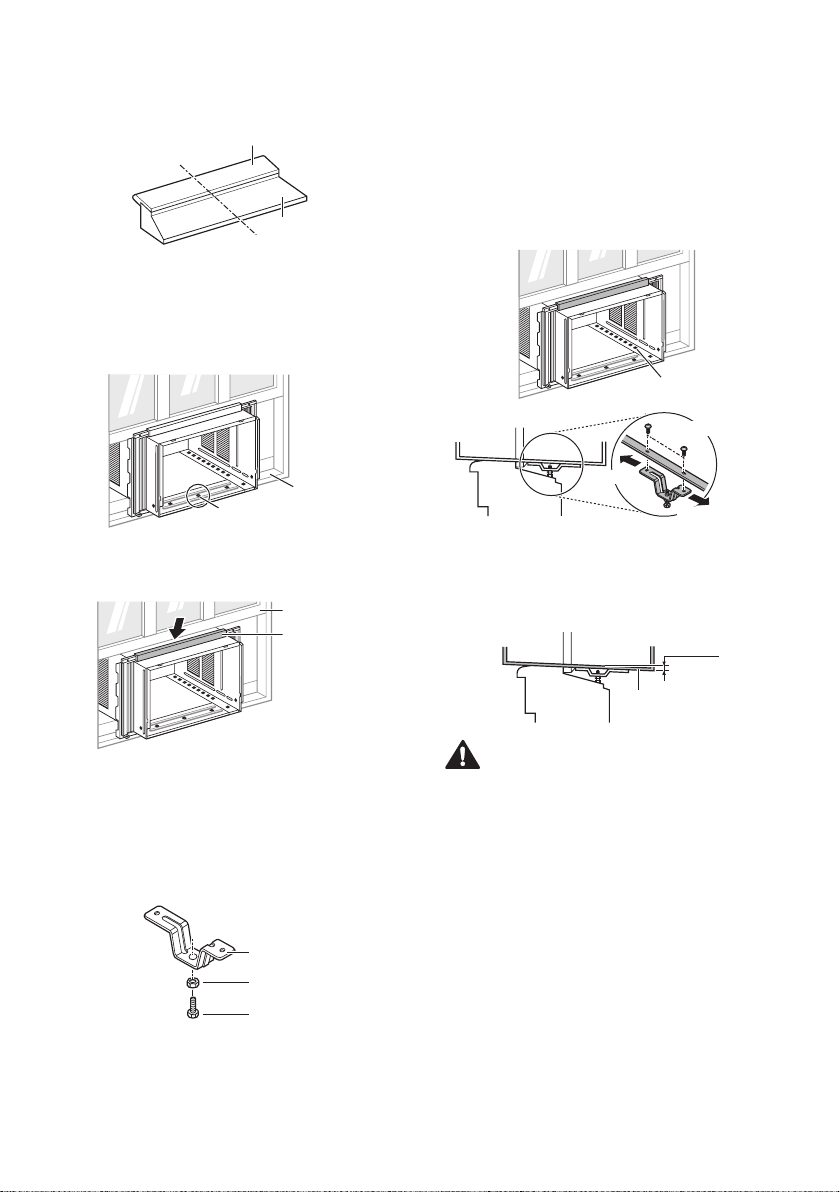
Cabinet Installation
Inside SillInside Sill
Center HoleCenter Hole
Outside SillOutside Sill
1
Open the window. Mark a line on the center of
the inside sill.
Carefully place the cabinet in the window and
align the center hole on the cabinet bottom
front with the center line on the sill.
Inside SillInside Sill
Center HoleCenter Hole
2
Pull the bottom window sash down behind the
upper guide until It meets the cabinet.
Window SashWindow Sash
Upper Panel Upper Panel
GuideGuide
NOTE
• Do not pull the window sash down so tightly
that the movement of the curtain panels is
restricted.
3
Loosely assemble each sill support.
Sill SupportSill Support
NutNut
BoltBolt
NOTE
• If the distance to the outer window sill is not
that deep, you may not need the bolt and nut.
4
Use 2 type A screws to attach a sill support
to the cabinet track holes on one side. Use
the cabinet track holes that will place the sill
support nearest to the outer edge of the sill.
The longer side of the sill support should be
facing outside the window.
Repeat with the second sill support on the
opposite side of the cabinet.
Screws (Type A)Screws (Type A)
IndoorIndoor
Cabinet Track HolesCabinet Track Holes
OutdoorOutdoor
5
Install the cabinet with a slight tilt (about 1/2”)
downward on the outside.
Use the bolt and nut to adjust the tilt of the
cabinet.
about 1/2”about 1/2”
CabinetCabinet
CAUTION
• Do not drill a hole in the bottom pan.
The product is designed to operate with
approximately 1/2” of water in the bottom pan.
There is no need to add water if the pan is dry.
Loading ...
Loading ...
Loading ...