Loading ...
Loading ...
Loading ...
4
1886
Have dual switches?
Follow these steps:
We know wiring is hard. Let’s make it easier.
Follow these steps to get your fan wired quickly and safely. Follow the route be-
low that best matches your wall switch setup. If you are unfamiliar with wiring or
uncomfortable doing it yourself, please contact a qualied electrician.
Have a single switch?
Follow these steps:
Hunter Pro Tip:
Here is how to connect the wires:
Push the bare metal ends of the wires together and slide a wire
nut over them. Then, twist the wire nut clockwise until tight.
Give it a gentle pull to make sure none of the wires are loose.
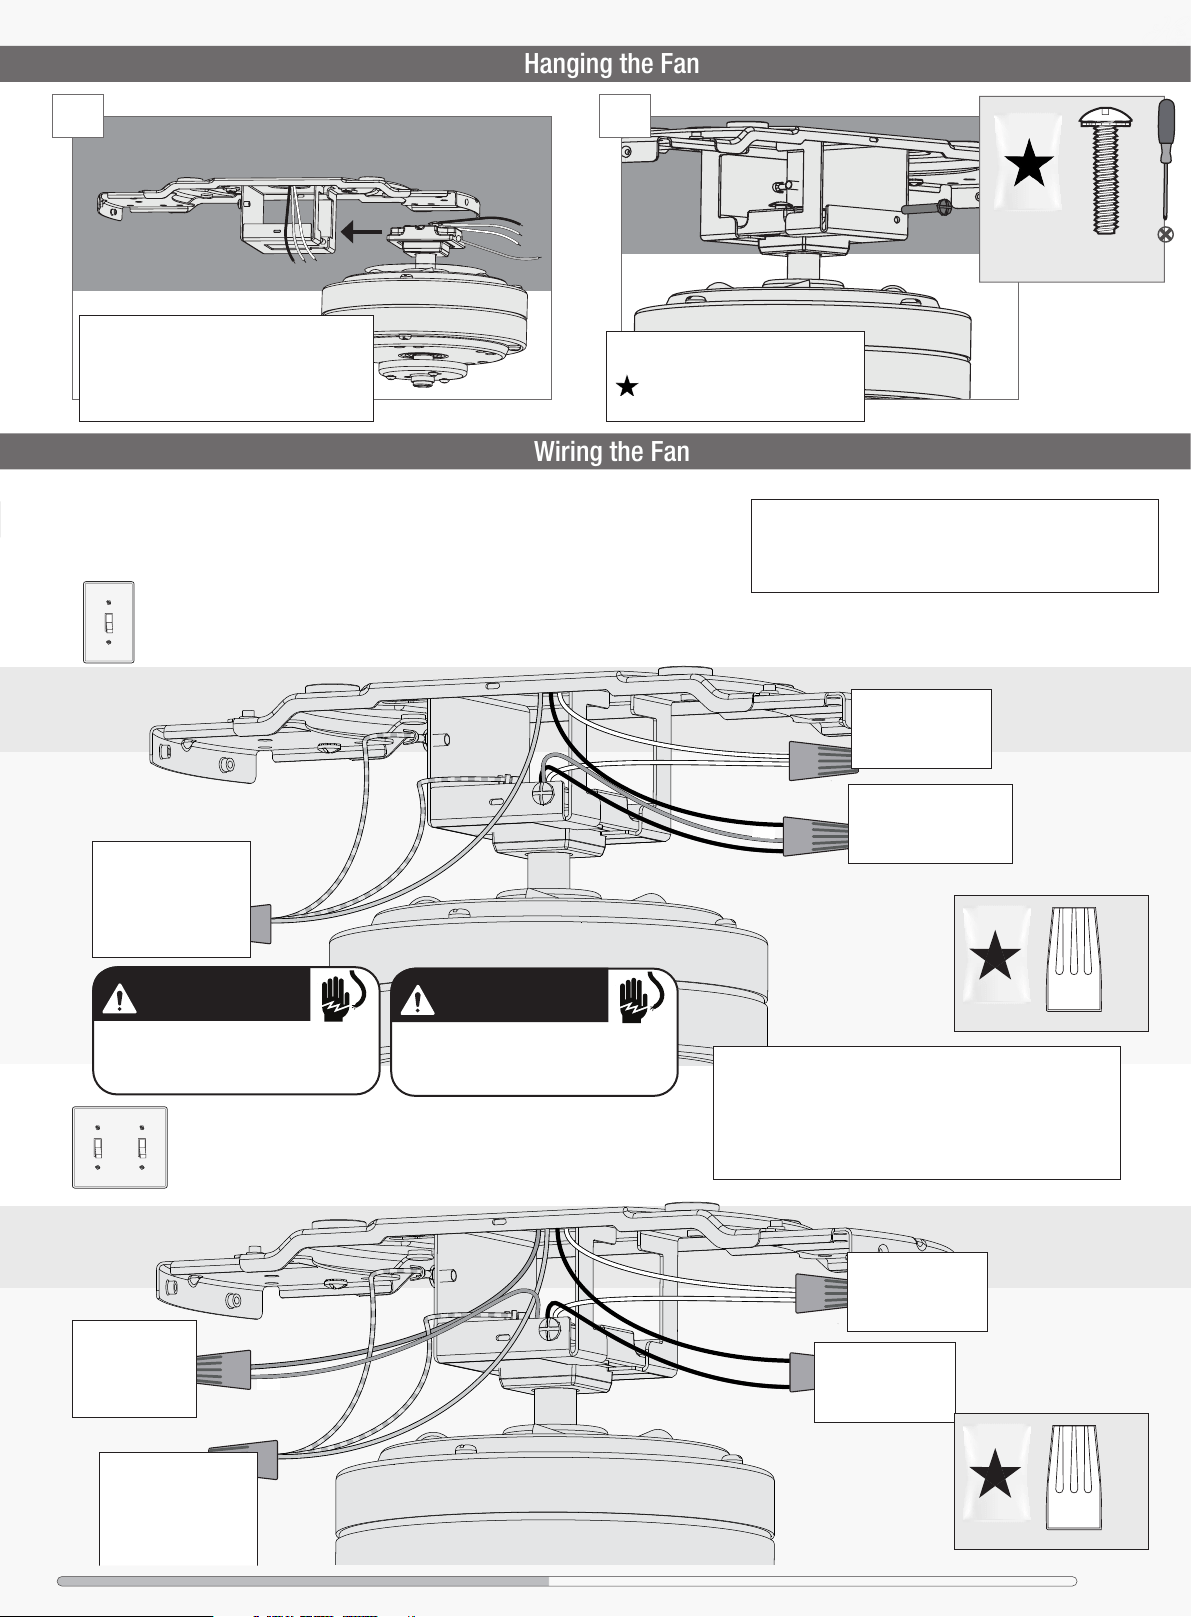
Wiring the Fan
x4
BAG
Connect the white
(grounded) wire from
the ceiling to the white
wire from the fan.
Connect the three
grounding wires (green,
green/yellow stripe, or
bare copper) coming from
the ceiling and hanging
bracket.
Connect the black wire
(ungrounded) from the
ceiling to the black and the
blue wires from the fan.
Black
Blue
White
Ungrounded
Grounded
Grounding
G
r
e
e
n
/
Y
e
l
l
o
w
S
t
r
i
p
e
G
r
e
e
n
/
Y
e
l
l
o
w
S
t
r
i
p
e
Connect the white
(grounded) wire from
the ceiling to the white
wire from the fan.
Connect the black wire
(ungrounded) from the
ceiling to the black
wire from the fan.
Black
Blue
White
Ungrounded
Grounded
Grounding
G
r
e
e
n
/
Y
e
l
l
o
w
S
t
r
i
p
e
G
r
e
e
n
/
Y
e
l
l
o
w
S
t
r
i
p
e
Connect the second
ungrounded (light)
wire from the
ceiling to the blue
wire from the fan.
Ungrounded (light)
Connect the three
grounding wires (green,
green/yellow stripe, or
bare copper) coming from
the ceiling and hanging
bracket.
Wire Nut
x4
BAG
Wire Nut
Hanging the Fan
1
STEP
2
STEP
While holding the wires out of the way, lift the
motor assembly and place the square hanger
into the opening in the ceiling bracket. Be sure
the ground wire attached to the hanger faces
out of the large opening in the ceiling bracket.
Once the motor is in the ceiling bracket,
use the two locking screws found in the
hardware bag to secure the motor
to the ceiling bracket.
x2
BAG
Locking
Screw
Ceiling Bracket Hanging Fan Wiring Motor Housing Blades Light
WARNING
The ceiling fan must be grounded. If the
ground wire for the installation site is not
present, immediately STOP installation and
consult a qualied electrician.
WARNING
All wiring must be in accordance with
national and local electrical codes ANSI/NFPA
70. If you are unfamiliar with wiring or in
doubt, consult a qualied electrician.
Have extra wiring?
Turn the wires upward and push them carefully back through
the hanger bracket into the outlet box. Spread the wires apart,
with the grounded wires on one side of the outlet box and the
ungrounded wires on the other side of the outlet box. Make
sure that the wires are still attached to the wire nuts.
Hunter Pro Tip:
Loading ...
Loading ...
Loading ...