Loading ...
Loading ...
Loading ...
11
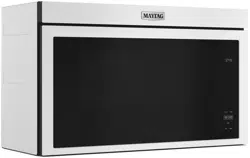
5. Using a pencil to mark a upper cabinet hole. This step can be
skipped if your unit is using recirculation or wall venting
installation.
A
A. Upper Cabinet Hole
Mark Rear Wall
The microwave oven must be installed on a minimum of 1 wall
stud, preferably 2, using a minimum of 1 lag screw, preferably 2.
See “Find the Wall Stud(s)” section for find the wall studs.
1. Using measuring tape, and find clearly mark the vertical
centerline of the opening.
A
A. Centerline
2. Align the center markers on the cardboard plate, to the
centerline on the wall, making sure it is level, and that the top
of the cardboard template is butted up against the back edge
of the upper cabinet.
Using a pencil to mark the wall venting hole (door wall venting
installation only), skip it if your unit is for recirculation or wall
venting installation.
A
B
C
A. Back Edge of Upper Cabinet
B. Wall Venting Hole
C. Cardboard Plate
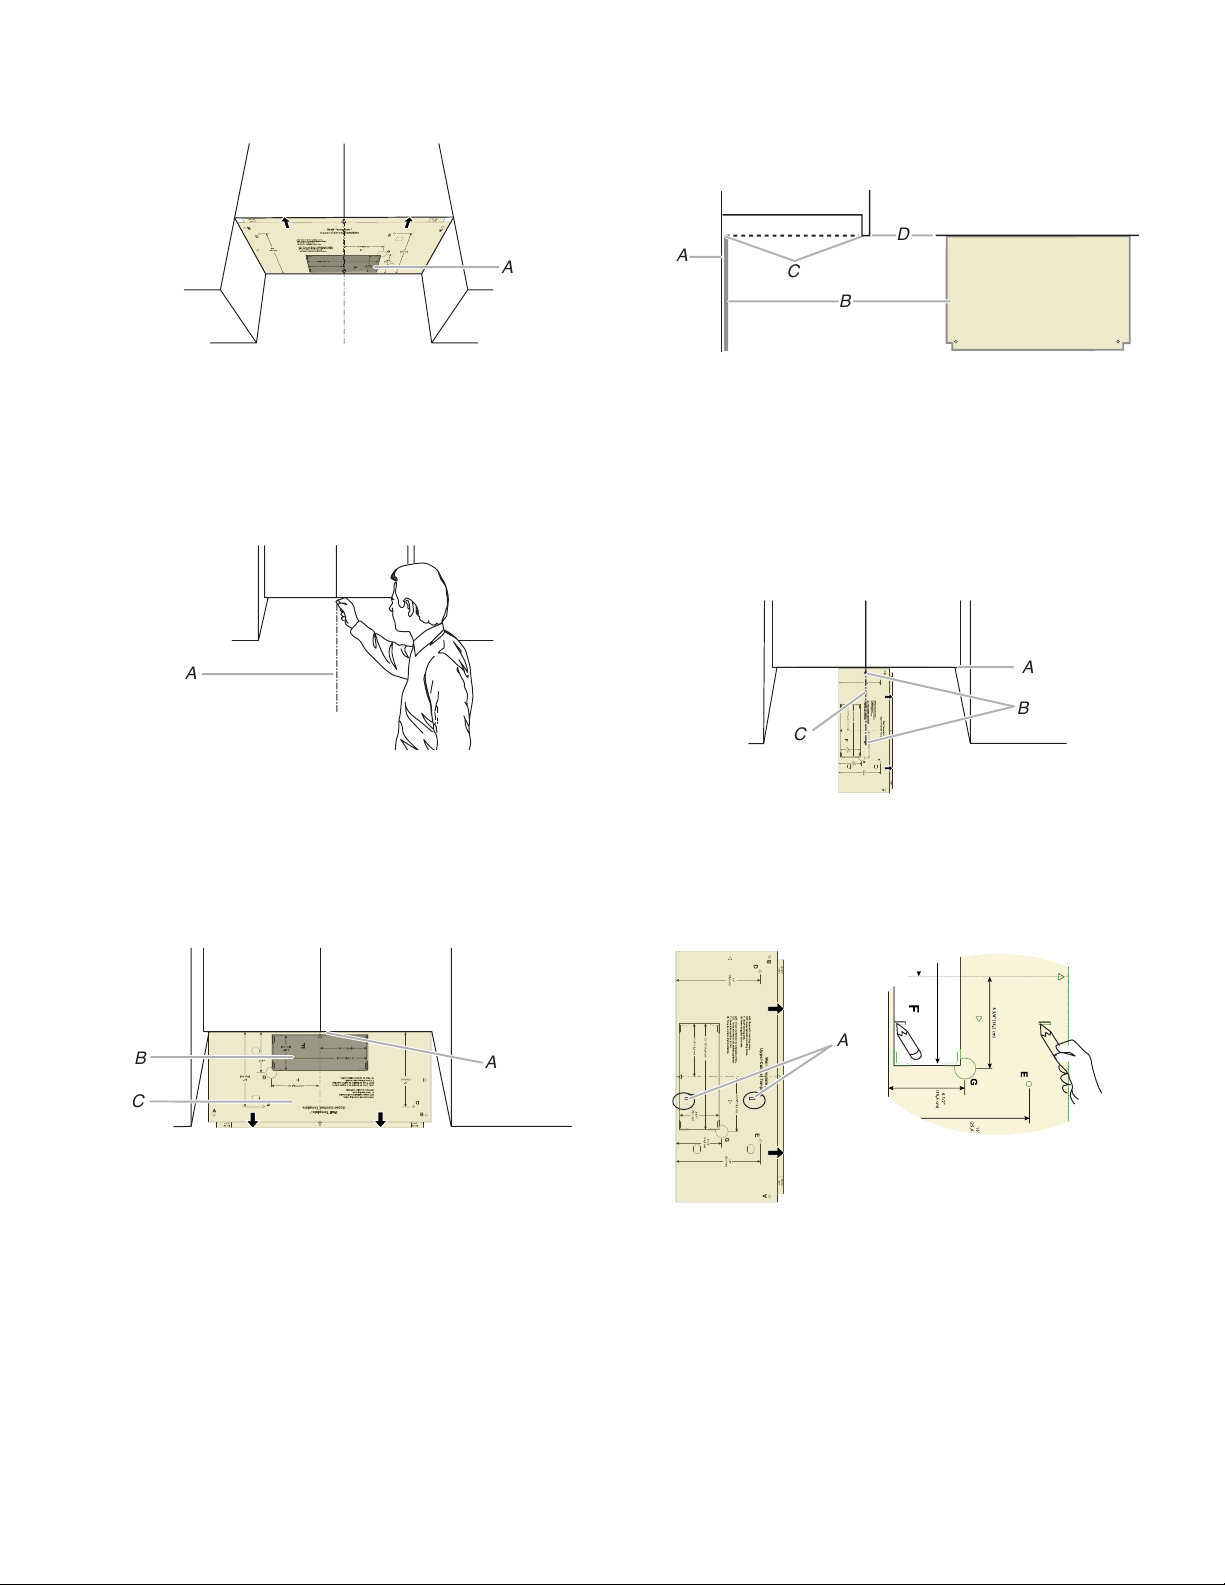
NOTE:
� If the front edge of the upper cabinet is lower than the back
edge, lower the cardboard template so that its top is level
with the front edge of the cabinet.
A
C
B
D
A. Rear wall
B. Cardboard plate
C. Top of cardboard plate must align with front edge of
cabinet
D. Front edge of upper cabinet
3. Vertical the cardboard plate, holding the cardboard plate in
place. Align the side center mark on the cardboard plate over
the vertical centerline draw in step 1. Make sure the cardboard
plate is level, and that the top of the cardboard template is
butted up against the bottom edge of the upper cabinet.
B
A
C
A. Bottom Edge of Upper Cabinet & Top of the
Cardboard Plate
B. Side Center Marks on Cardboard Plate
C. Centerline
4. Finding and drawing two small lines through the two
cardboard plate bottom position lines.
A
A. Cardboard Plate Bottom Position Line
Loading ...
Loading ...
Loading ...