Loading ...
Loading ...
Loading ...
15 ENGLISH
MAINTENANCE
WARNING: Always be sure that the lock
key and battery cartridge are removed from the
mower before storing or carrying the mower or
attempting to perform inspection or maintenance.
WARNING: Always remove the lock key when
the mower is not in use. Store the lock key in a
safe place out of reach of children.
WARNING: Wear gloves when performing
inspection or maintenance.
WARNING: Always wear the safety goggles or
safety glasses with side shields when performing
inspection or maintenance.
NOTICE: Never use gasoline, benzine, thinner,
alcohol or the like. Discoloration, deformation or
cracks may result.
To maintain product SAFETY and RELIABILITY,
UHSDLUVDQ\RWKHUPDLQWHQDQFHRUDGMXVWPHQWVKRXOG
EHSHUIRUPHGE\0DNLWD$XWKRUL]HGRU)DFWRU\6HUYLFH
&HQWHUVDOZD\VXVLQJ0DNLWDUHSODFHPHQWSDUWV
Maintenance
1. 5HPRYHWKHORFNNH\DQGEDWWHU\FDUWULGJHVDQG
WKHQFORVHWKHEDWWHU\FRYHU
2.
Put the mower on its side so that the mowing height
DGMXVWLQJOHYHUFRPHVWRWKHXSSHUVLGH&OHDQJUDVV
clippings accumulated on the underside of mower deck.
3. Pour water toward the bottom of the machine to
which the blade is attached.
NOTICE: Do not wash the machine with high
pressure water.
4. Check all nuts, bolts, screws, etc. for tightness.
5.
Inspect moving parts for damage, breakage, and wear.
Damaged or missing parts should be repaired or replaced.
6. Store the mower in a safe place out of the reach of
children.
For XML06/XML08
NOTICE: Do not pour water to the area shown in
WKH¿JXUH3RXULQJZDWHUWRWKHPRWRUXQLWPD\FDXVH
a malfunction of the machine.
1
Ź1. Area where water should not be poured
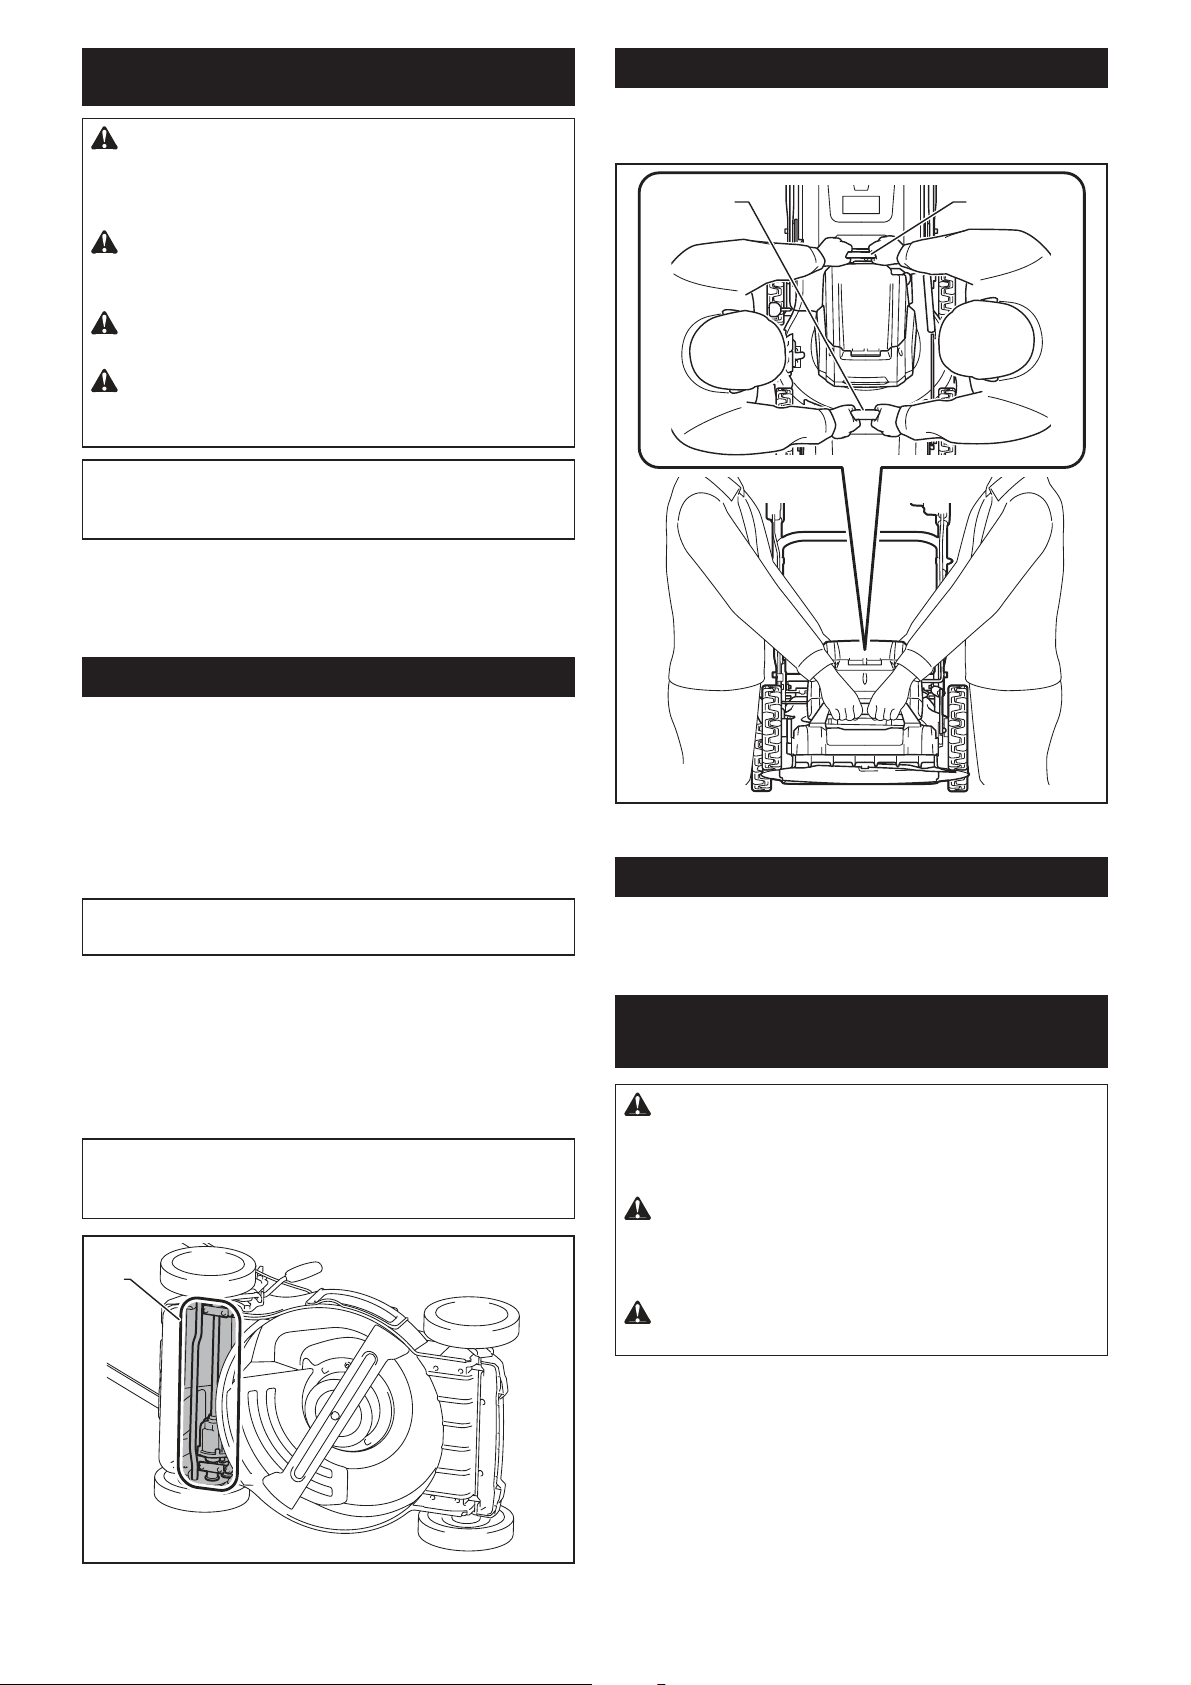
Carrying the mower
:KHQFDUU\LQJWKHPRZHUKROGWKHIURQWJULSDQGUHDU
JULSZLWKWZRSHRSOHDVVKRZQLQWKH¿JXUH
1
2
Ź1. Front grip 2. Rear grip
Storing
6WRUHPRZHULQGRRUVLQDFRROGU\DQGORFNHGSODFH
Don't store the mower and charger in locations where
WKHWHPSHUDWXUHPD\UHDFKRUH[FHHG&)
Removing or installing the mower
blade
WARNING: The blade coasts for a few sec-
onds after releasing the switch. Do not start any
operation until the blade comes to a complete
stop.
WARNING: Always remove the lock key and
battery cartridge when removing or installing the
blade. Failure to remove the lock key and battery
cartridge may cause a serious injury.
WARNING: Always wear gloves when han-
dling the blade.
Removing the mower blade
1. Put the mower on its side so that the mowing
KHLJKWDGMXVWLQJOHYHUFRPHVWRWKHXSSHUVLGH
2. To lock the blade, insert the pin into a hole on the
PRZHUERG\
Loading ...
Loading ...
Loading ...