Loading ...
Loading ...
Loading ...

18
WELDING PROCESS
1. Please refer to “Welding Label” in the unit and select proper setting based on the variety of metals
and their thickness.
2. Adjust output polarity according to the welding wire and to ensure whether or not the protective
gases are needed.
3. Connect the ground clamp to work pieces that are to be welded. This connection should be good
and secure. Your welding torch should have clear access to the work piece.
4. Wearing your welding helmet, gloves and long sleeve shirt and pants, press the trigger of the
welding gun and begin to weld. Keep the nozzle of the welding torch approximately 1/4” away
from the work piece.
5. Use a “Push” technique, which means you will be holding the gun in your right hand with the
nozzle and gun tilted back about 10- 20 degrees and pushing the gun or moving from right to left.
6. Once you depress the trigger the wire will arc and you will notice a molten puddle from. You want
to “move” this puddle to the left following the seam or areas to be welded.
7. If you “burn through” the material you are moving too slowly or you heat setting is too high.
8. Start with the initial setting on the chart and increase or decrease wire speed to obtain the best
weld. Release the trigger of the welding torch to stop welding.
9. After welding, close valve of the gas bottle (if gas is used) and then press trigger of the welding
torch to release any gasses left in the hose. Finally, power off the welding machine.
10. I f you’re welding patch panels or quarter panels on us e the “stitch” type method. Depress the
trigger momentarily to form a small puddle or single bead. Then depress again to form another
bead aside of the first. Continue until you have 4 or 5 small beads connected about 1⁄2- 3/4” in
length.
11. Move to the other end of the panel and repeat the process. Now go to the middle and repeat.
Continue this process moving to different areas of the panel to eliminate heat warping the
material.
SPOOL GUN OPERATION
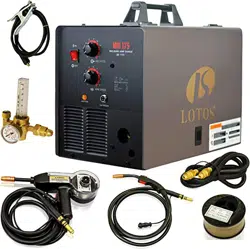
Y o ur MIG175 can operate a hand- held spool gun. This will allow you weld both Aluminum and
Steel.
1. NOTE: for use on steel 18ga - 1/4”; aluminum 3 /16” plate or thinner.
2. Turn the power off and remove plug from AC outlet.
3. Change the internal switch from MIG to Spool Gun.
4. Plug spool gun into outlet on the front panel of the unit.
5. Install 4” roll of steel or aluminum (4043) wire NOTE: Spool gun with Mig will only weld
aluminum plate 3
/
16
” and t
hinner
.
6. Use 100% pure Argon shielding gas.
7. Clean the aluminum and weld area with a new stainless steel brush to remove all oxides from
surface.
8. Use a “push” gun movement technique.
9. Keep the contact tip 3⁄4” from work piece.
10. Set voltage setting to E/F and wire speed to 5 for 1/8” thick material.
11. Set voltage setting to H/I and wire speed to 8/9 for materials over 1/8”
NOTE: these are initial start settings you will have to fine tune to meet materials
thicknesses and welding techniques.
Loading ...
Loading ...
Loading ...
